
Okta
Okta Single Sign-On (SSO) enables users to access multiple applications with a single set of credentials. It simplifies authentication processes and enhances security by centralizing user login management. This guide outlines the steps to set up and configure Okta SSO for your applications.
The Okta extension is compatible with CData Virtuality Authentication Management Component 25.2 and later versions, running on Java 17.
1. Add application in Okta
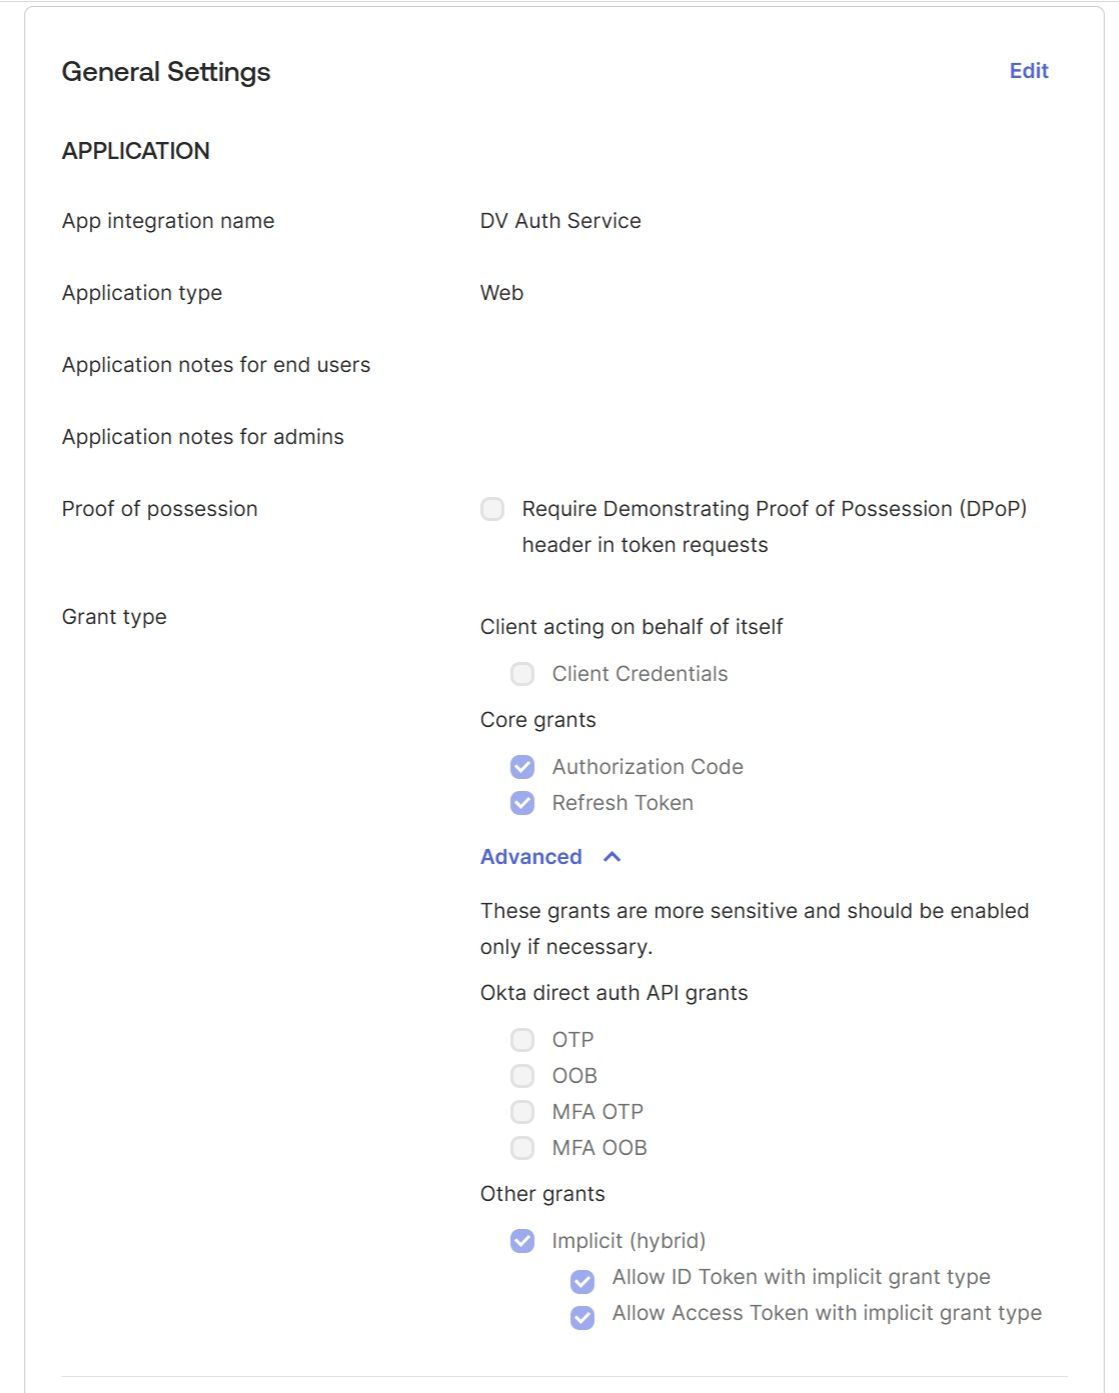
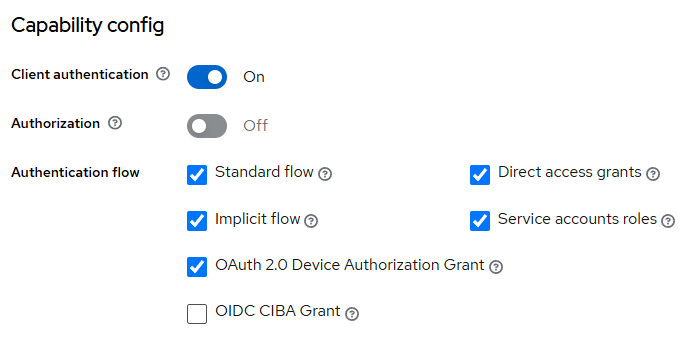
In Okta, go to "Applications" and create a new application: "Create App Integration" → choose "OIDC - OpenID Connect" → choose "Web Application", and give a name to your application, for example, "DV Auth Service":
2. Create groups and assign them to users
The new "DV Auth Service" application must be assigned to groups. To do this, you first need to create the groups in Okta by navigating to "Directory" → "Groups" → "Add Group." These groups will be mapped to the Cdata Virtuality Server roles, so you can create as many groups as there are roles on the Server. For this example, we created two primary groups: "CDV Administrators" and "CDV-OData." These will be mapped to the CData Virtuality Server's admin-role and odata-role respectively. 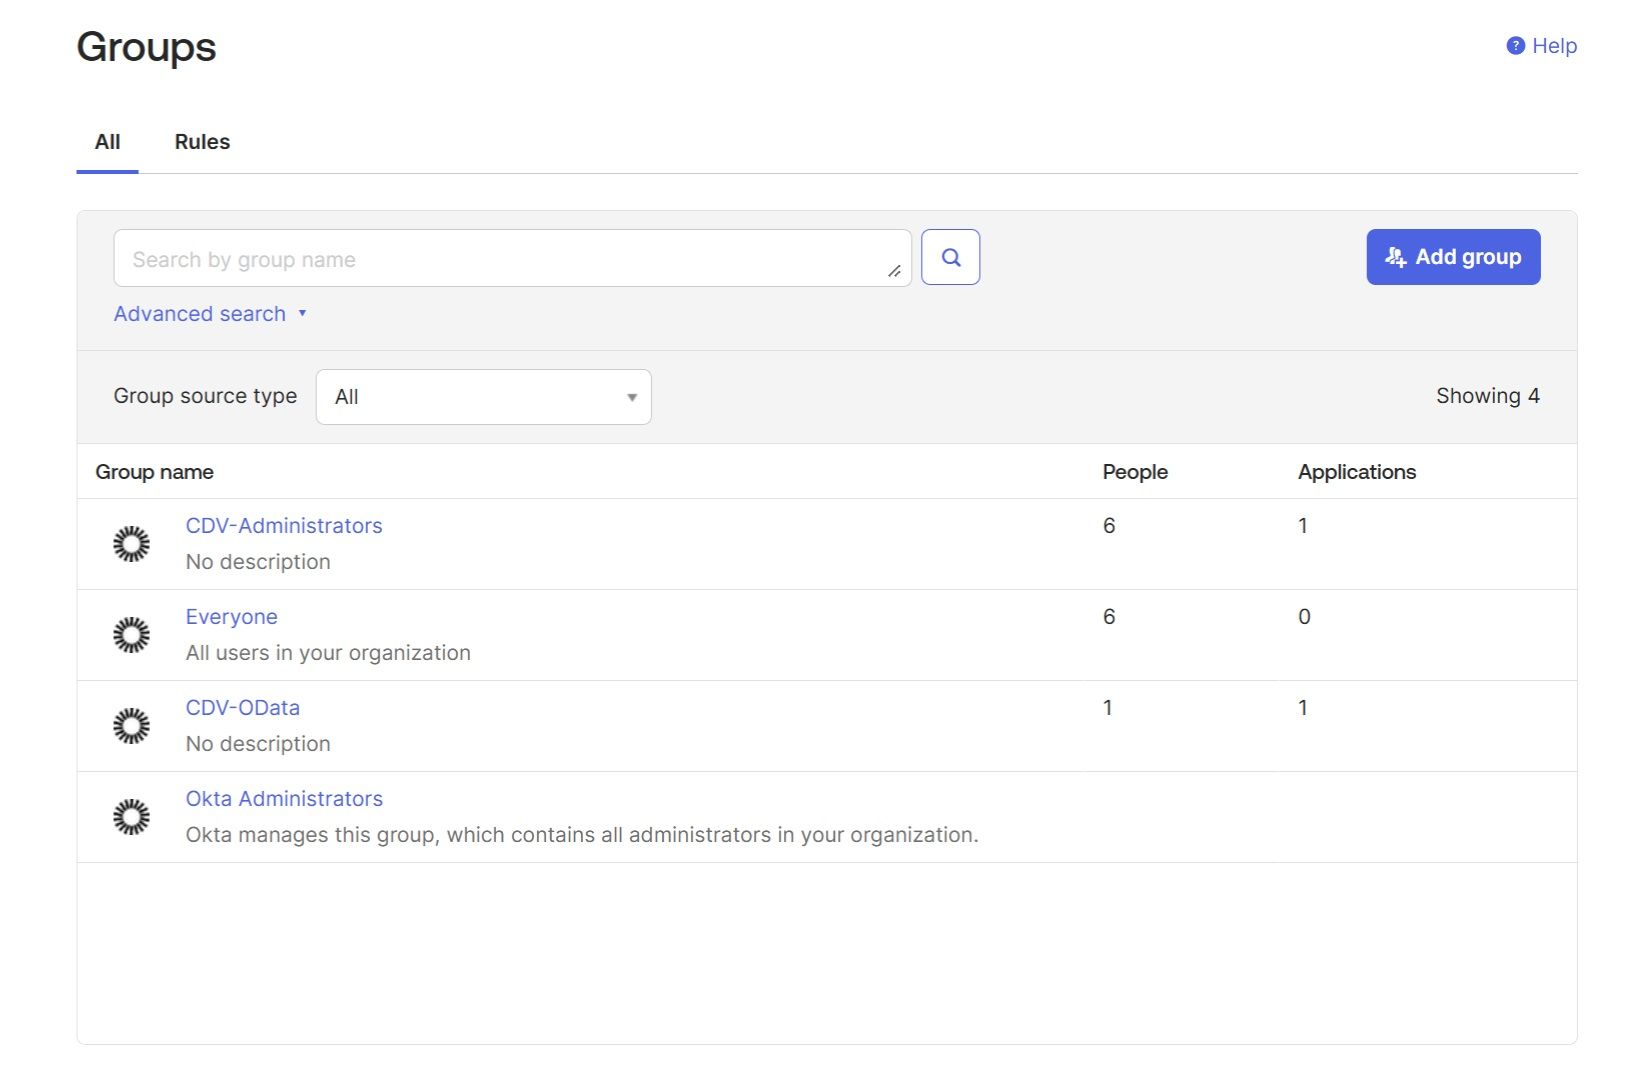
Create new users if necessary by navigating to “People” → “Add person“. Assign existing and new users to corresponding “CDV-*” groups (click on a user and choose the “Groups” tab).
3. Assign groups to application
Assign the "DV Auth Service" application to groups created in the previous step, navigate back to “Application” → “DV Auth Service” → “Assignments” → “Assign” → “Assign to Groups“: 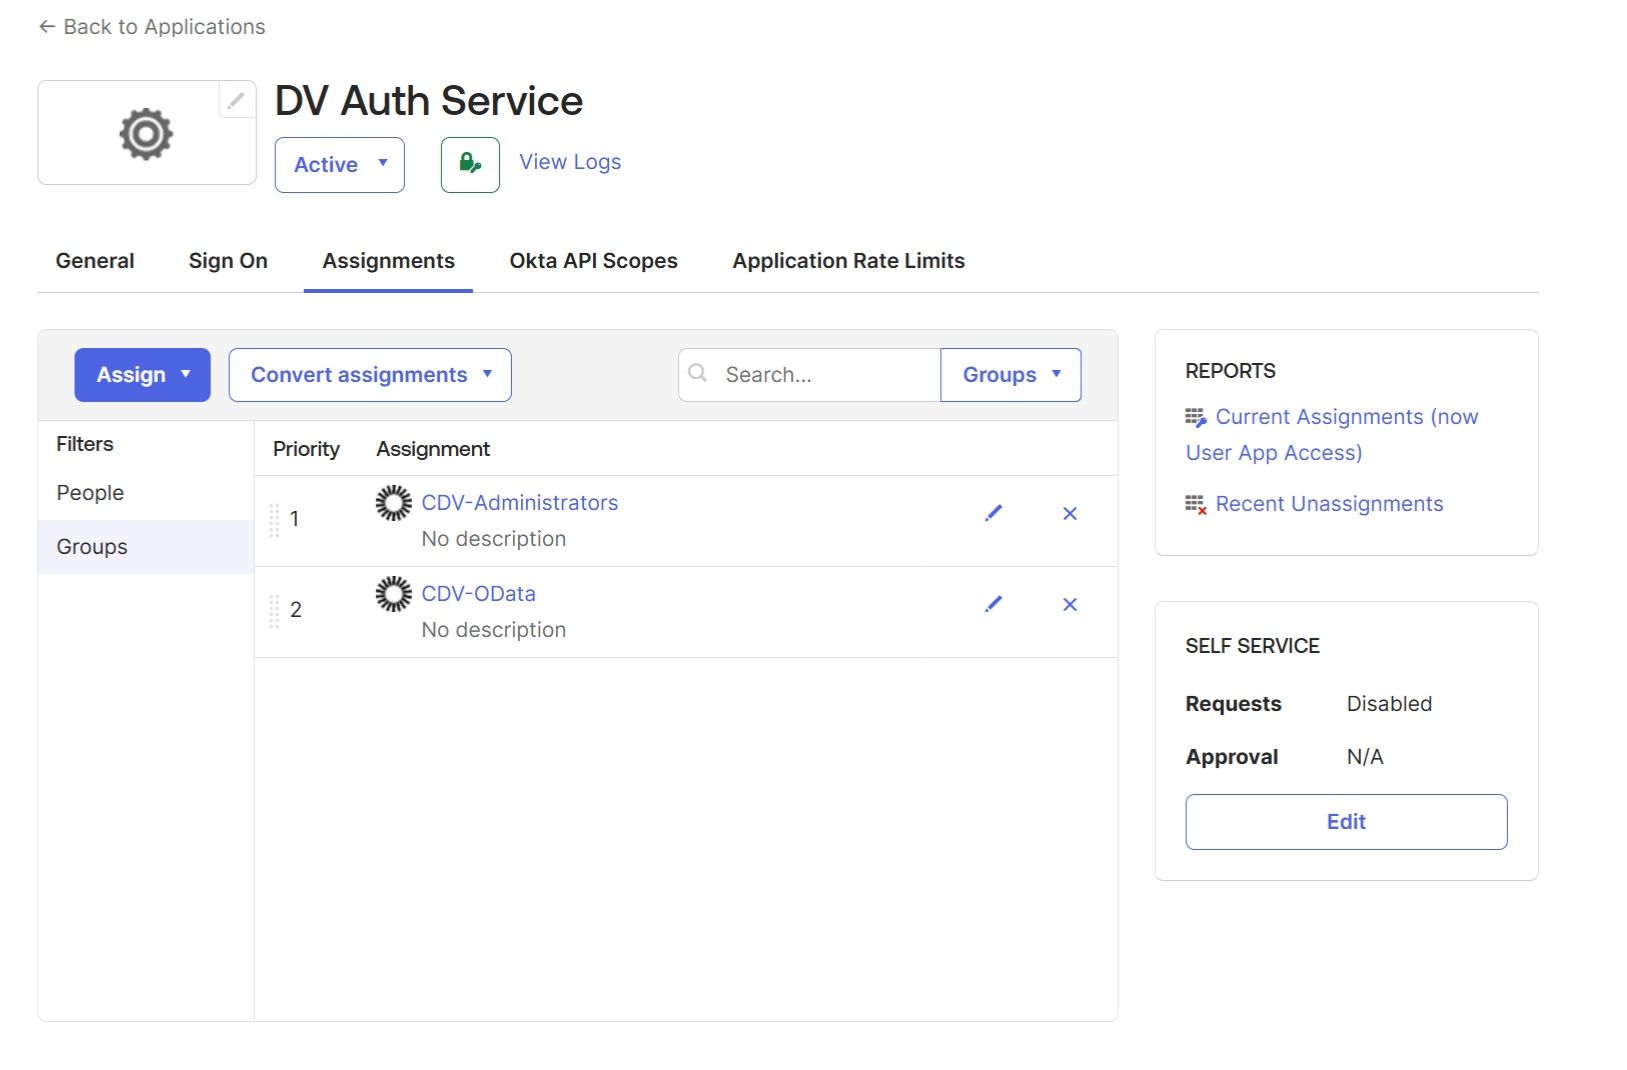
4. Set up application Sign On and Group filter
Check the “Sign On” tab in your application (“Application” → “DV Auth Service” → “Sign On”). The Groups filter in the “OpenID Connect ID Token” section can be left empty: 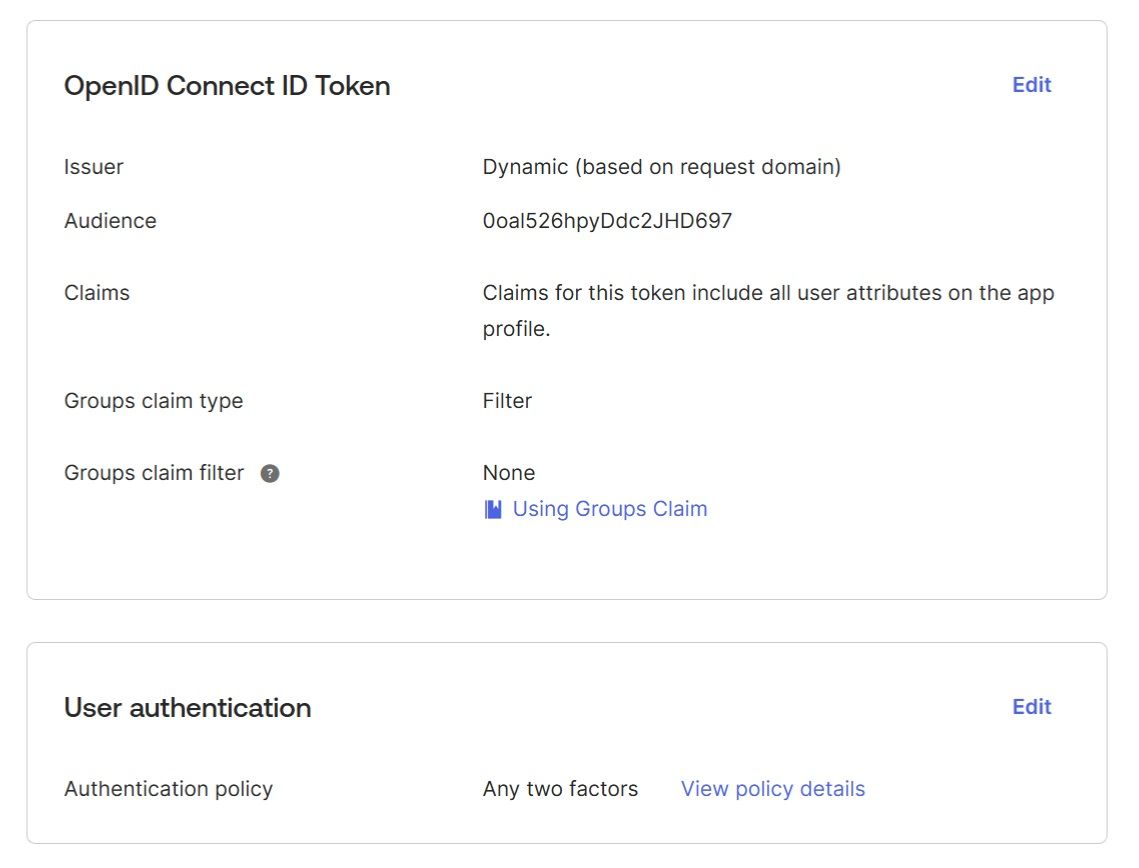
5. Set up authorization server
In the "Security" → "API" → "Authorization Servers" section choose the default authorization server:

6. Add Identity provider on the CData Virtuality Authentication Management Component
Switch to the CData Virtuality Authentication Management Component and start configuring the Okta integration. Choose the realm to use. Further “Identity providers” → “Add provider” → “OpenID Connect v1.0“: 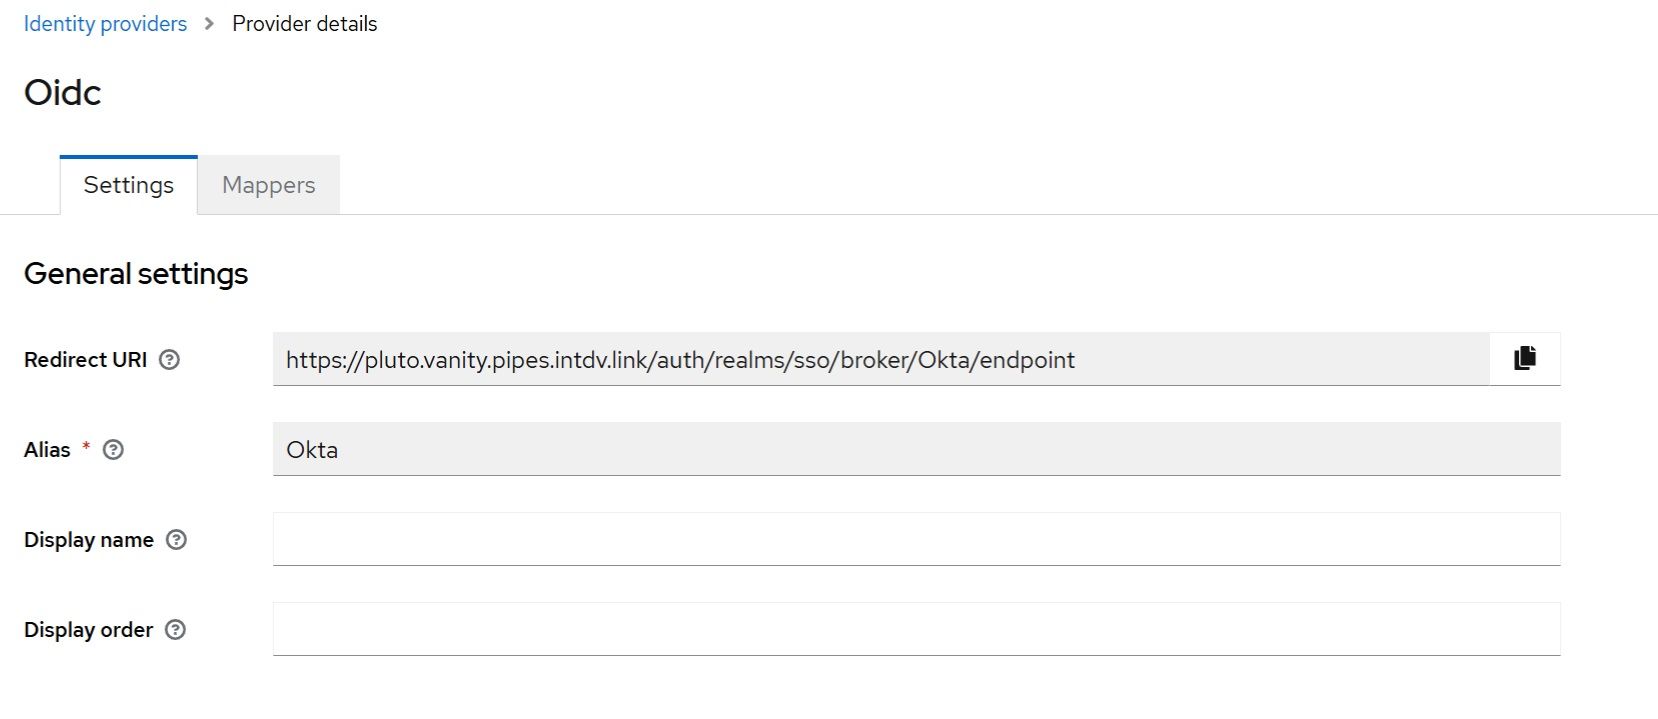
Since we configured the default Okta authorization server in the step 5, the following URL should be used as the Discovery Endpoint in Keycloak:
Metadata URI from the default Authorization server added in Step 5 + /.well-known/openid-configuration.
Example: https://dev-89527949.okta.com/oauth2/default/.well-known/openid-configuration (be careful, as this URL depends on your unique Okta instance ID and the unique name of the custom Okta authorization server).
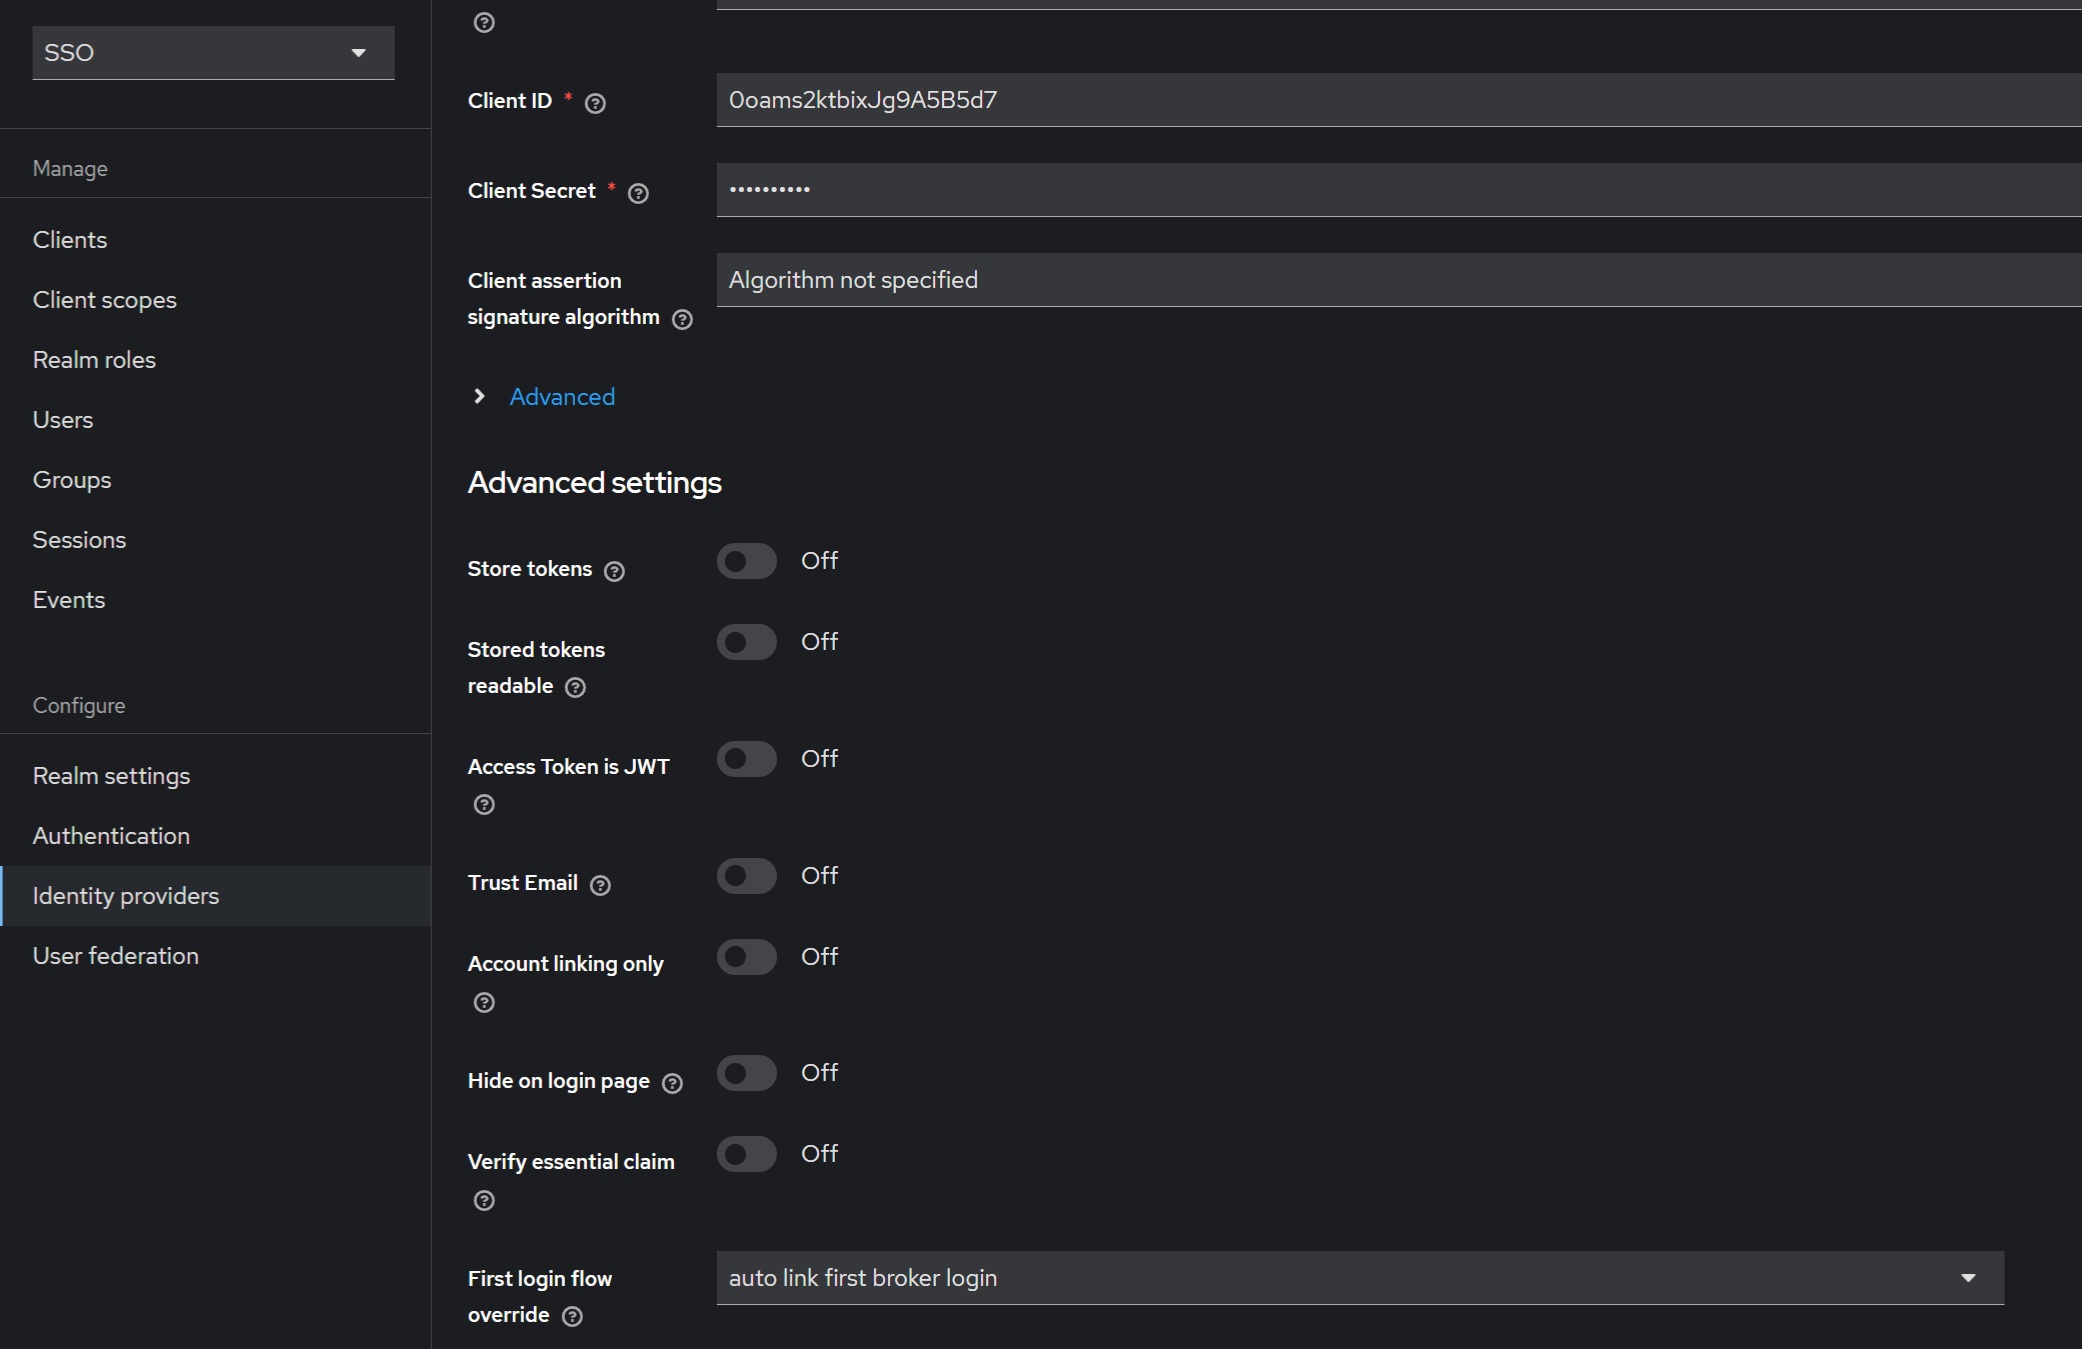
Once you provide the "Discovery Endpoint," the CData Virtuality Authentication Management Component will automatically populate all the required URL fields in the metadata section.
Next, enter the Client ID and Client Secret credentials in their respective fields, which you can retrieve from the Okta "DV Auth Service" application. Add “openid profile email” under the “Scopes”.
Save the new Okta identity provider.
Edit the newly created identity provider, enable the “Use PKCE” option, and select the S256 PKCE method.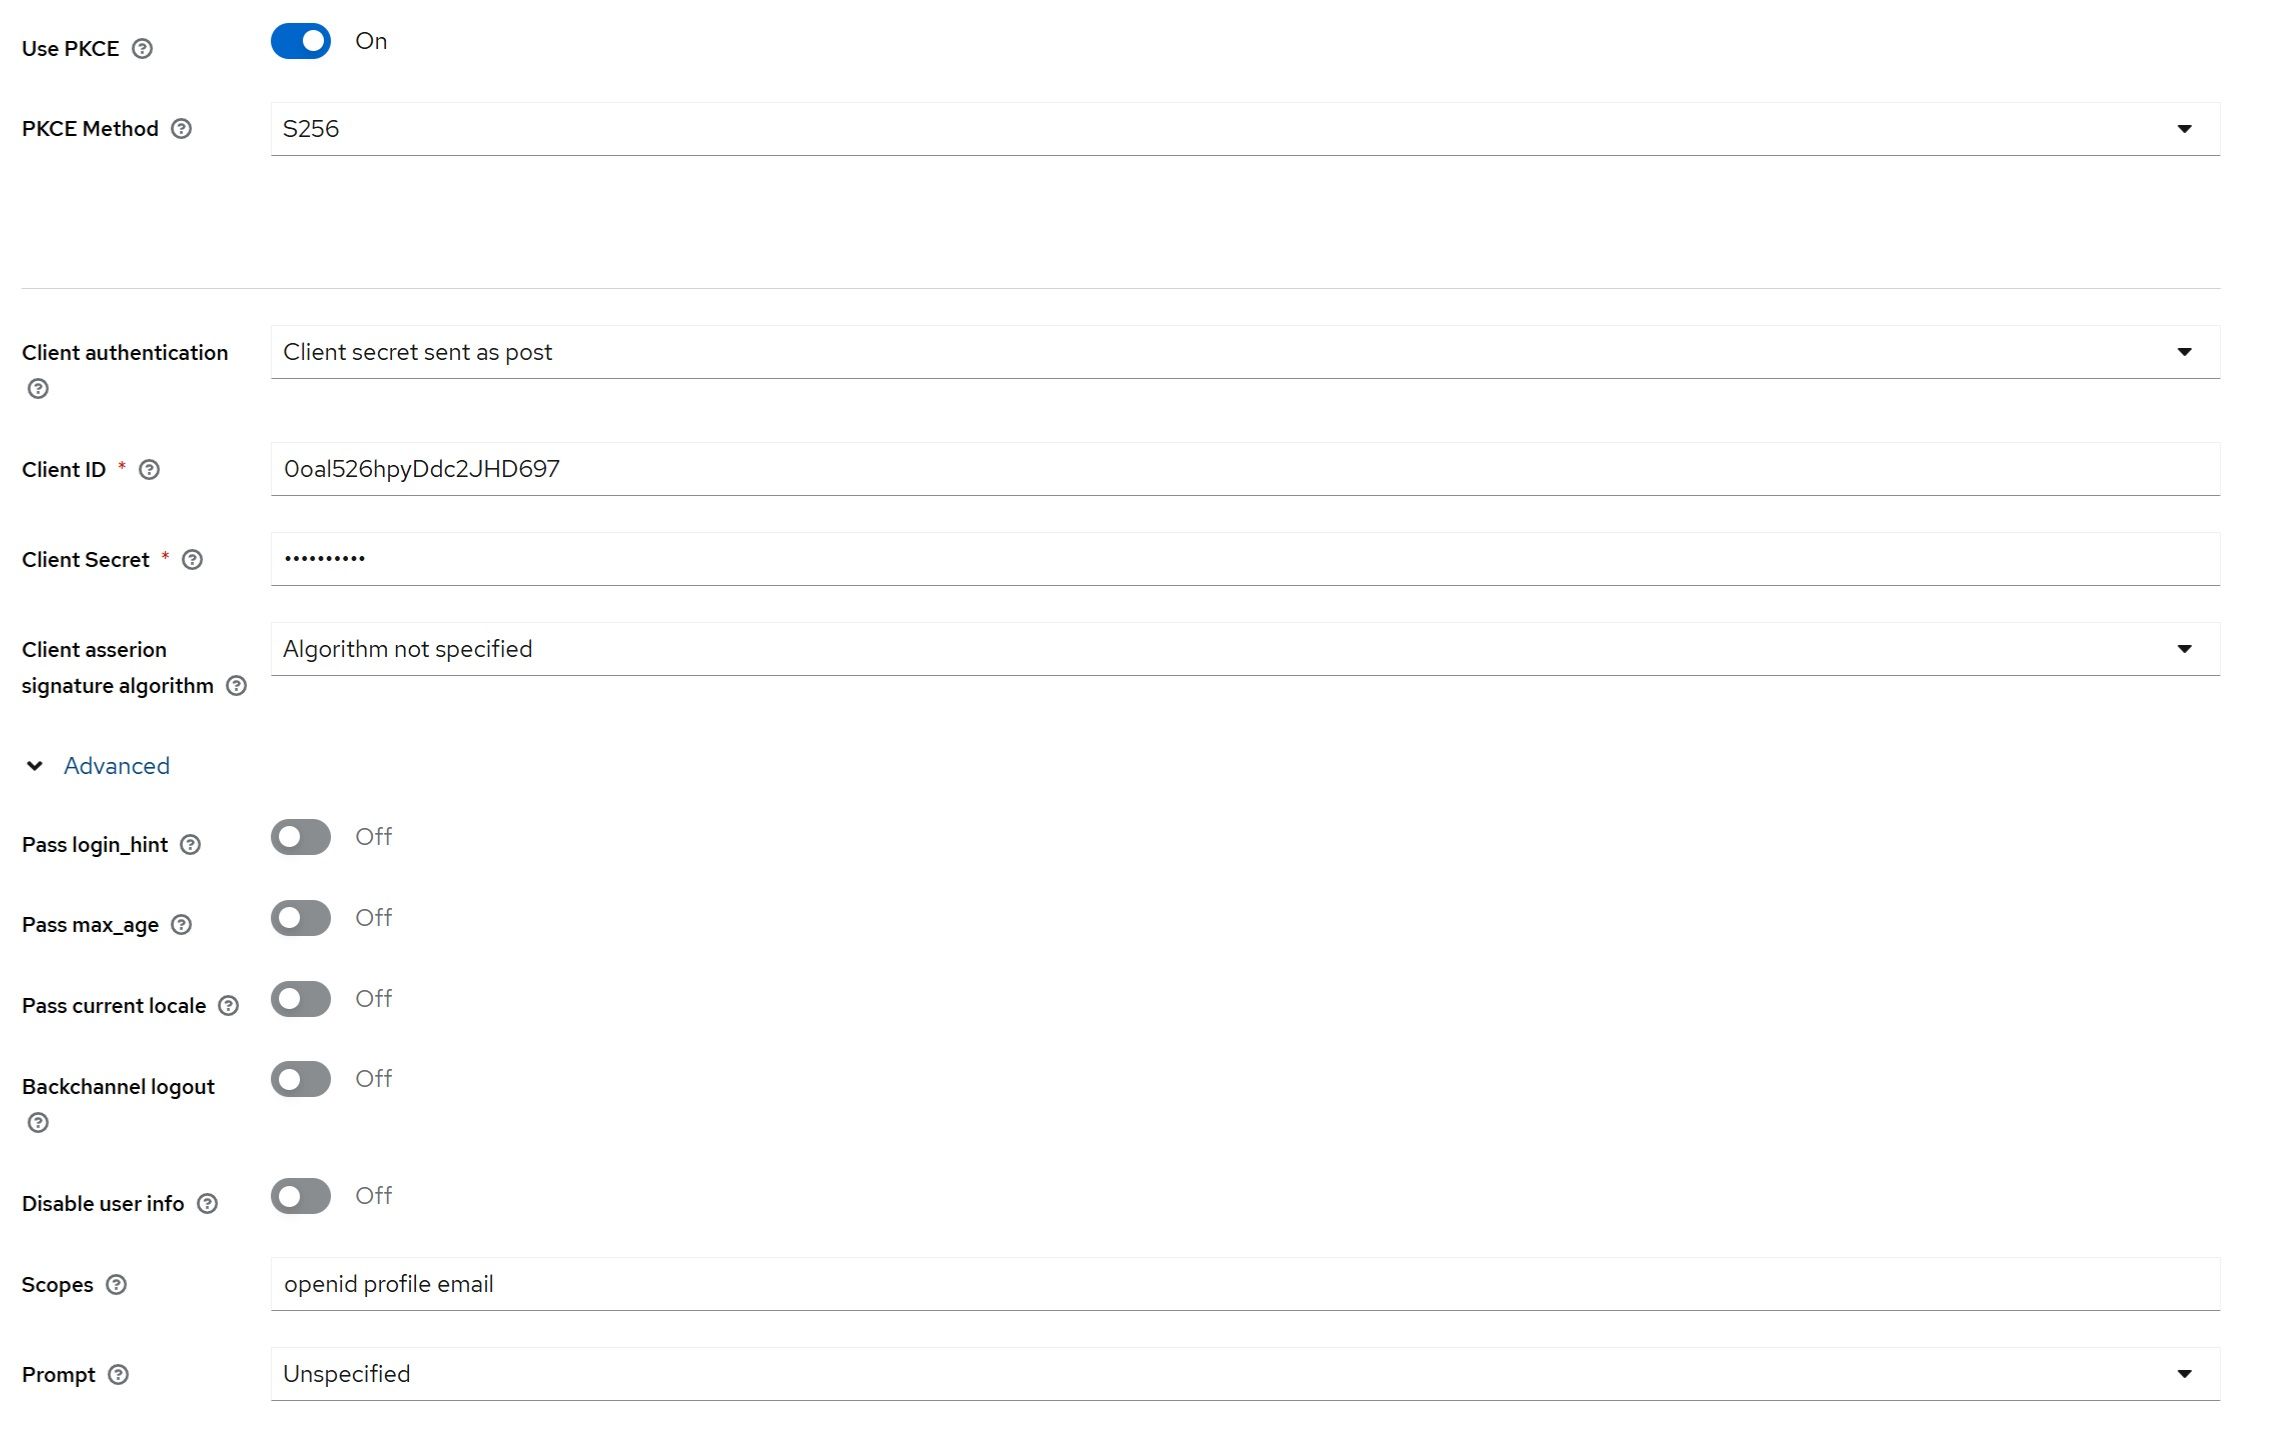
7. Create an Okta API token in Okta application
In the “Security” → “API” → “Tokens” section, create an Okta API token. It will be needed to configure the Okta extension in the CData Virtuality Authentication Management Component
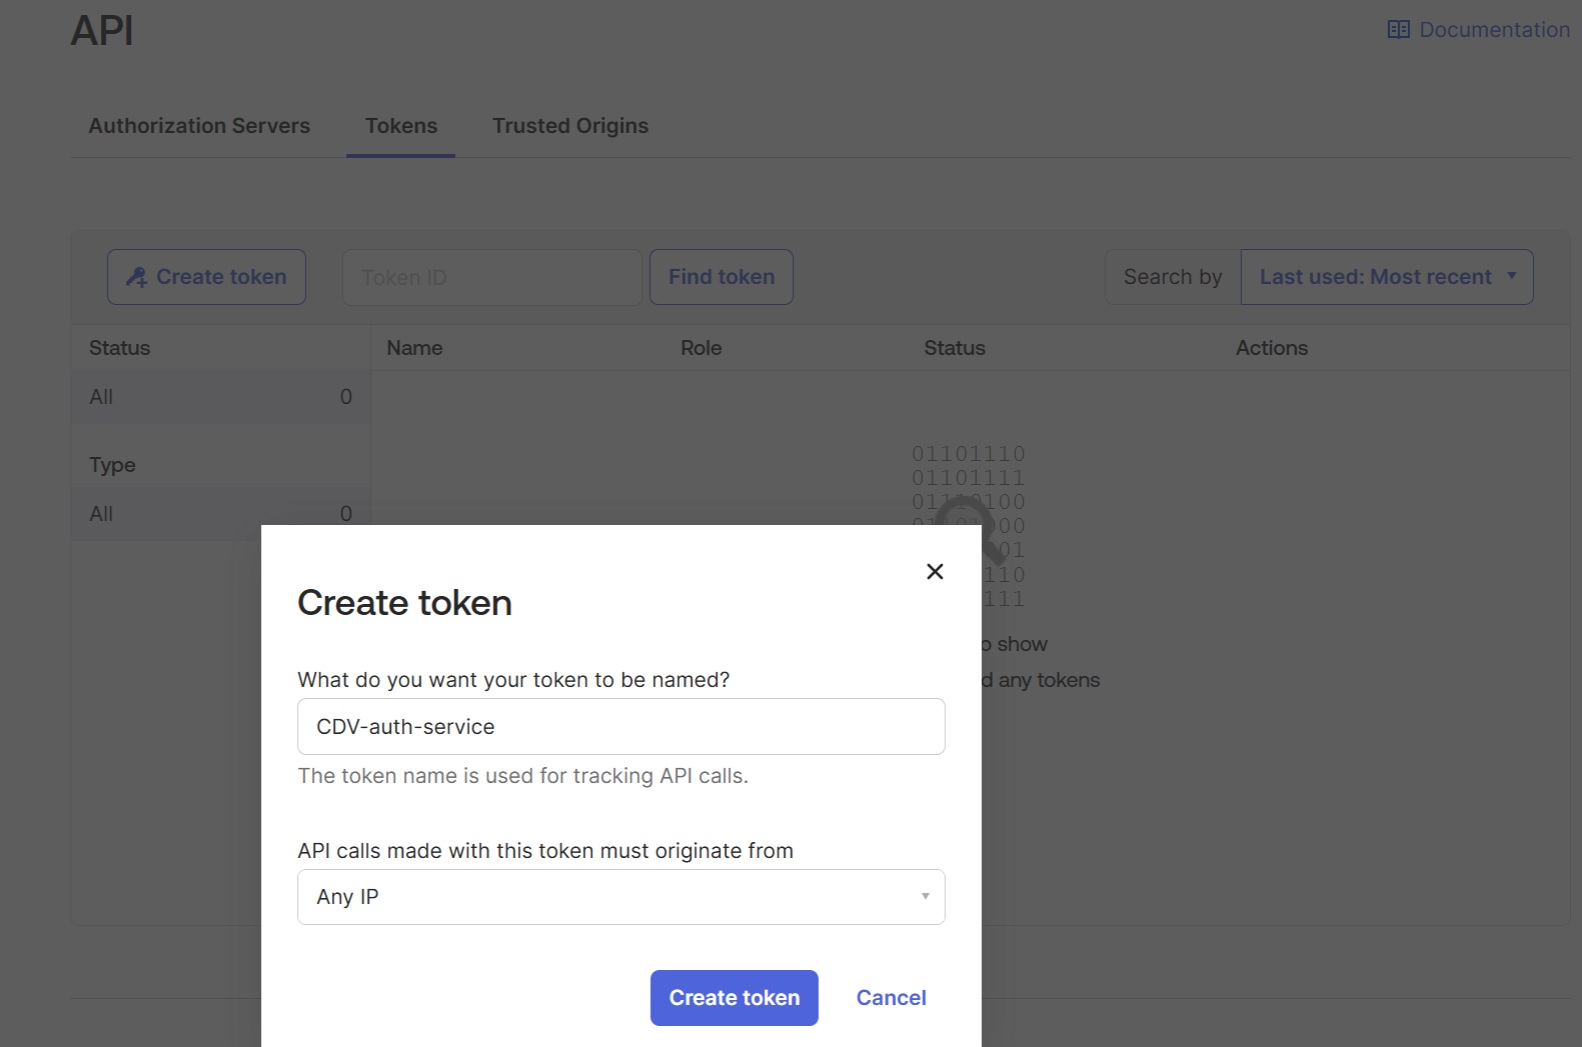
Please make a note of this token as it will be the only time that you will be able to view it.
8. Configure the "Sign-in redirect URIs" in Okta application
Switch back to Okta and configure the "Sign-in redirect URIs" using the value of the “Redirect URI” generated by the Authentication Management Component for Okta Identity provider in step 6: 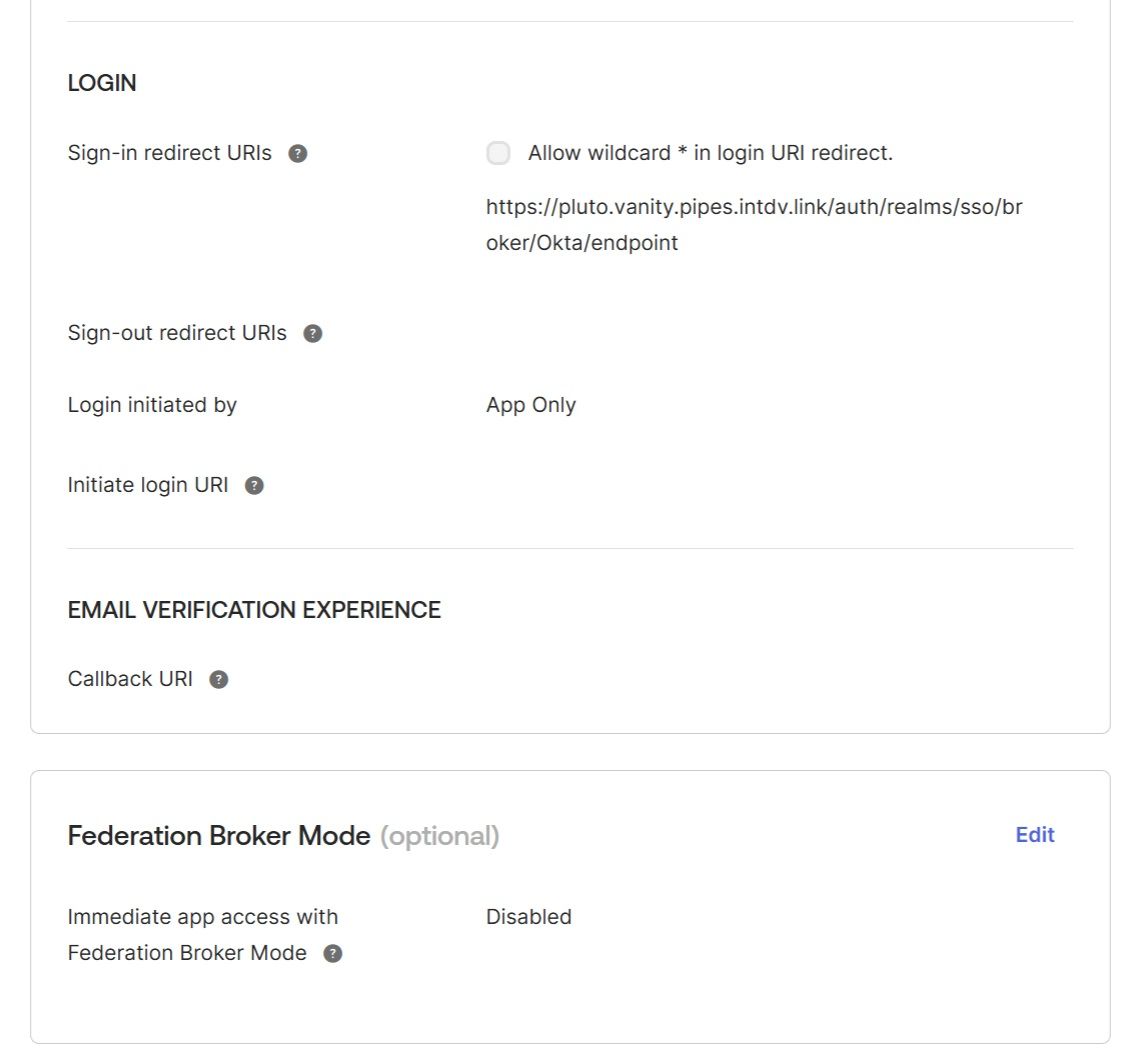
The Federation Broker Mode must be disabled.
9. Configuration of Okta extension on the CData Virtuality Authentication Management Component
9.1. Add an Okta provider
Add an Okta provider using the “User Federation” → “Add Okta Provider” wizard. If you don’t see the “Add Okta Provider” option, check if your CData Virtuality Authentication Management Component providers folder contains okta-user-storage-provider-jar-with-dependencies.jar
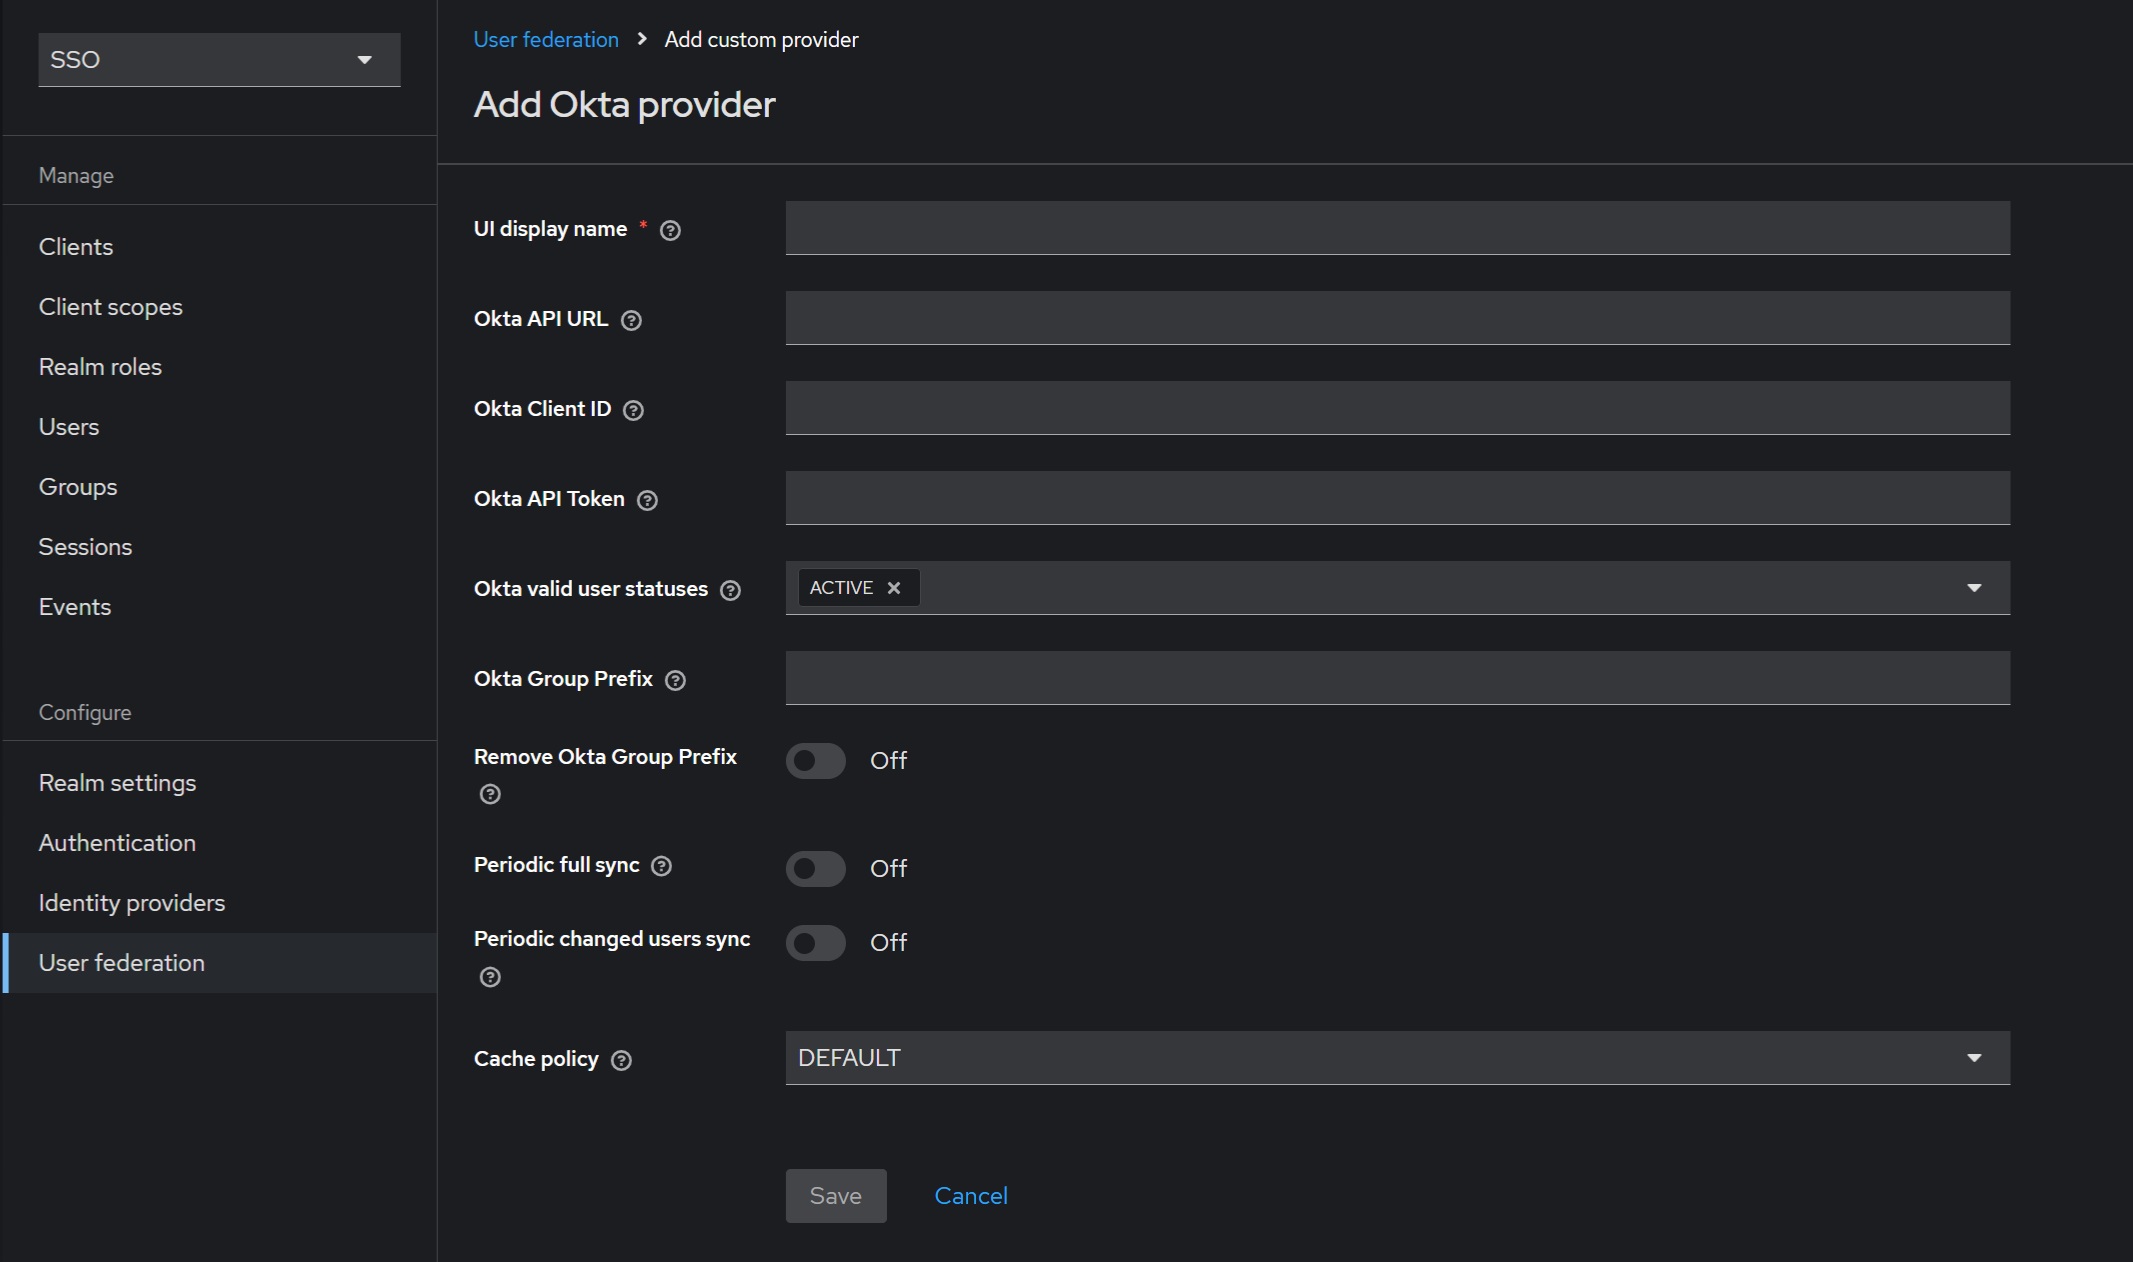
Fill in all the mandatory fields, such as “UI Display Name”, “Okta API URL”, “Okta Client ID”, and “Okta API Token”. For example:
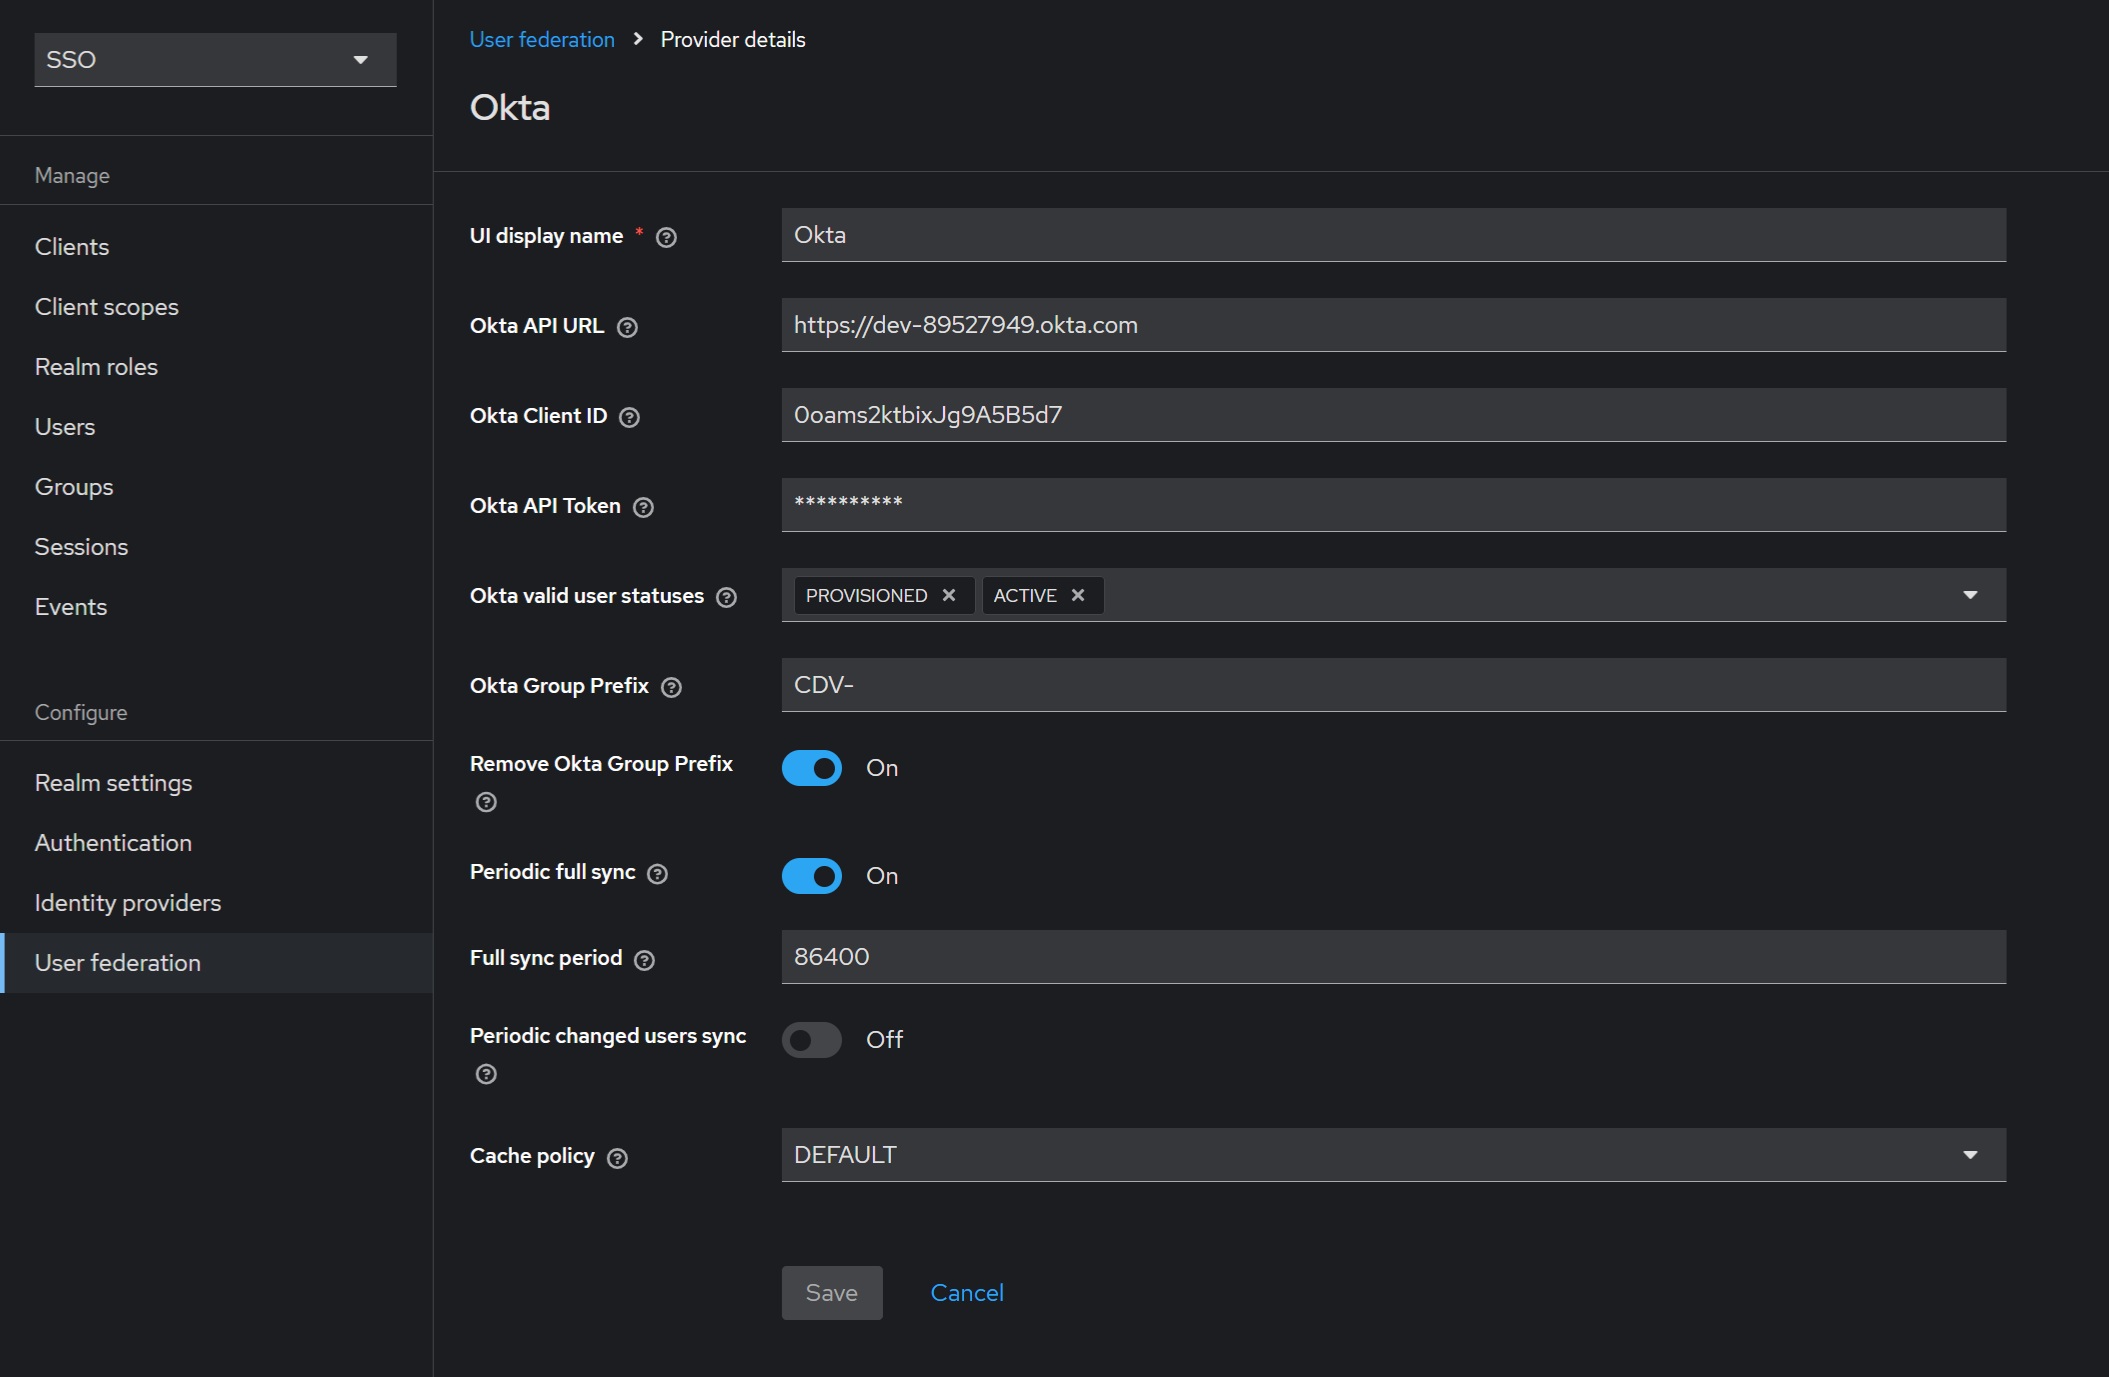
The Okta API token should be created in advance in Okta → “Security” → “API” → “Tokens” section (see the “Create an Okta API token in Okta application” section). The “Okta Group Prefix” serves two purposes: filtering Okta groups and modifying group names. If you specify a prefix (e.g., “CDV-”), the Okta extension will load only groups that match (“CDV-*”). If the “Remove Okta Group Prefix” option is enabled, the prefix will be removed from group names (e.g., “CDV-admin-role” will become “admin-role” aligning well with CData Virtuality server roles).
Additionally, you can enable the “Periodic full sync” option, which will automatically load all users and their groups at a specified interval (in seconds). Similarly, the “Periodic changed users sync” option loads only users changed on Okta’s side.
9.2. Add Okta users and roles
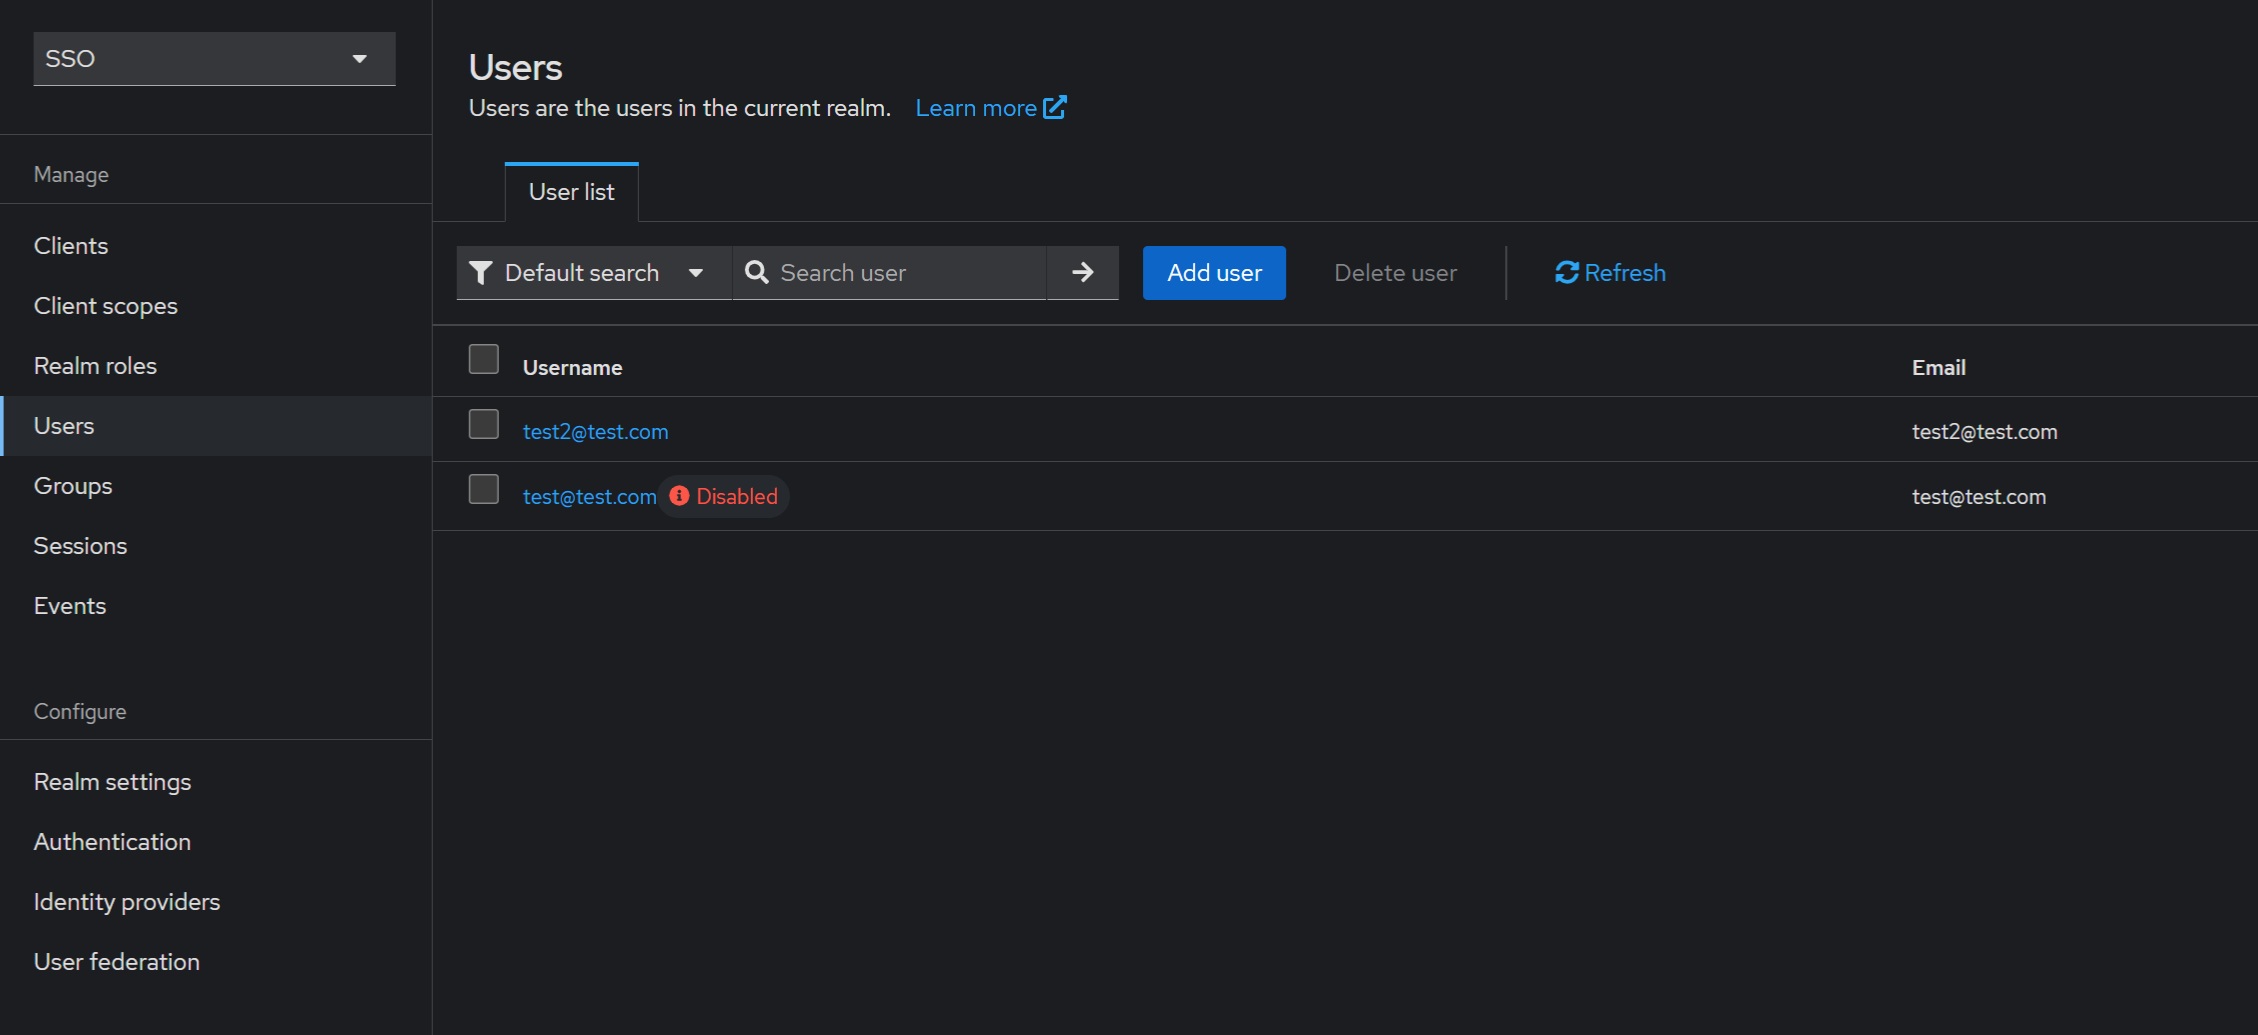
Once the Okta extension is configured, click the “Sync all users” action in the same wizard at the top right corner:

You will receive a notification about added, updated, removed, or failed users. Now, you can check the “Users” and “Realm roles” sections, which should contain all imported or loaded users/groups from Okta.
9.3. Broker login configuration
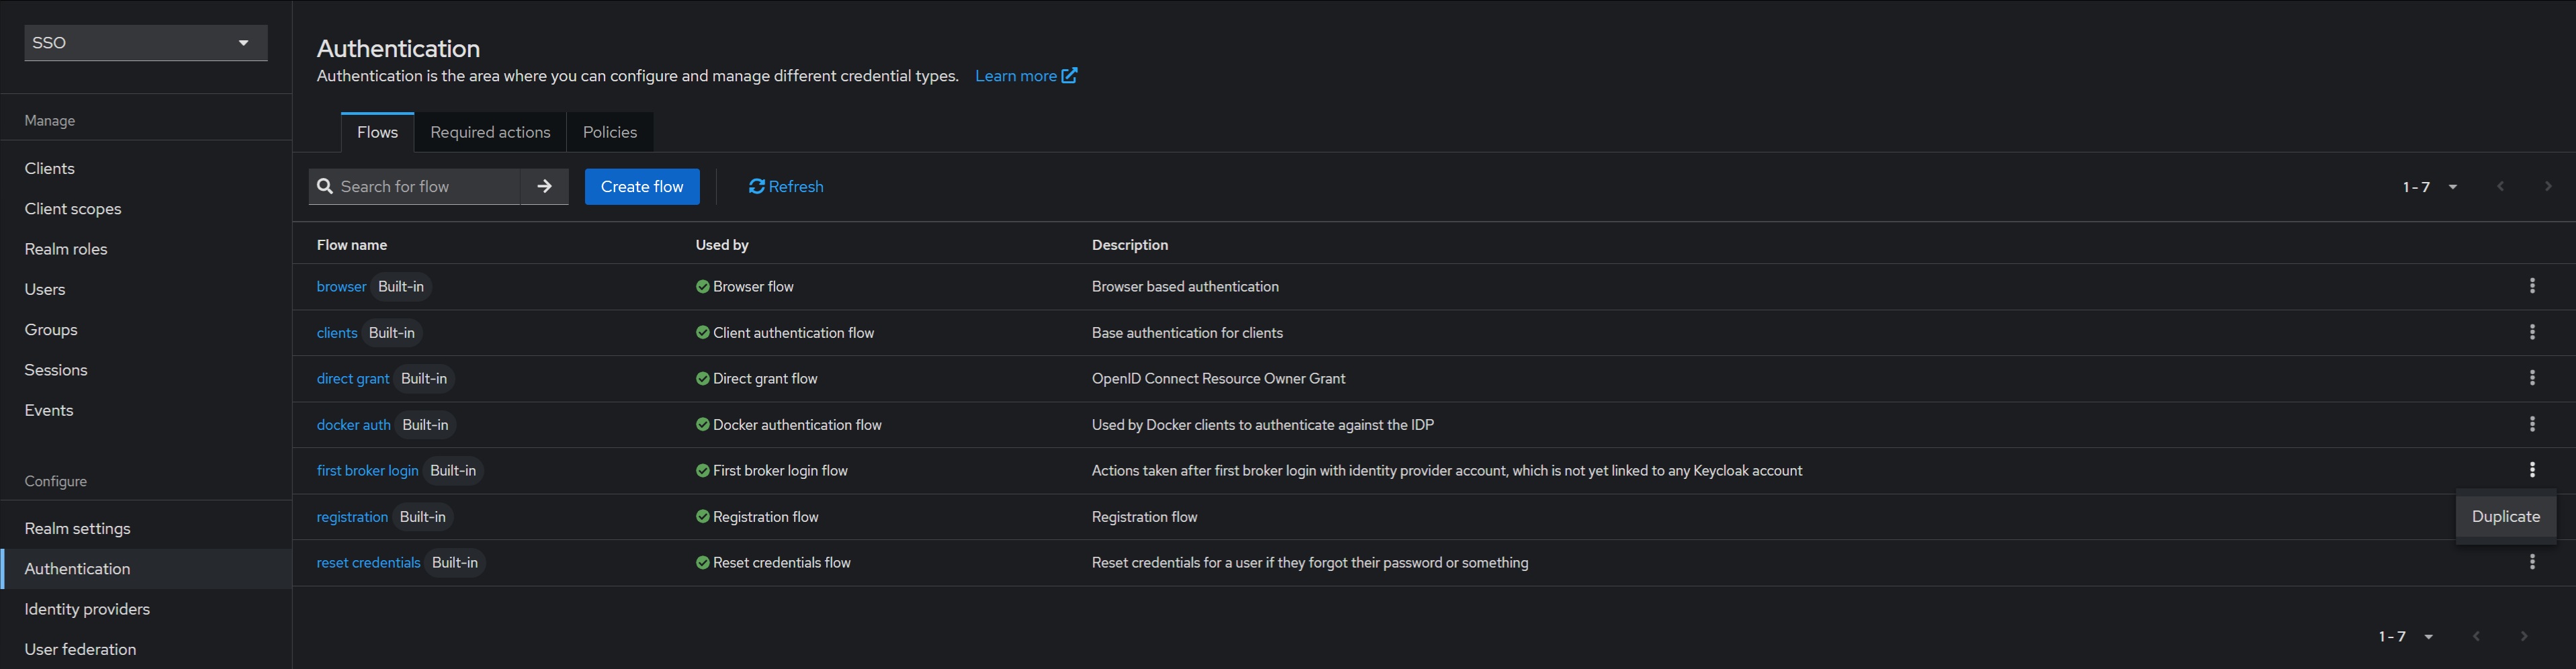
The default first login flow searches for a Keycloak account matching the external identity and prompts the user to link them (displaying a window during login). If no matching account is found, a new one is automatically created. However, this default behavior may not be suitable for our setup, so we should disable the workflow, it’s better to configure an auto setting for existing users not showing any additional windows. In the “Authentication” section for the “first login broker” choose the “Duplicate” action and create, say, the “auto link first broker login“:
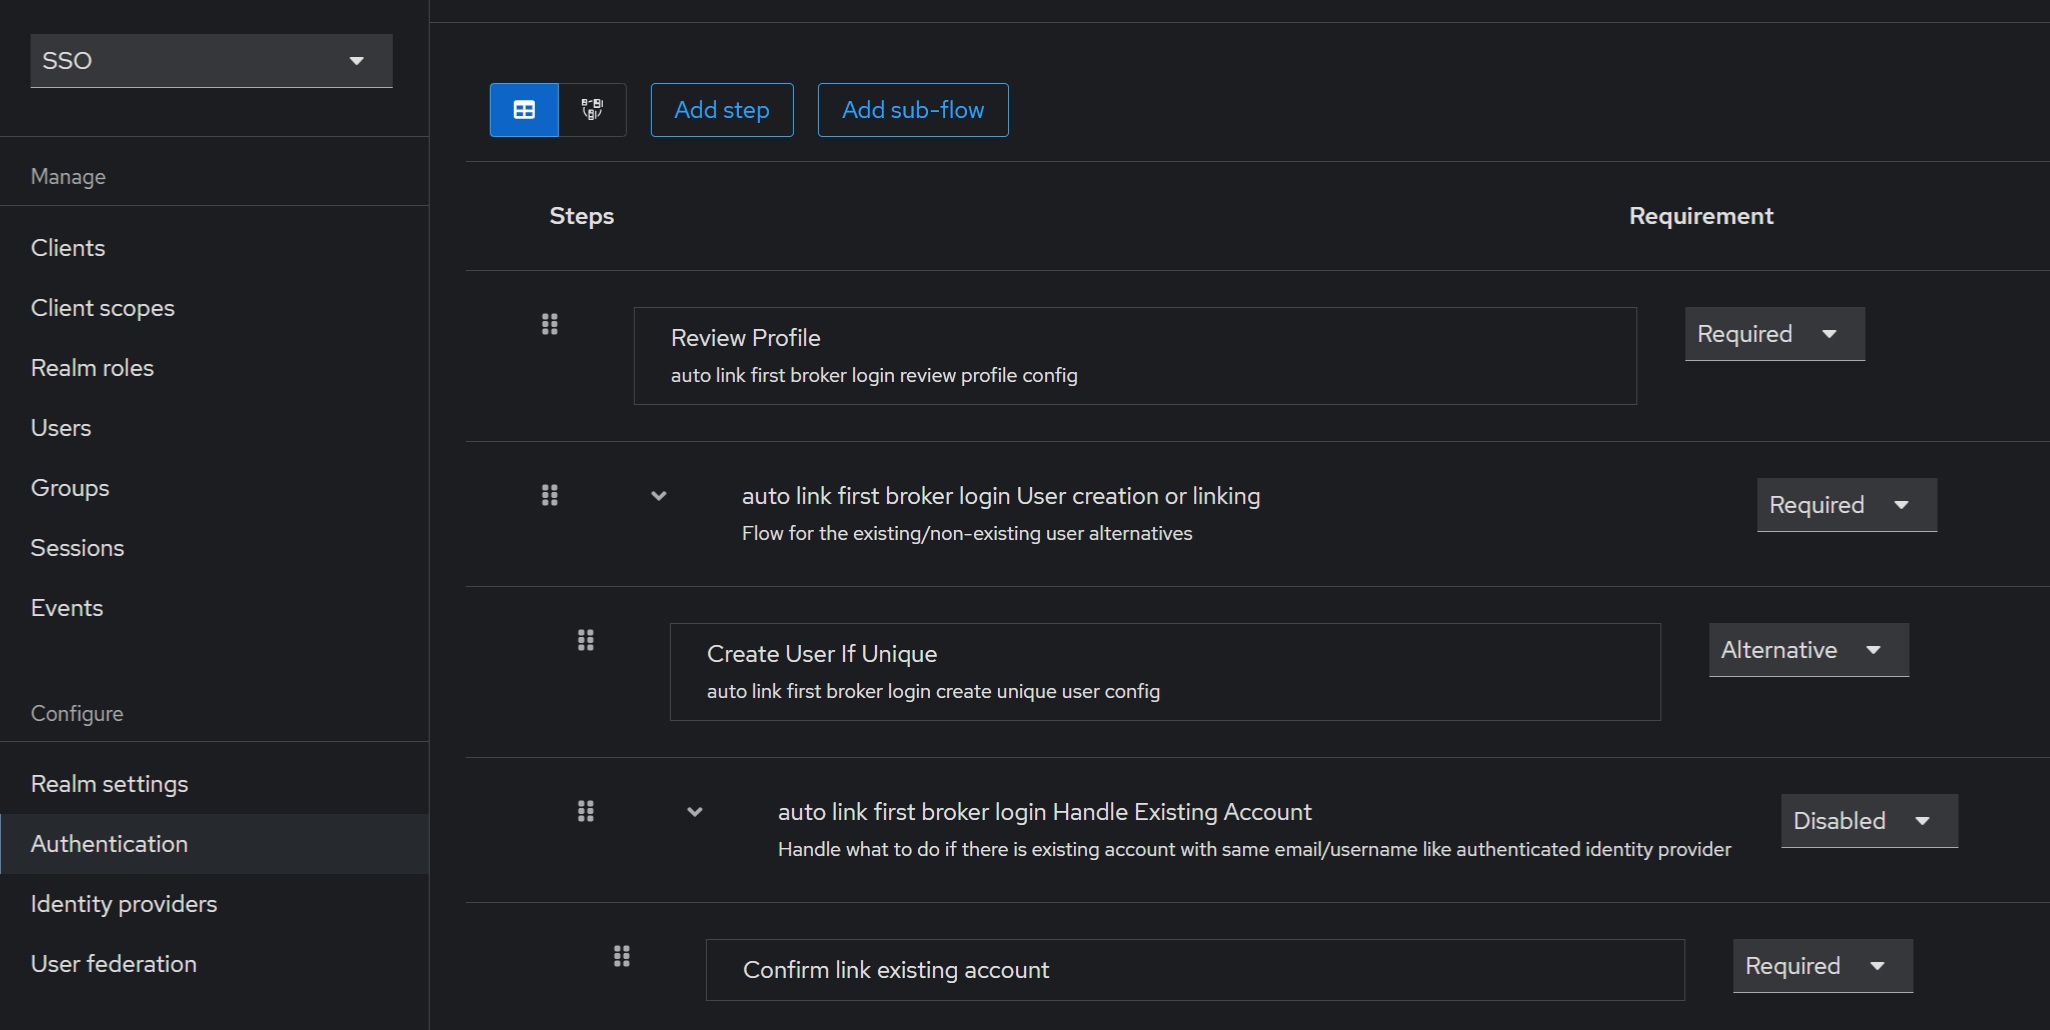
In the “auto link first broker login” disable the “auto link first broker login Handle Existing Account” step:
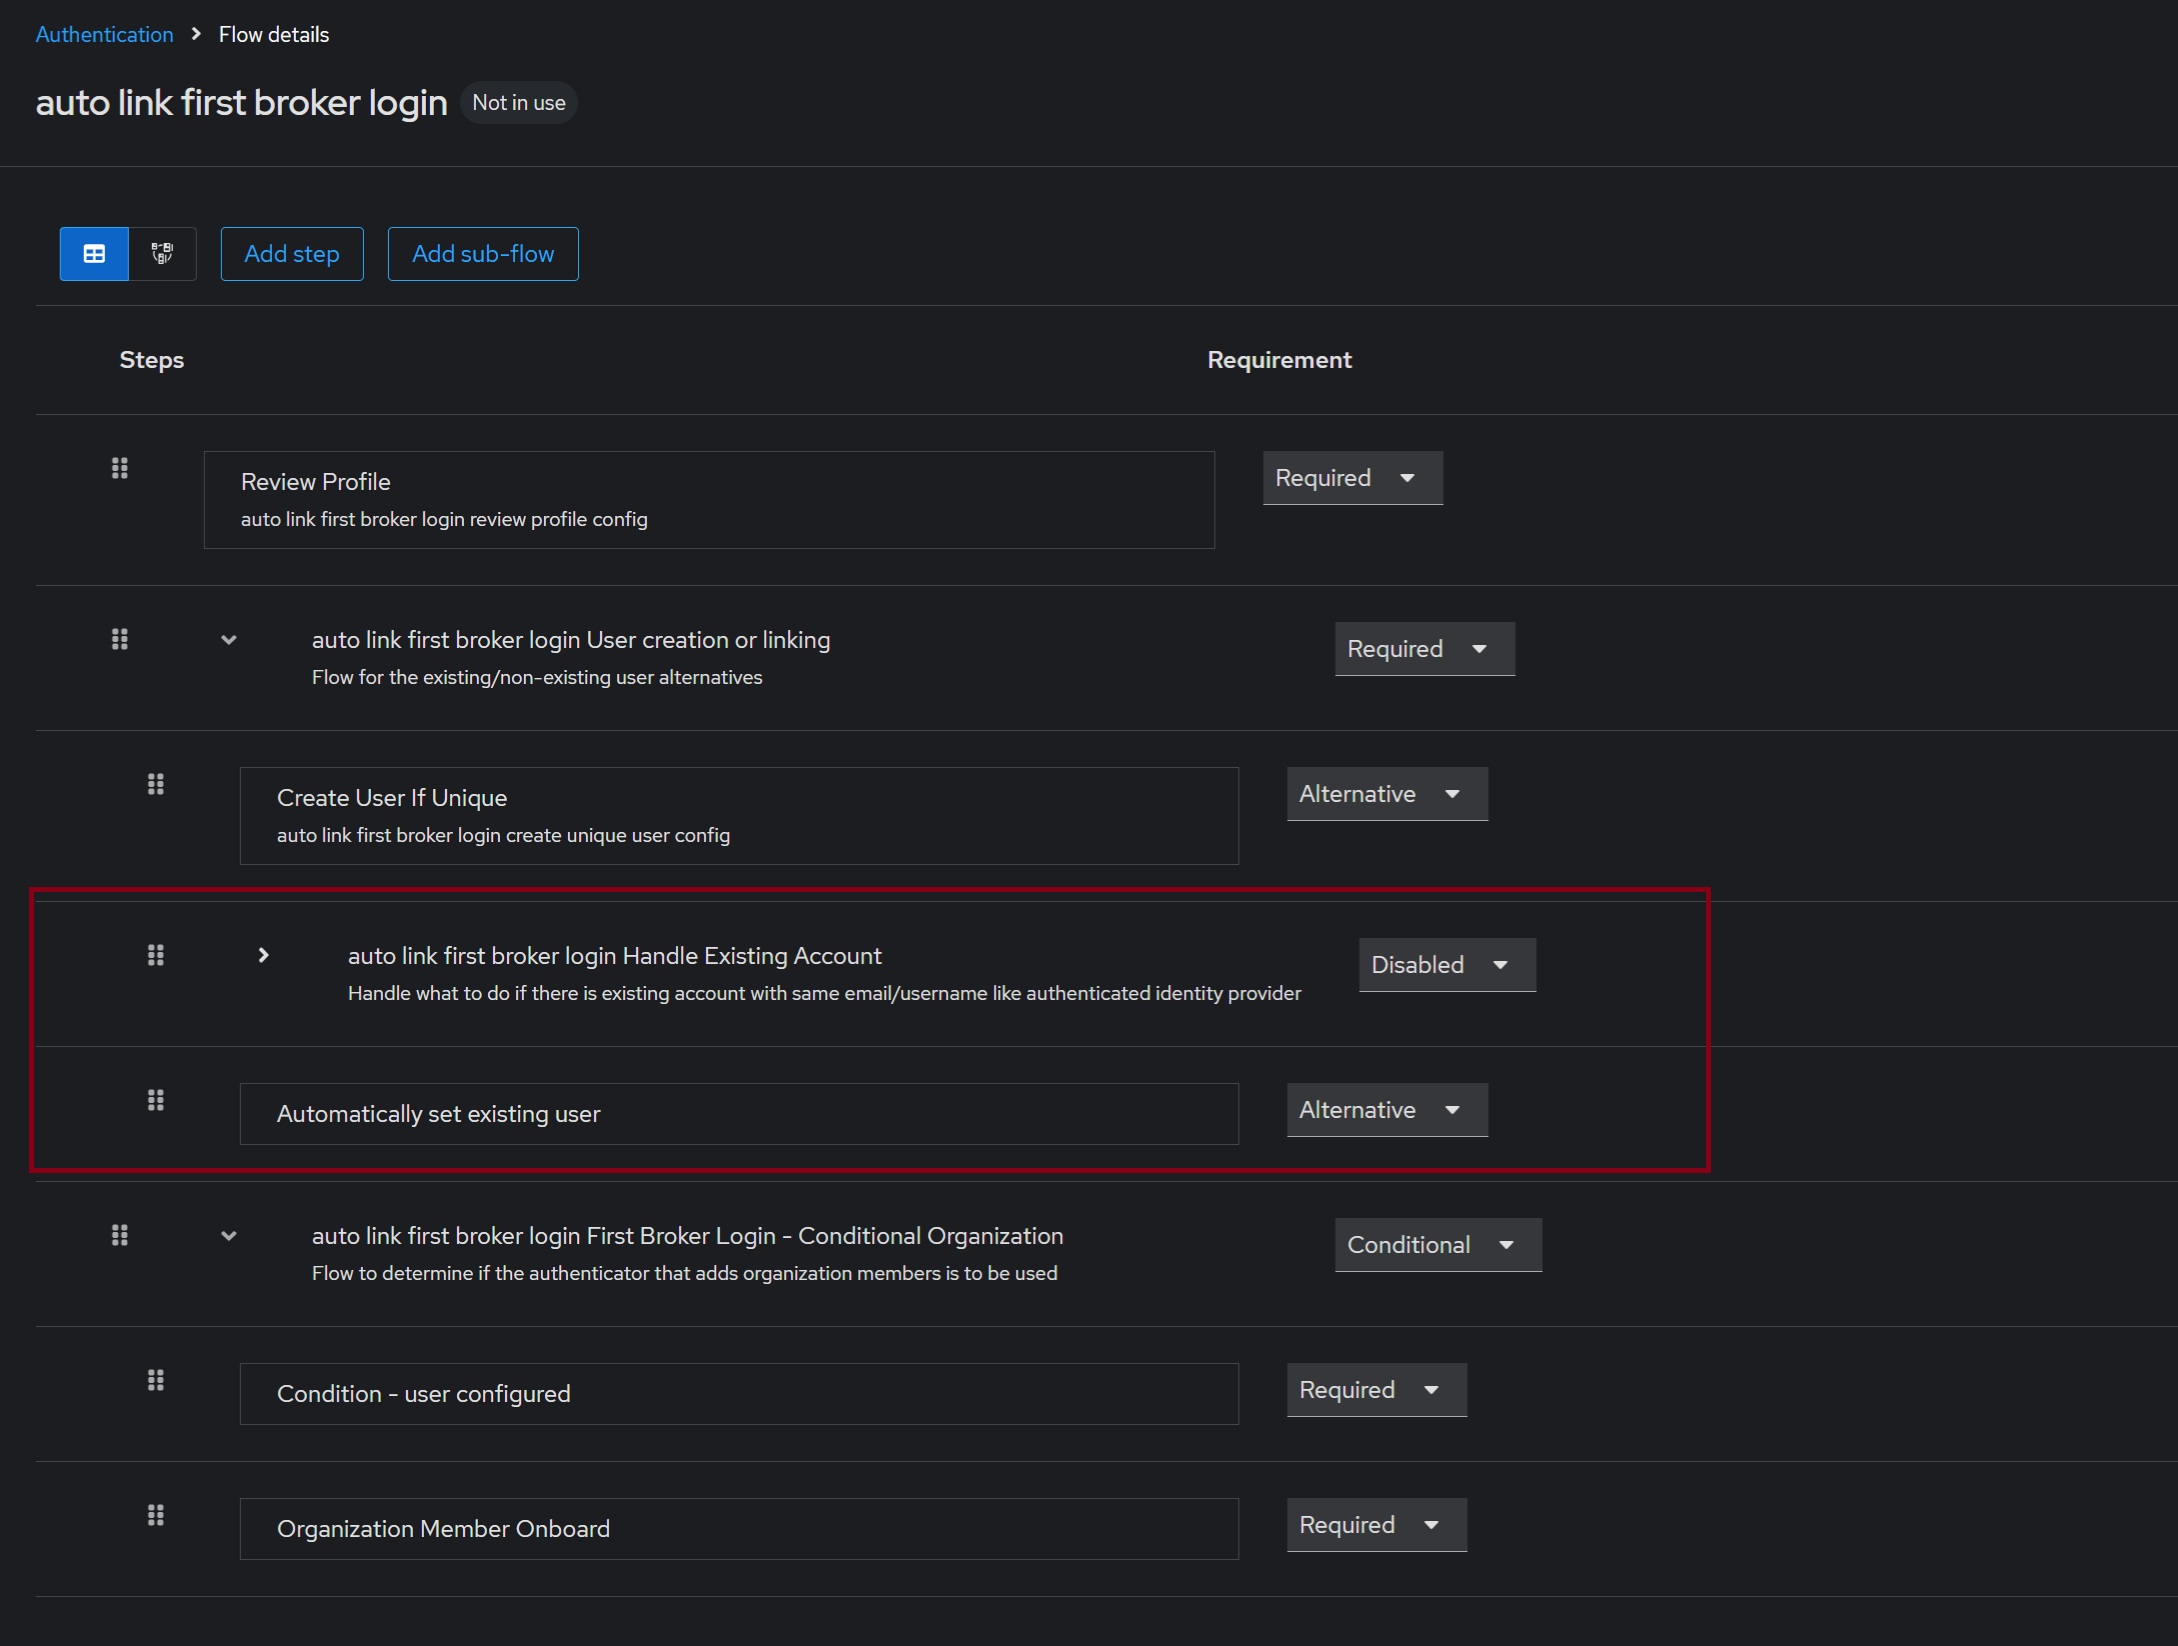
Add the “Automatically set existing user” step after the “Create User If Unique” step so that it’s under the disabled “auto link first broker login Handle Existing Account”:
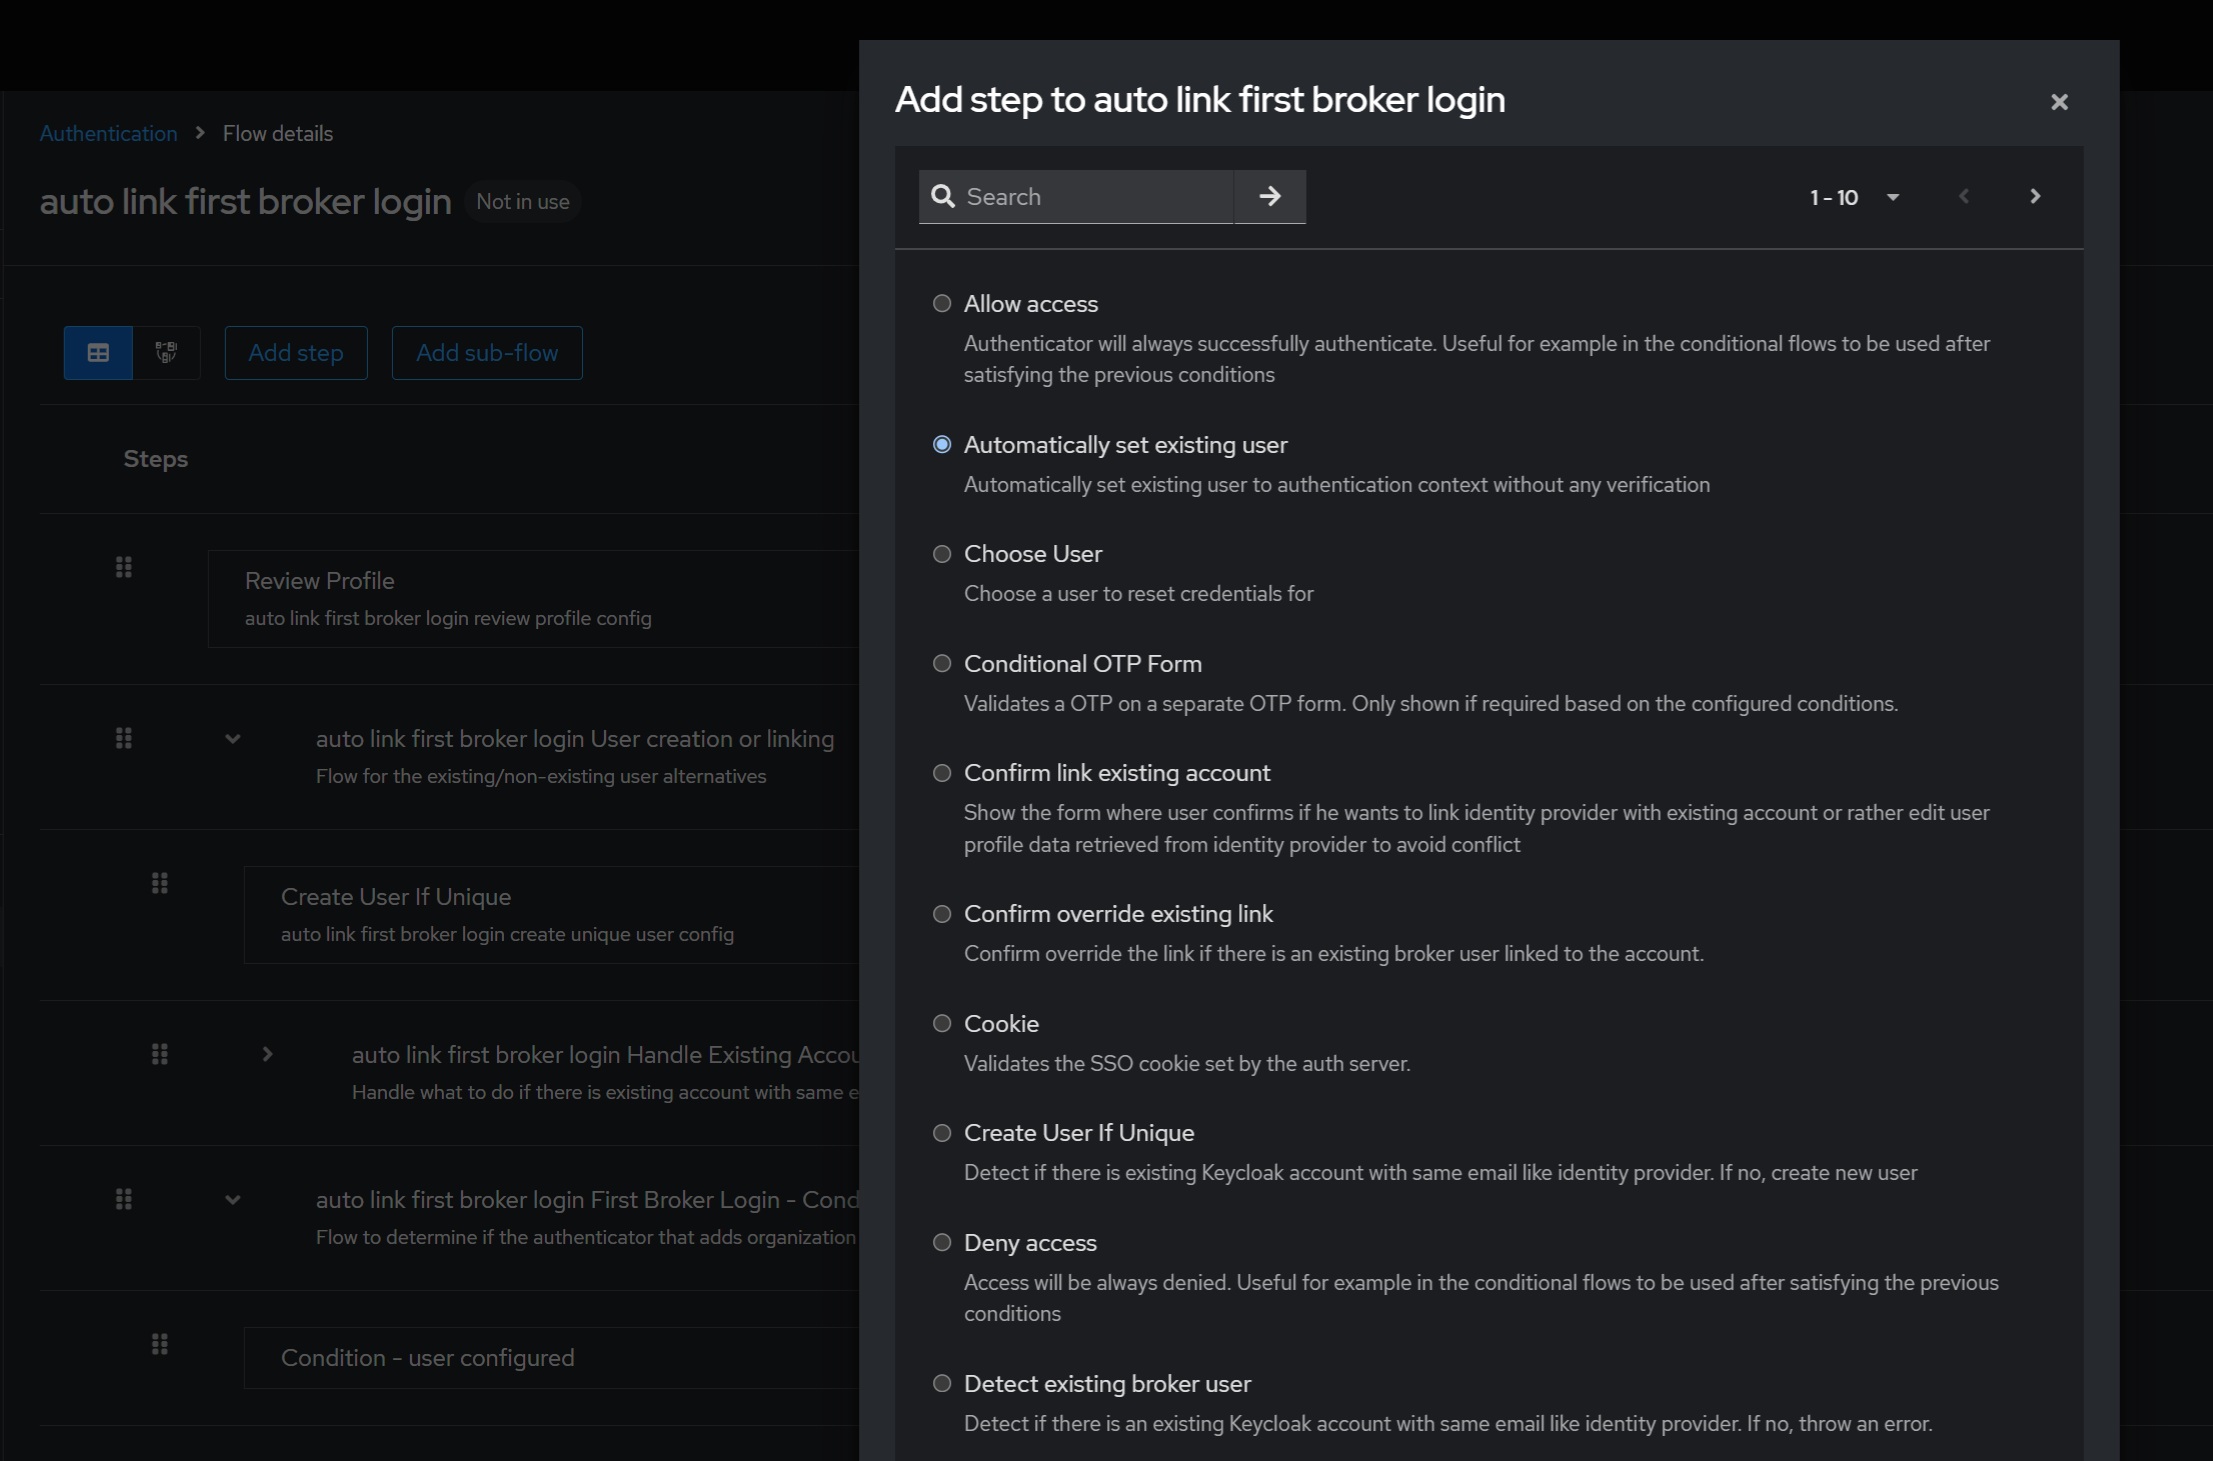
Set the new step to the “Alternative” state:
Link the new “auto link first broker login” broker login with Okta Identity Provider added in Further configuration of CDV Auth Service (Keycloak) section. In the “Identity providers” section choose the “okta” identity provider and set the “First login flow override” filed to the “auto link first broker login” value and save new changes:
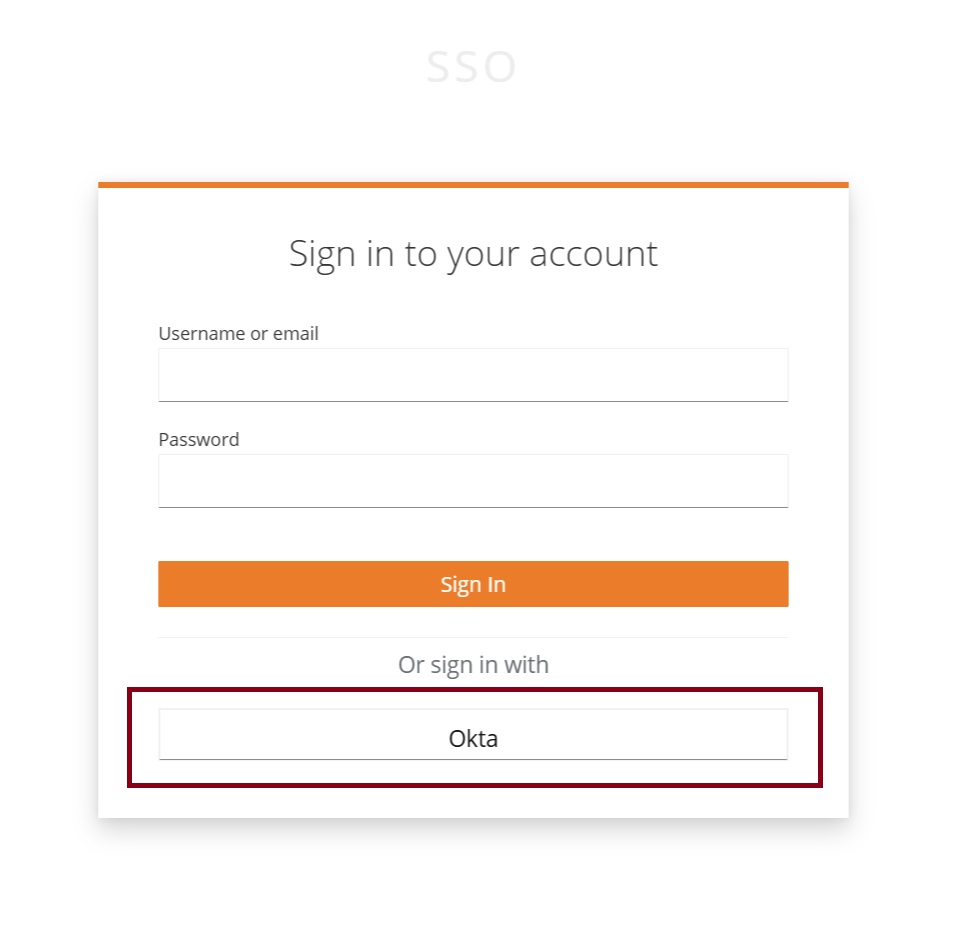
10. Log in using Okta authorization
Now, when you are logging in to the CData Virtuality Server via SSO, you see an additional “Okta” button. Clicking on it will redirect you to the Okta sign in page: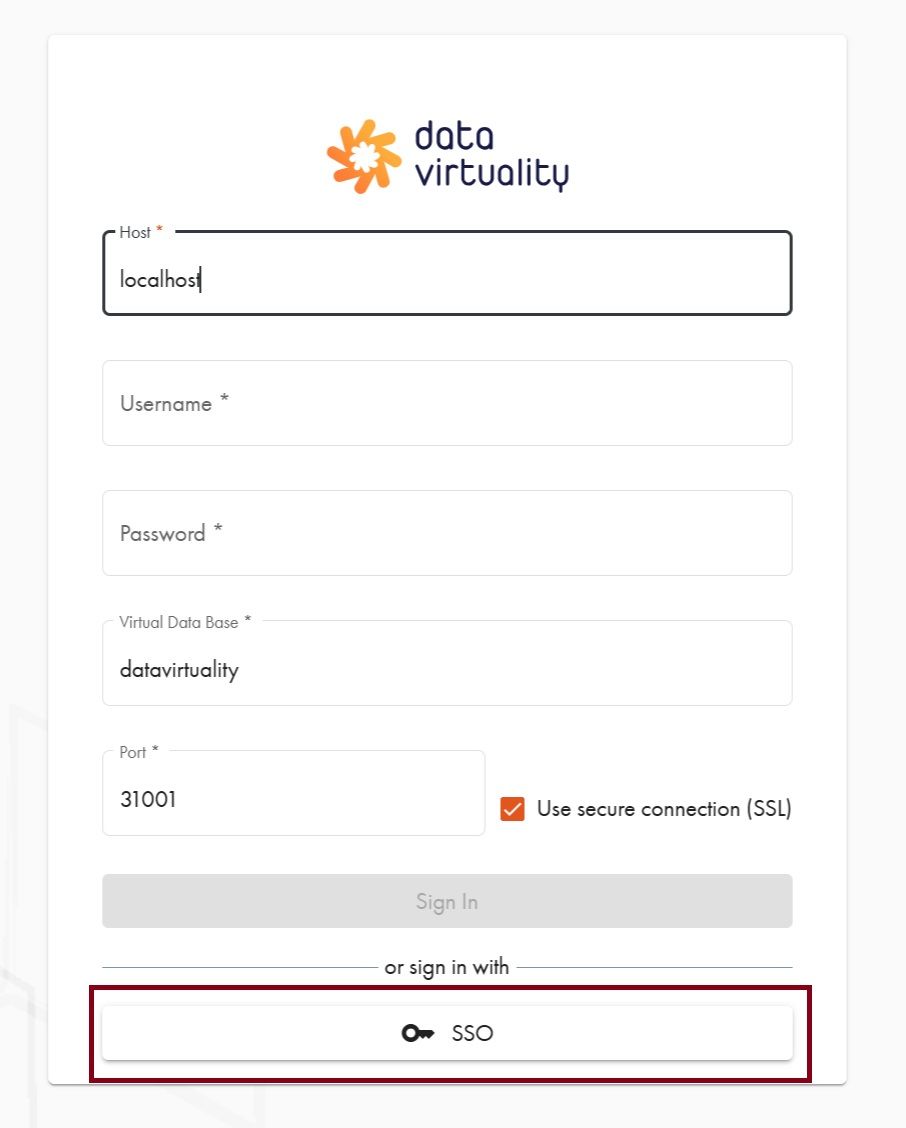
Obtaining Access and Refresh Tokens
To obtain access and refresh tokens for Okta users, configure the following parameters for the Client in the Authentication Management Component:
Select your Realm;
Navigate to your Client in the Authentication Management Component;
Configure the following parameters:
Using Okta Access and Refresh Tokens in JDBC and ODBC Clients
To enable connection using Okta user access and refresh tokens in CData Virtuality Studio and JDBC/ODBC clients, follow these steps:
Load Okta users into the CData Virtuality Authentication Management Component.
Obtain Okta users access and refresh tokens:
Get authorization code:
URL to obtain authorization code: <CData Virtuality Authentication Management Component URL>/realms/<your realm name>/protocol/openid-connect/auth?response_type=code&client_id=<your client id>&redirect_uri=http://localhost/;
Select Okta and log in using standard Okta authorization;
Copy code from the redirected URL:

Get access and refresh tokens:
URL to get tokens: <CData Virtuality Authentication Management Component URL>/realms/<your realm name>/protocol/openid-connect/token;
Parameters in request body:
grant_type = authorization_code
client_id = <your client id>
client_secret = <your client secret>
redirect_uri = http://localhost/
code = from Step a
Use the returned access and refresh tokens while connecting via CData Virtuality Studio and JDBC/ODBC clients.