
Creating Views
This section explains how to create a view in CData Virtuality by combining data retrieved from different database tables.
What is a View
In CData Virtuality, a view is a virtual table created by combining the results of queries from multiple data sources (e.g., a table in MySQL and a table in PostgreSQL). Views provide a way to unify and analyze data across diverse systems. This is how it works:
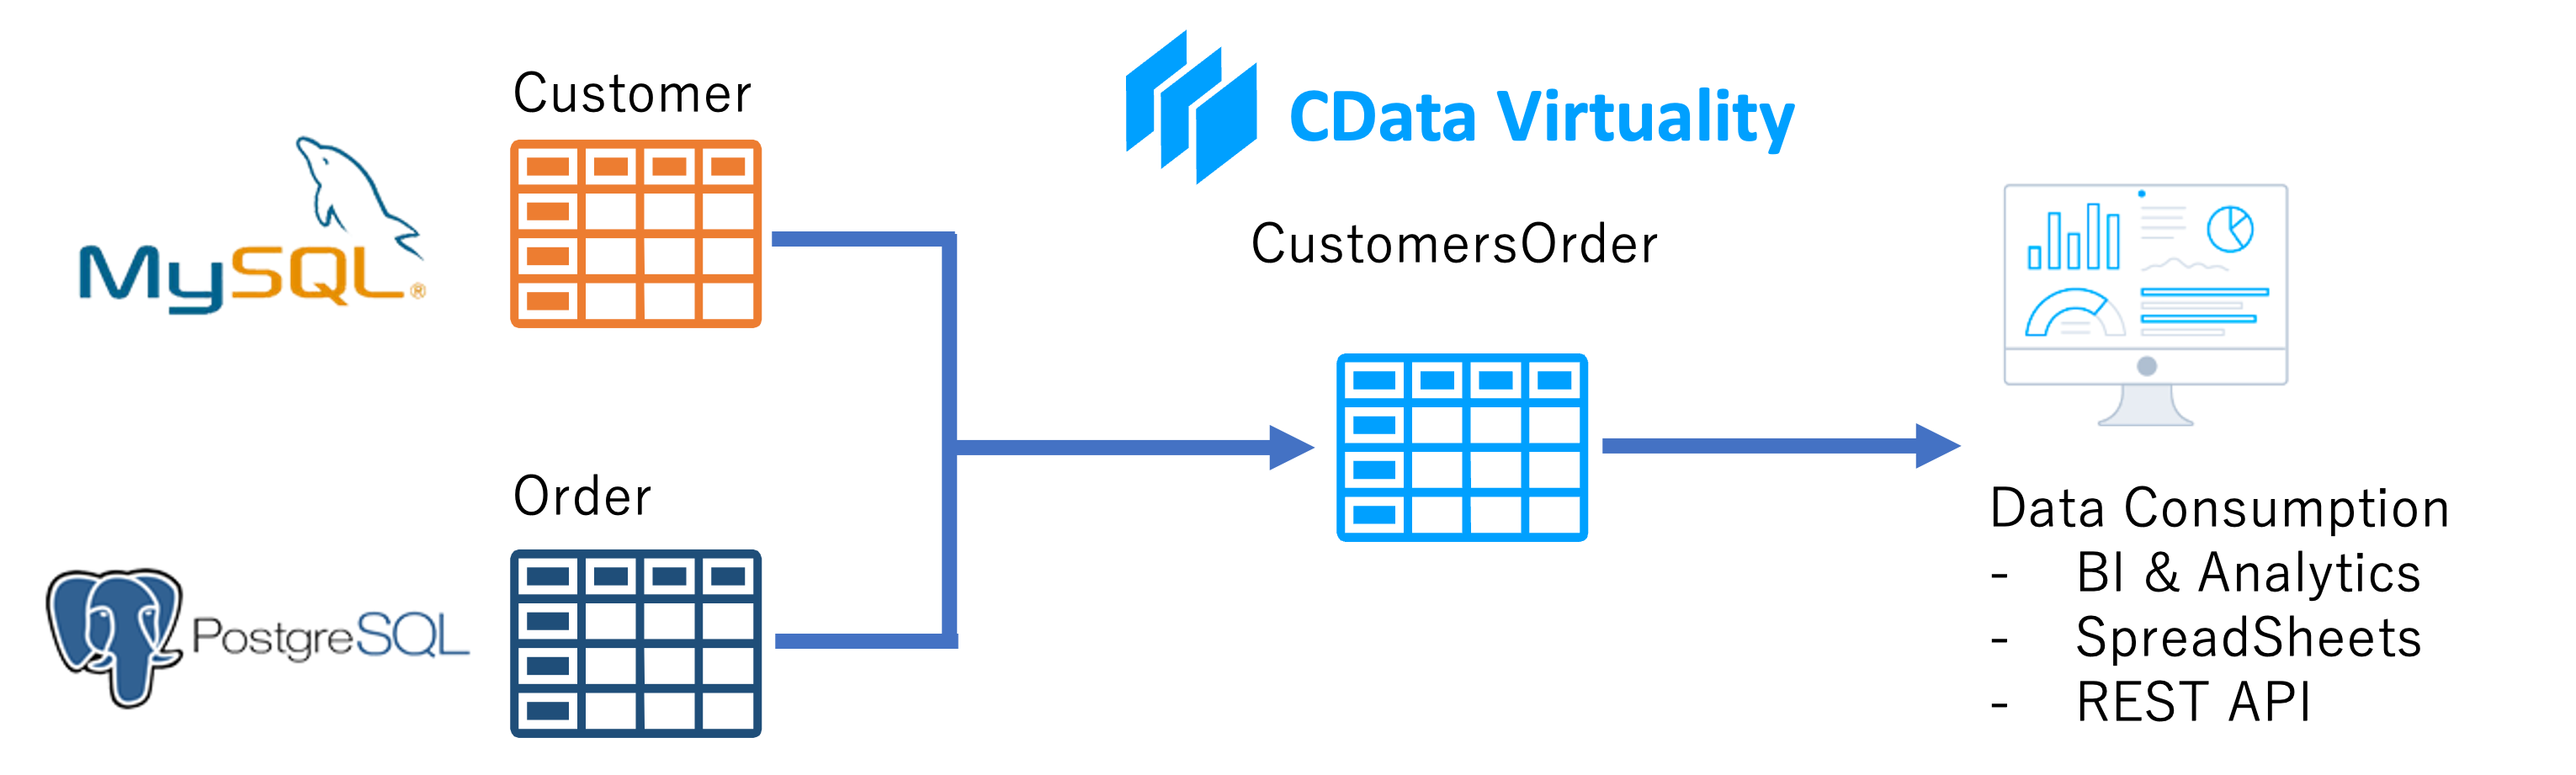
The created view is stored within a schema space in CData Virtuality, making it accessible for further querying and analysis.
Creating a View
This guide provides step-by-step instructions to create a view in both the CData Virtuality Web Interface / SaaS and the Studio.
We use sample data to illustrate the process. For instructions on connecting to the sample data, please see the corresponding guide.
Creating a View in the CData Virtuality Web UI
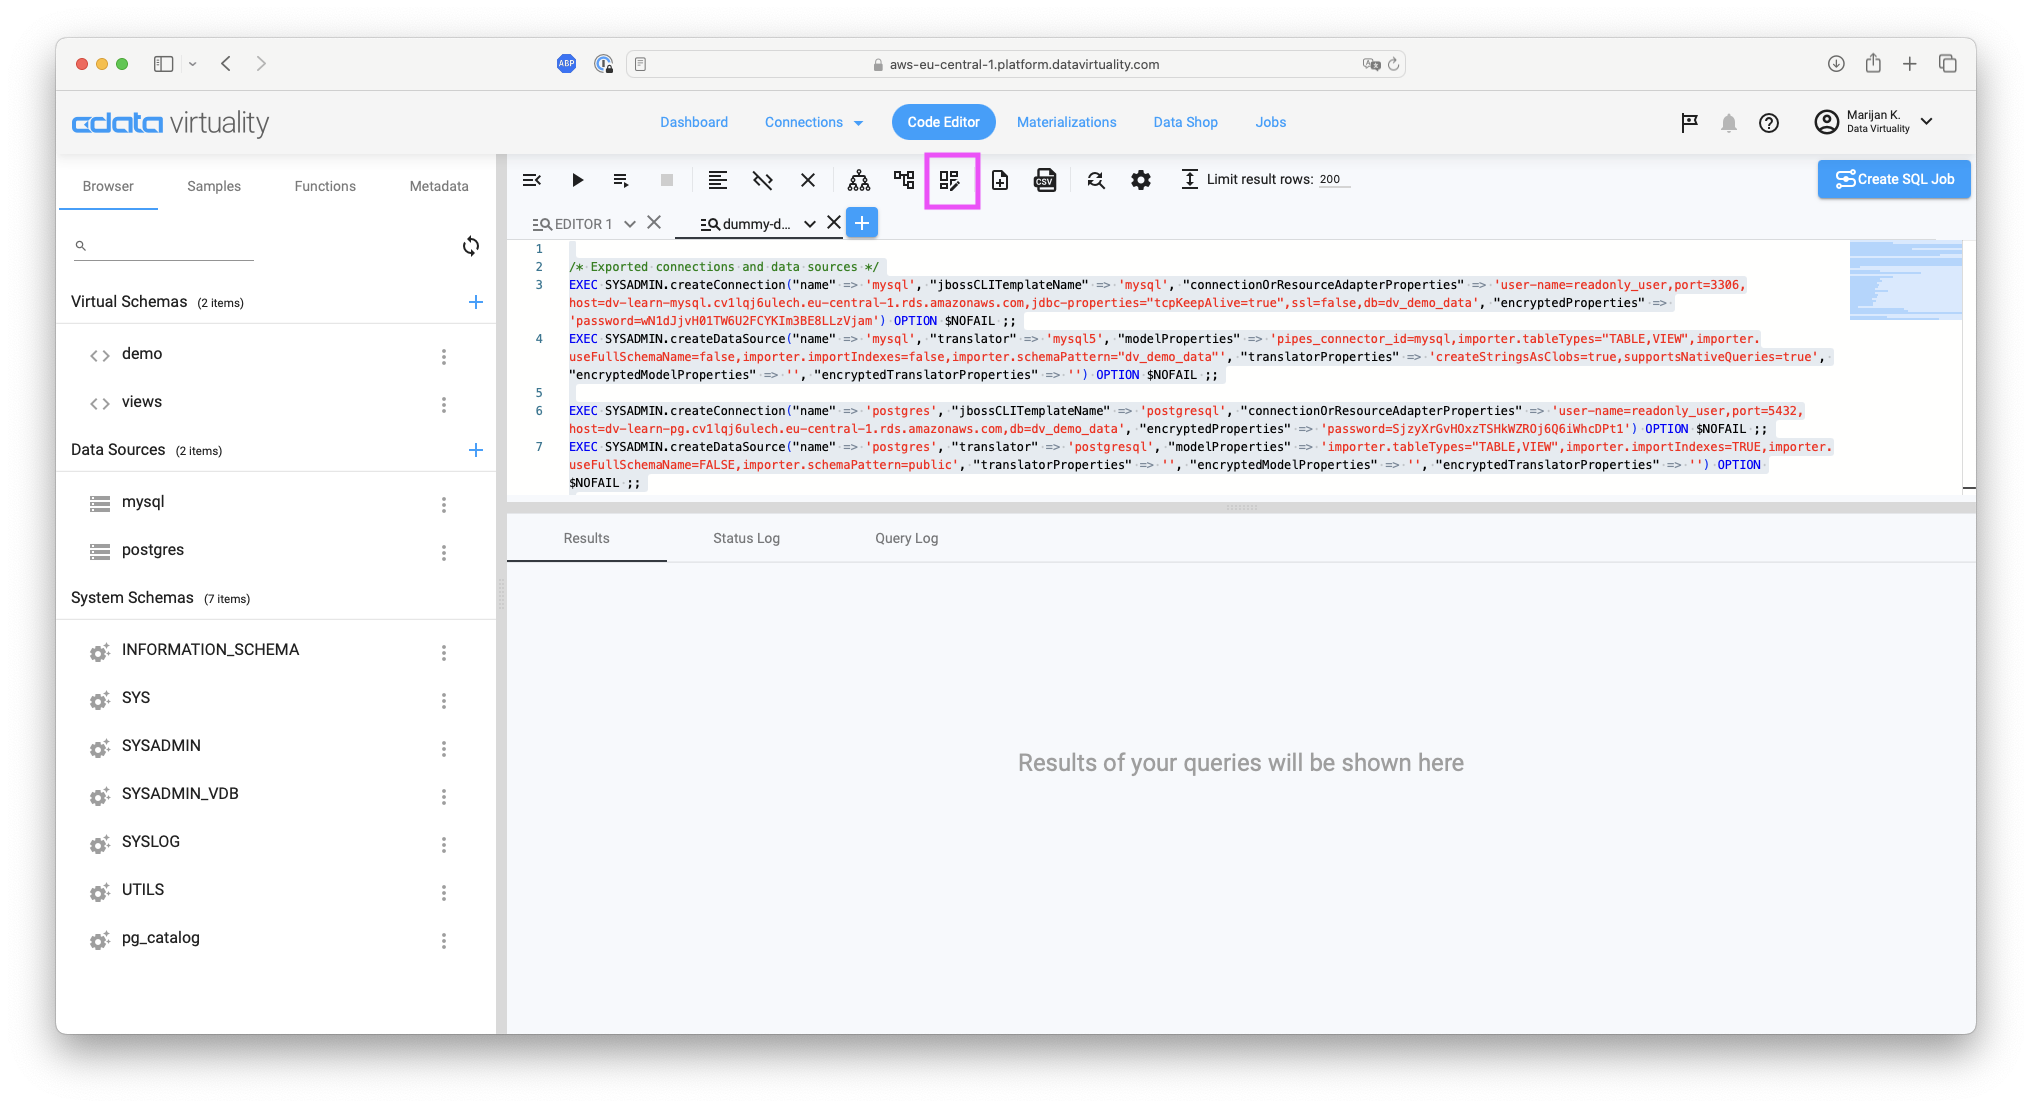
Open the Code Editor and click the View Builder button in the toolbar:
In the View Builder window, click the Open a table selection dialog button in the menu on the left side:
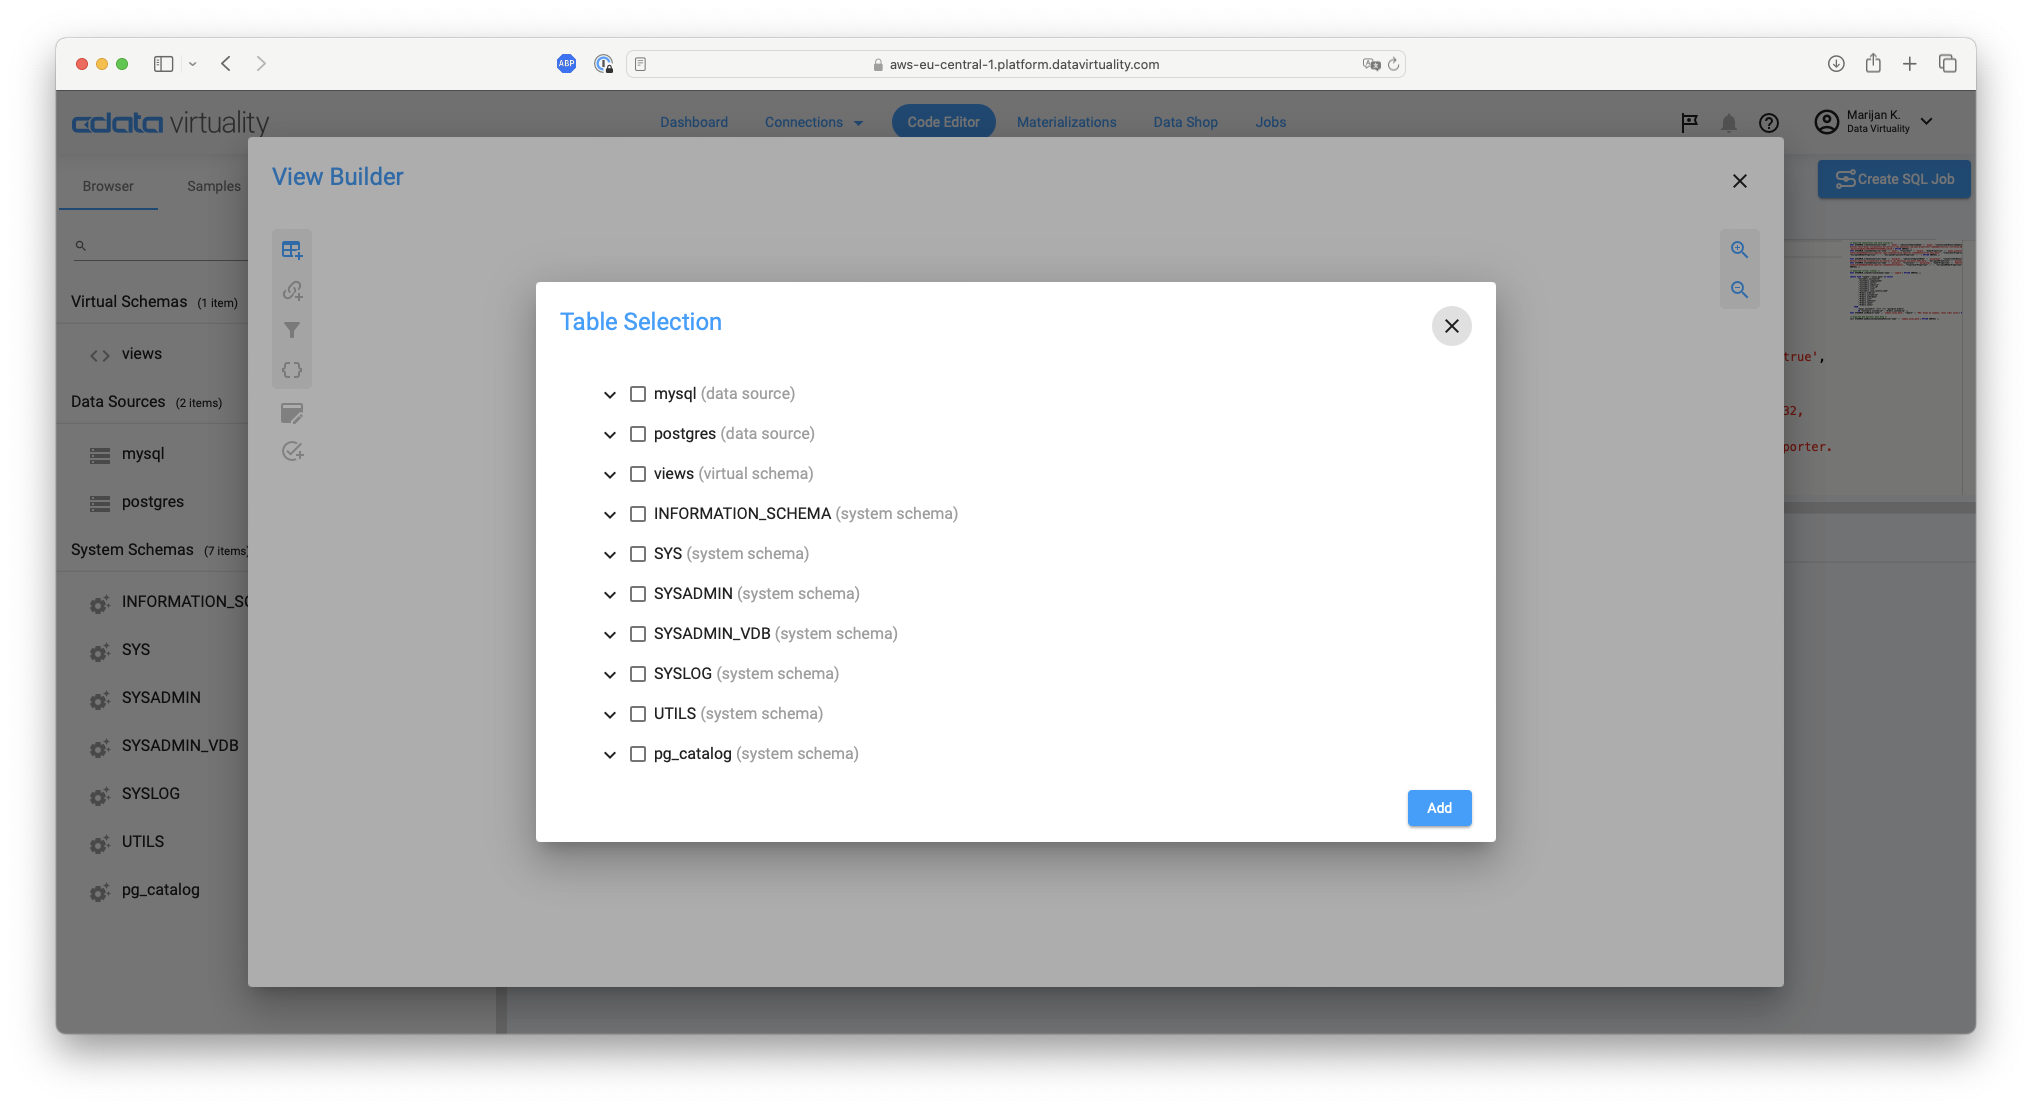
The Table Selection screen will appear. Select the Customers table from MySQL and the Orders table from PostgreSQL, both available in the sample databases, and click the Add button:

Return to the View Builder screen. Confirm that the two tables, Customers (from MySQL) and Orders (from PostgreSQL), have been successfully added:
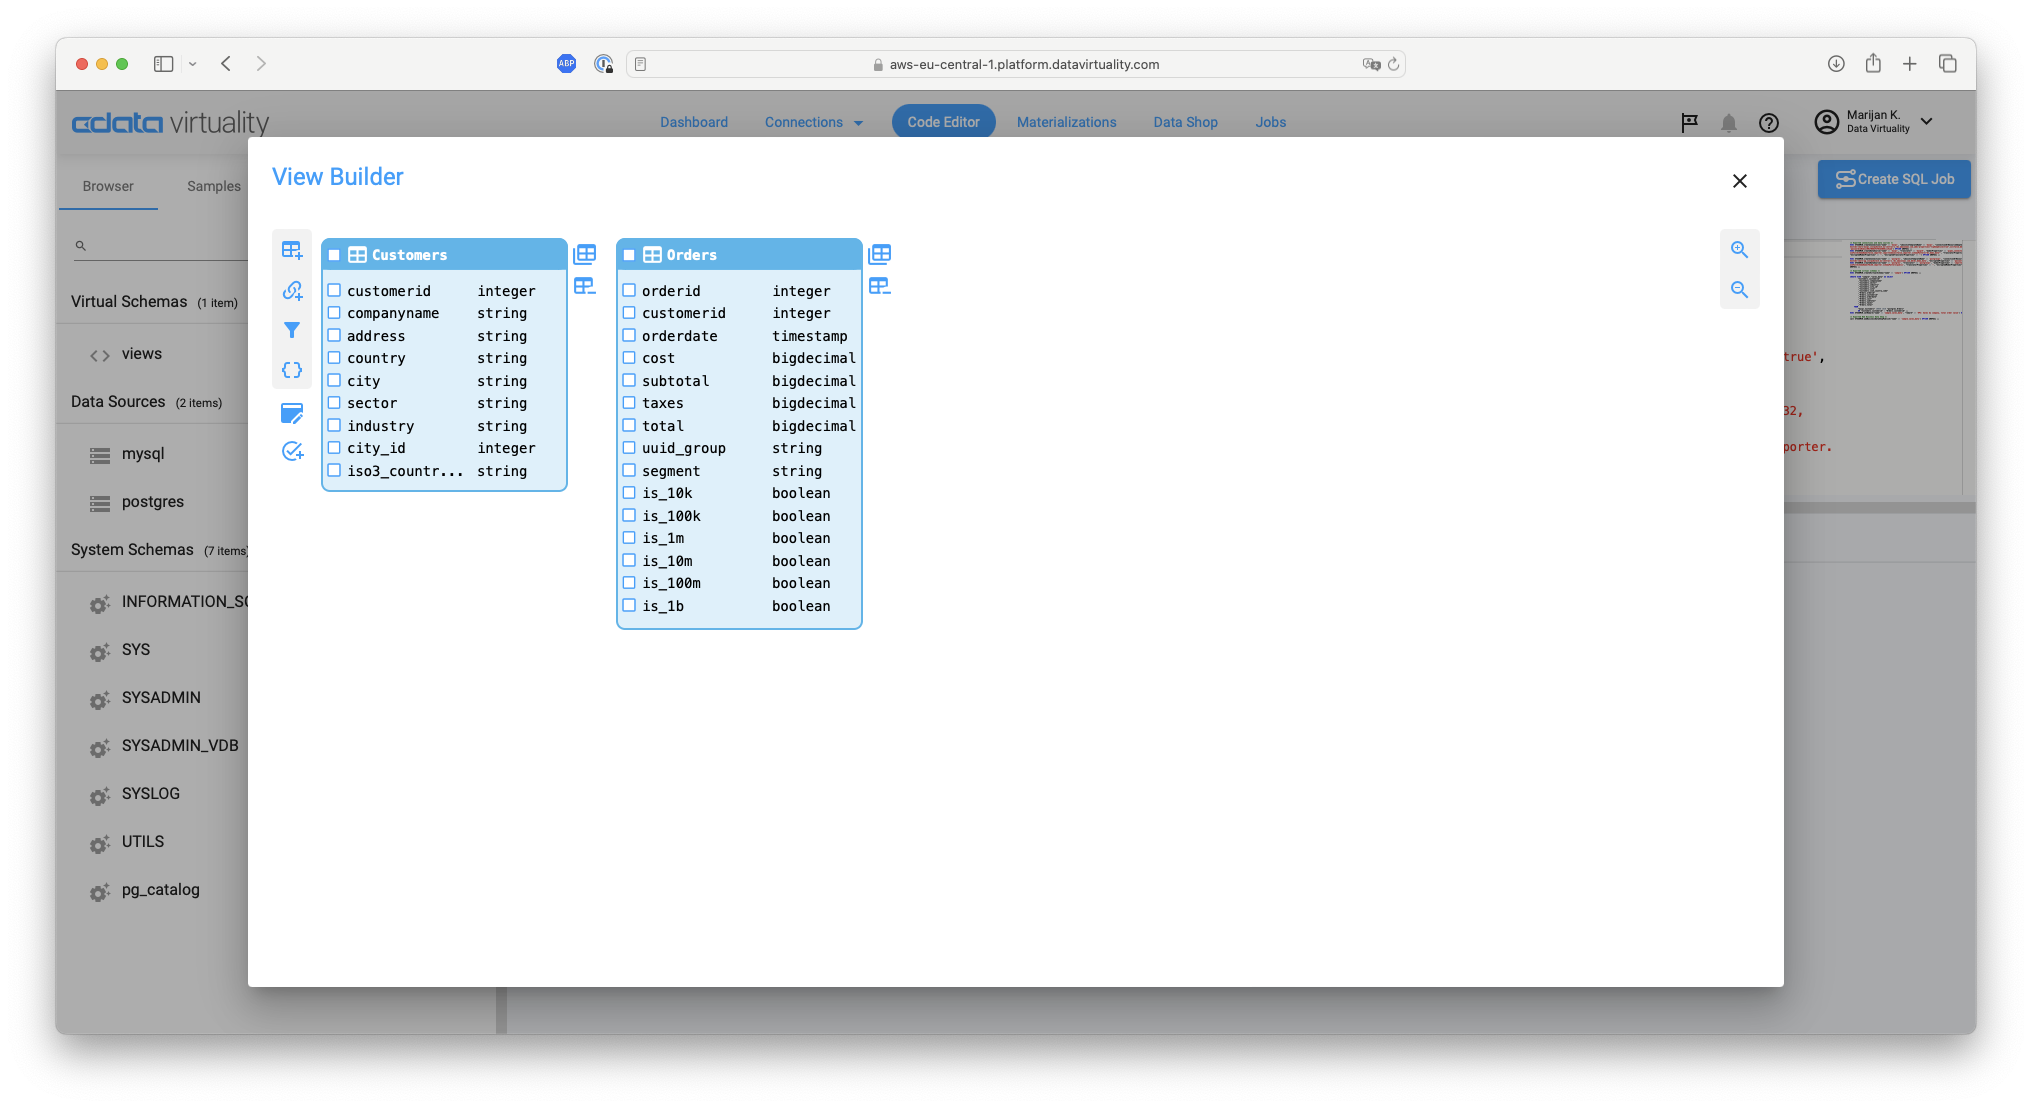
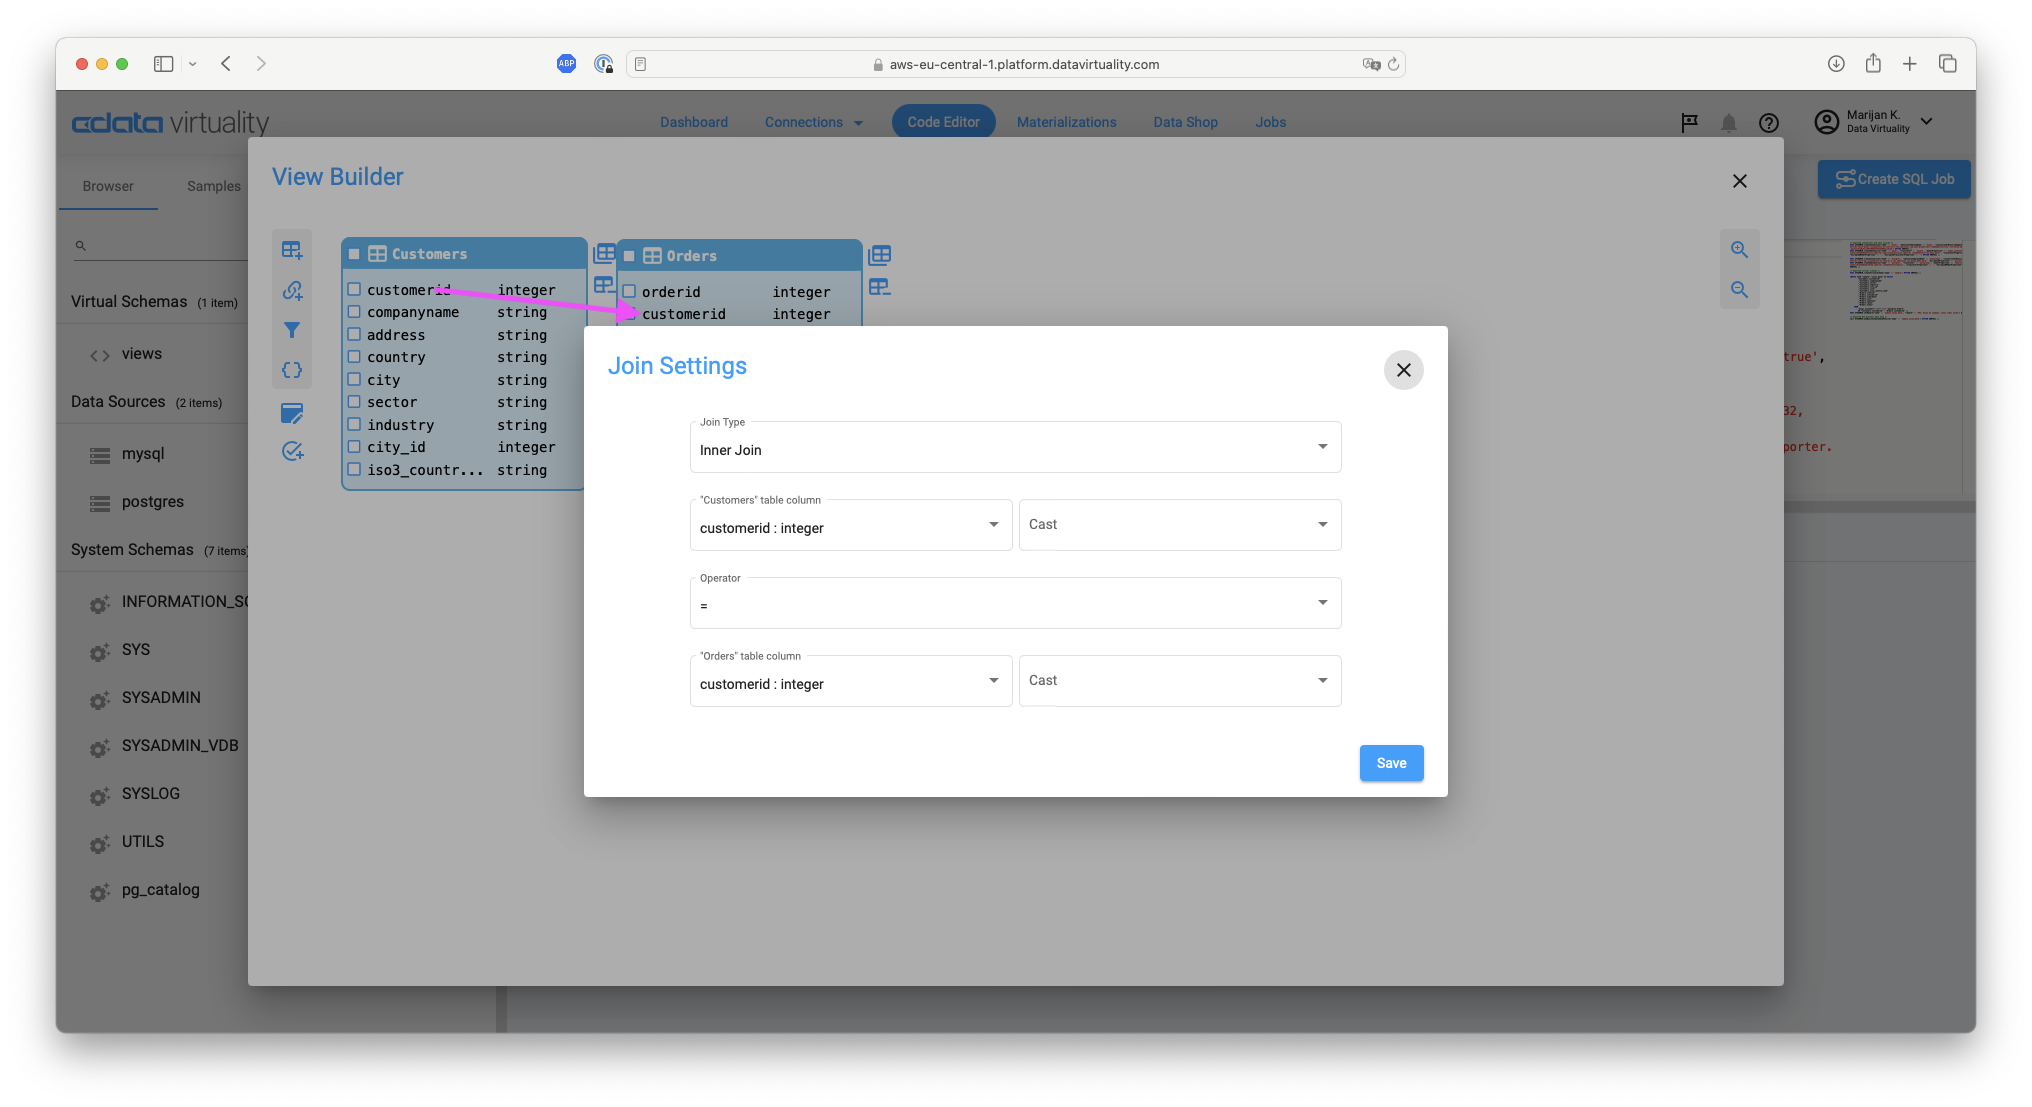
Drag the
customeridfield in the Customers table and drop it onto thecustomeridfield in the Orders table. The Join Setting screen will appear. Click the Save button, keeping the following default settings:
Join Type: Inner Join
"Customers" table column: customerid:integer, Cast
Operator: =
"Orders" table column: customerid:integer, Cast
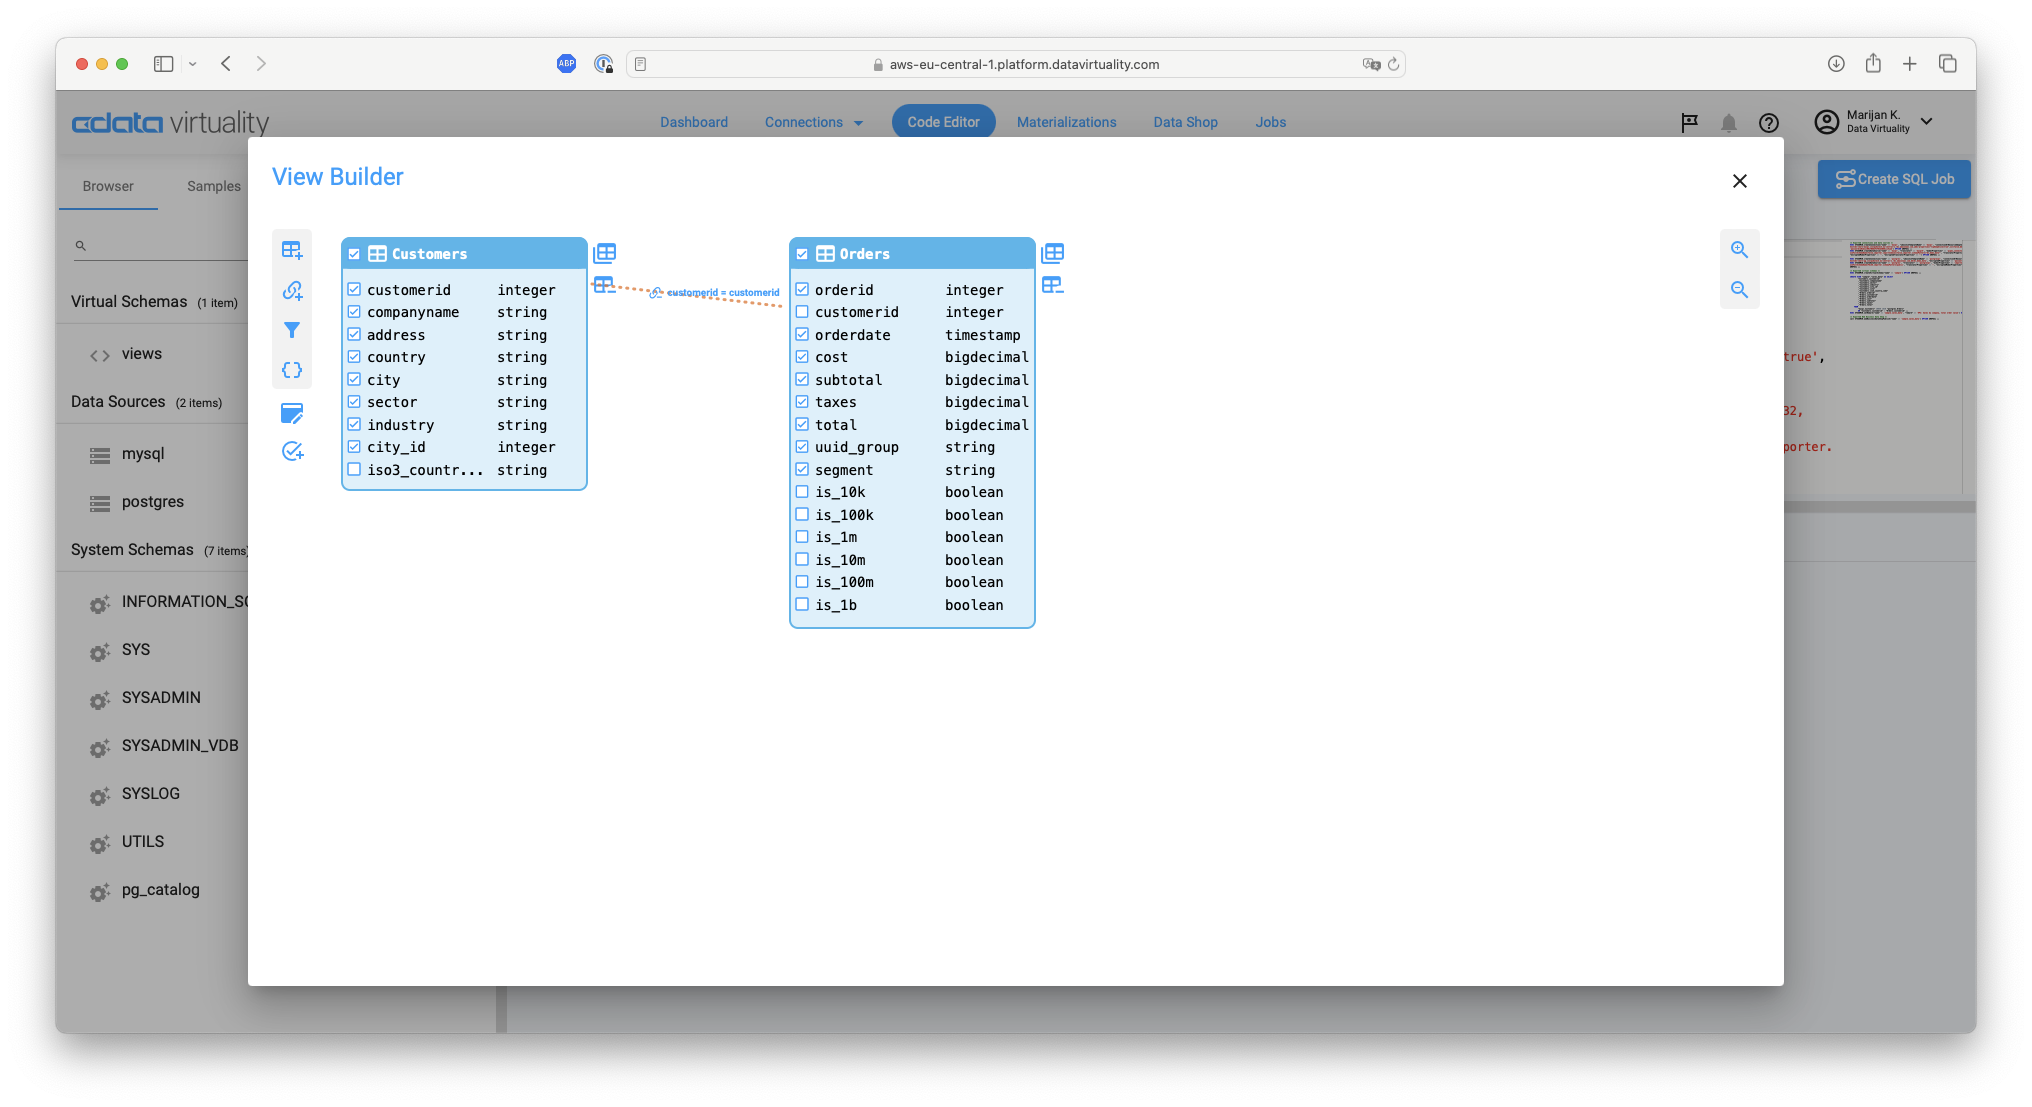
Verify that a relationship has been successfully created between the Customers and Orders tables. Select the desired items (fields) to retrieve from Customers and Orders and click the Create View button in the left menu:
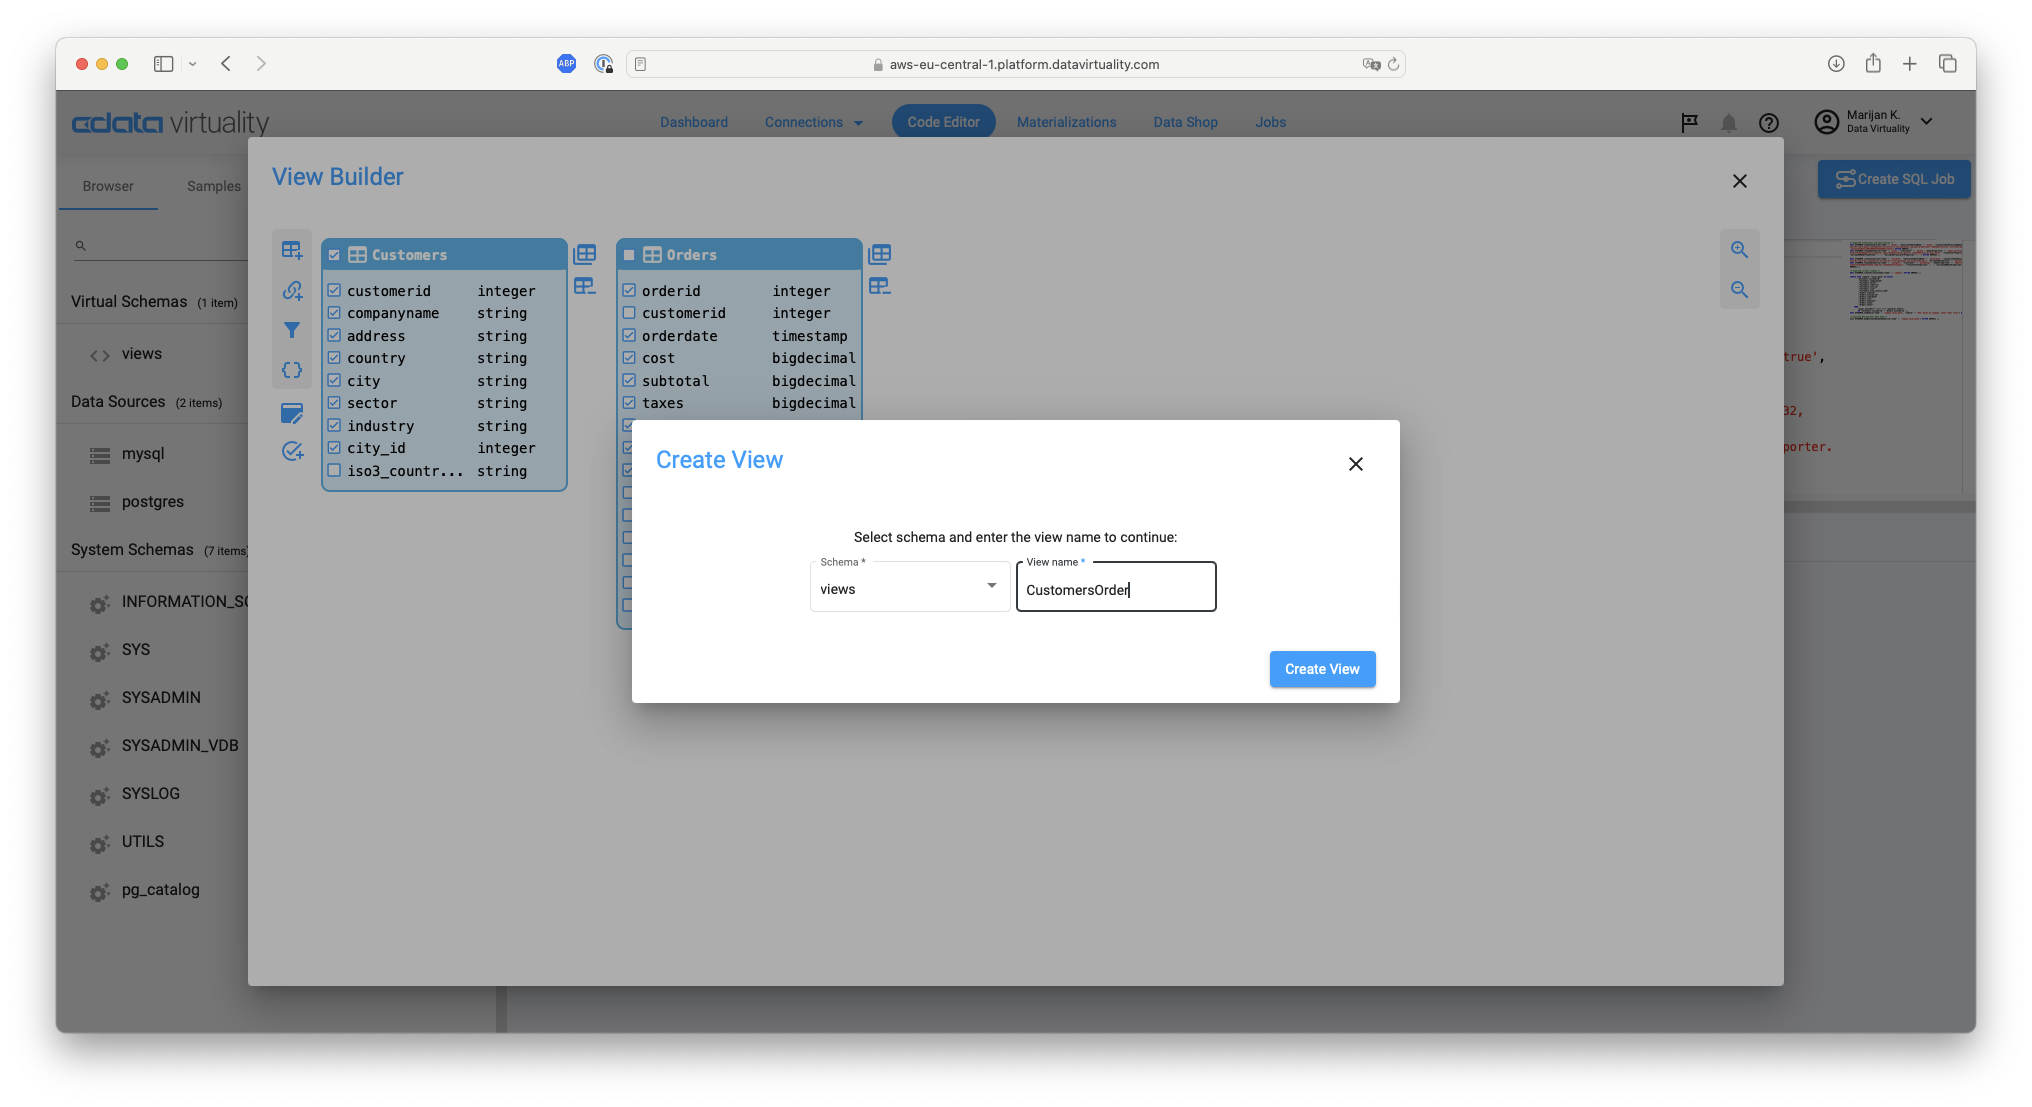
Select the schema, enter a name for the view (e.g.
CustomersOrder), and click the Create View button:
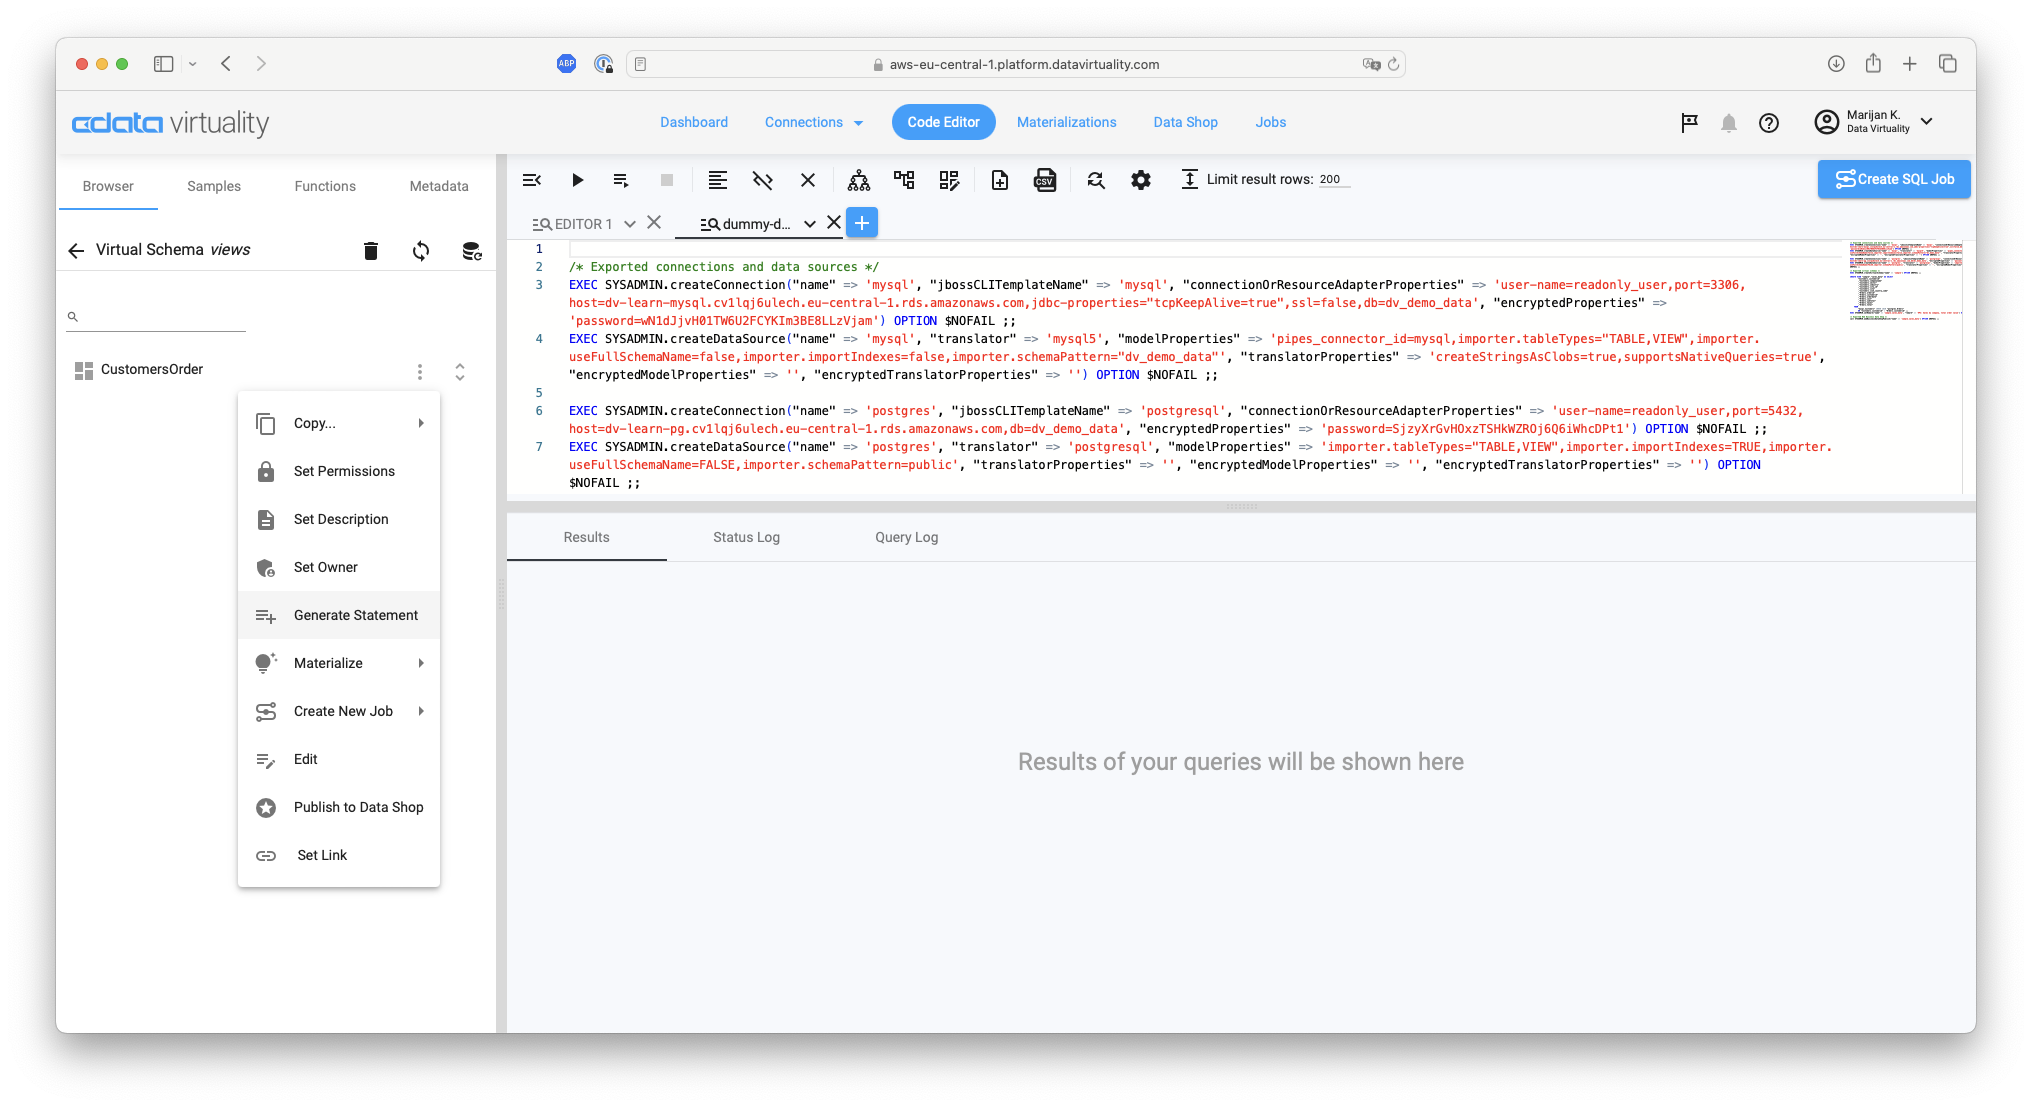
To retrieve the data from the created view, click the Browser tab -> Virtual Schemas -> Views in the left menu. Click on the three vertical dots on the right of the view name (e.g.,
CustomersOrder), and select Generate Statement from the context menu to retrieve the data:
The following SQL will be generated in the Code Editor:
SELECT "customerid", "companyname", "address", "country", "city", "sector", "industry", "city_id", "orderid", "orderdate", "cost", "subtotal", "taxes", "total", "uuid_group", "segment" FROM "views.CustomersOrder";;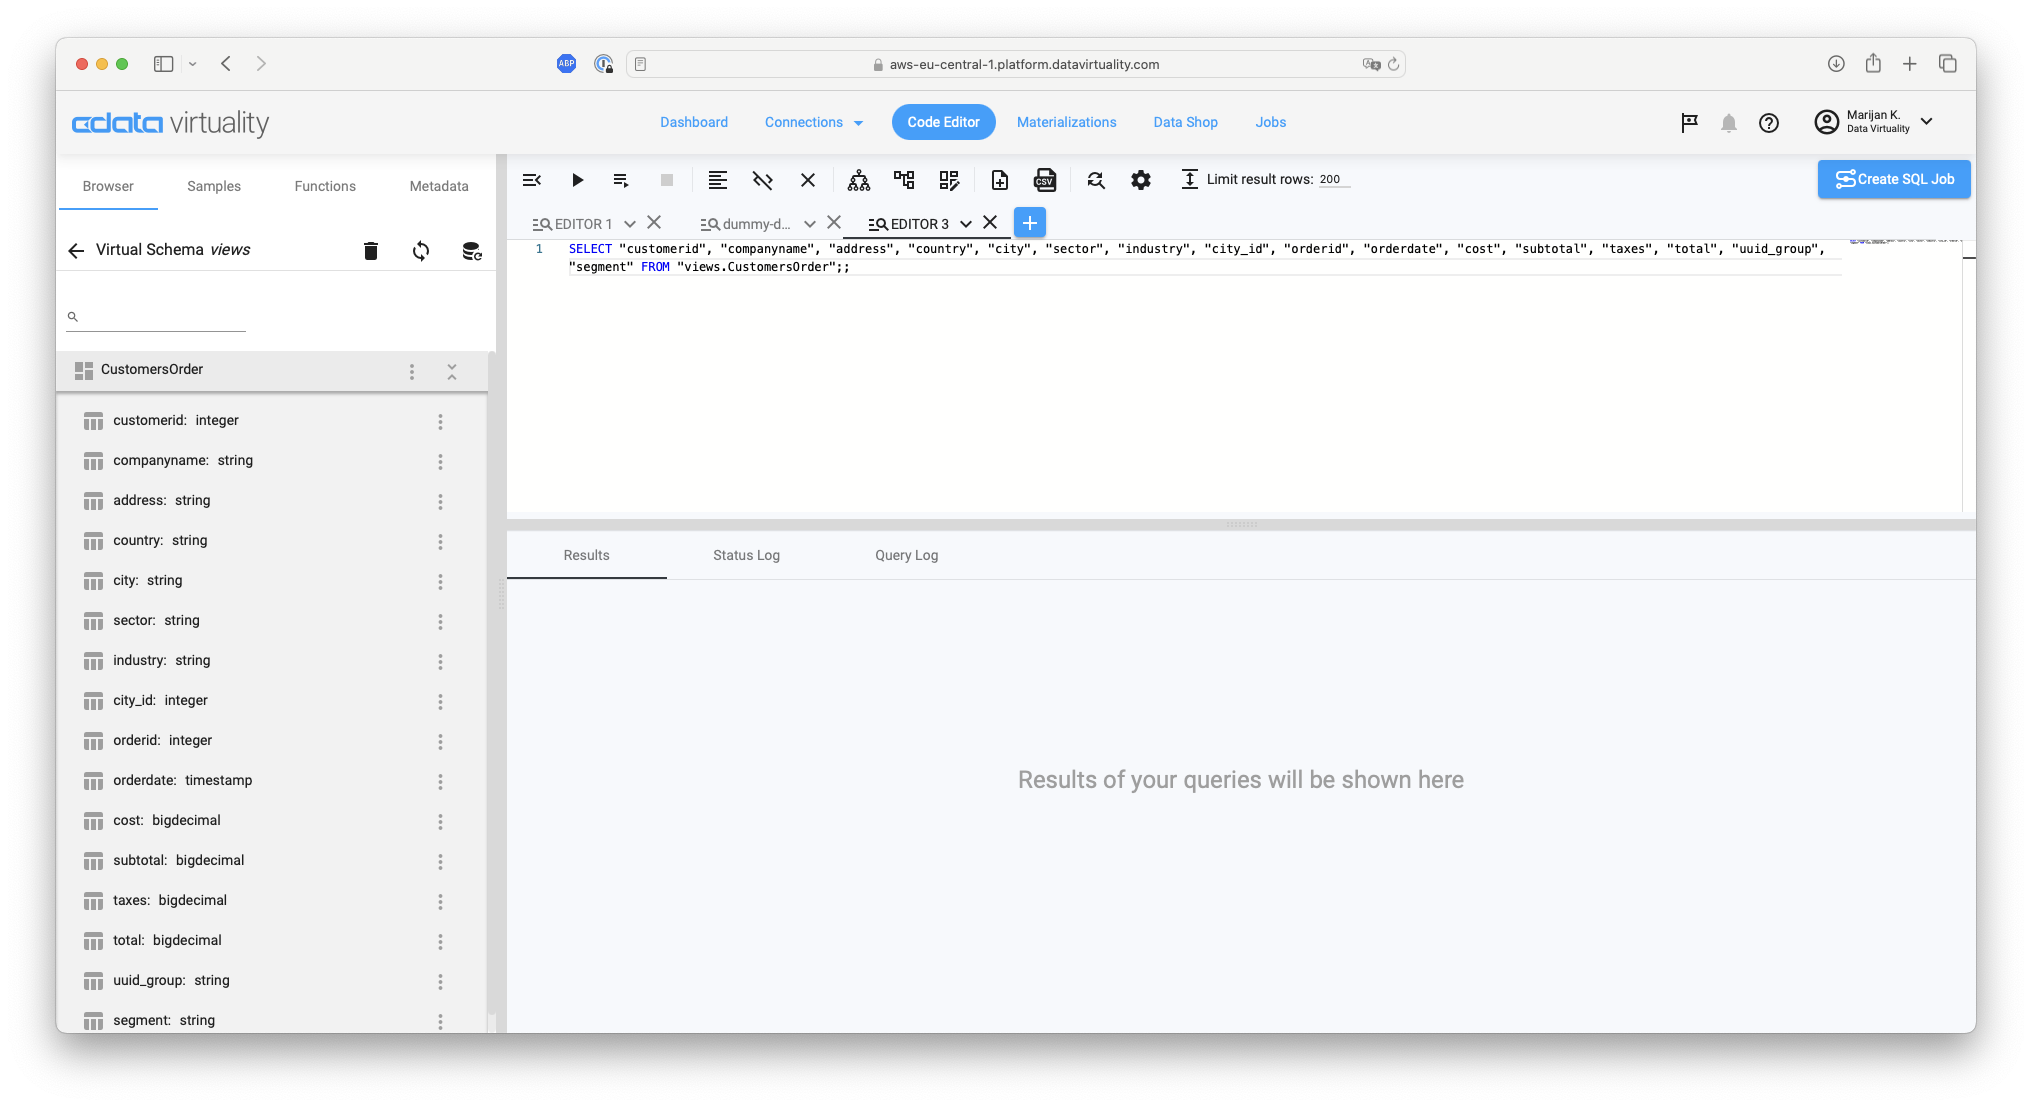
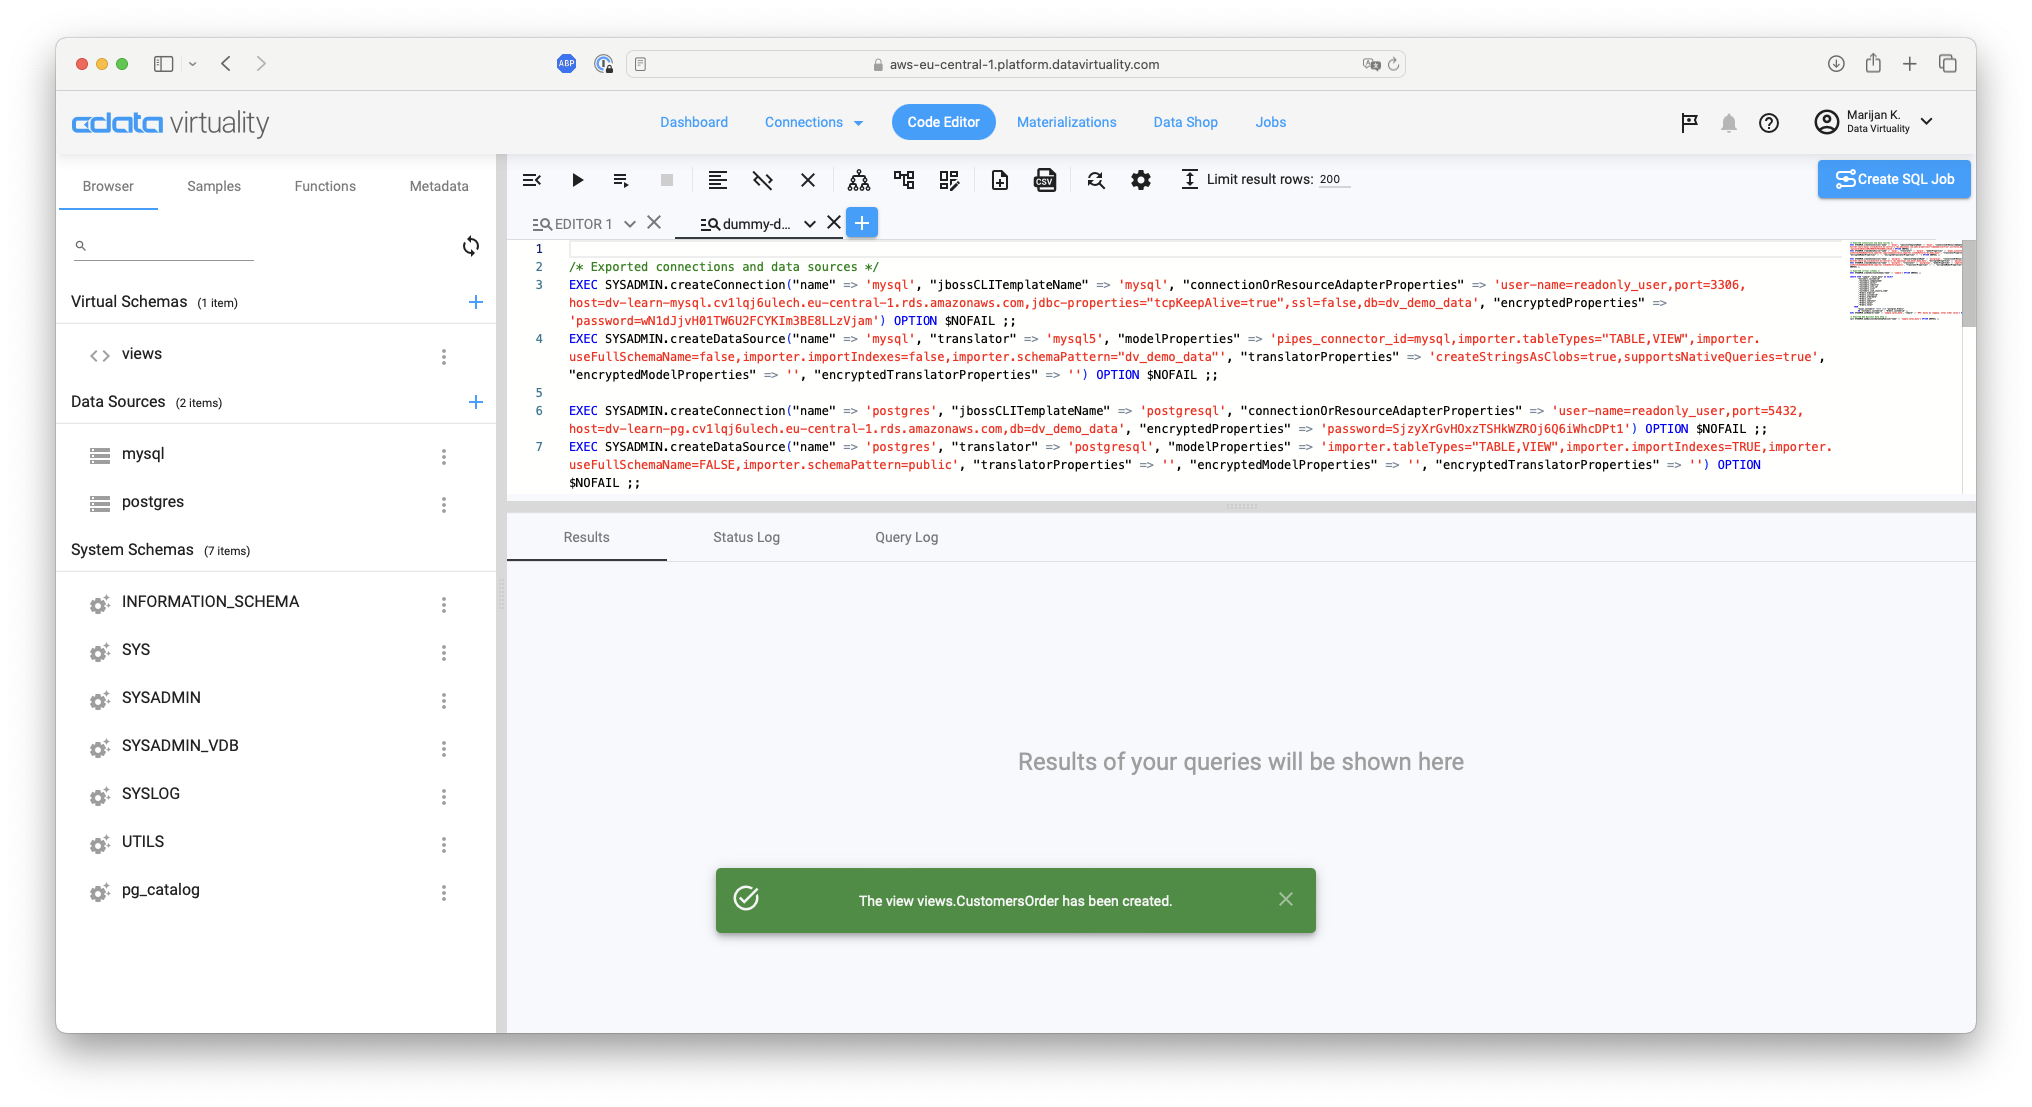
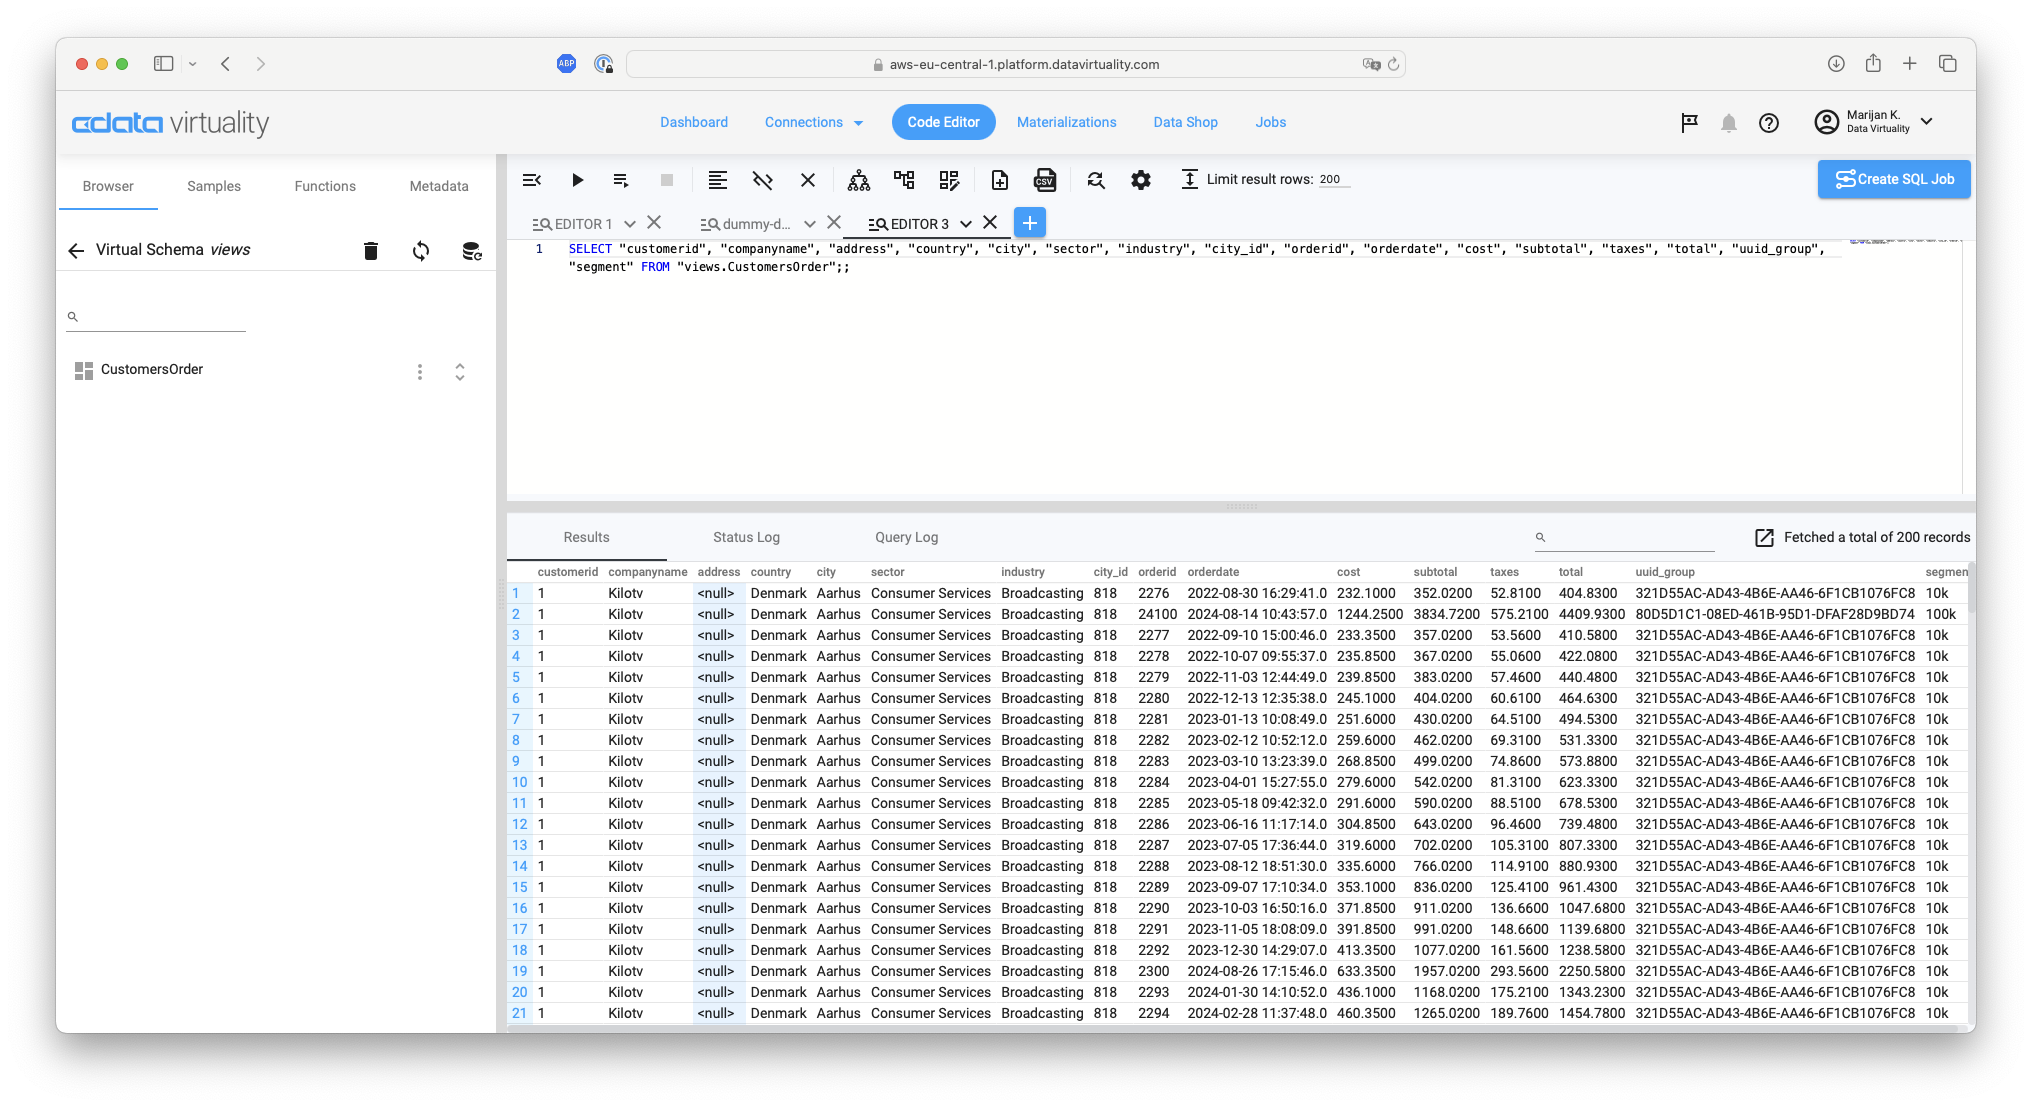
Click the Run Script button. The Result area will display the result of the combined data from the Customers table in MySQL and the Order table in PostgreSQL:
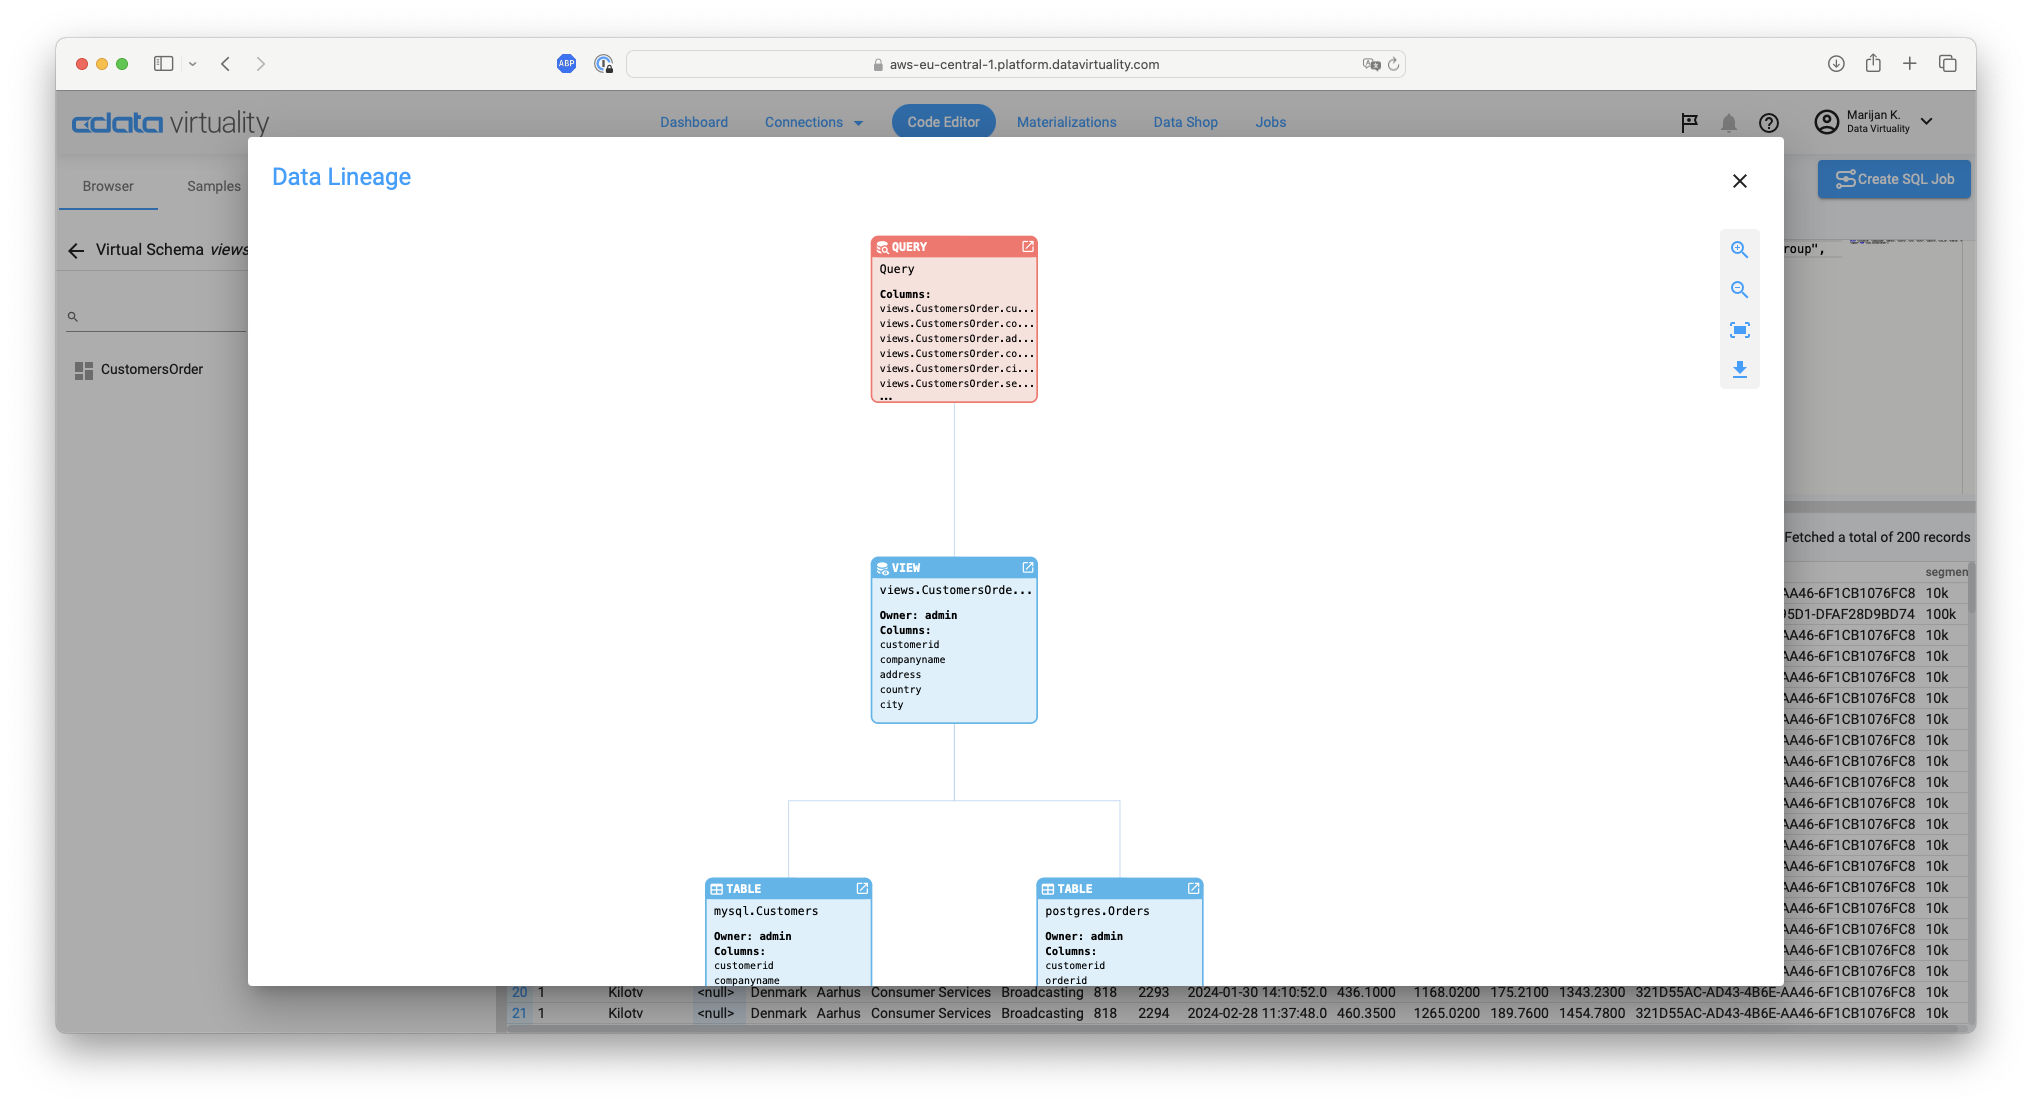
Click the Data Lineage button in the menu:

The Data Lineage screen will appear. It provides a graphical representation of the data sources from which the query (SELECT) retrieved the data:
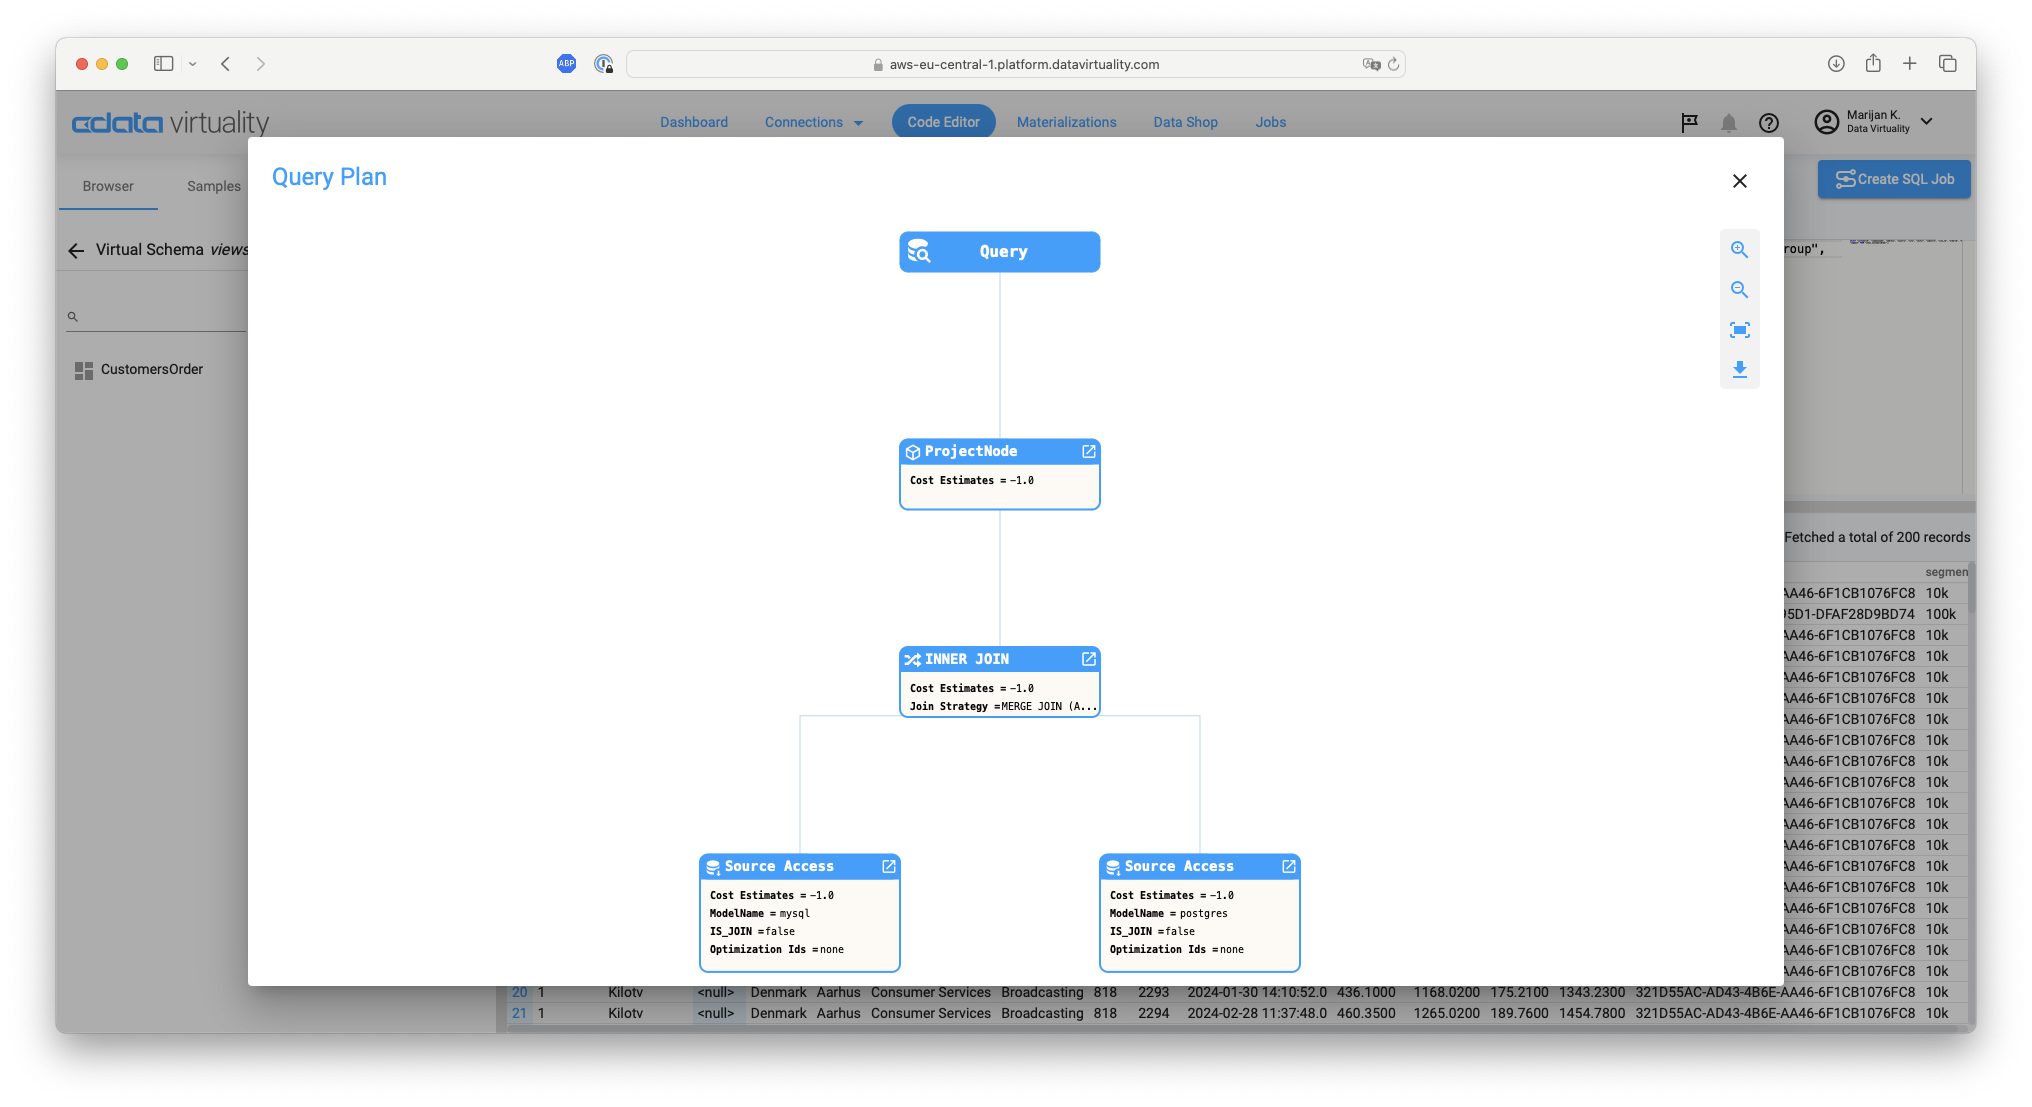
Close the Data Lineage screen and click the Query Plan button in the menu:
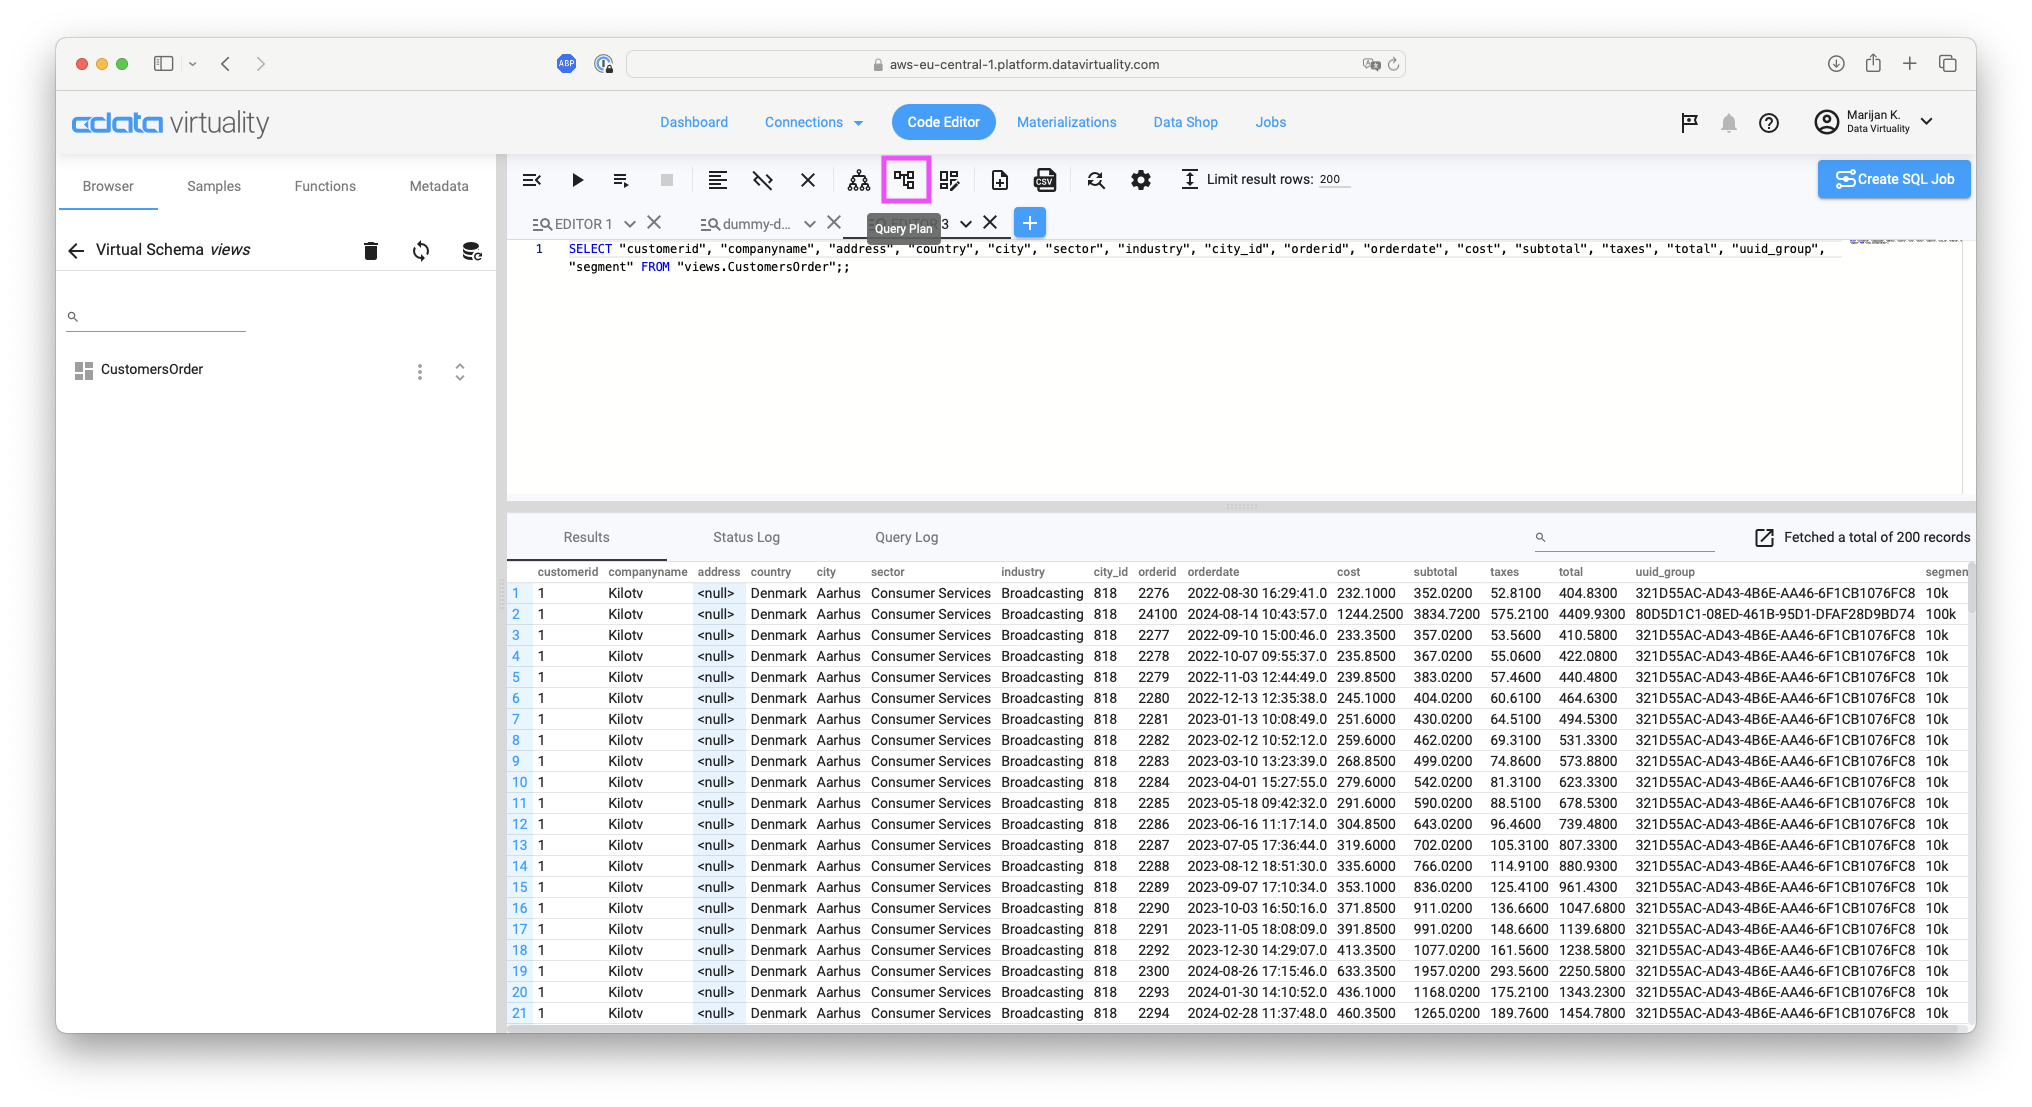
The Query Plan screen will appear. It provides a graphical representation of the execution plan of the query. In this example, the query shows that the data retrieved from each table in the data source is joined using a
MERGE JOINduring anINNER JOINoperation:
Close the Query Plan screen. In the Virtual Schema views section on the left side, click the three vertical dots on the right side of the view name, and select Edit from the context menu to modify the view:

A new Code Editor tab will open and the following SQL will be generated. It can be modified as needed and executed to change the view definition:
CREATE OR REPLACE VIEW "views.CustomersOrder" AS
  SELECT
  "Customers.customerid", "Customers.companyname", "Customers.address", "Customers.country", "Customers.city", "Customers.sector"," Customers.industry", "Customers.city_id", "Orders.orderid", "Orders.orderdate", "Orders.cost", "Orders.subtotal", "Orders.taxes", "Orders .total", "Orders.uuid_group", "Orders.segment".
  FROM
   "mysql.Customers" INNER JOIN "postgres.Orders" ON "Customers.customerid" = "Orders.customerid"
  ;;
Creating a View in the CData Virtuality Studio
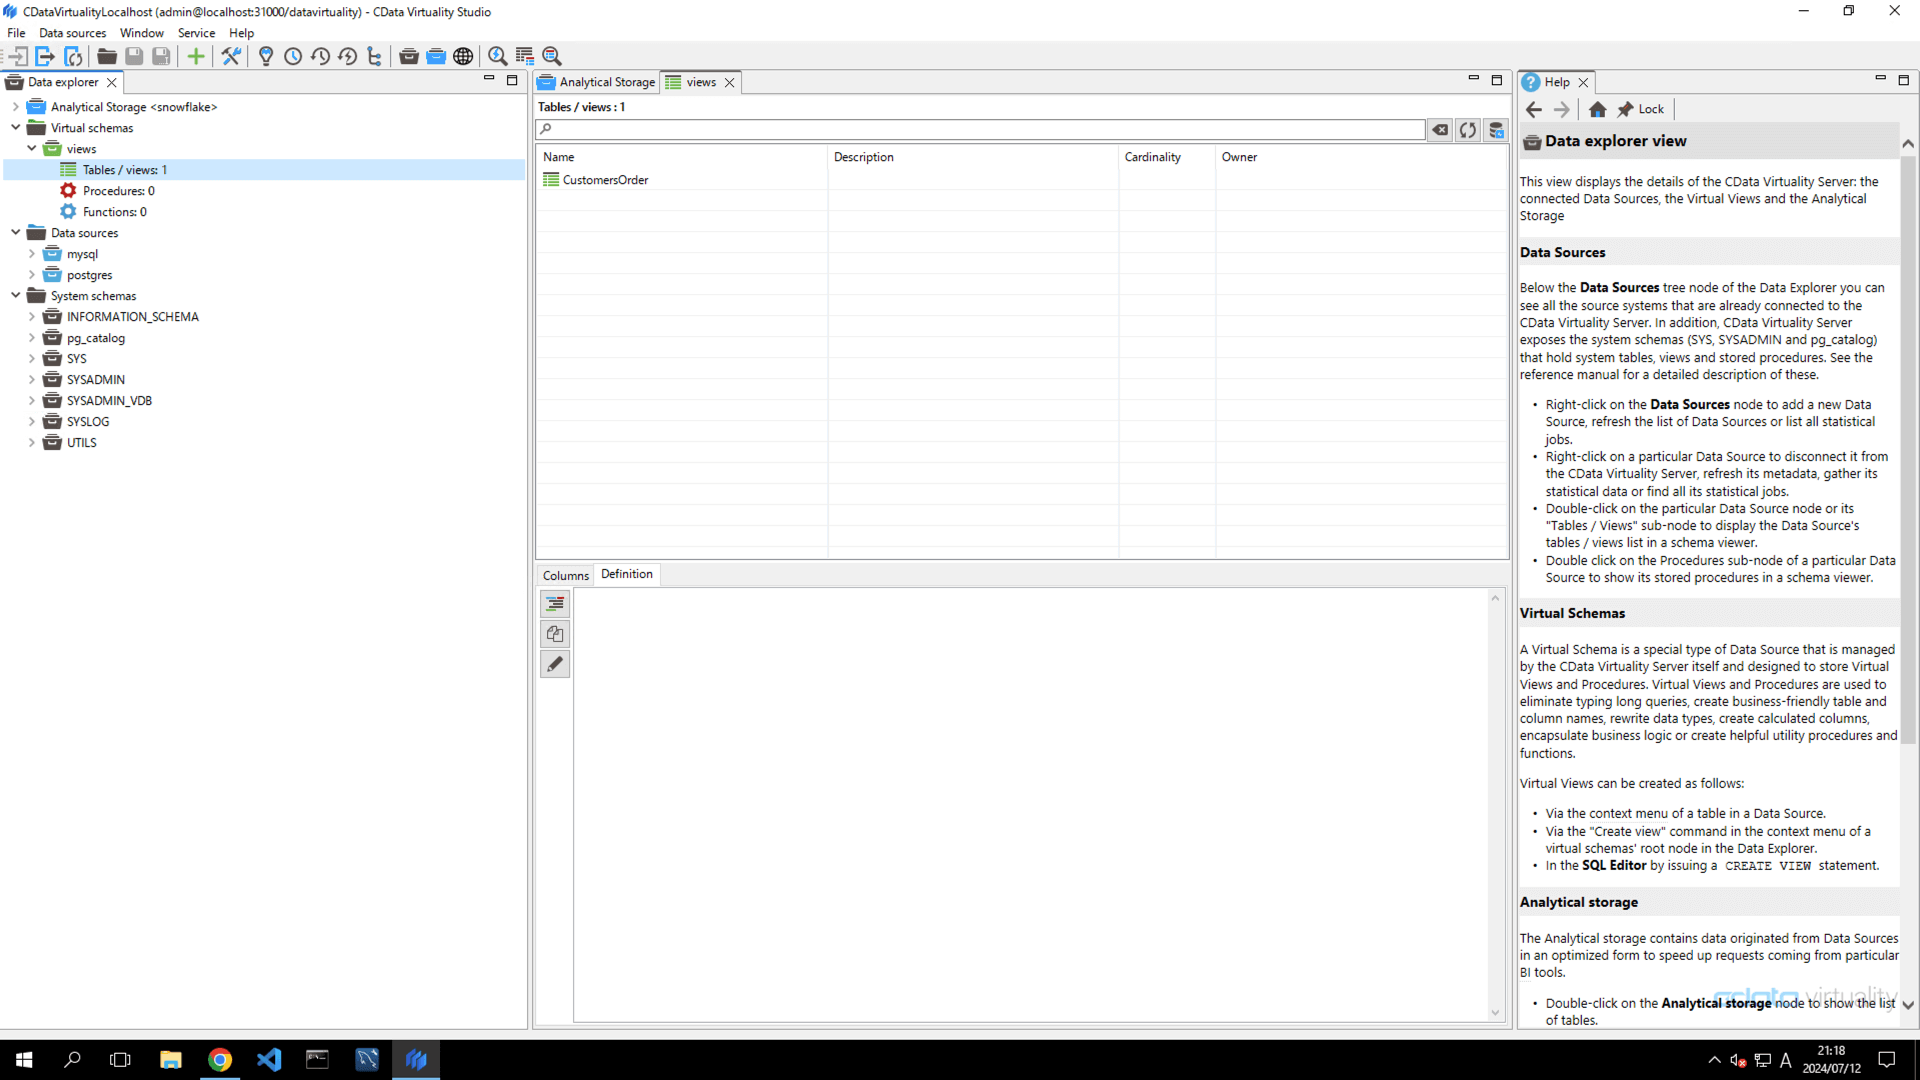
Start the CData Virtuality Studio. From the Data Explorer on the left, open Virtual Schemas -> Views -> Tables / Views. If views have previously been created using the CData Virtuality Web UI, those views will be displayed. If no views are displayed, click the Refresh the views / Refresh the datasources button in the upper right corner to update the list:
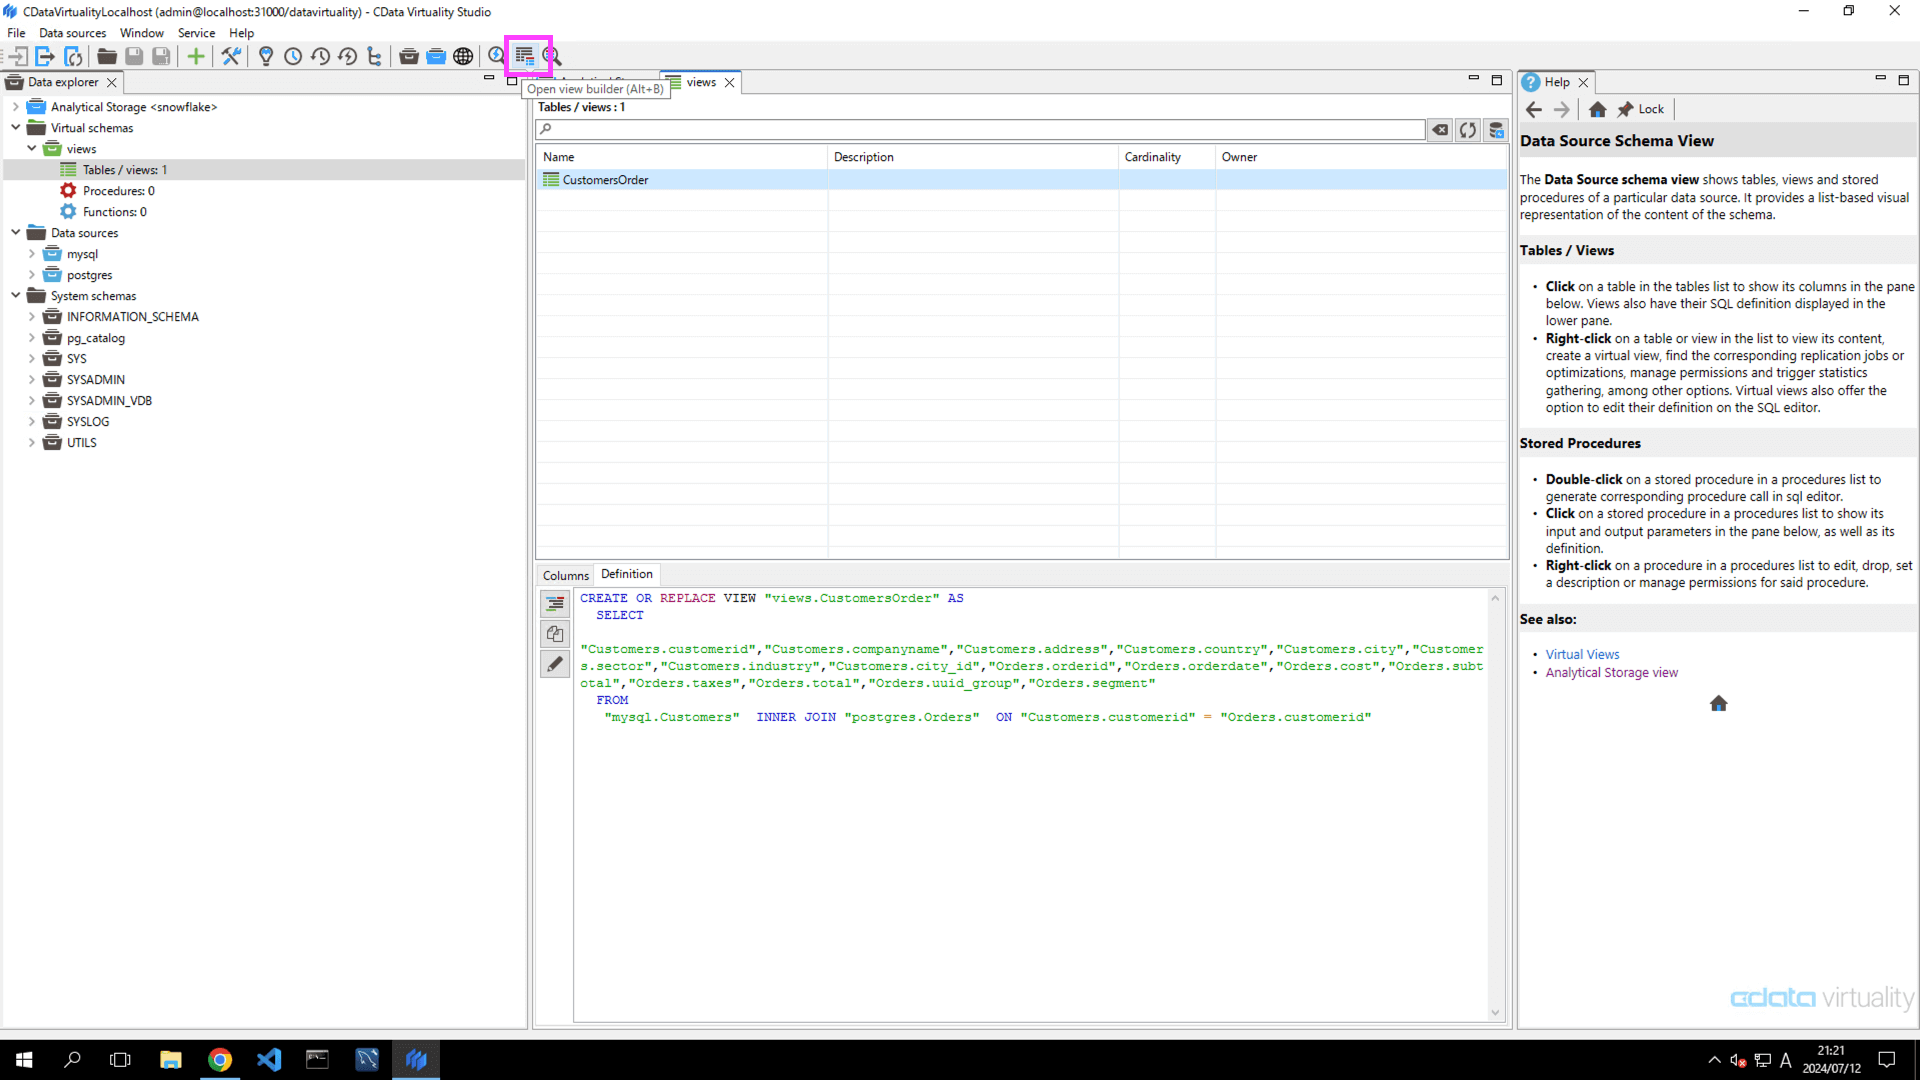
Click the Open View builder icon in the upper toolbar menu:
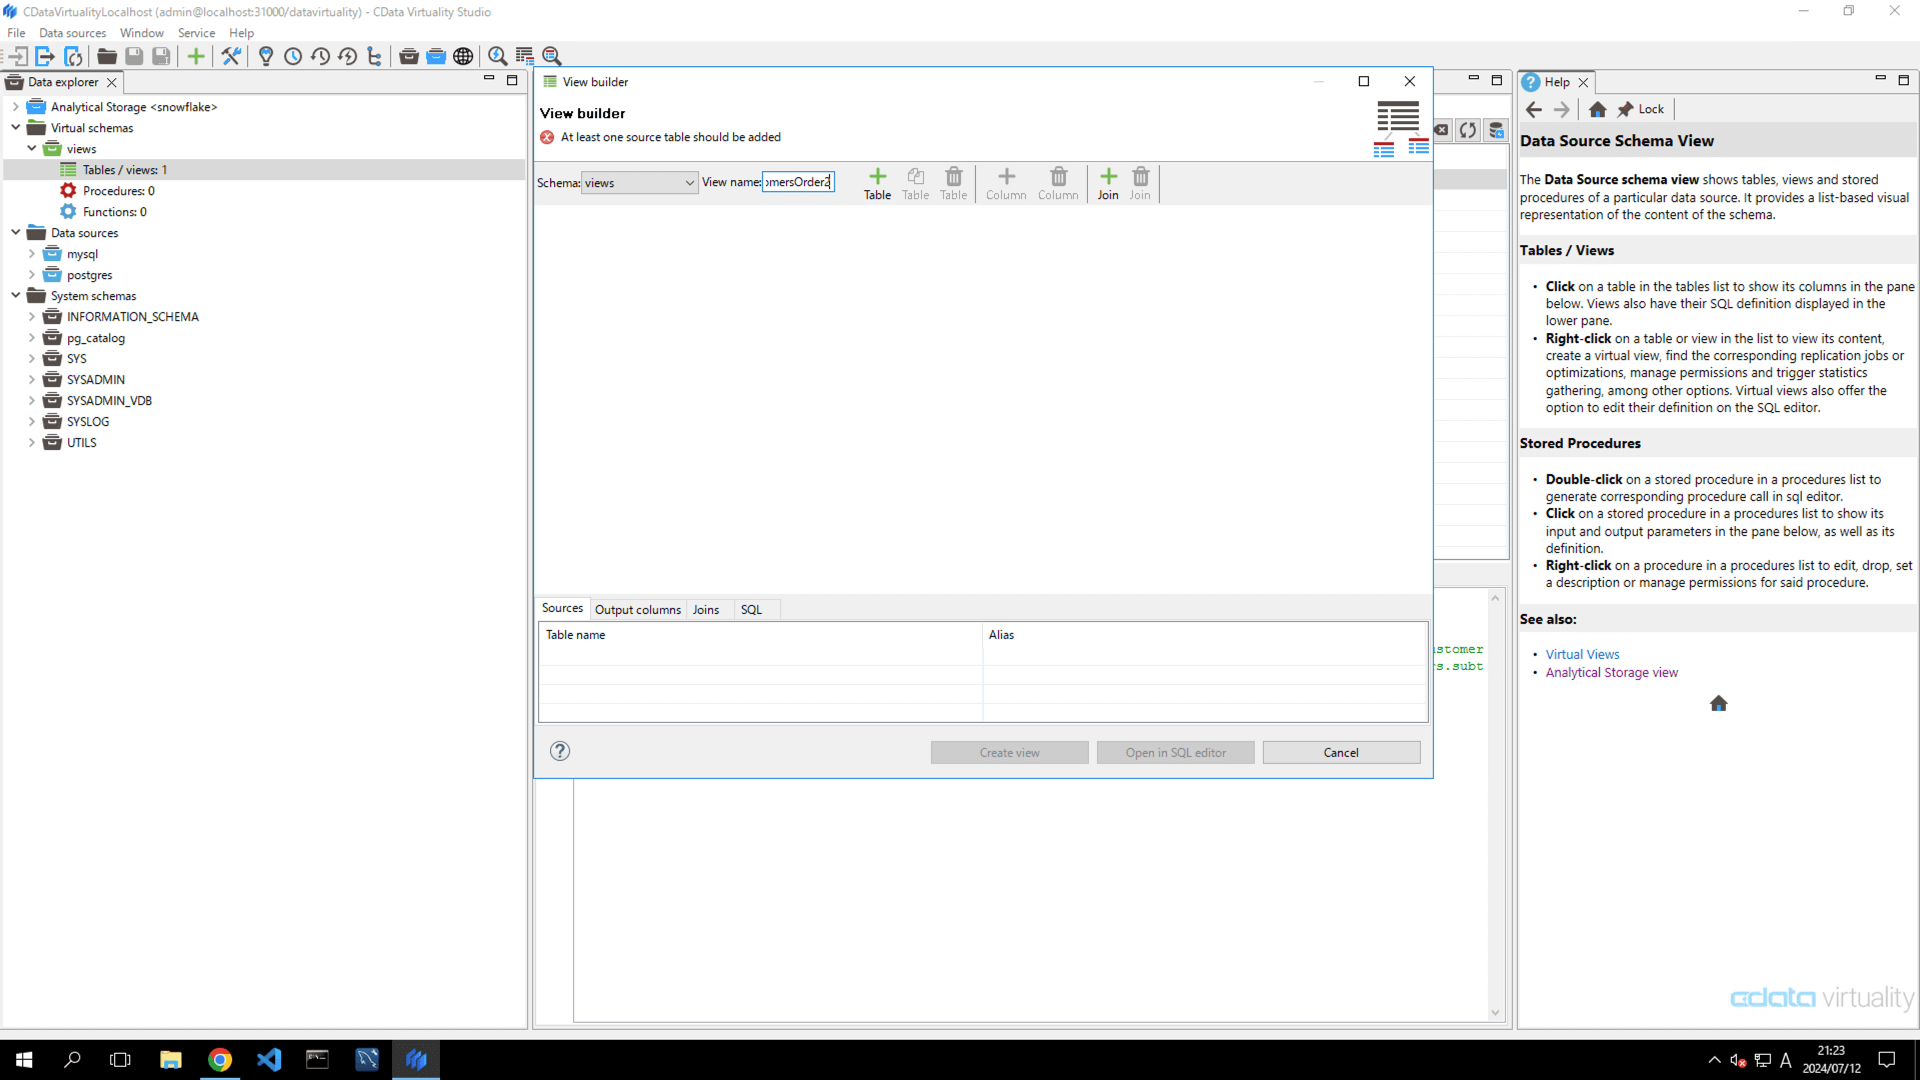
Select Schema and enter a view name (e.g.,
CustomersOrder_builder). Please note that the view name must be unique:
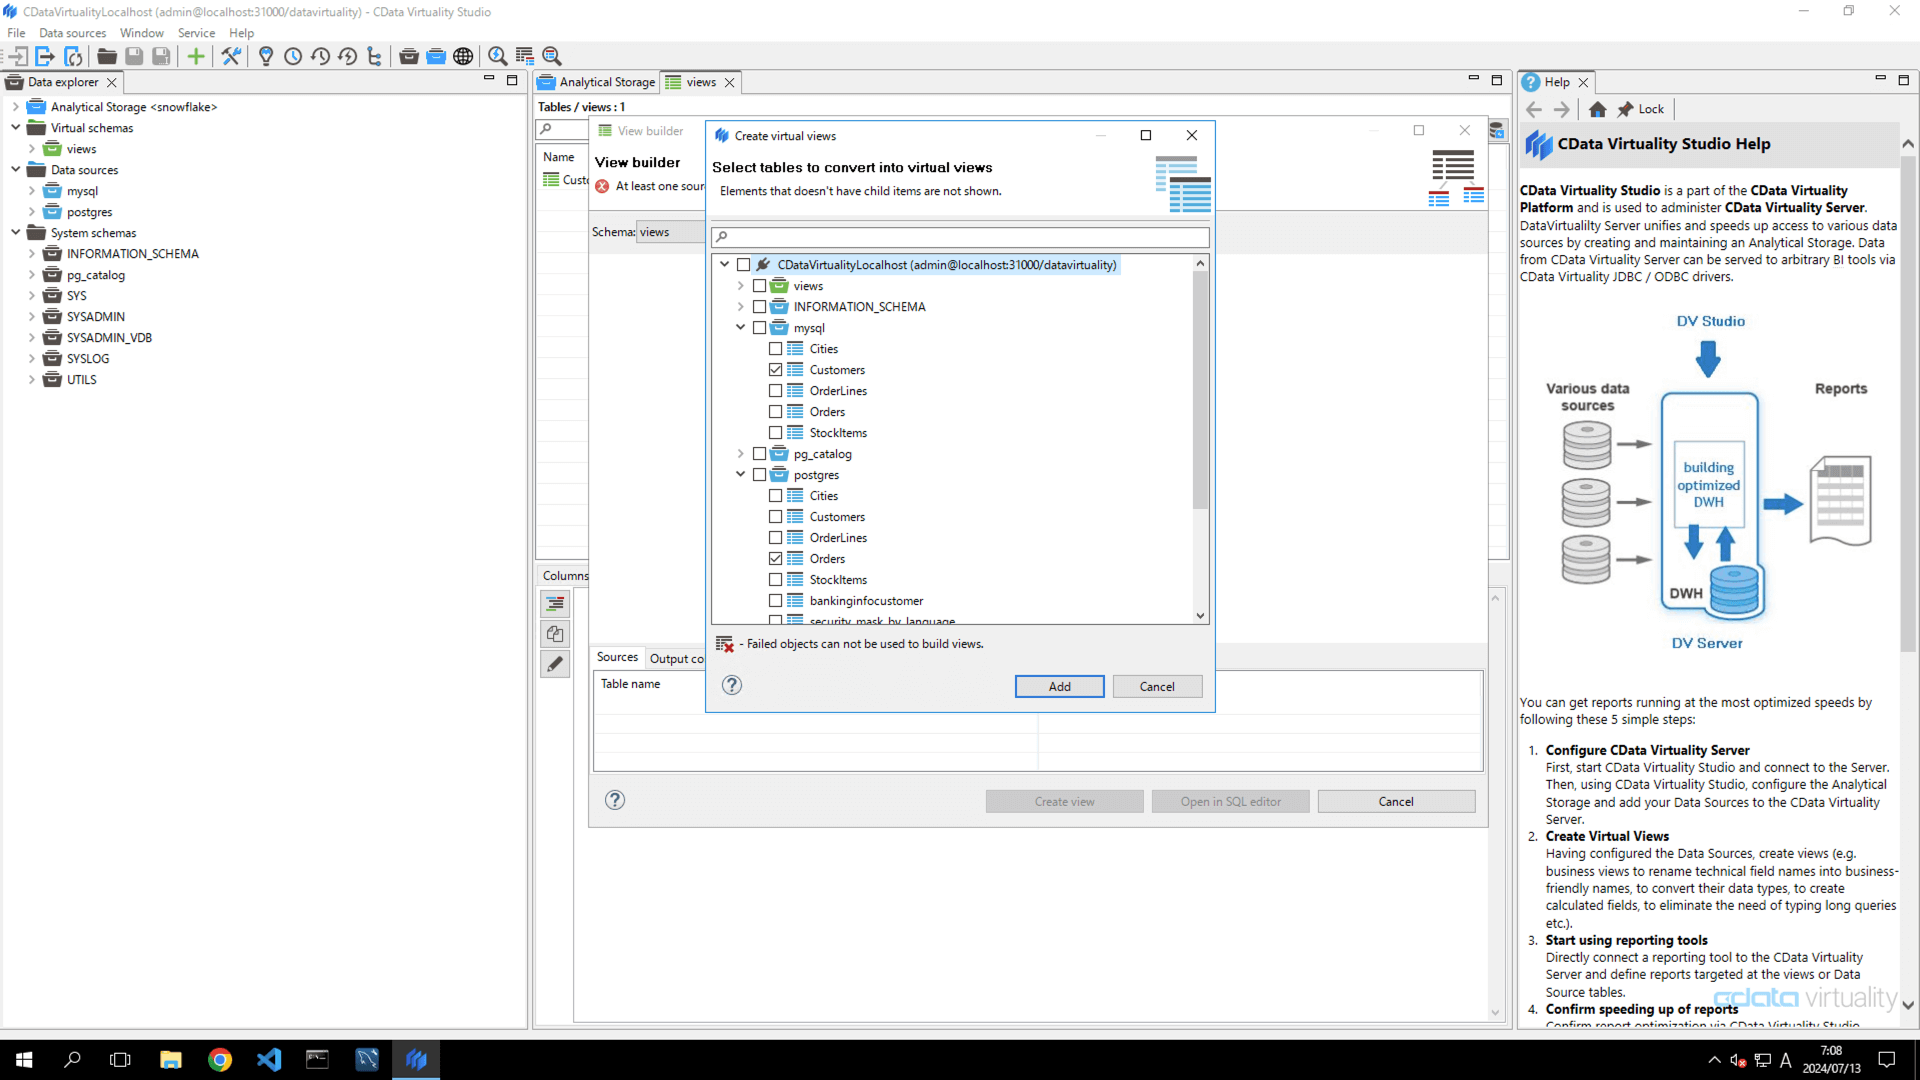
Click the + button to open the Create virtual views screen. Select the Customers table from MySQL and the Orders table from PostgreSQL, both provided as sample databases, and click the Add button:
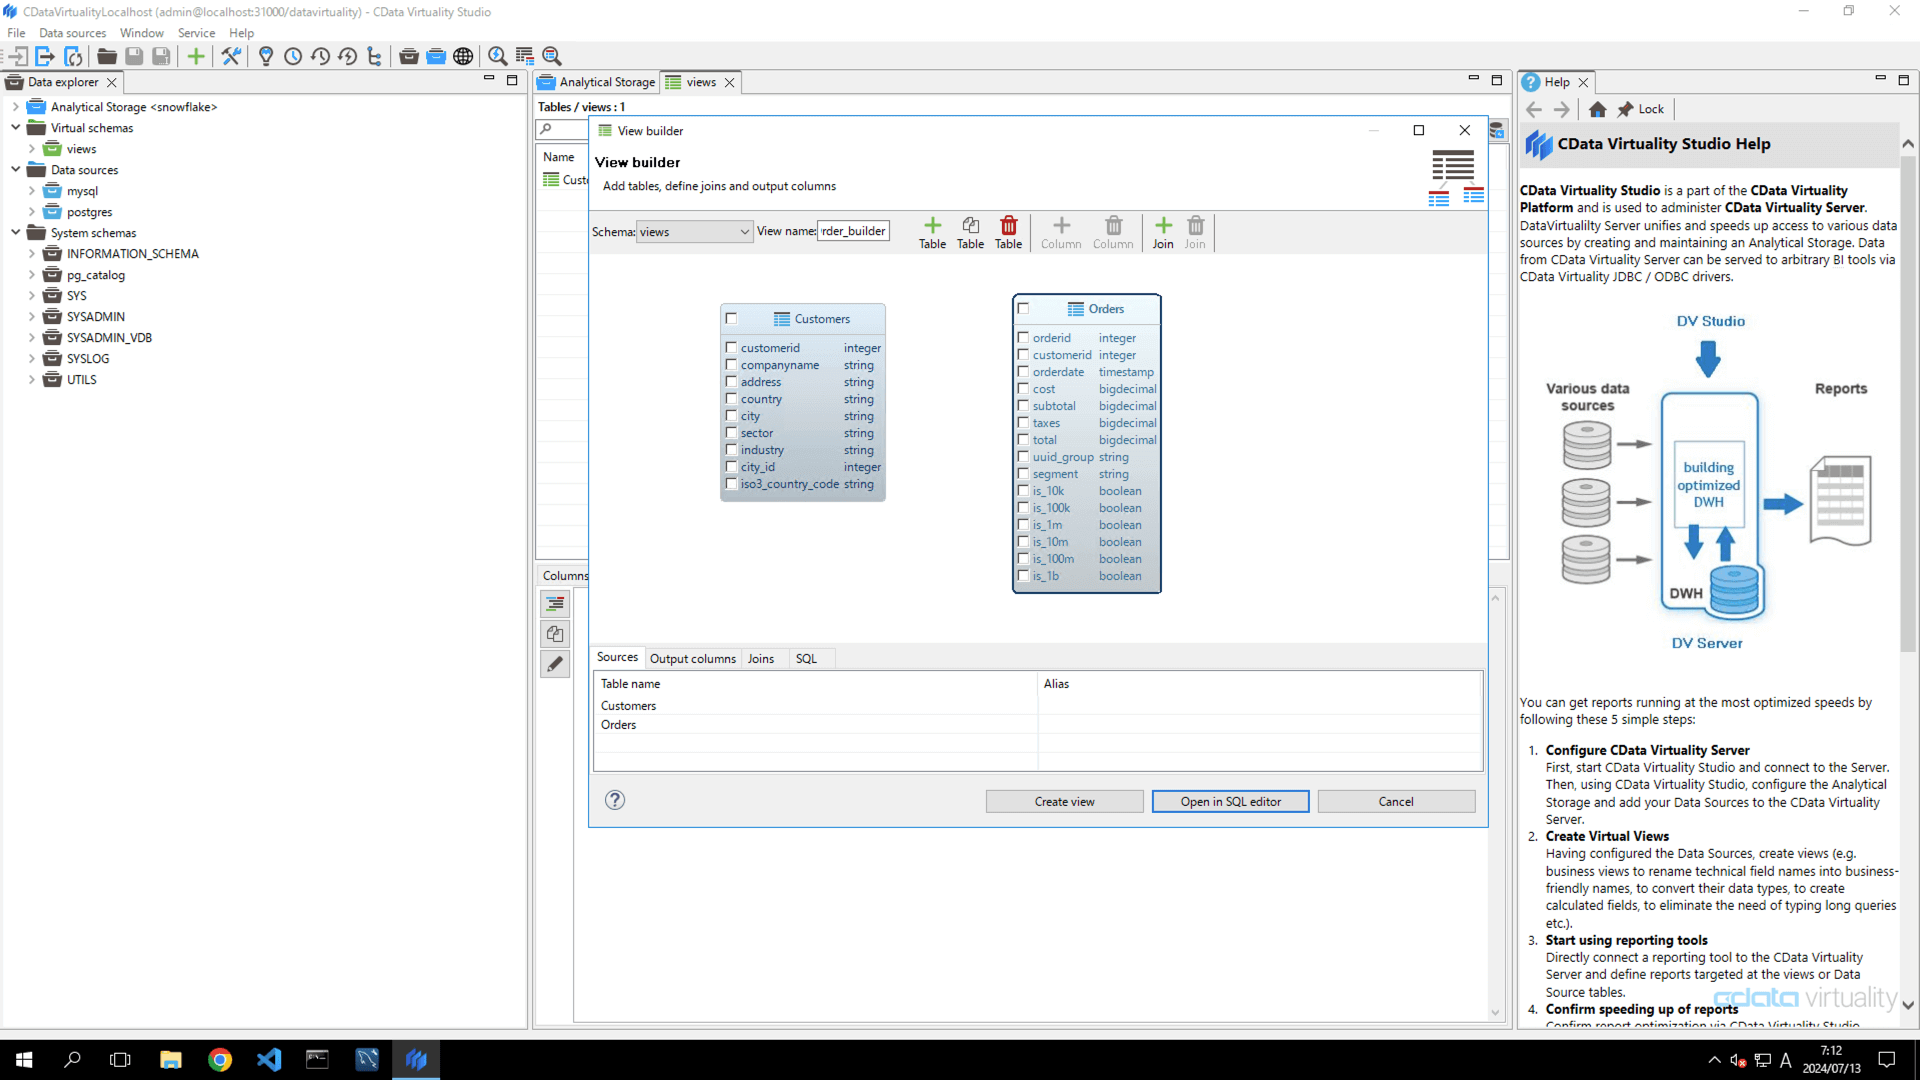
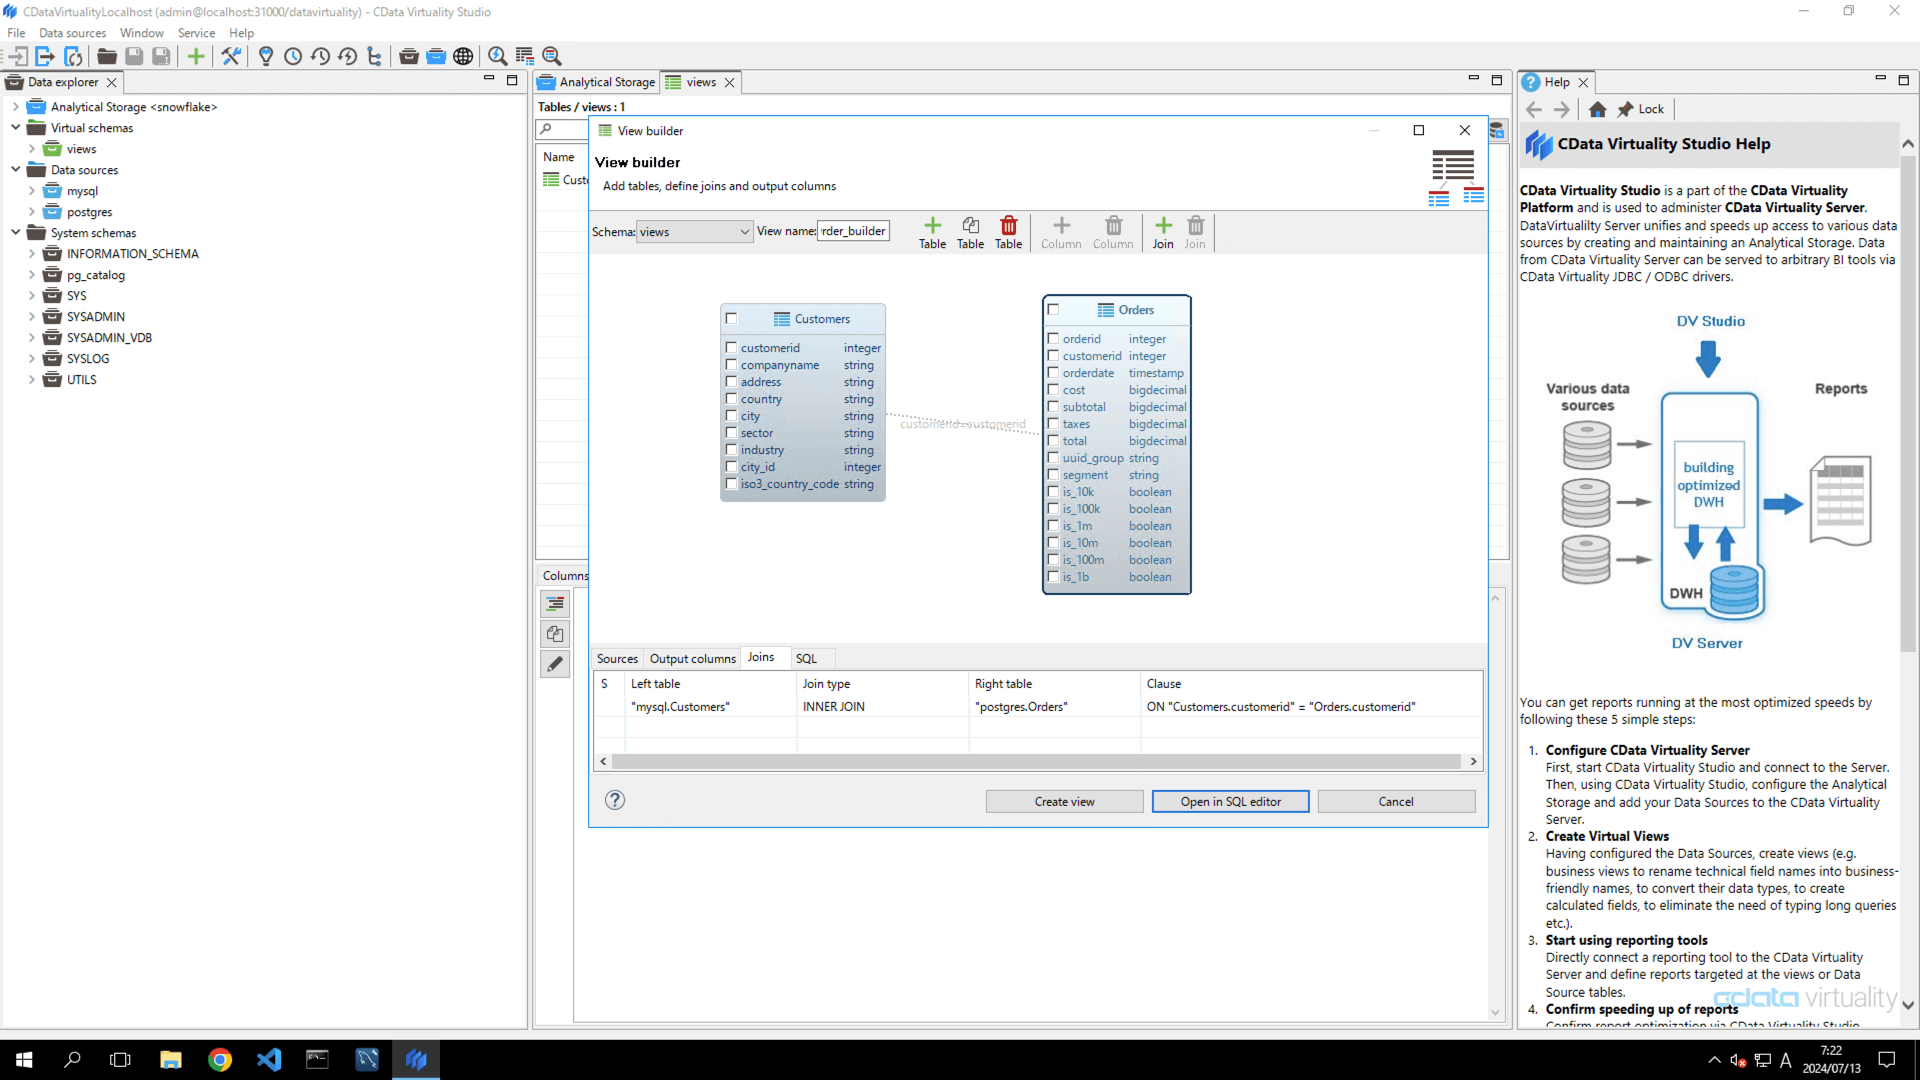
Return to the View Builder screen. Confirm that the two tables, Customers (from MySQL) and Orders (from PostgreSQL), have been successfully added:
Drag the customerid field in the Customers table and drop it at the location of the customerid field in Orders:
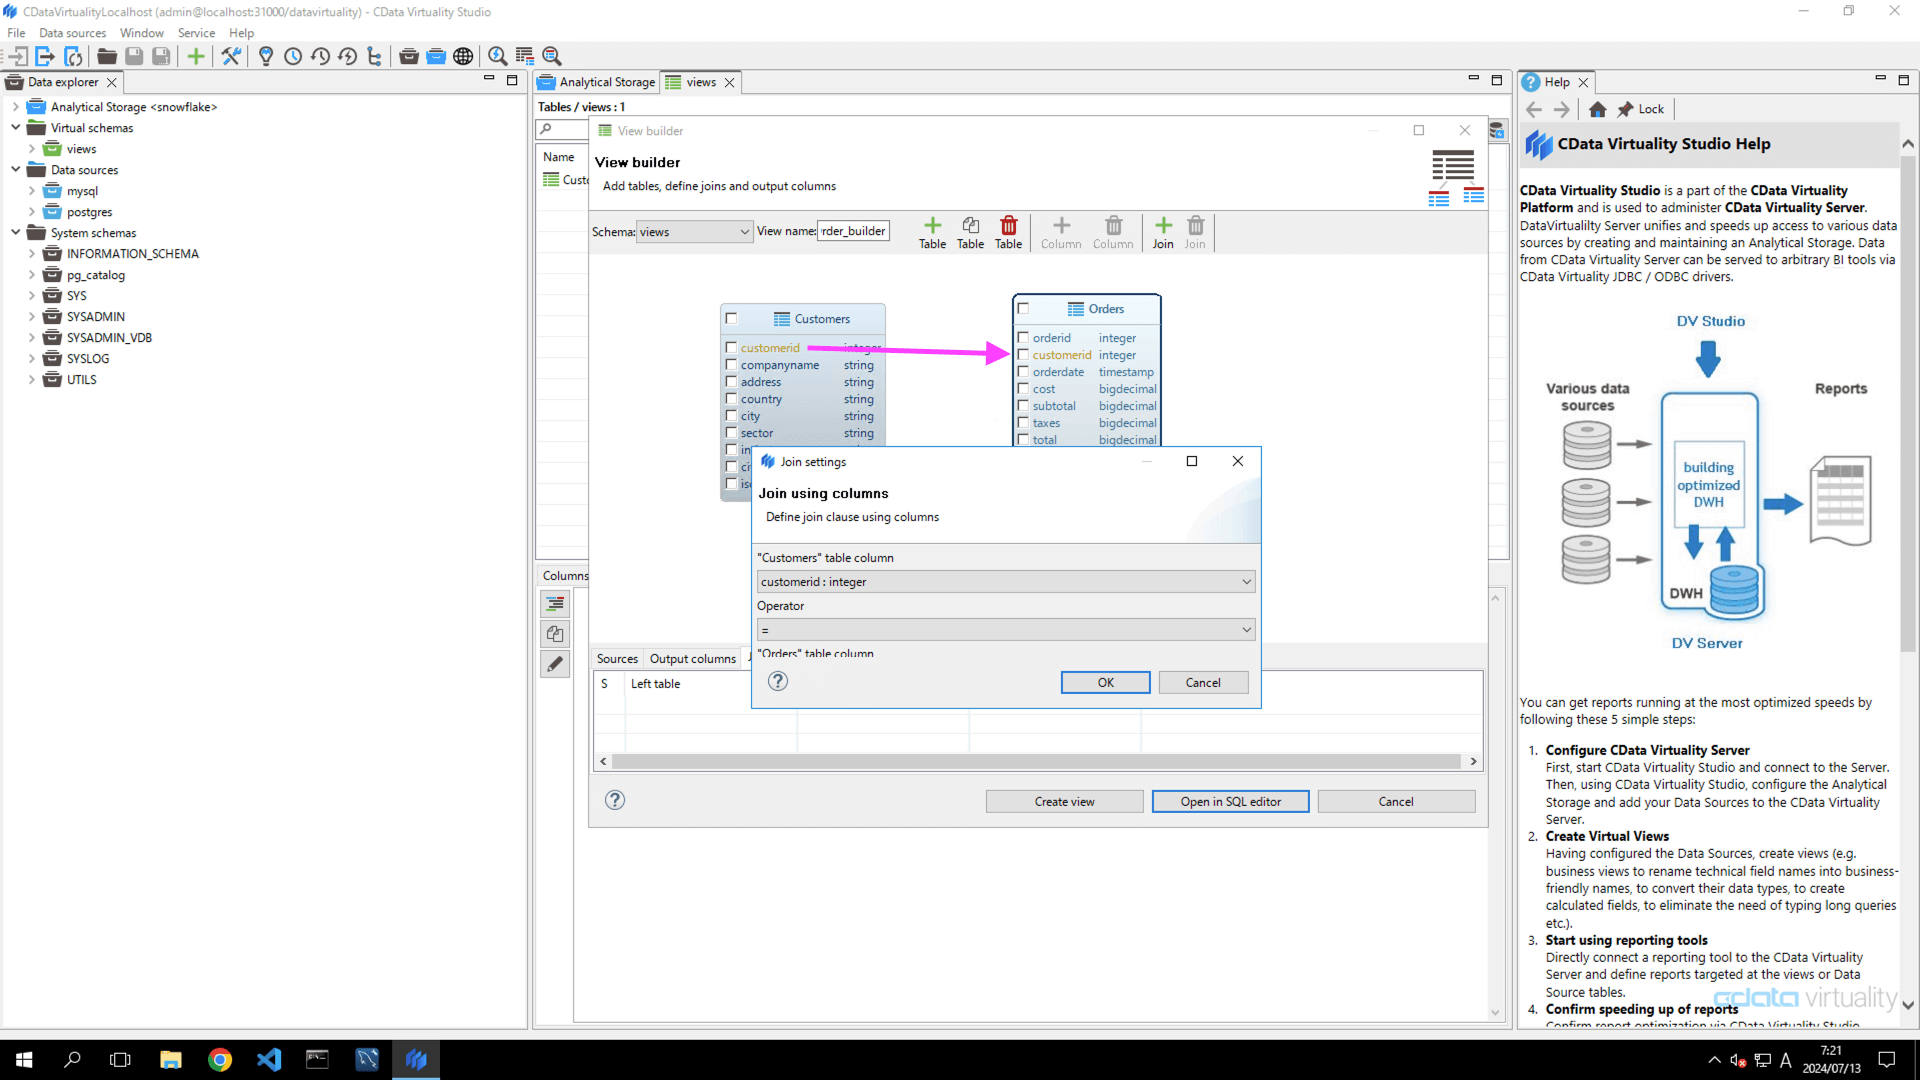
The Join Setting screen will appear. Click the Save button, keeping the following default settings:
Join Type: Inner Join
"Customers" table column: customerid:integer
Operator: =
"Orders" table column: customerid:integer
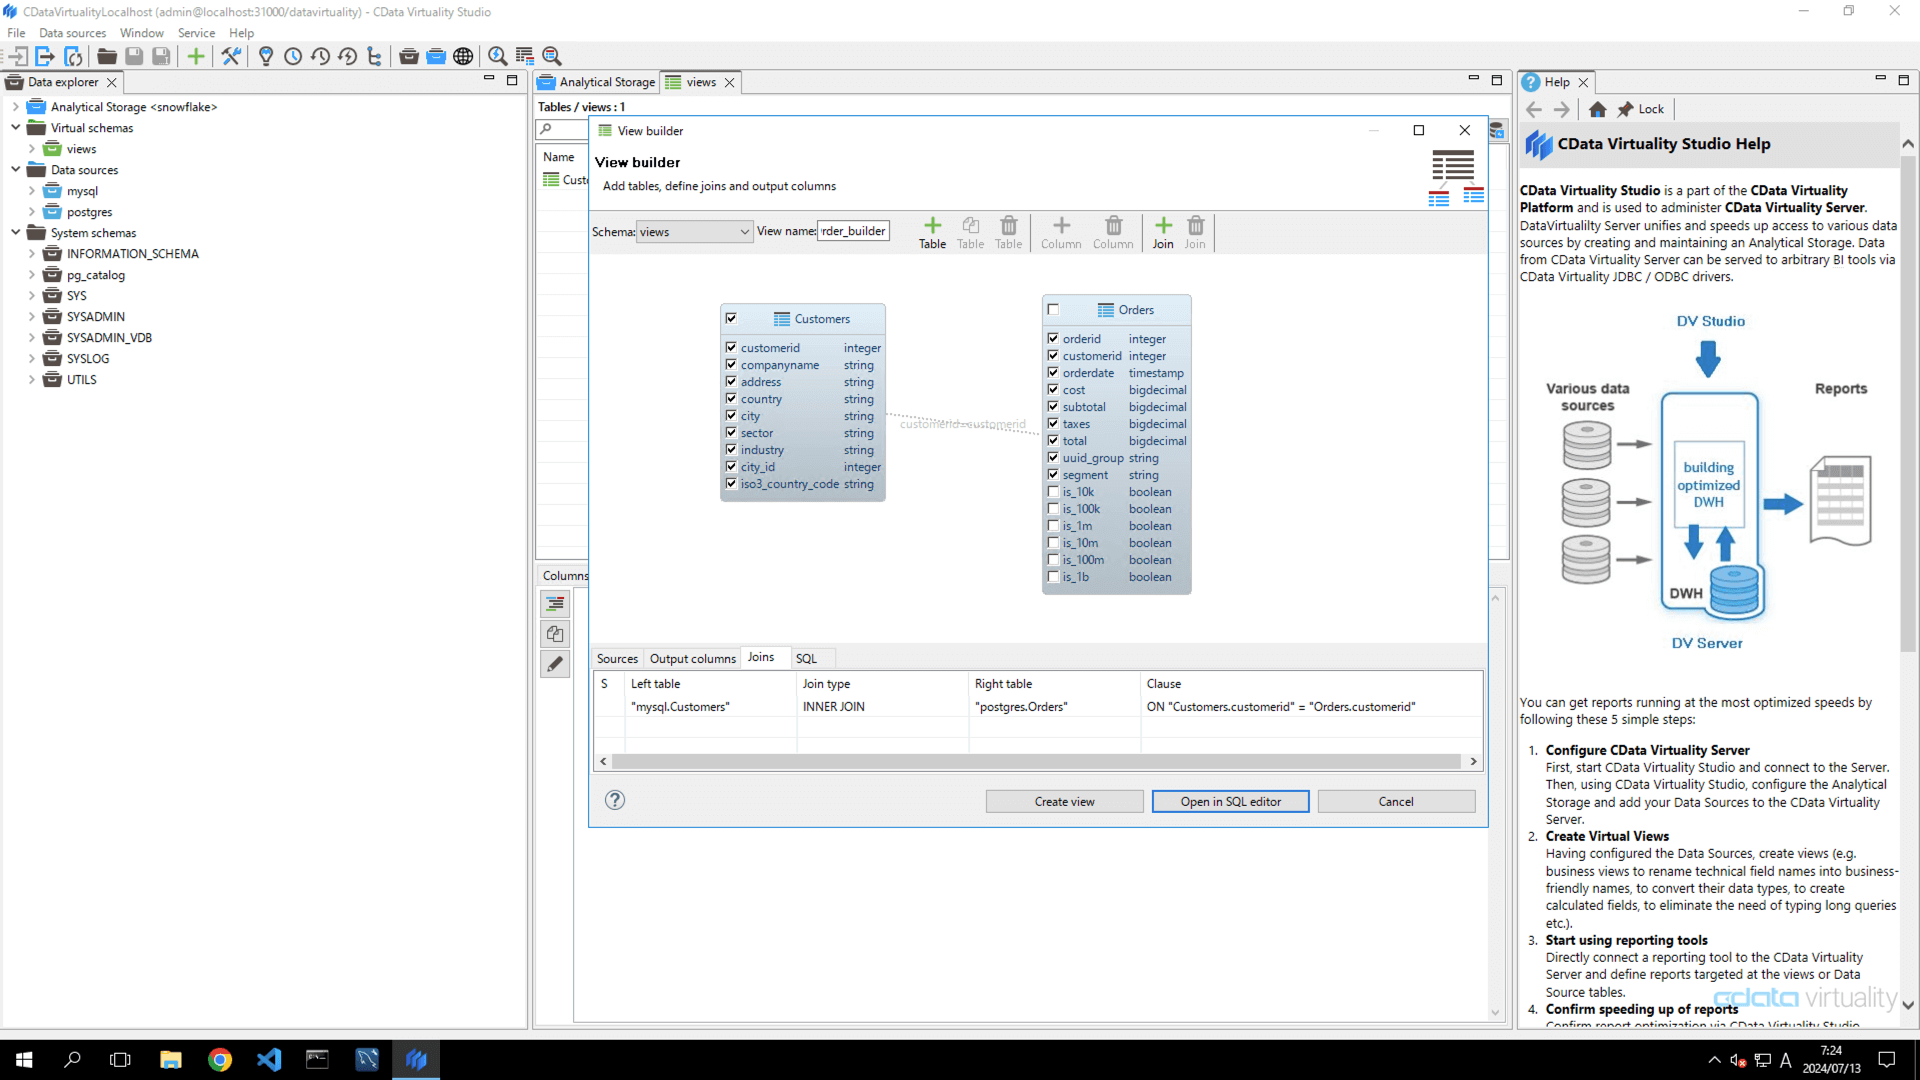
Verify that a relationship has been successfully created between the Customers and Orders tables. Select the desired items (fields) to retrieve from Customers and Orders and click the Create View button in the left menu:
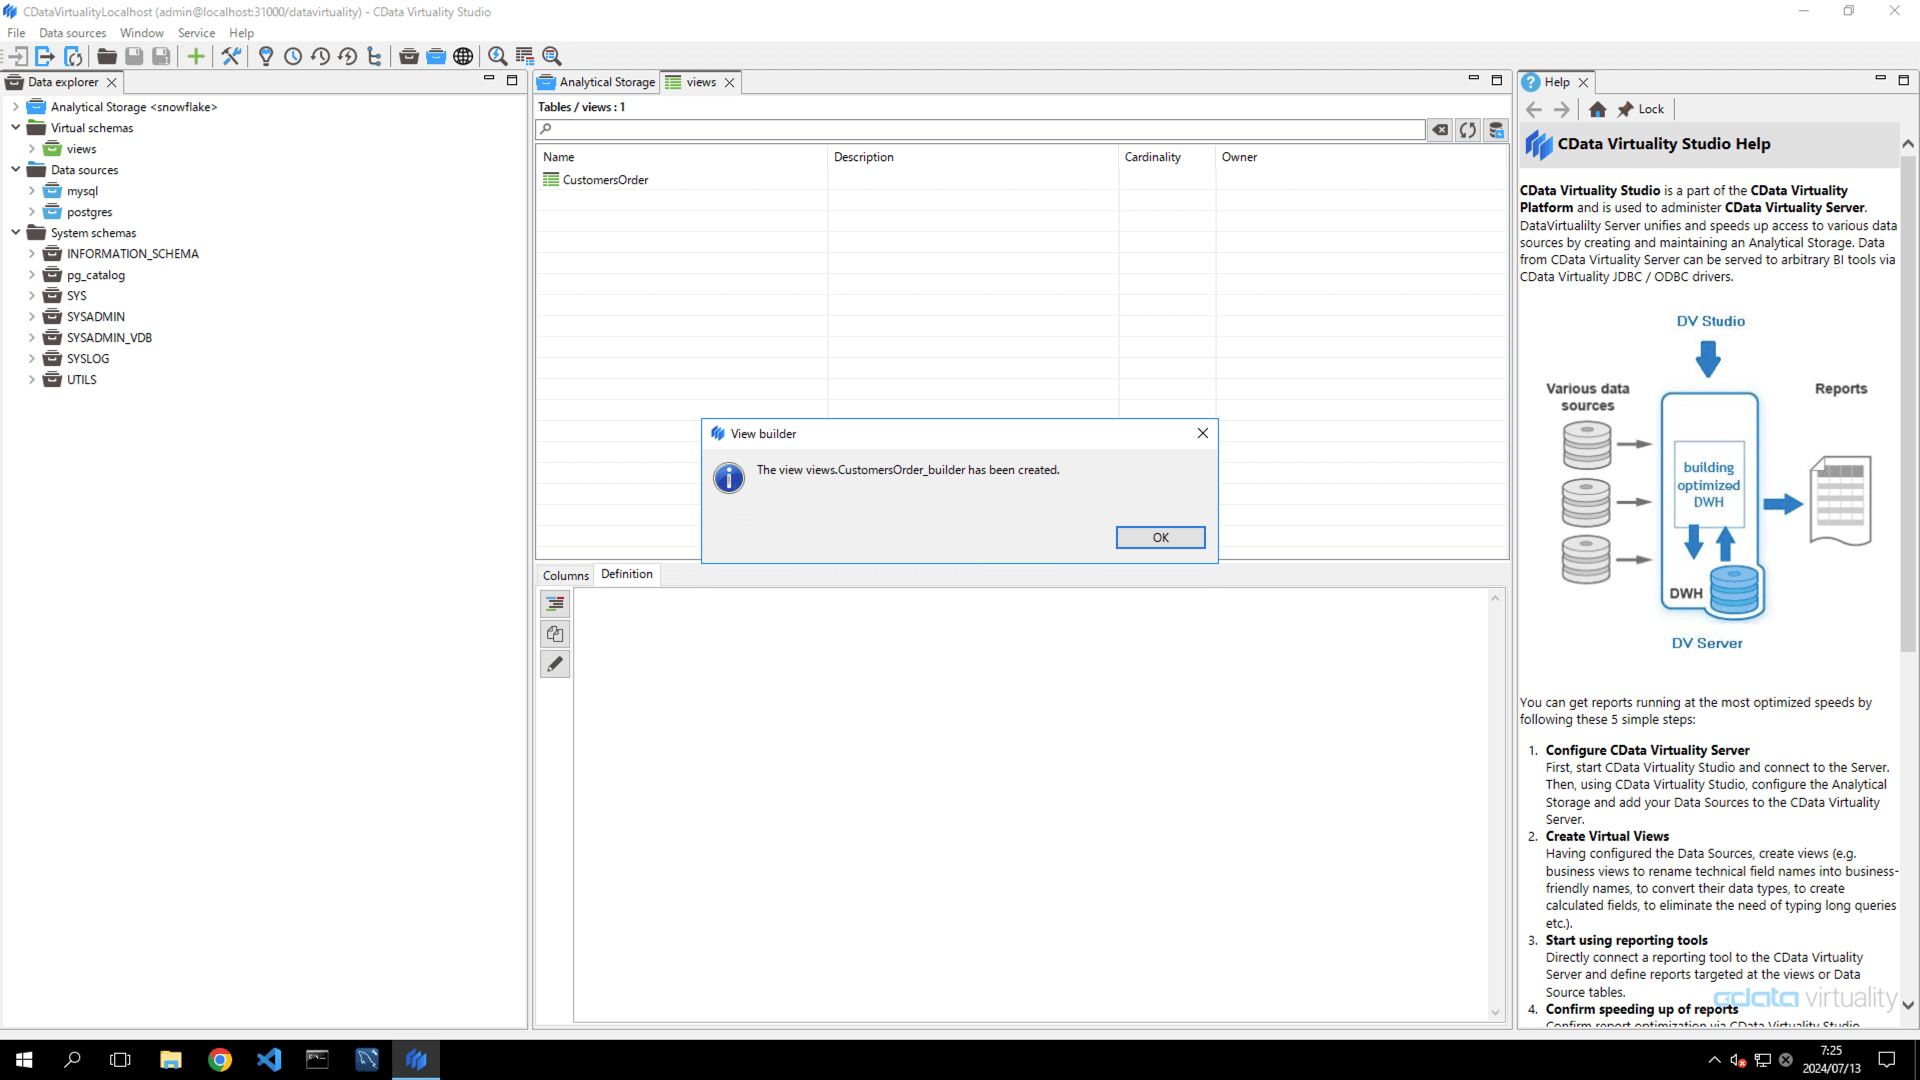
When a dialog box appears confirming that the view was created successfully, click the OK button:
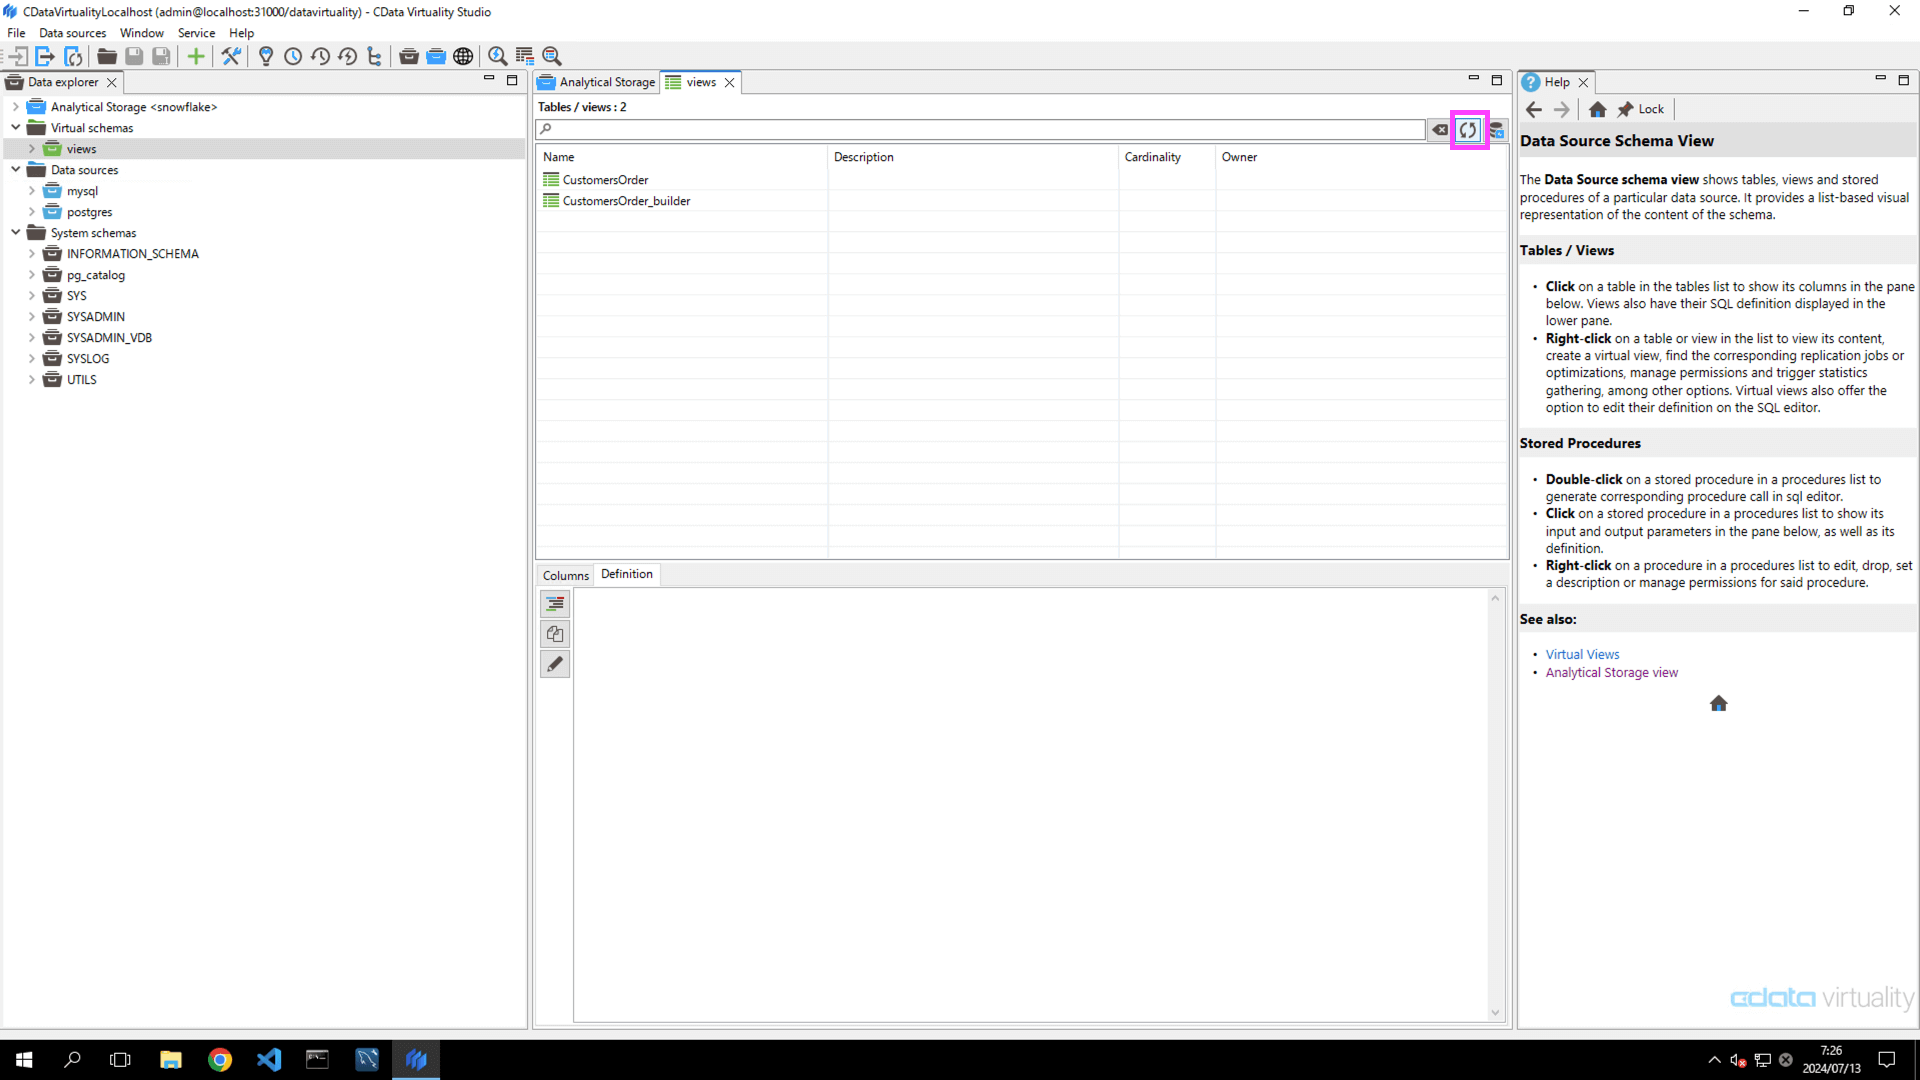
Click the Refresh current views button in the upper right corner of the Views window. Ensure that the newly created view is displayed in the list:
To retrieve the data from the created view, right-click the name of the created view (e.g.,
CustomersOrder_builder), and select Generate Statement from the context menu to retrieve the data:
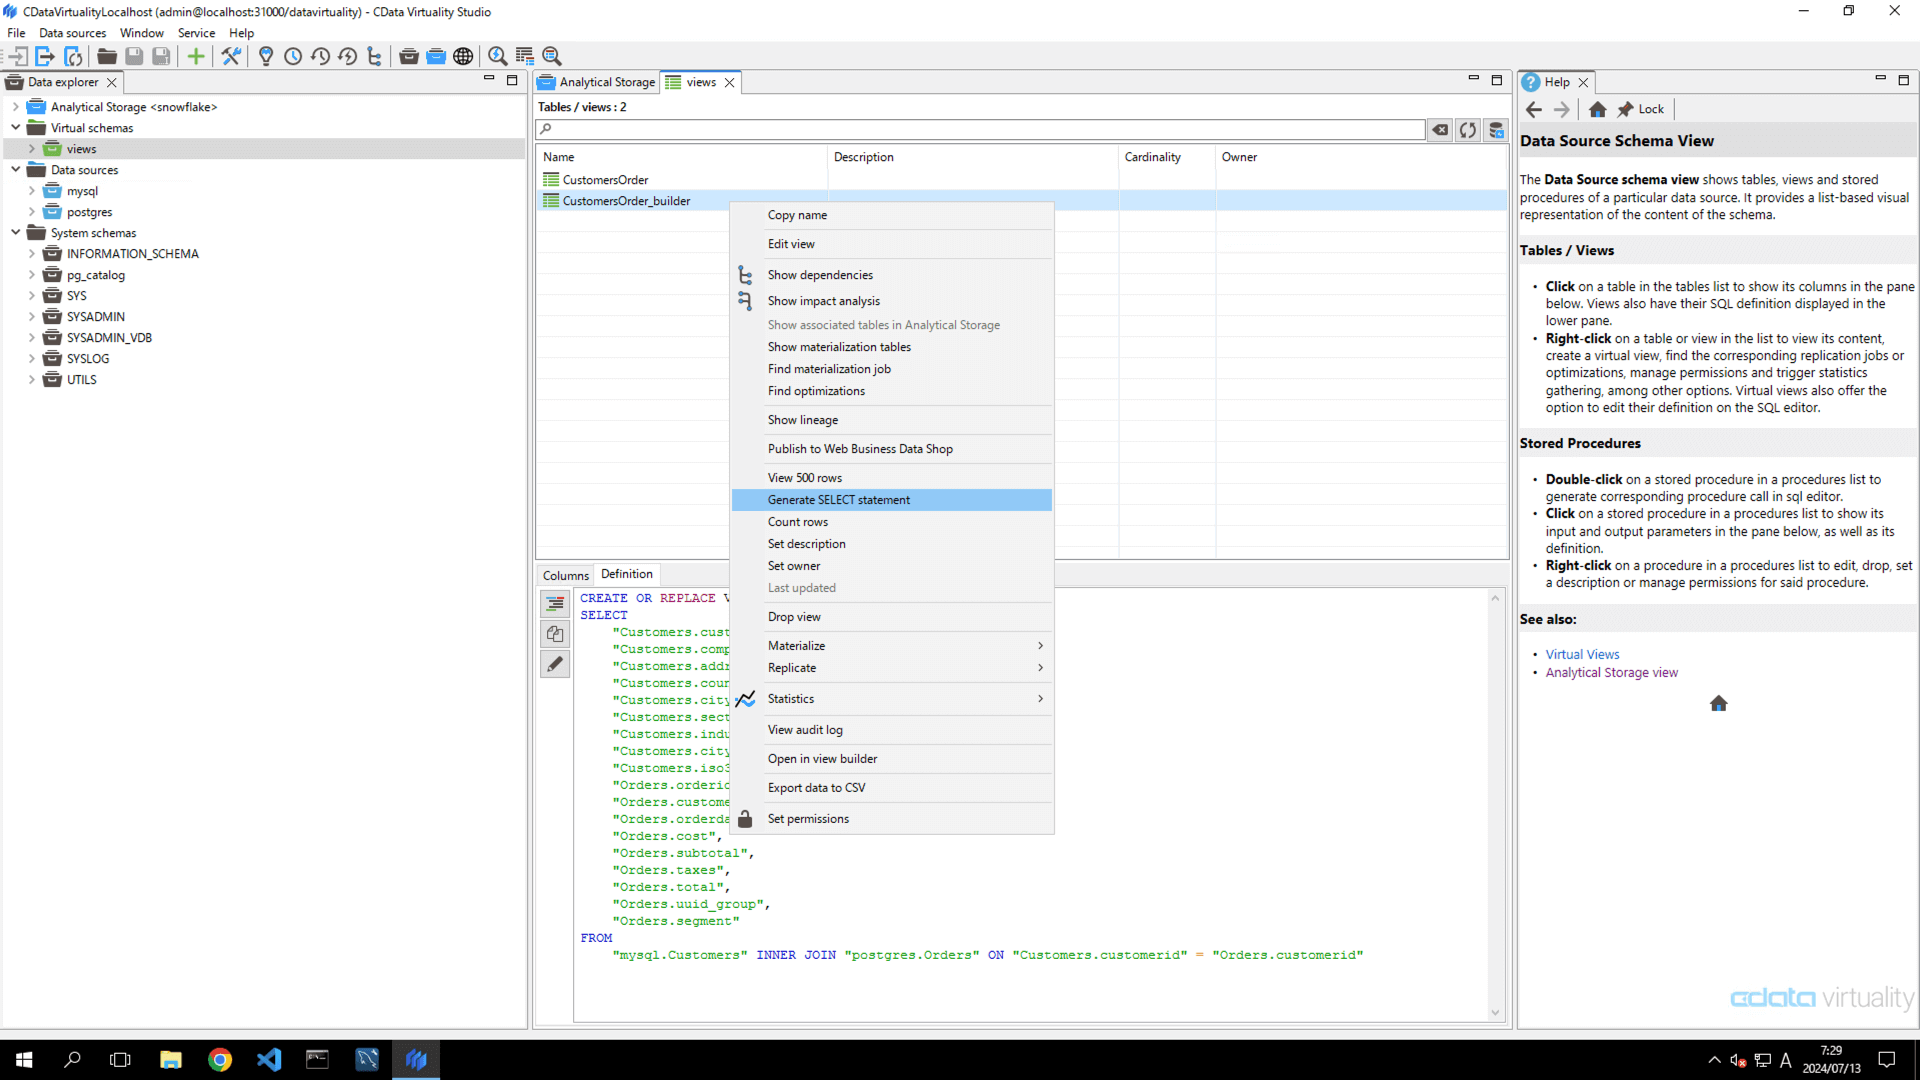
The following SQL will be generated in the Code Editor:
SELECT "customerid", "companyname", "address", "country", "city", "sector", "industry", "city_id", "iso3_country_code", "orderid", "Orders_ customerid", "orderdate", "cost", "subtotal", "taxes", "total", "uuid_group", "segment"
FROM "views.CustomersOrder_builder";;; "order_name", "country", "city", "sector", "industry", "city_id", "iso3_country_code", "orderid", "Orders_Order_builder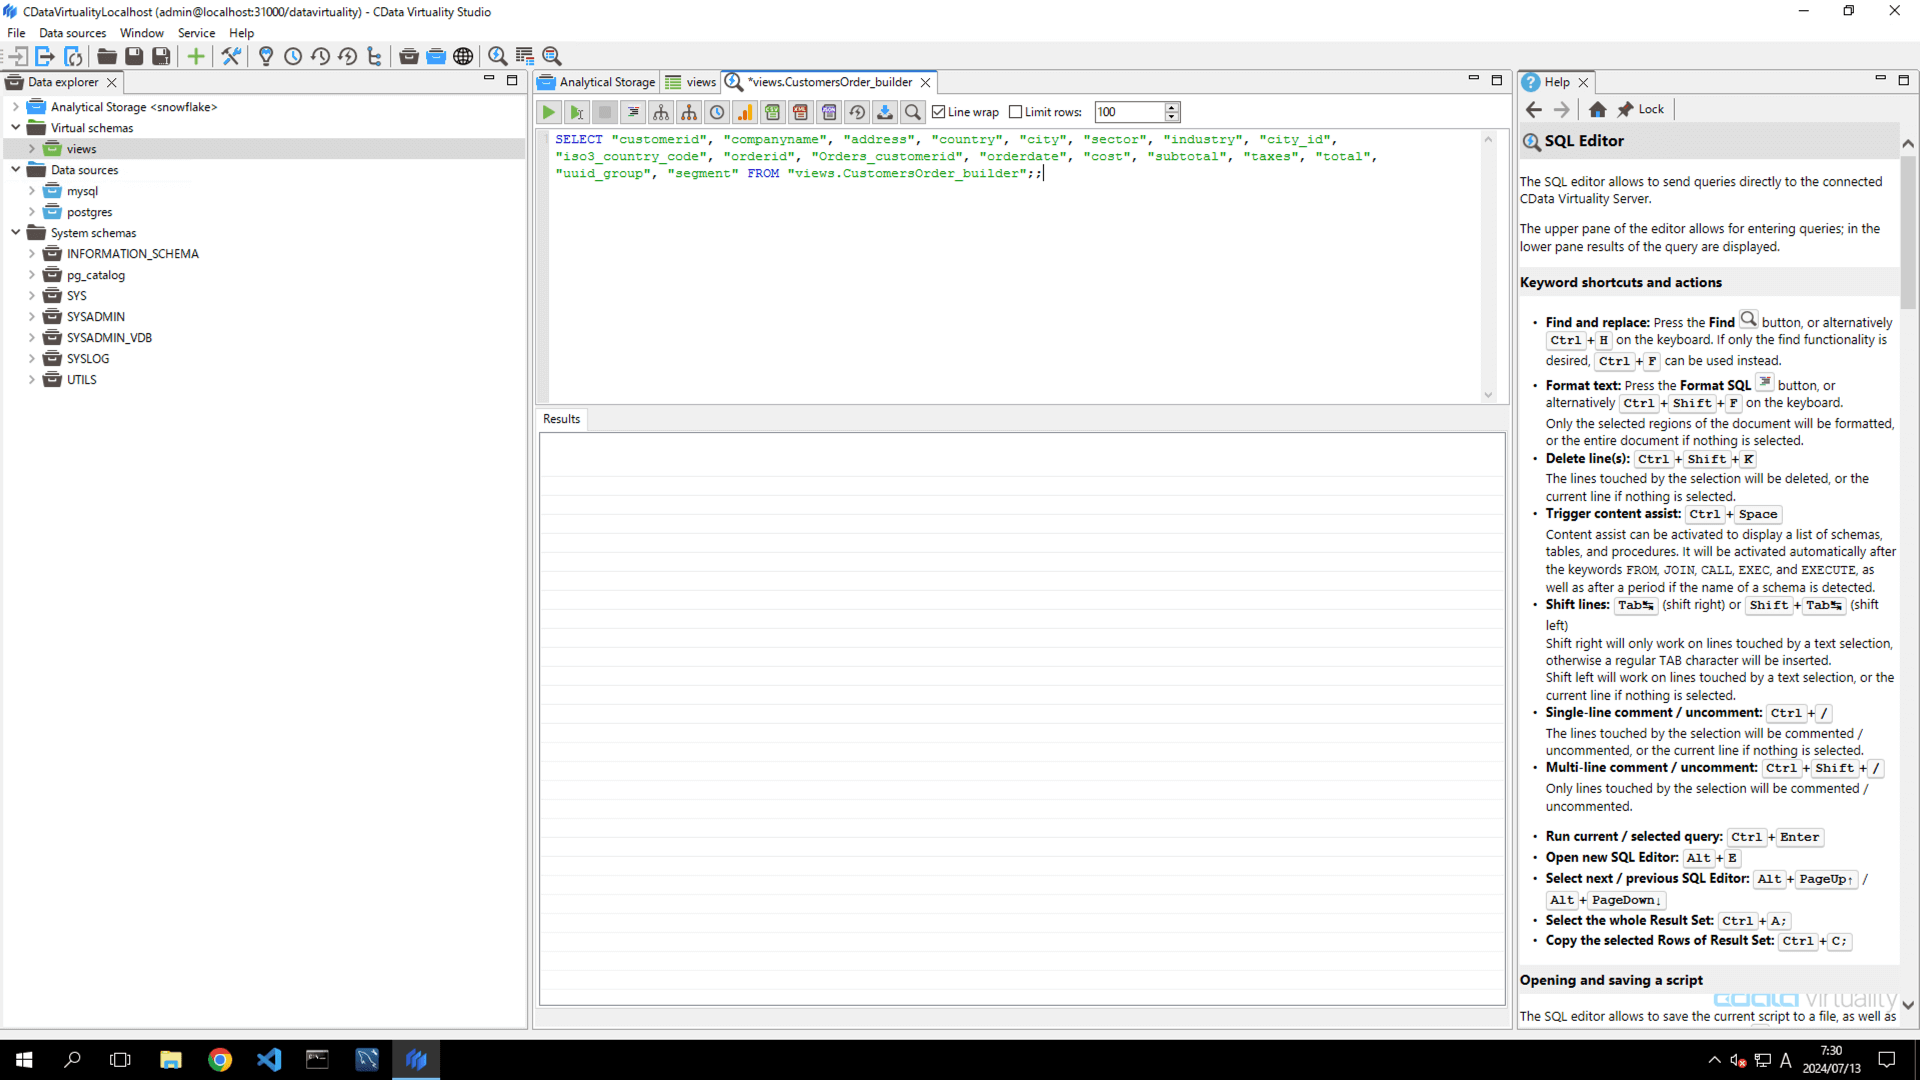
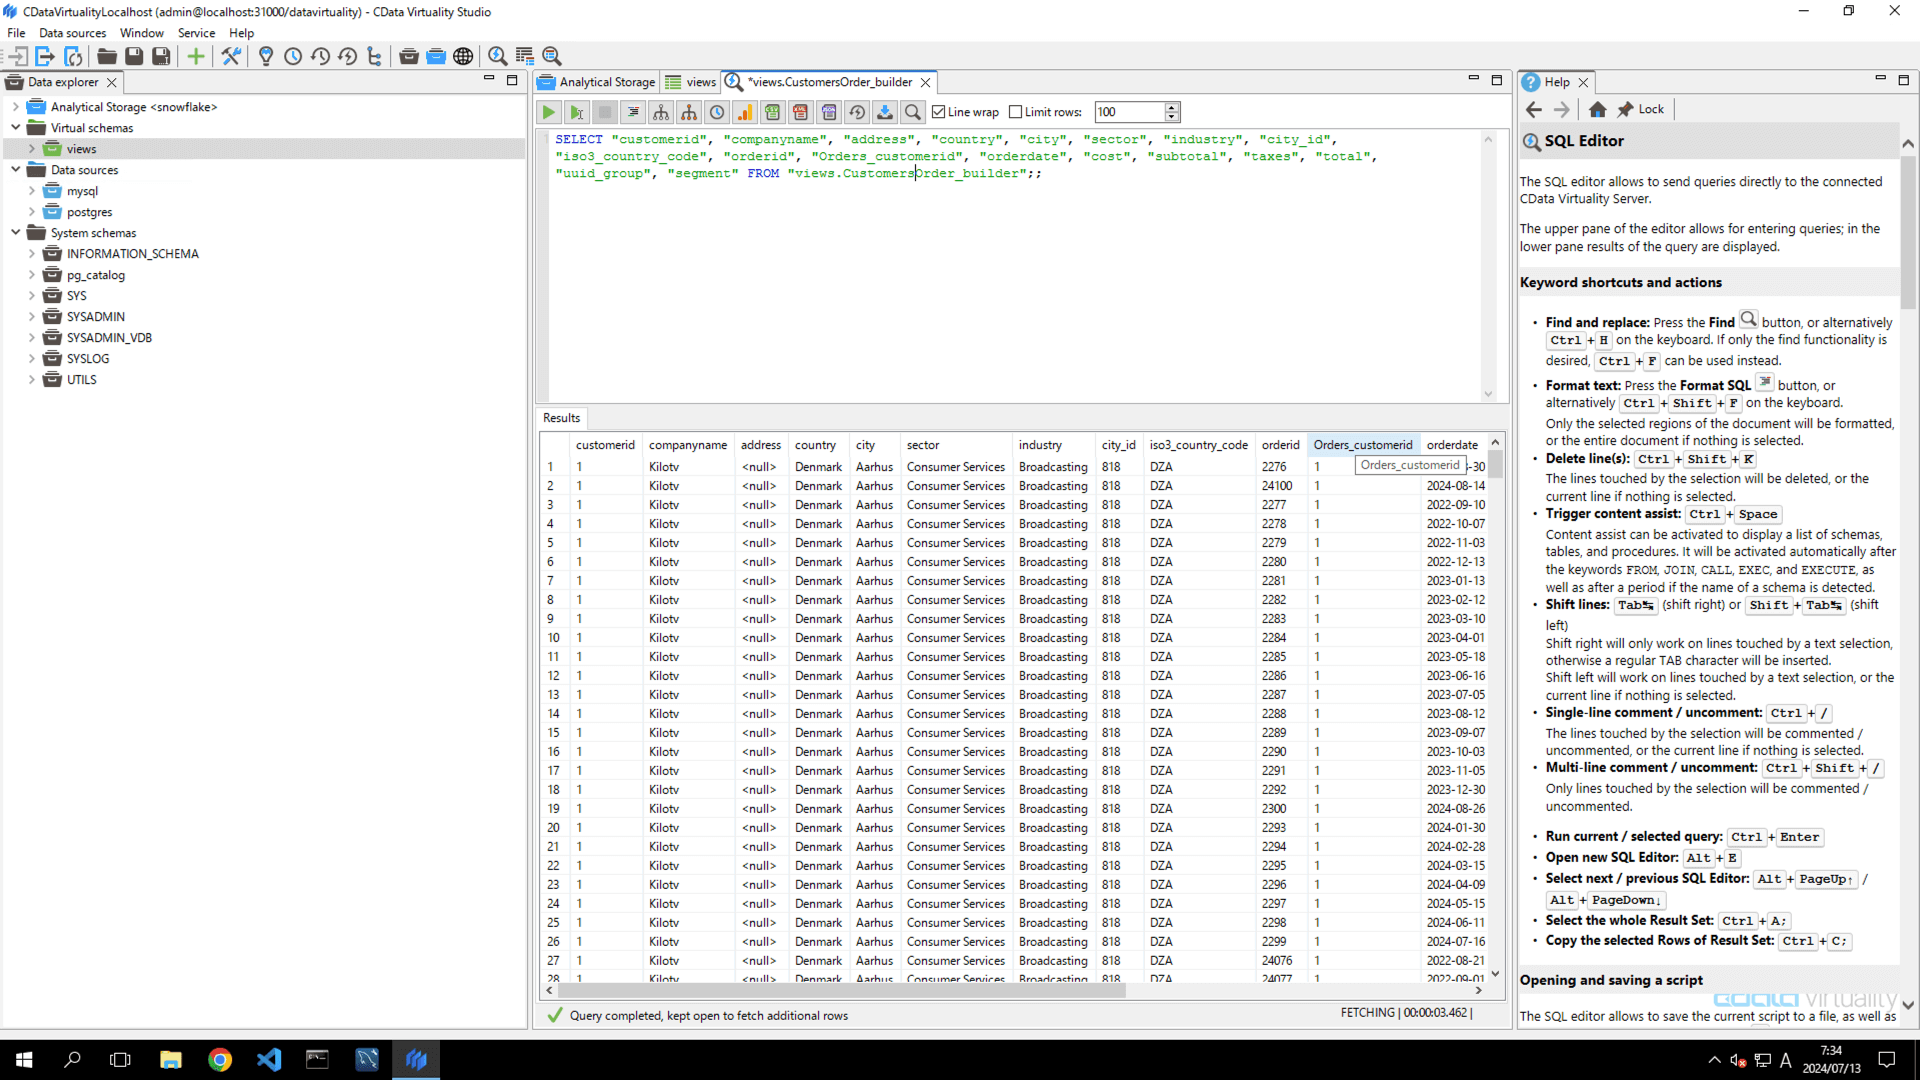
Click the green Play button to run the script. The Result area will display the result of the combined data from the Customers table in MySQL and the Order table in PostgreSQL:
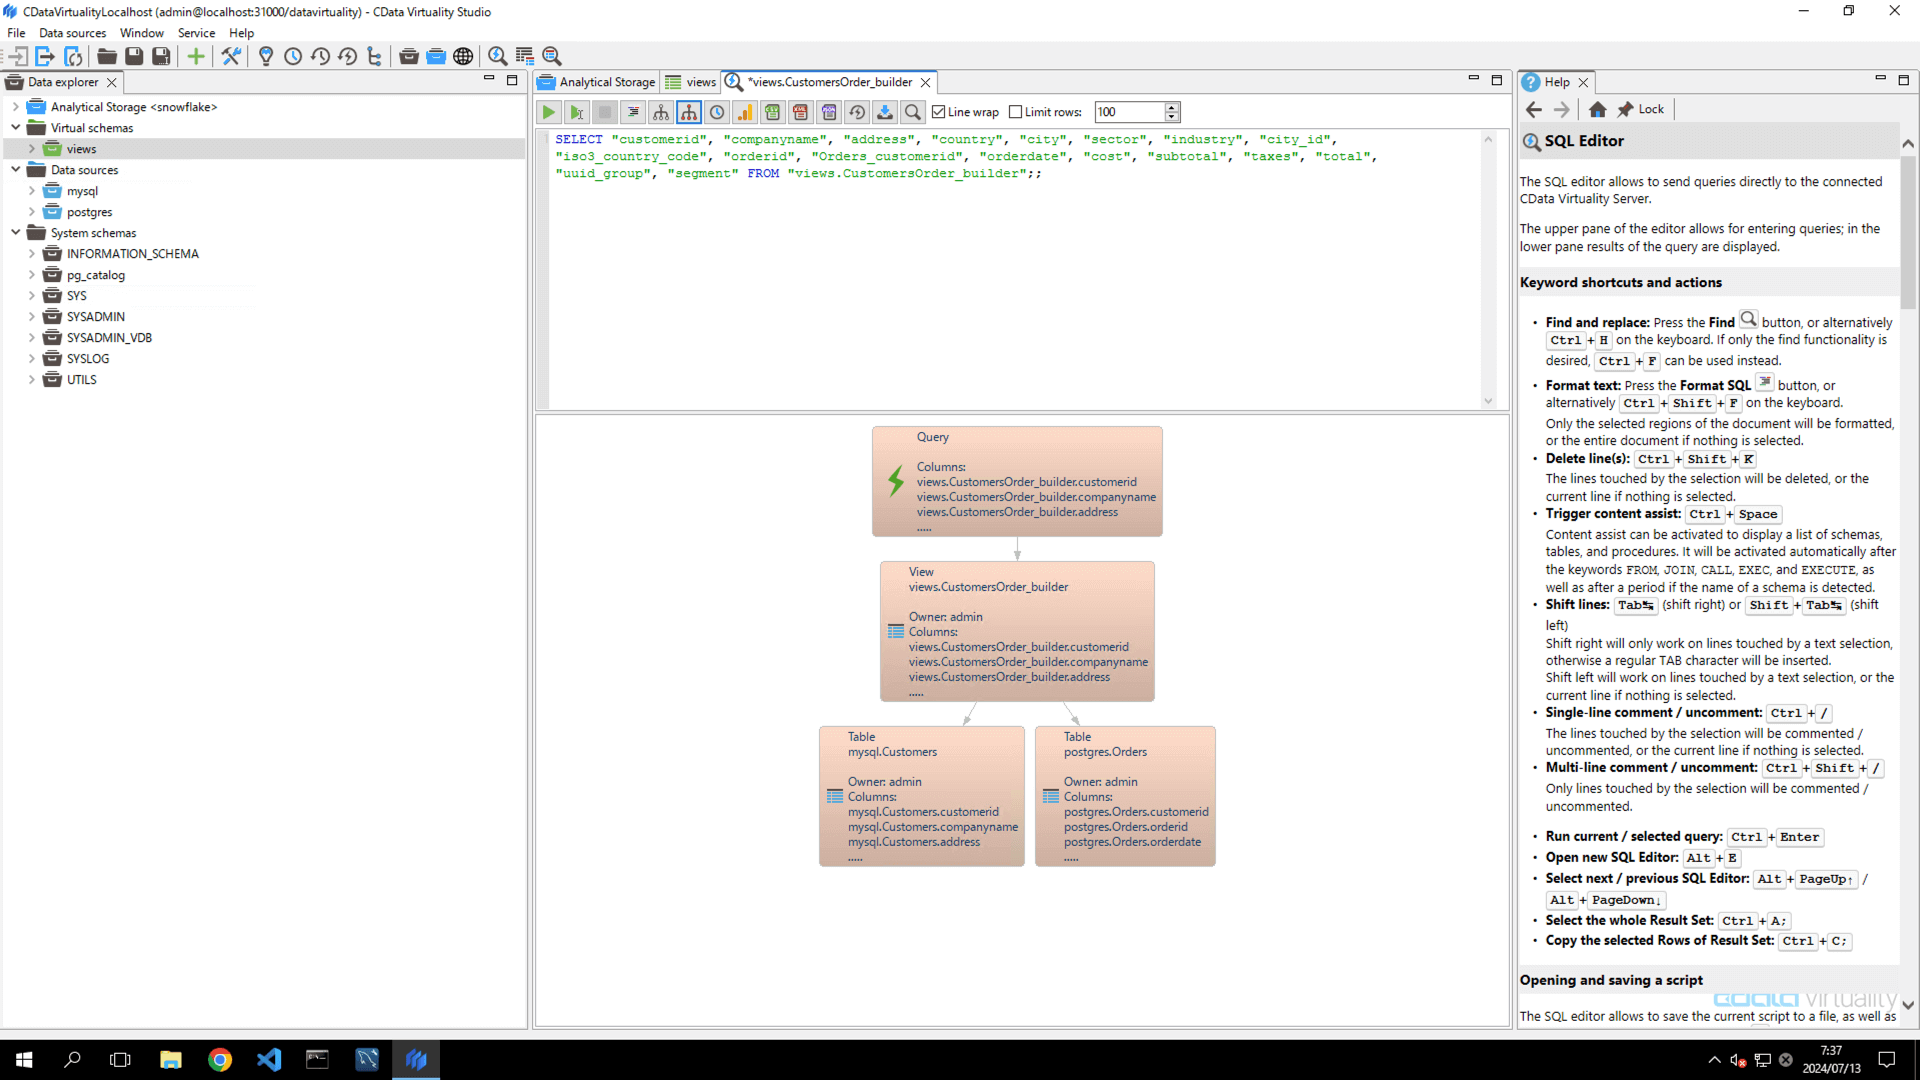
Click the Data Lineage button in the menu. The Data Lineage screen will appear. It provides a graphical representation of the data sources from which the query (SELECT) retrieved the data:
Close the Data Lineage screen and click the Show Query Plan button in the menu. The Query Plan screen will appear. It provides a graphical representation of the execution plan of the query. In this example, the query shows that the data retrieved from each table in the data source is joined using a
MERGE JOINduring anINNER JOINoperation.Navigate back to the Views list tab and select the created view. The definition of the view will be displayed in the Definition field:
CREATE OR REPLACE VIEW "views.CustomersOrder_builder" AS
SELECT
	"Customers.customerid", "customerid".
	"Customers.companyname", "Customers.
	"Customers.address", "Customers.address".
	"Customers.country", "Customers".
	"Customers.city", "Customers".
	"Customers.sector", "Customers.sector".
	"Customers.industry", "Customers".
	"Customers.city_id", "Customers.
	"Customers.iso3_country_code", "iso3_country_code".
	"Orders.orderid", "orderid".
	"Orders.customerid" AS "Orders_customerid", "Orders.
	"Orders.orderdate", "orderdate".
	"Orders.cost", "Orders.cost".
	"Orders.subtotal", "Orders.subtotal".
	"Orders.taxes", "Orders.taxes".
	"Orders.total", "Orders.total".
	"Orders.uuid_group", "Orders.
	"Orders.segment".
FROM
	"mysql.Customers" INNER JOIN "postgres.Orders" ON "Customers.customerid" = "Orders.customerid"
See Also
Create View for more in-depth information on how to create a view