
Okta SSO for SaaS
Okta Single Sign-On (SSO) enables users to access multiple applications with a single set of credentials. It simplifies authentication processes and enhances security by centralizing user login management. This guide outlines the steps to set up and configure Okta SSO for your applications.
1. Add application in Okta
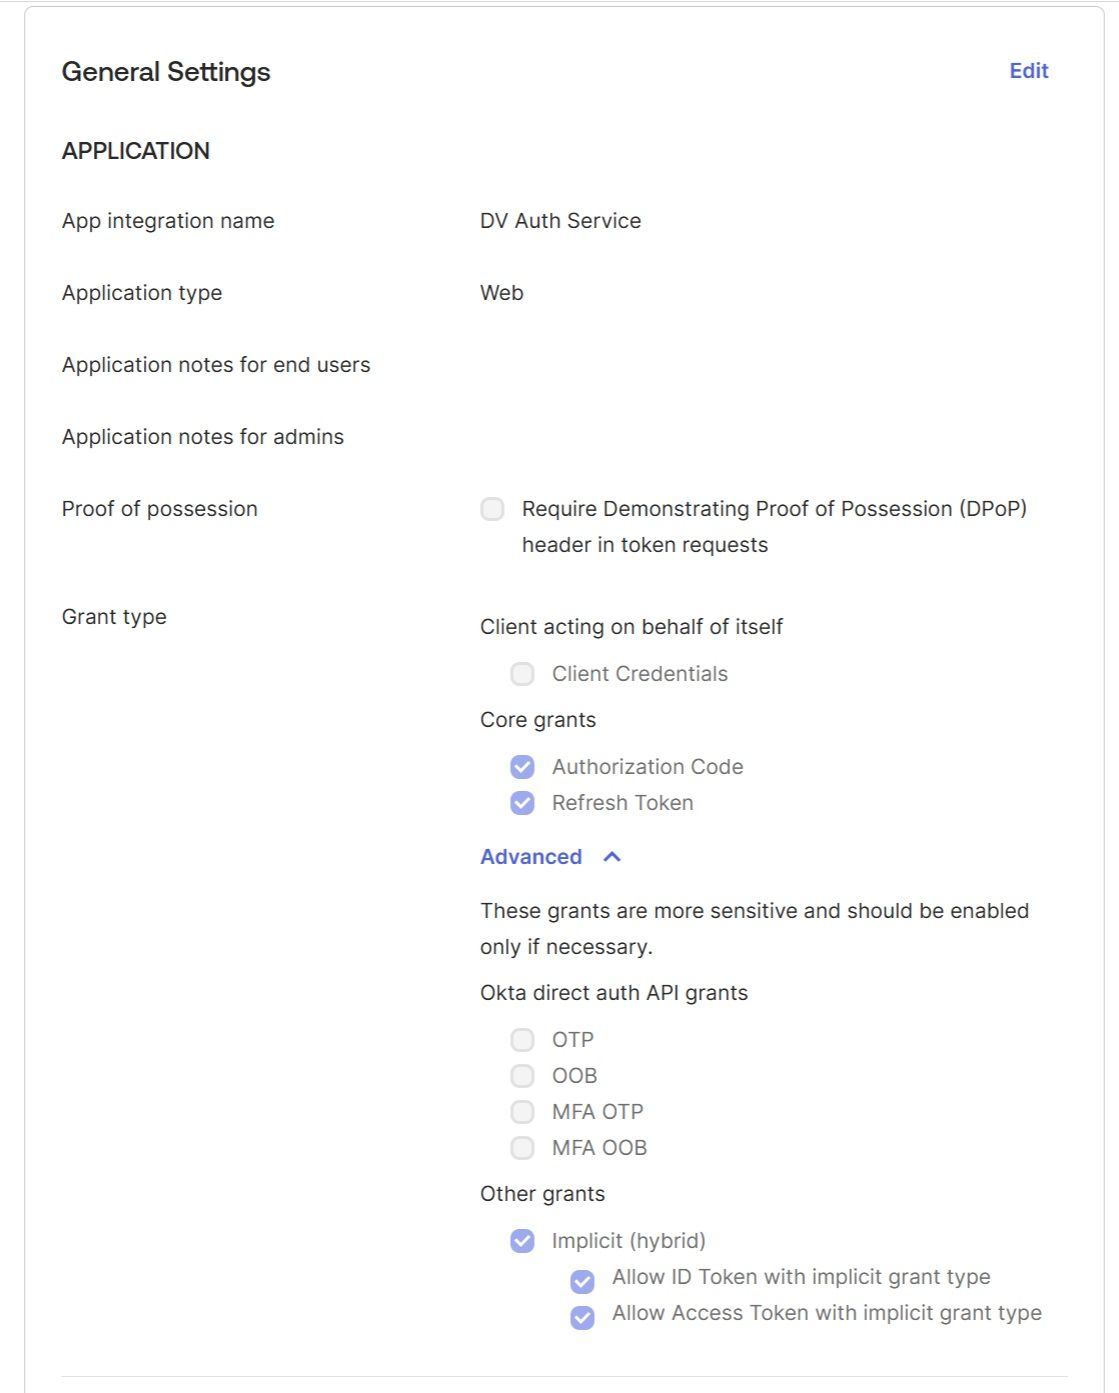
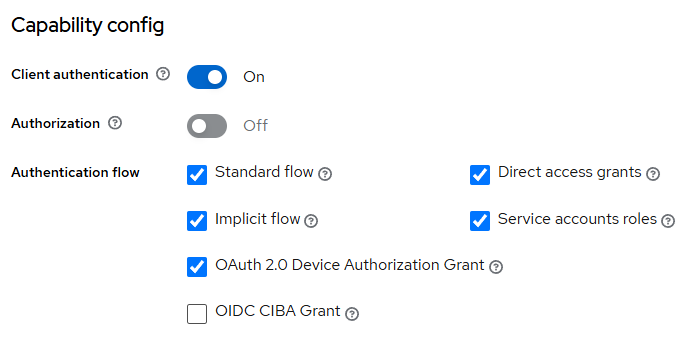
In Okta, go to "Applications" and create a new application: "Create App Integration" → choose "OIDC - OpenID Connect" → choose "Web Application", and give a name to your application, for example, "DV Auth Service":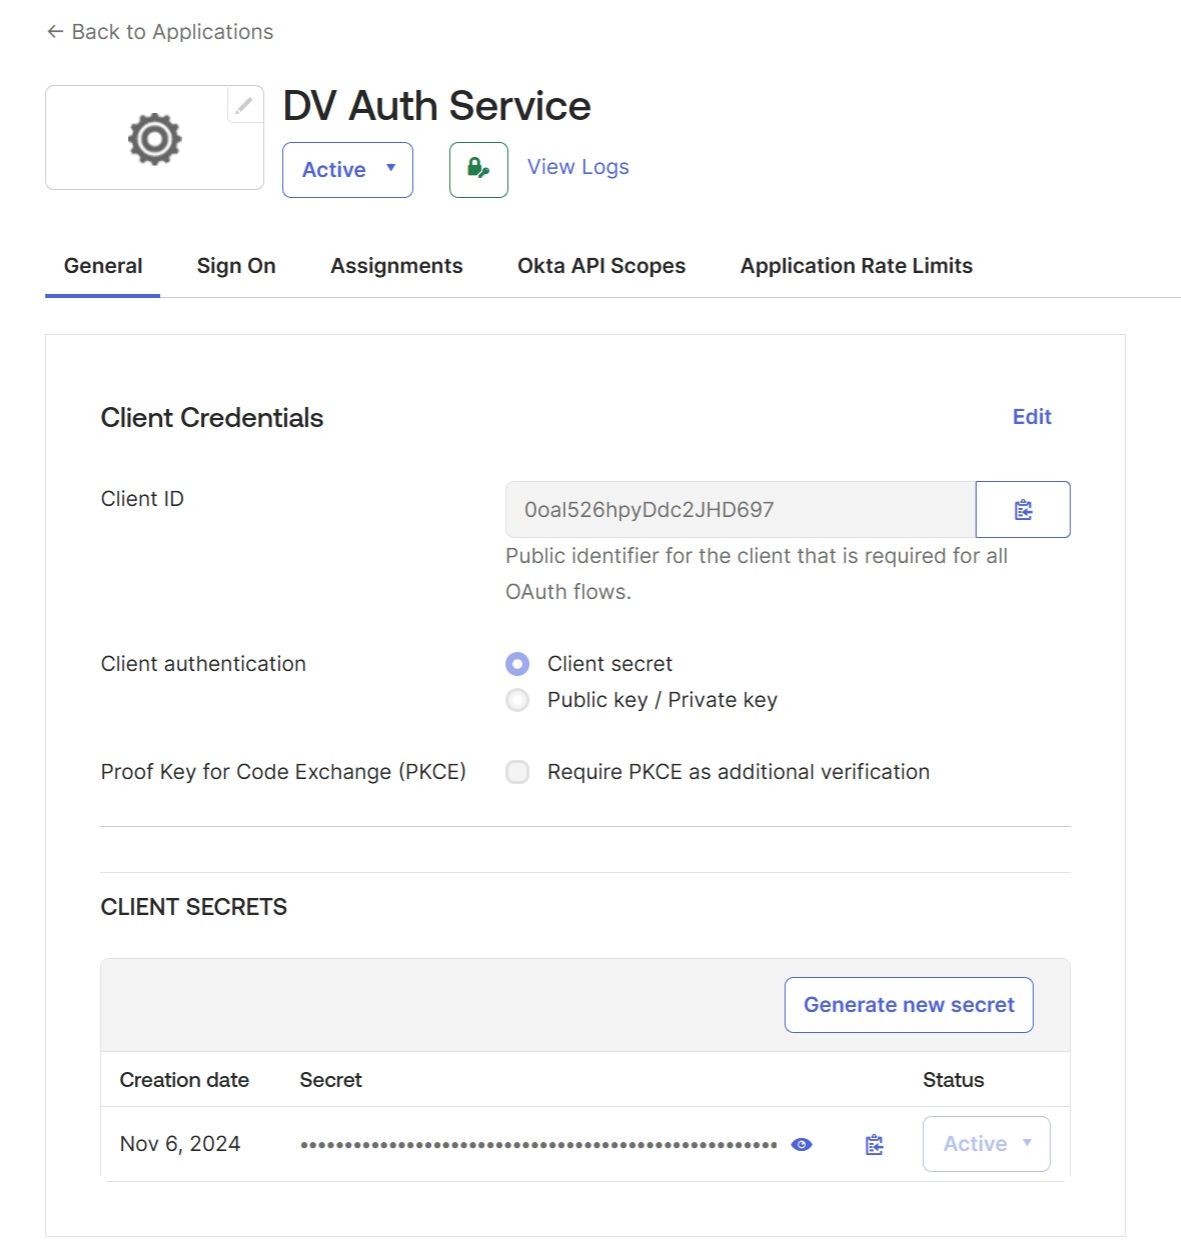
2. Create groups and assign them to users
The new "DV Auth Service" application must be assigned to groups. To do this, you first need to create the groups in Okta by navigating to "Directory" → "Groups" → "Add Group." These groups will be mapped to the Cdata Virtuality Server roles, so you can create as many groups as there are roles on the Server. For this example, we created two primary groups: "CDV Administrators" and "CDV-OData." These will be mapped by the CData Virtuality Authentication Management Component to the CData Virtuality Server's admin-role and odata-role respectively. 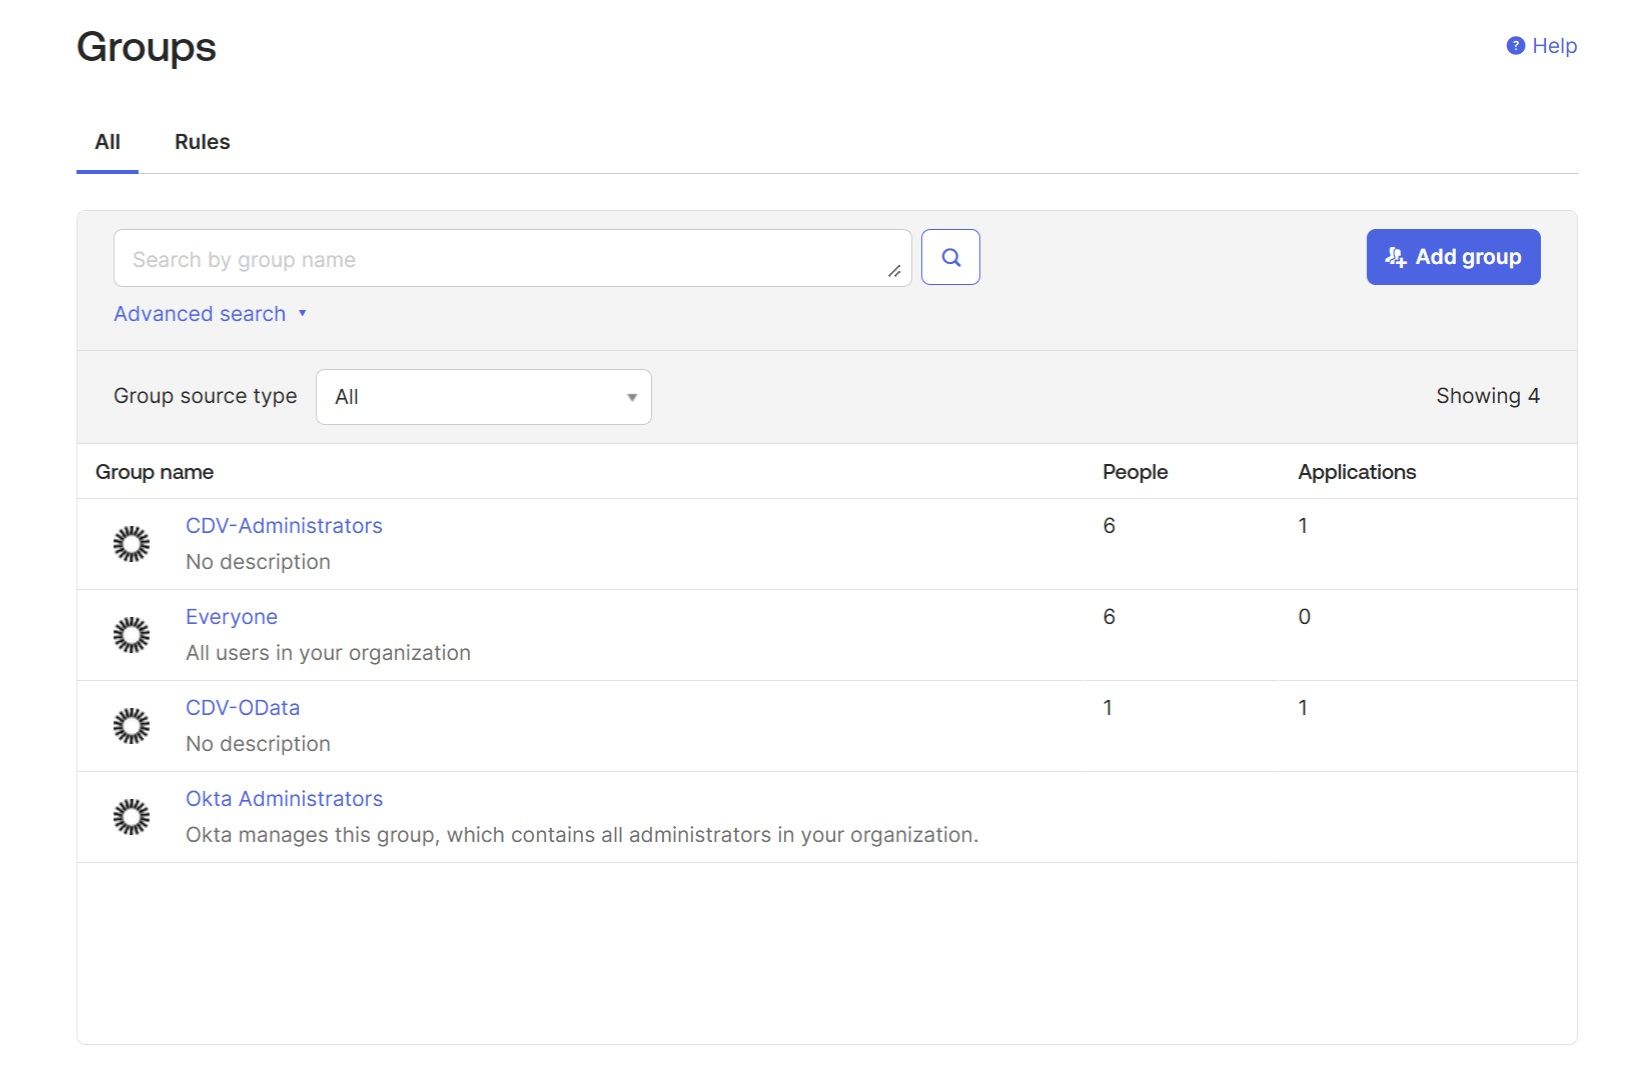
Create new users if necessary by navigating to “People” → “Add person“. Assign existing and new users to corresponding “CDV-*” groups (click on a user and choose the “Groups” tab):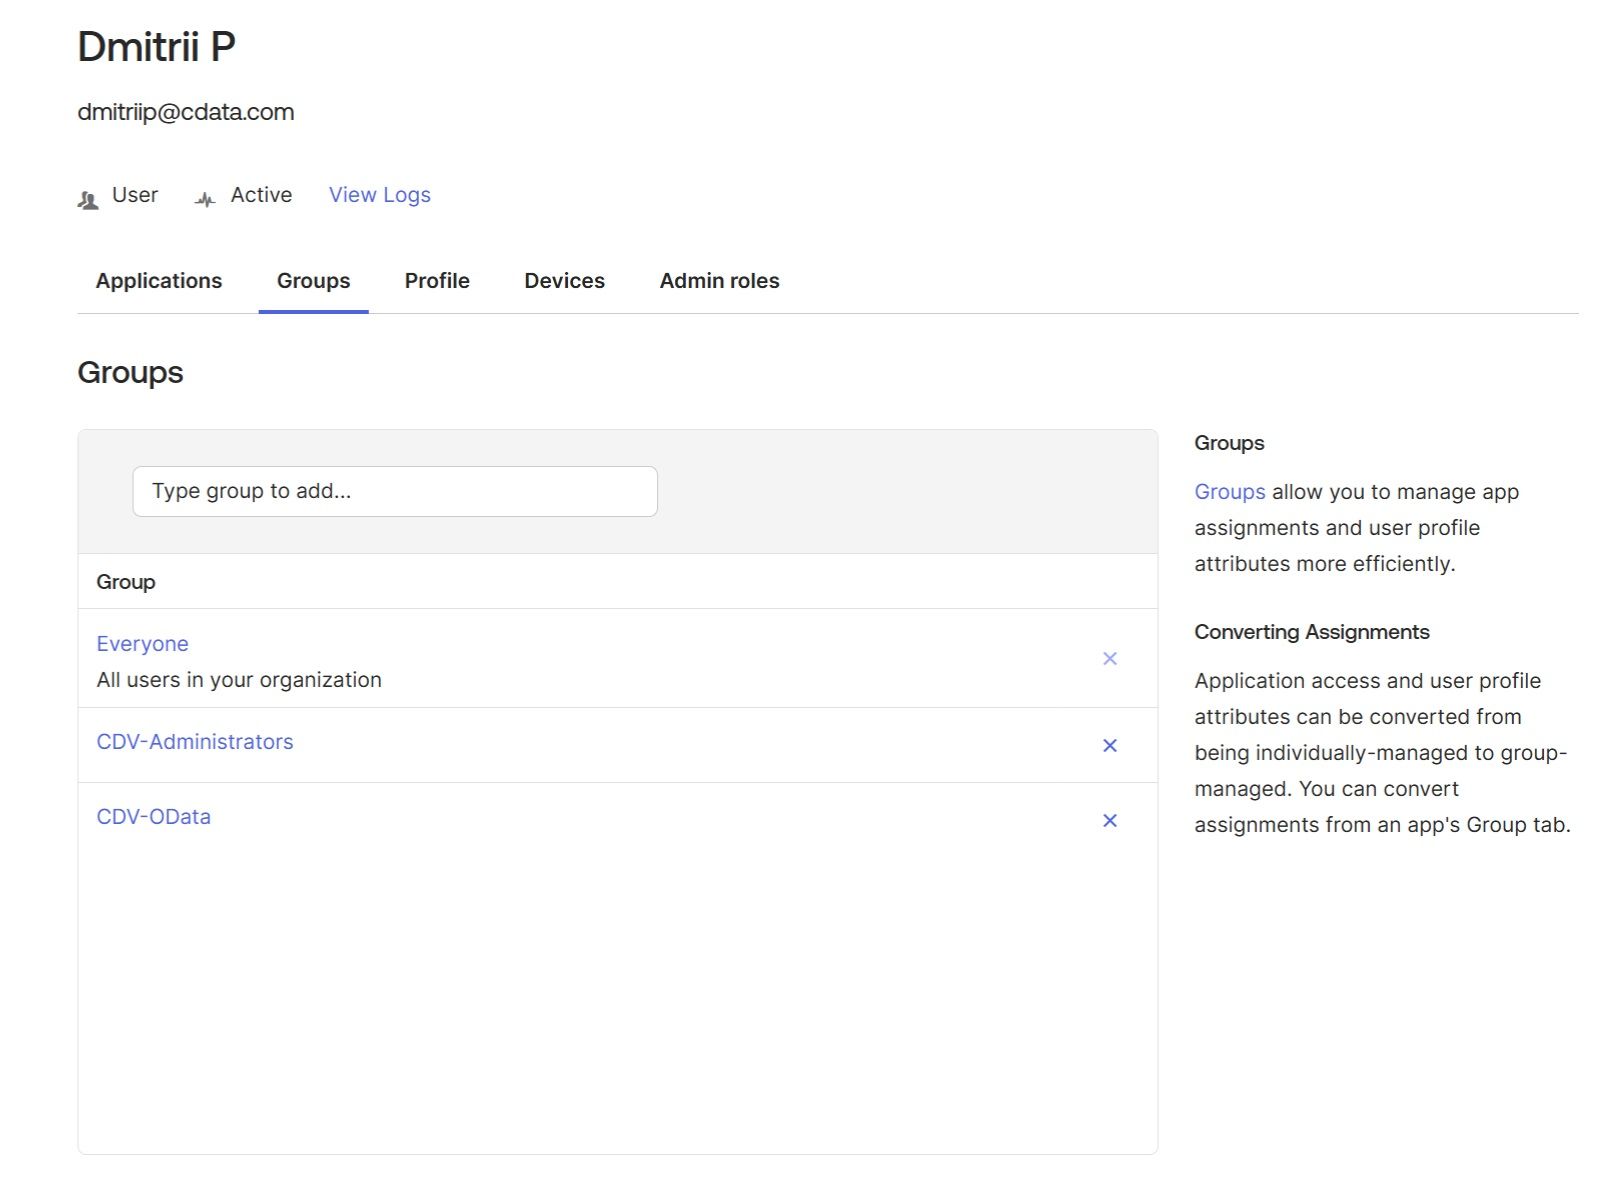
3. Assign groups to application
Assign the "DV Auth Service" application to groups created in the previous step, navigate back to “Application” → “DV Auth Service” → “Assignments” → “Assign” → “Assign to Groups“: 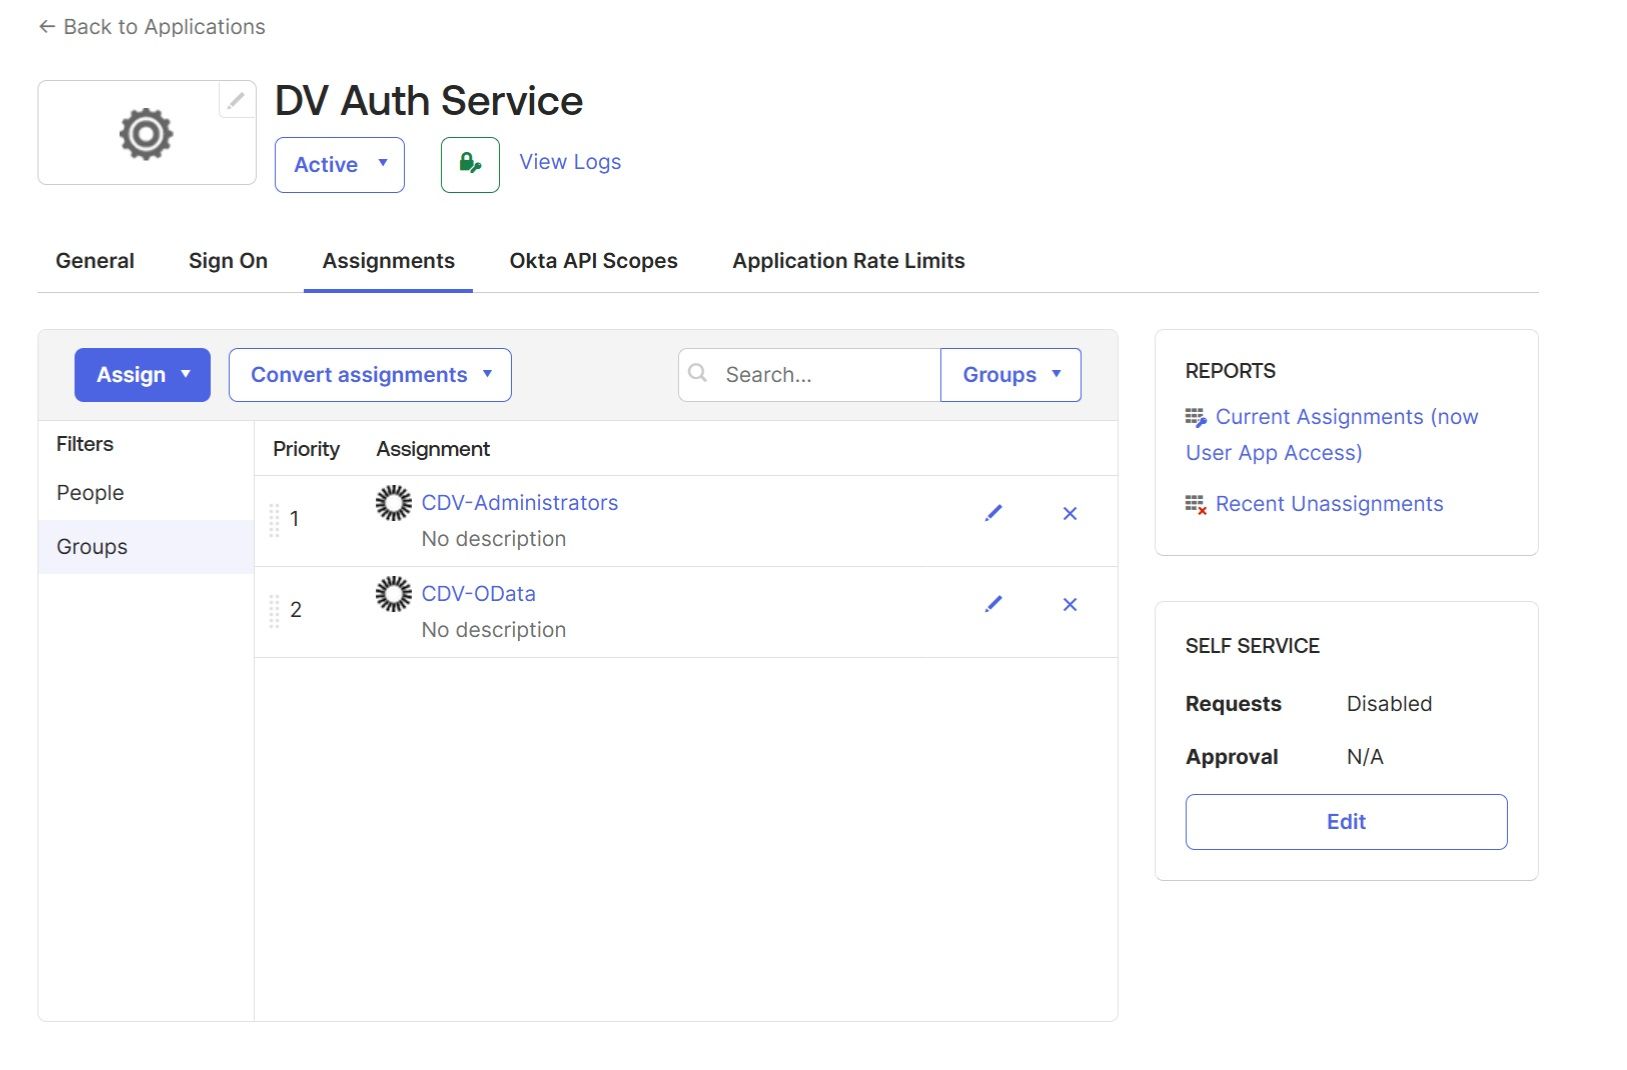
4. Set up application Sign On and Group filter
Check the “Sign On” tab in your application (“Application” → “DV Auth Service” → “Sign On”). The Groups filter in the “OpenID Connect ID Token” section can be left empty: 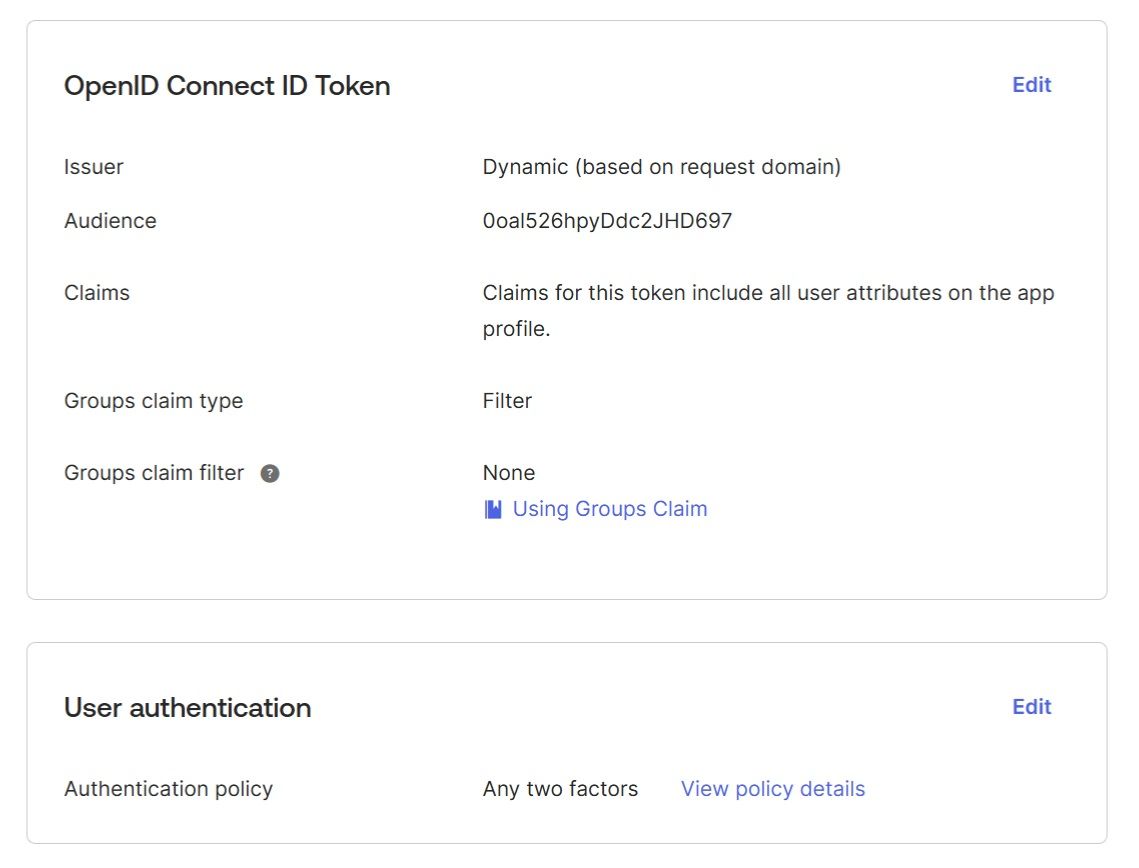
5. Add and set up custom authorization server
In the "Security" → "API" → "Authorization Servers" section, create a custom authorization server. You must create a custom server, as custom claims only work with custom authorization servers. For safety, it would be better to deactivate the old default authorization server. Once the custom authorization server is created, it will be assigned a unique name, for example, ausli43p7eXRgGTZV697: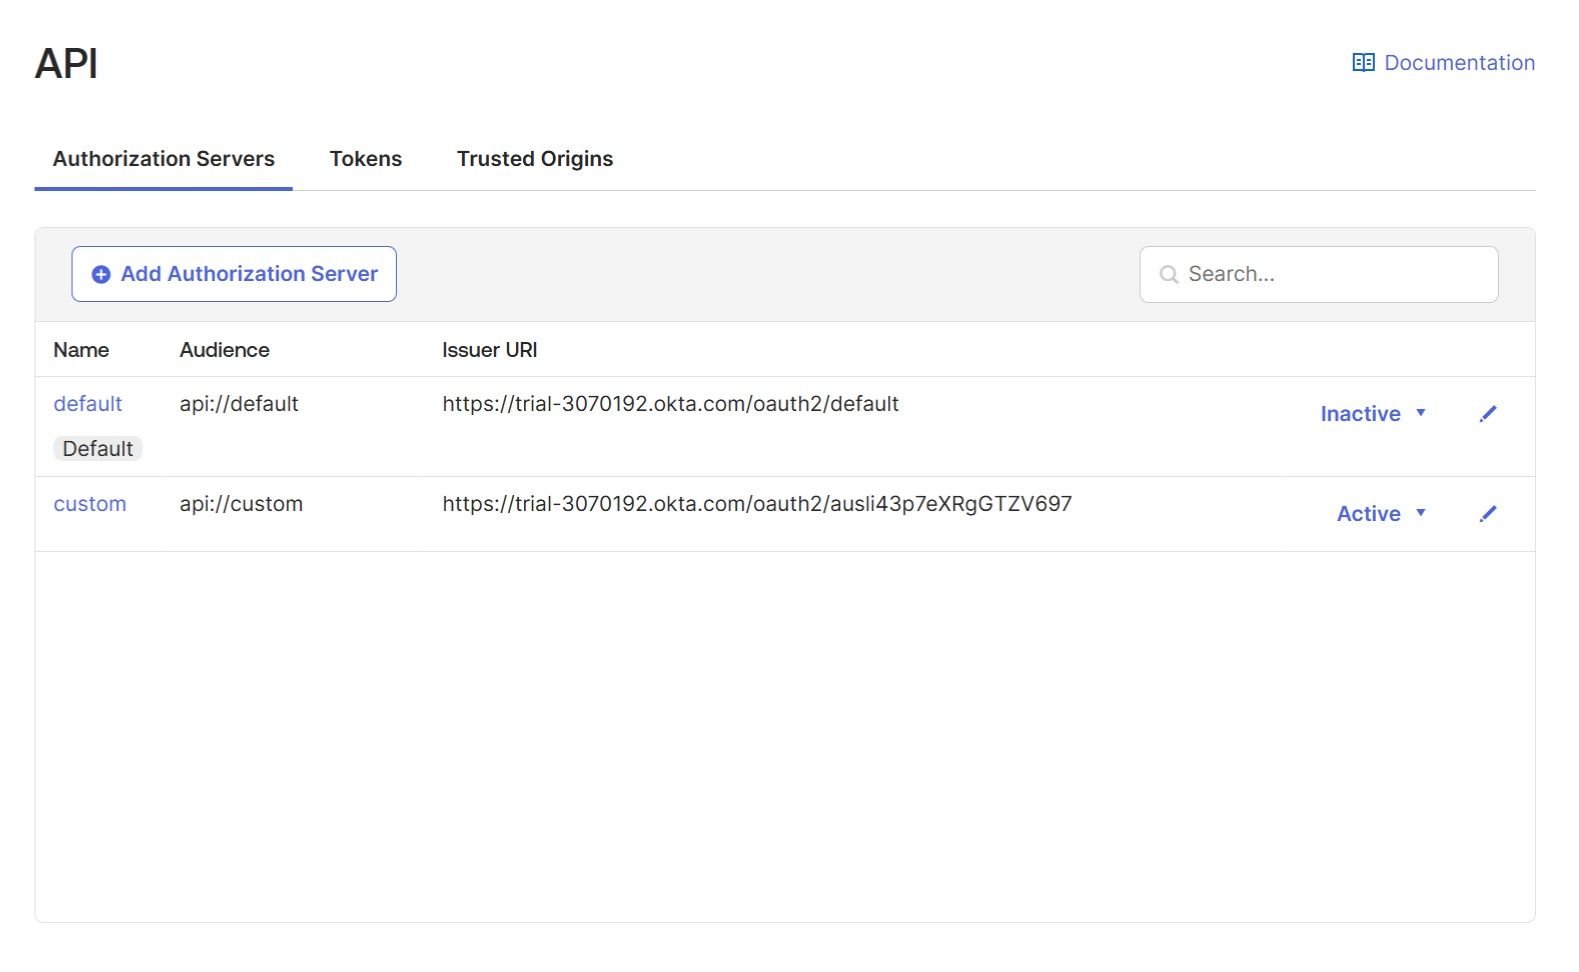
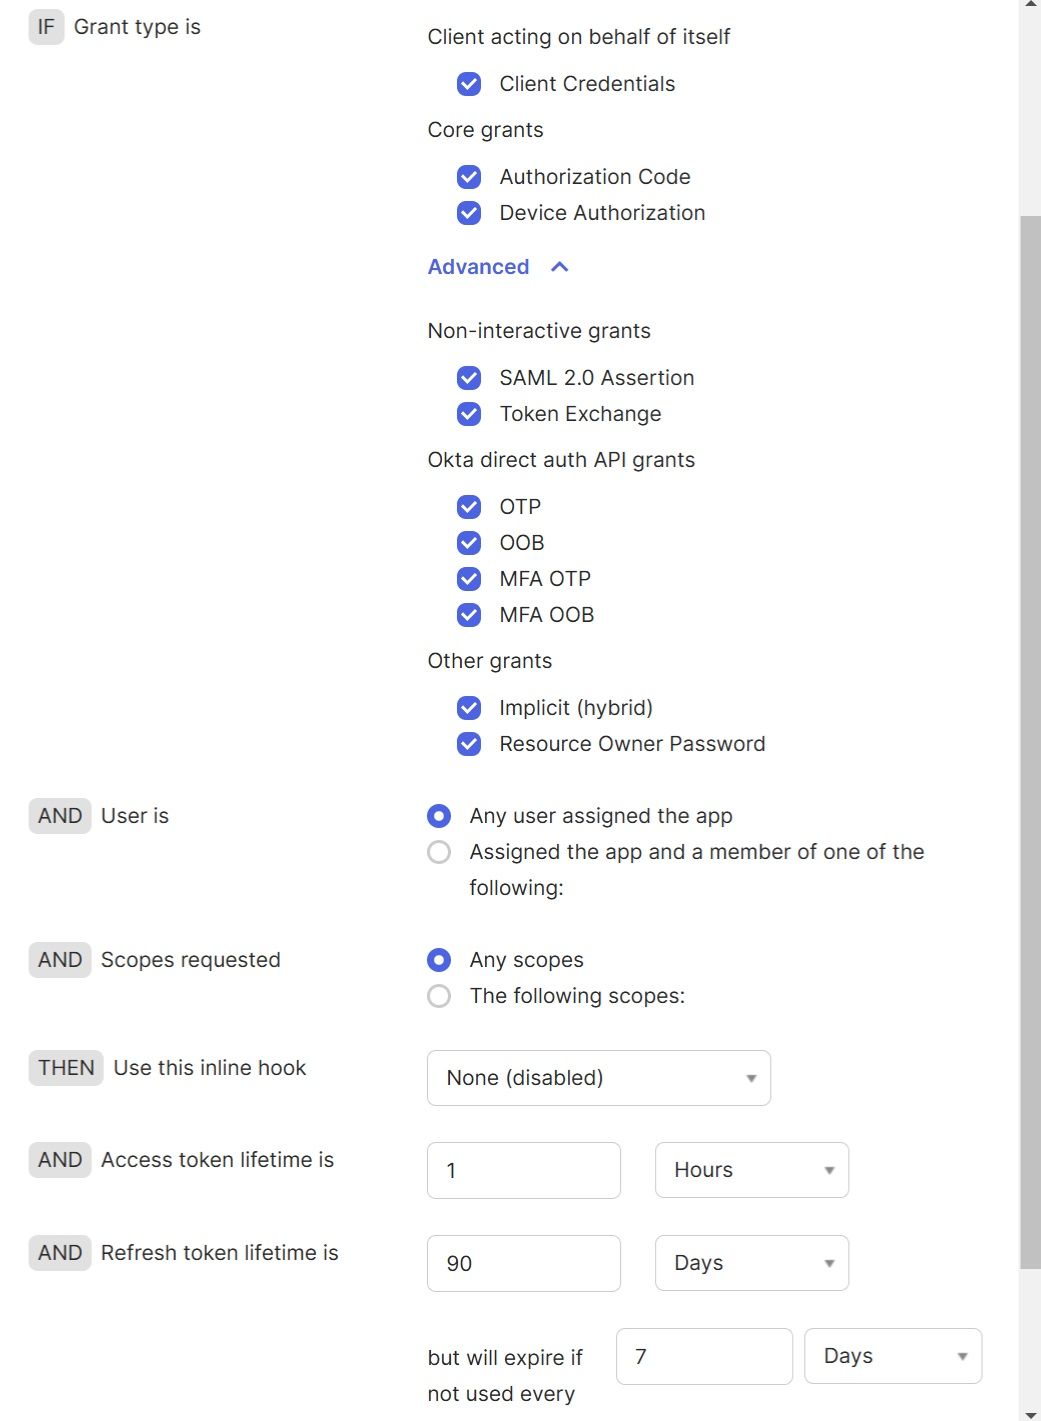
In the "Access Policies" tab of your custom authorization server, add a "Custom Policy" and a "Custom Policy Rule" (these are sample names, you can use any names you like). In the "Custom Policy Rule", you can also configure the "Access token lifetime" parameter (default is 1 hour):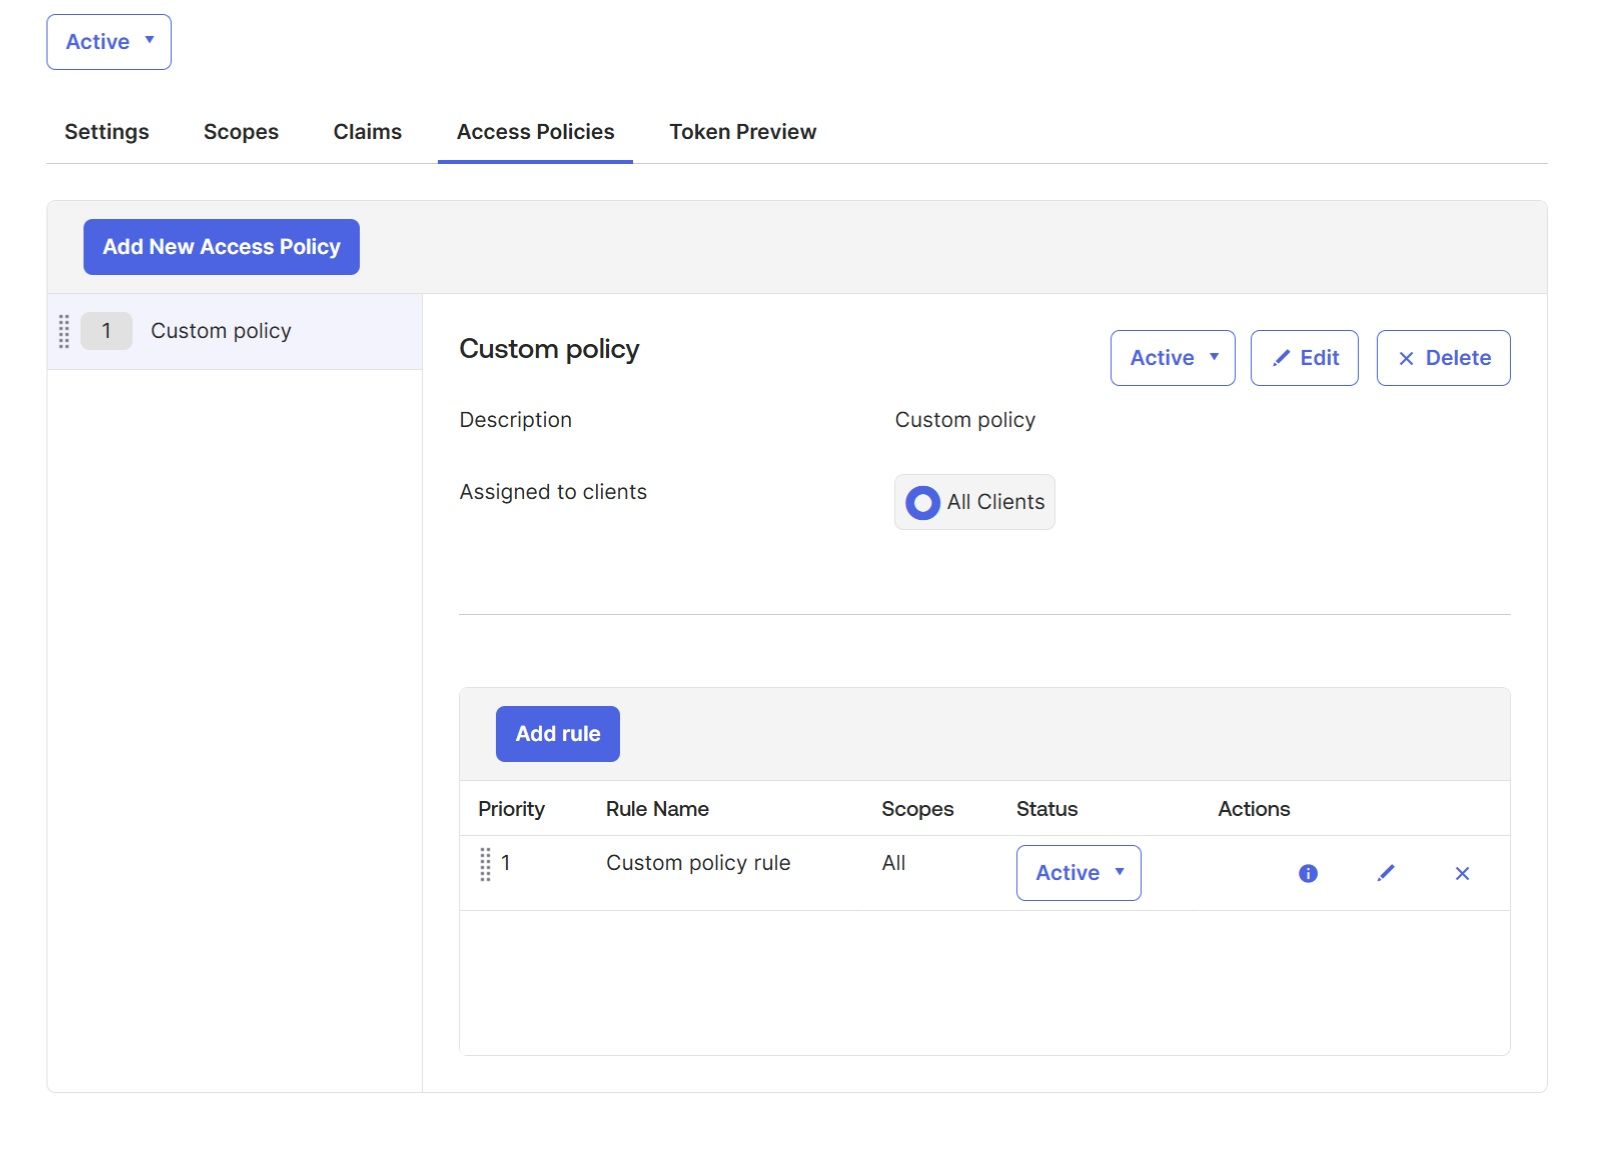
In the "Claims" tab of your custom Auth server, add the "groups" custom claim (this claim will contain all Okta "CDV-" groups the user belongs to). This claim must be included in the ID Token: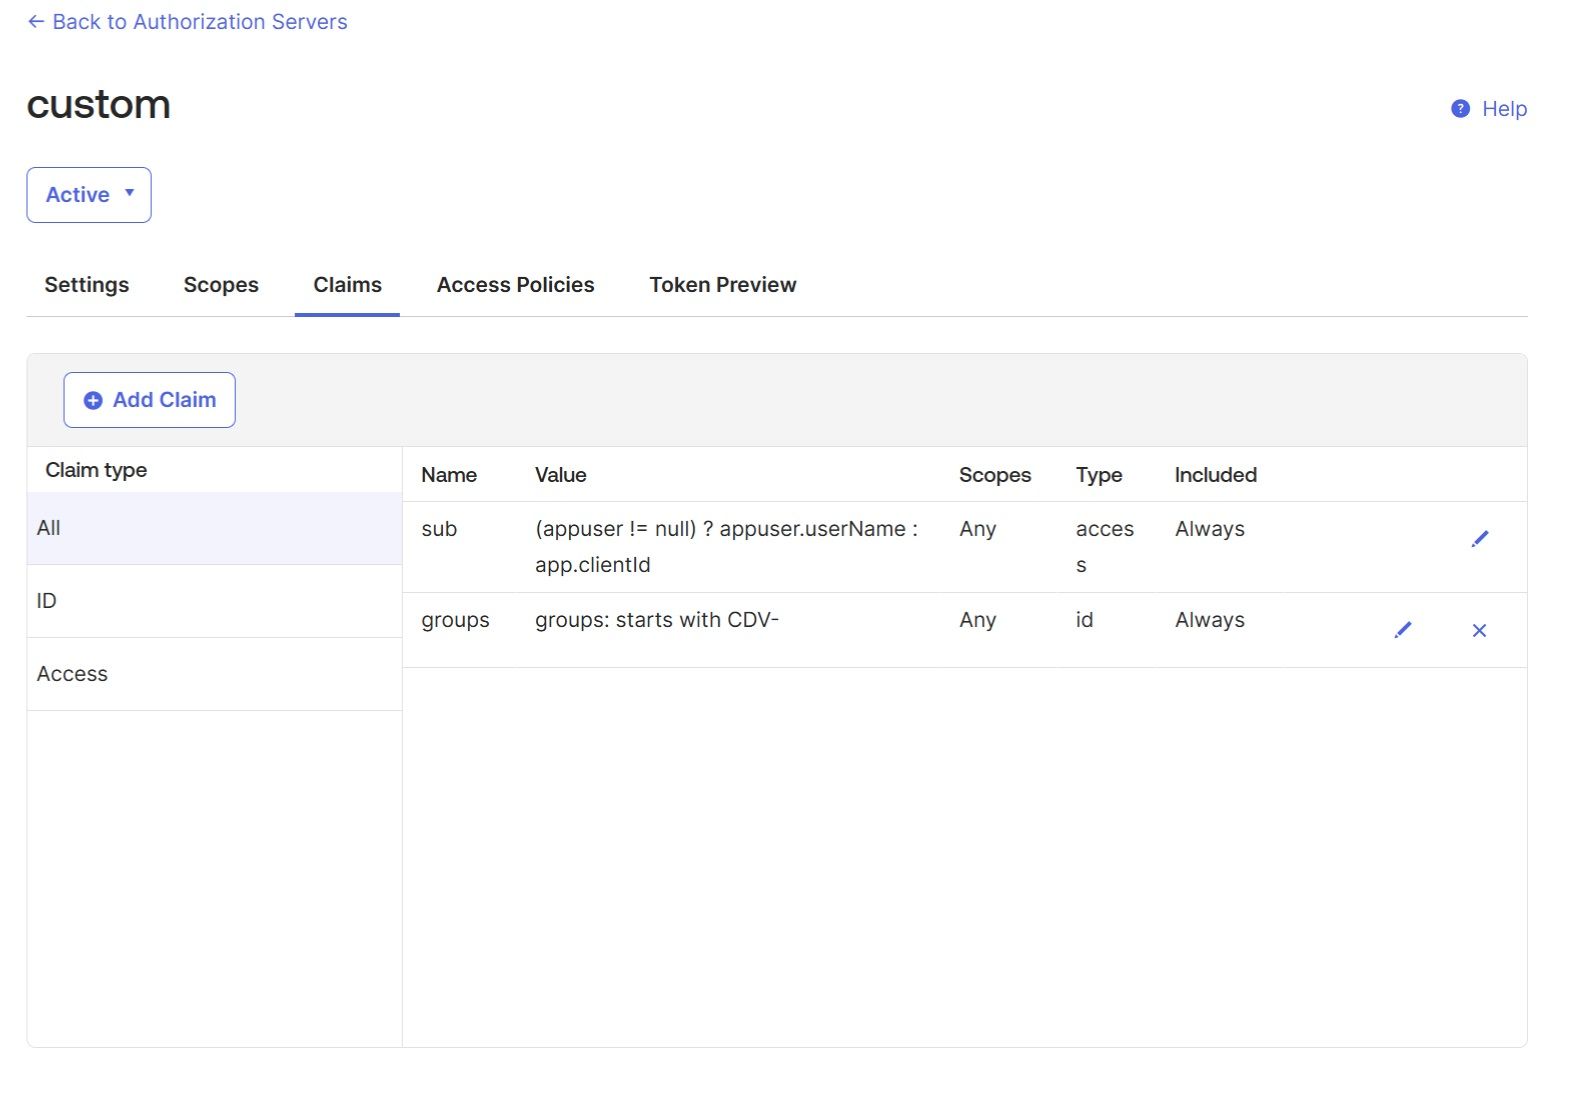

6. Add Identity provider on the CData Virtuality Authentication Management Component
Switch to the Authentication Management Component and start configuring the Okta integration. Choose the realm to use. Further “Identity providers” → “Add provider” → “OpenID Connect v1.0“: 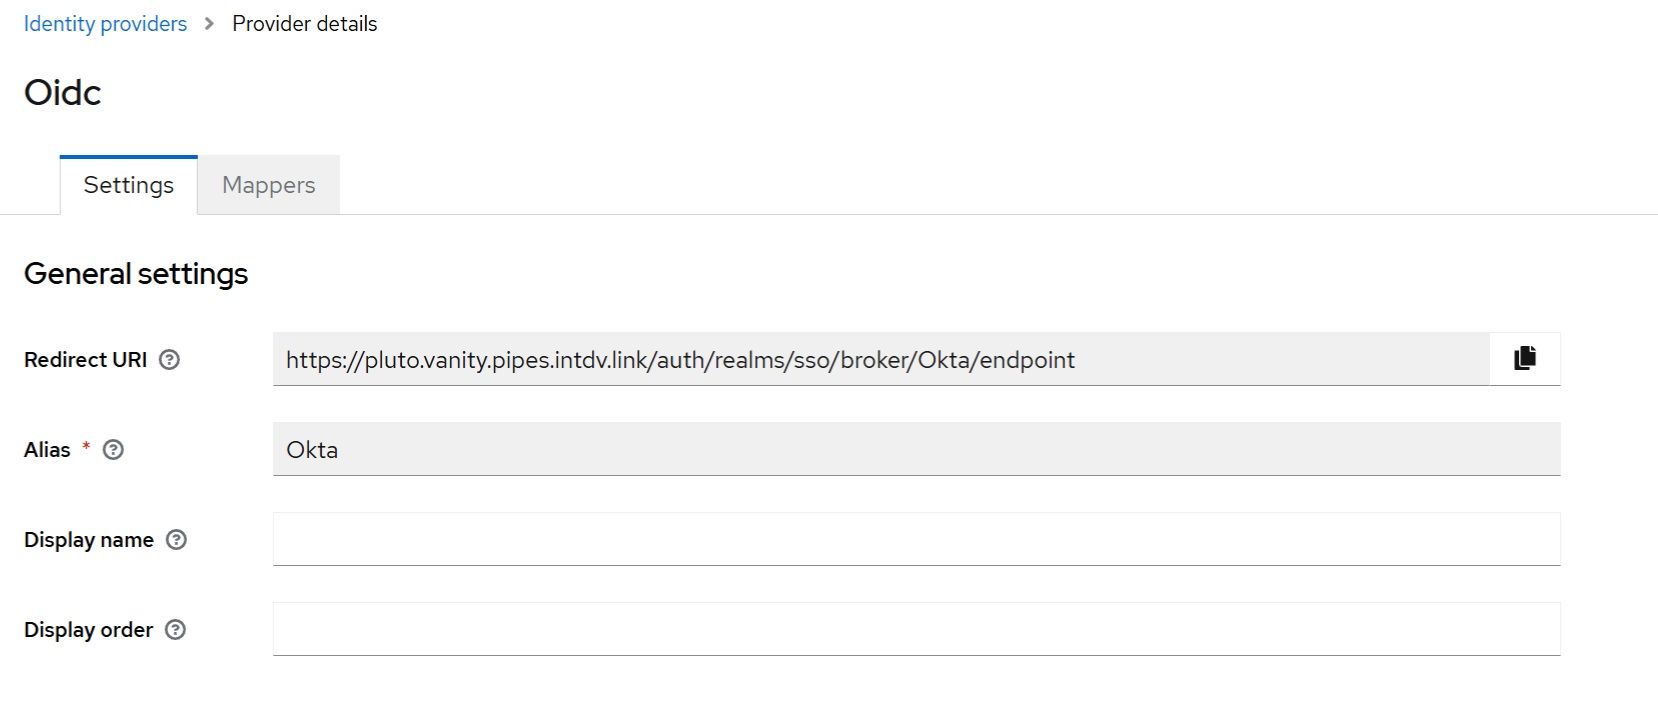
Since we created a custom Okta authorization server in Step 5, the following URL should be used as the Discovery Endpoint in the Authentication Management Component:
Metadata URI from the Authorization server added in Step 5 + /.well-known/openid-configuration.
Example: https://3070192.okta.com/oauth2/ausli43p7eXRgGTZV697/.well-known/openid-configuration (be careful, as this URL depends on your unique Okta instance ID and the unique name of the custom Okta authorization server).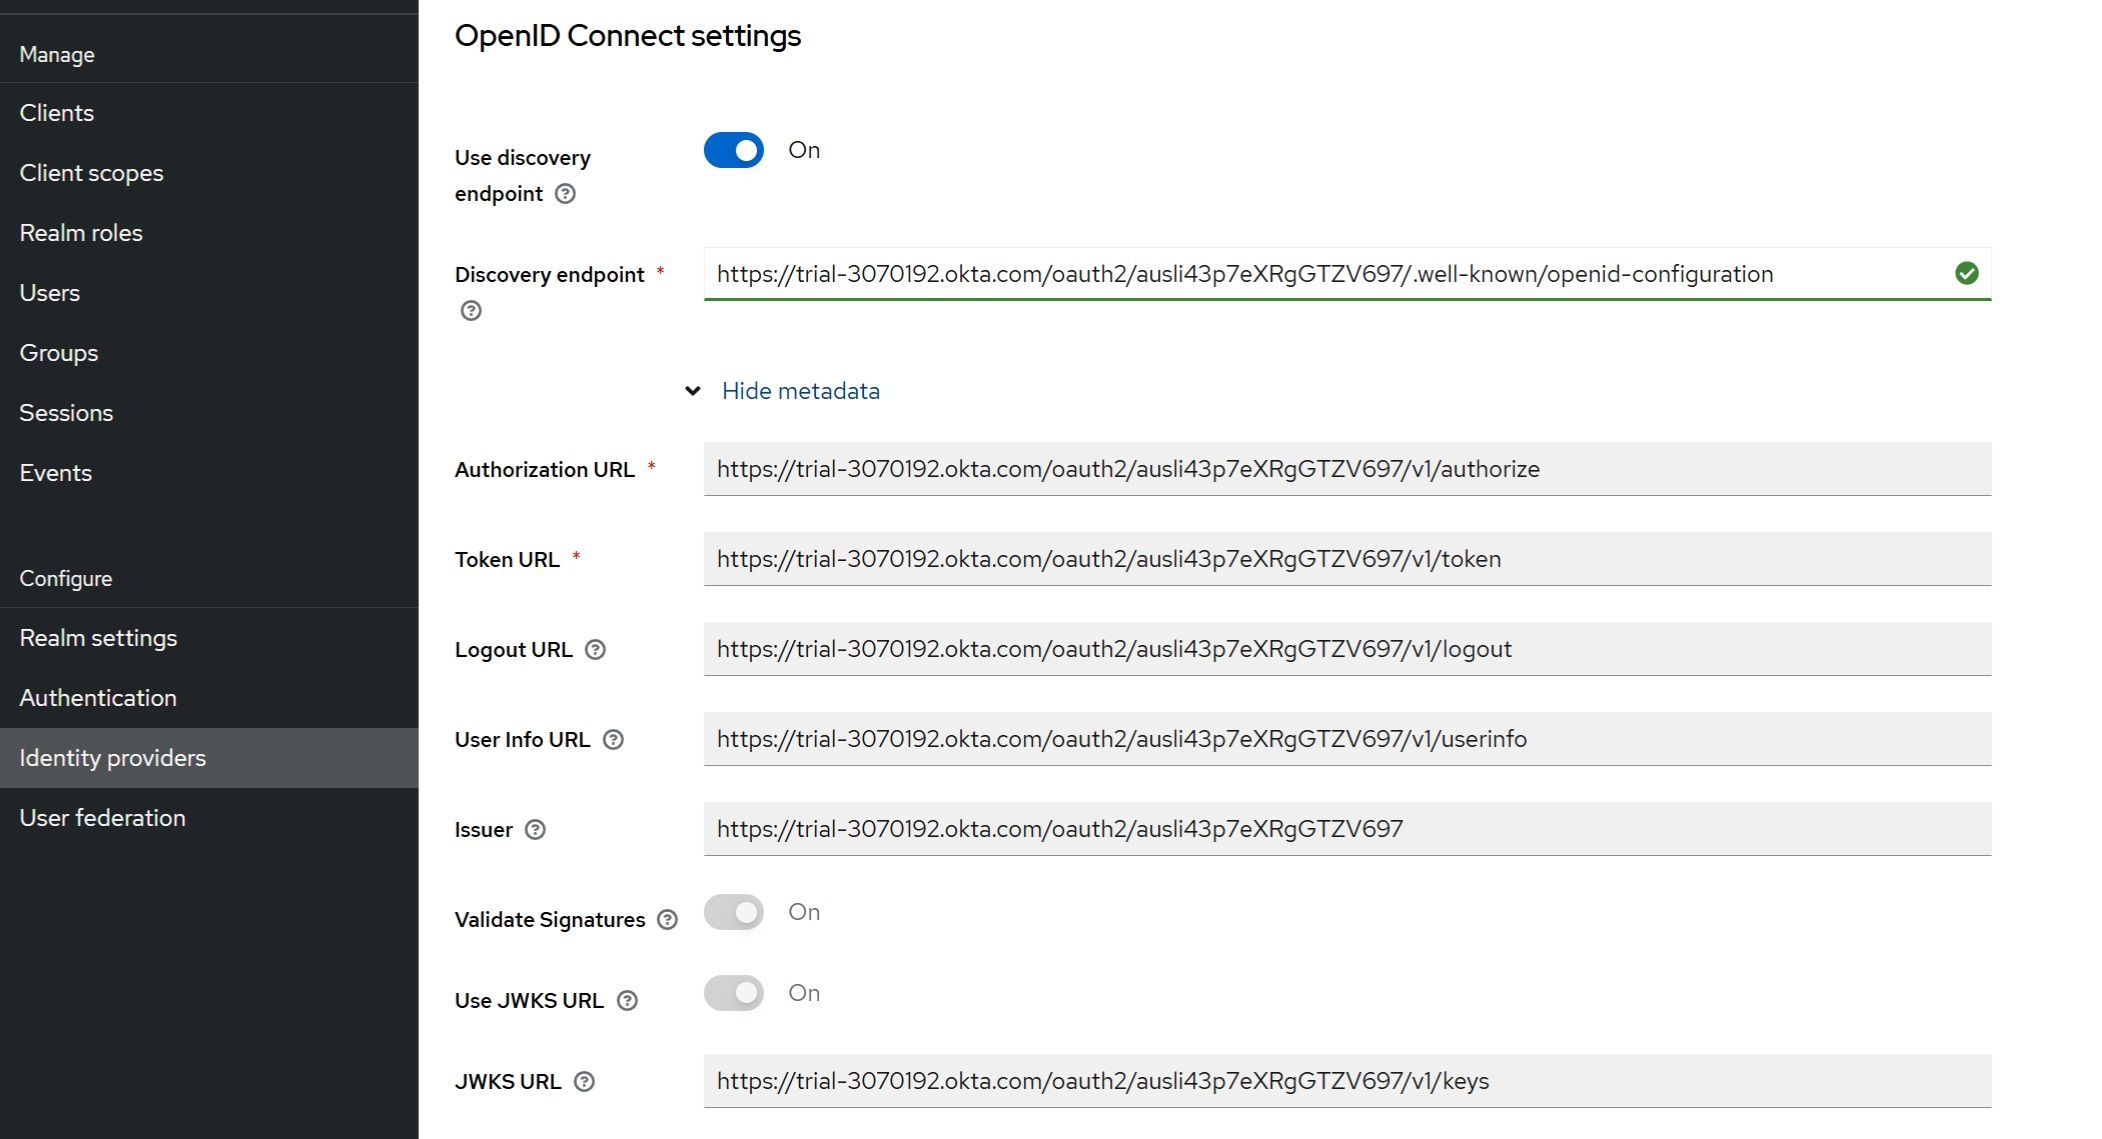
Once you provide the "Discovery Endpoint," Authentication Management Component will automatically populate all the required URL fields in the metadata section.
Next, enter the Client ID and Client Secret credentials in their respective fields, which you can retrieve from the Okta "DV Auth Service" application. Add “openid profile email” under the “Scopes”.
Save the new Okta identity provider.
Edit the newly created identity provider, enable the “Use PKCE” option, and select the S256 PKCE method.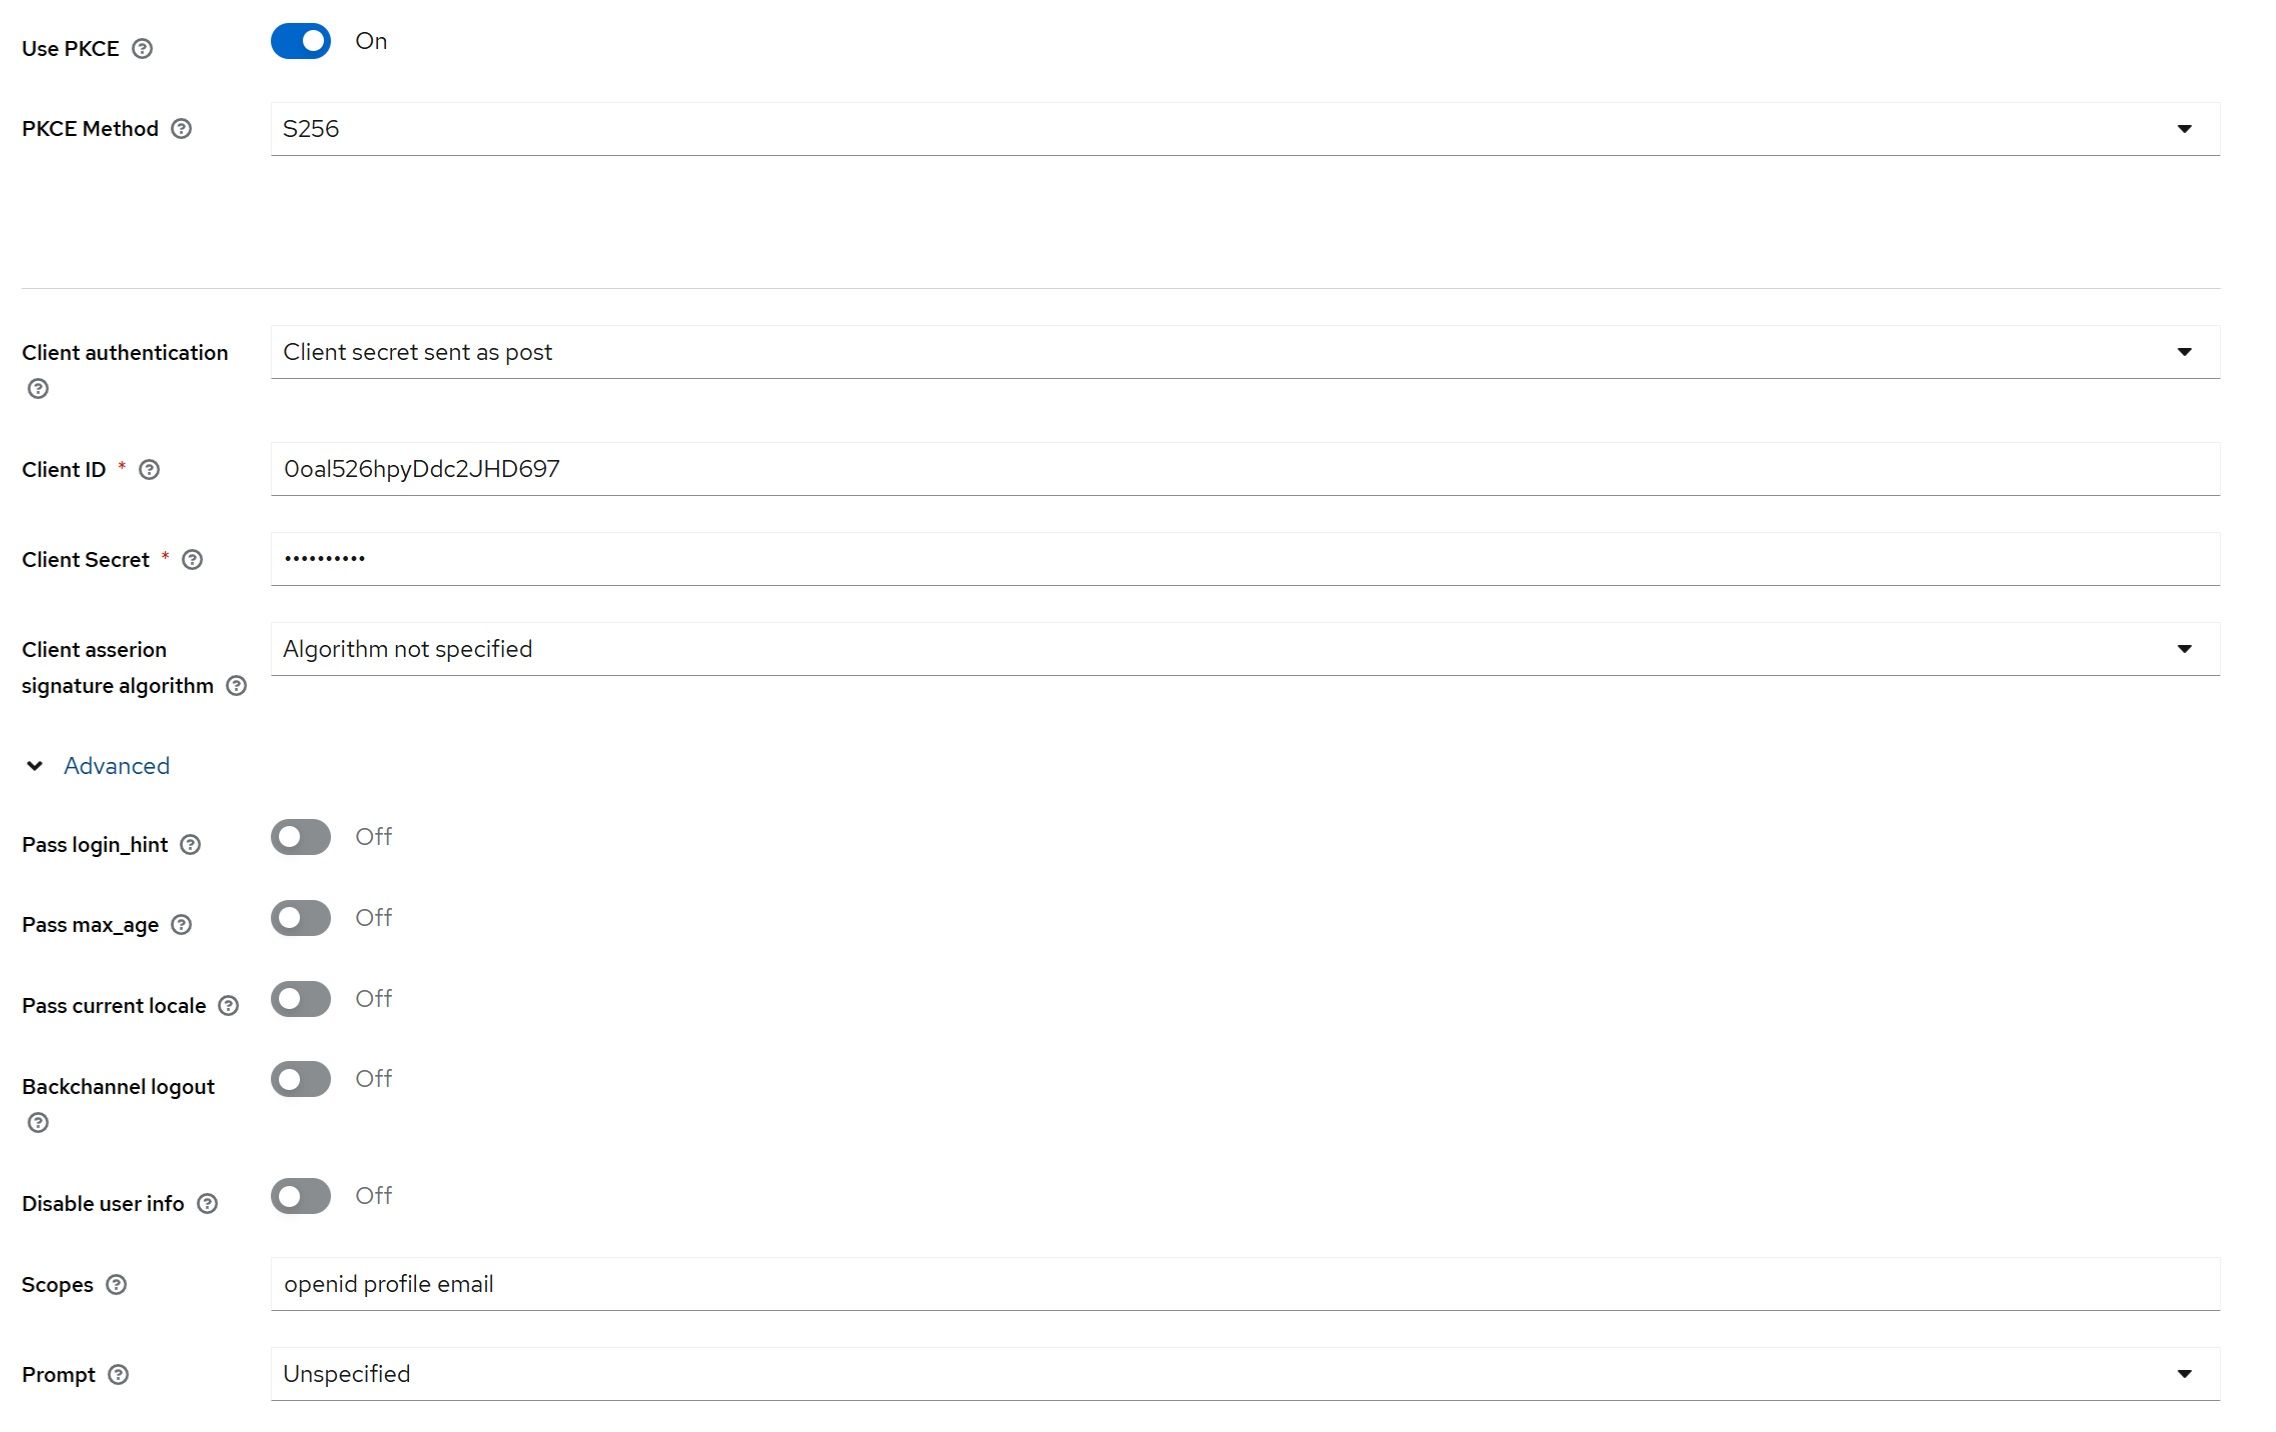
7. Add mappers to enable the import of Okta user groups into the CData Virtuality Authentication Management Component roles
Ensure that the Authentication Management Component already contains all the required CData Virtuality Server roles (e.g., admin-role and odata-role).
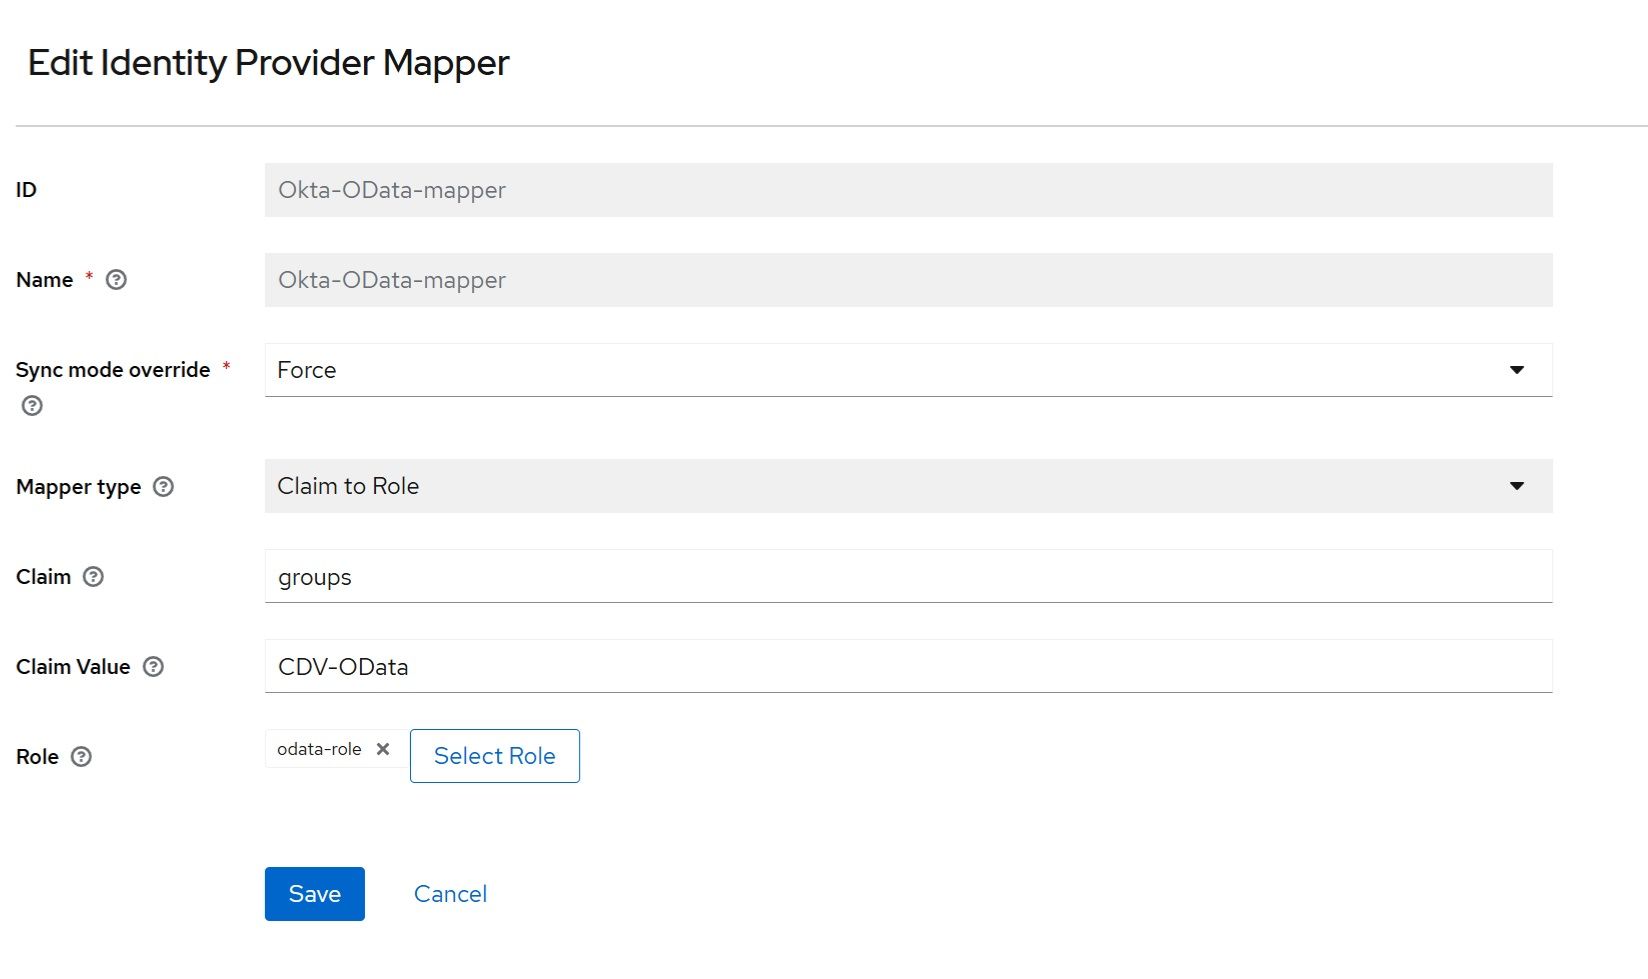
Navigate to “Identity Providers” → “Okta” → “Mappers” → “Add Mapper”. For this example, map the Okta CDV-Administrators group to the admin-role and the CDV-OData group to the odata-role: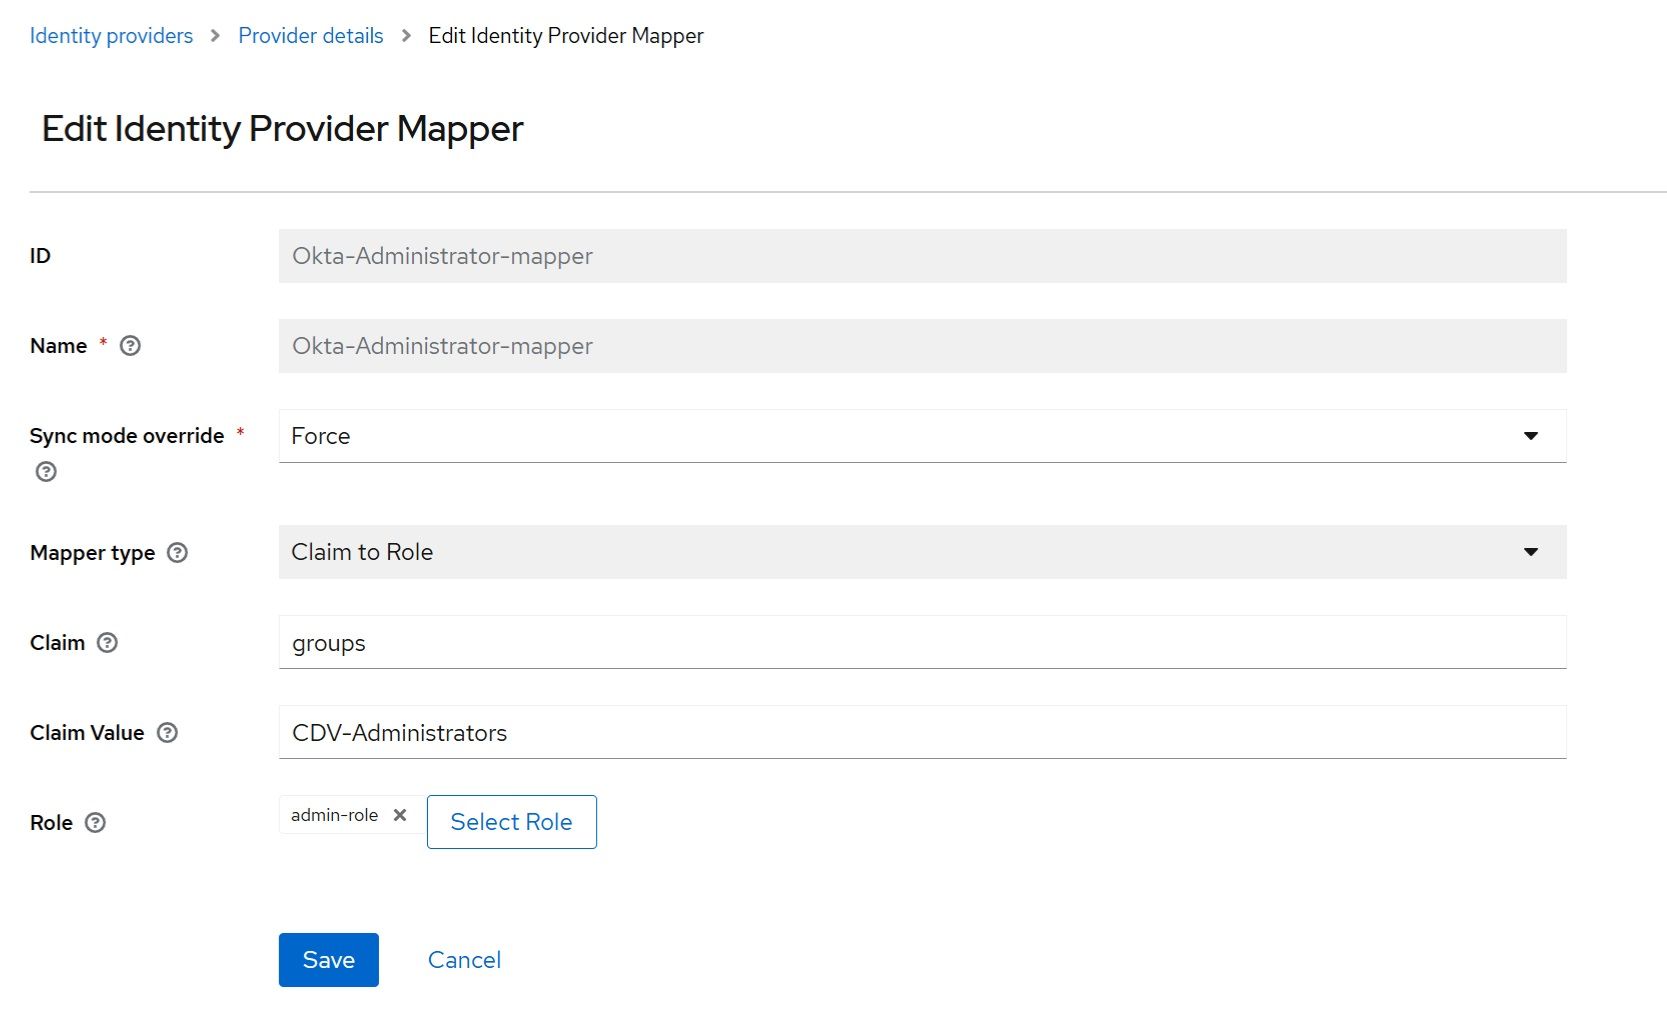
8. Configure the "Sign-in redirect URIs" in Okta application
Switch back to Okta and configure the "Sign-in redirect URIs" using the value of the “Redirect URI” generated by the CData Virtuality Authentication Management Component for Okta Identity provider in step 6: 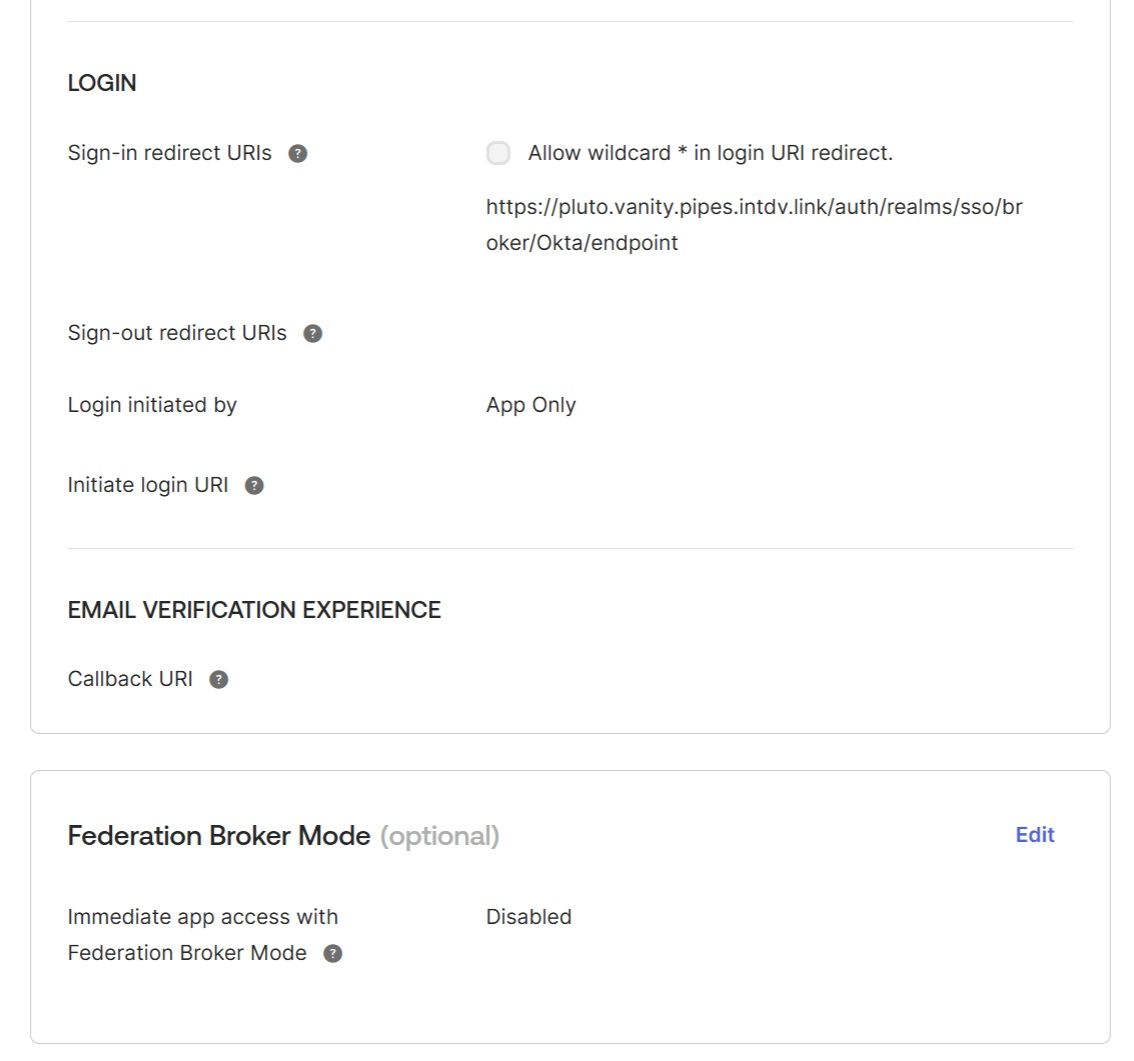
The Federation Broker Mode must be disabled.
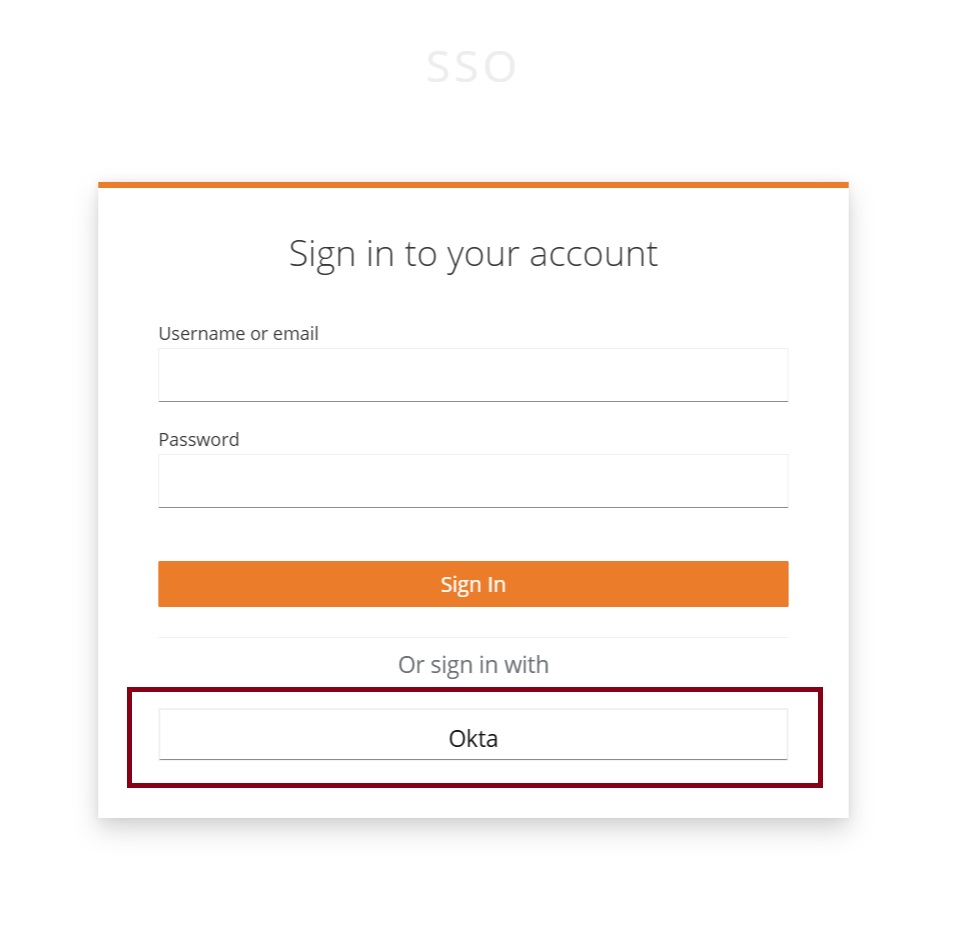
9. Log in using Okta authorization
Now, when you are logging in to the CData Virtuality Server via SSO, you see an additional “Okta” button. Clicking on it will redirect you to the Okta sign in page: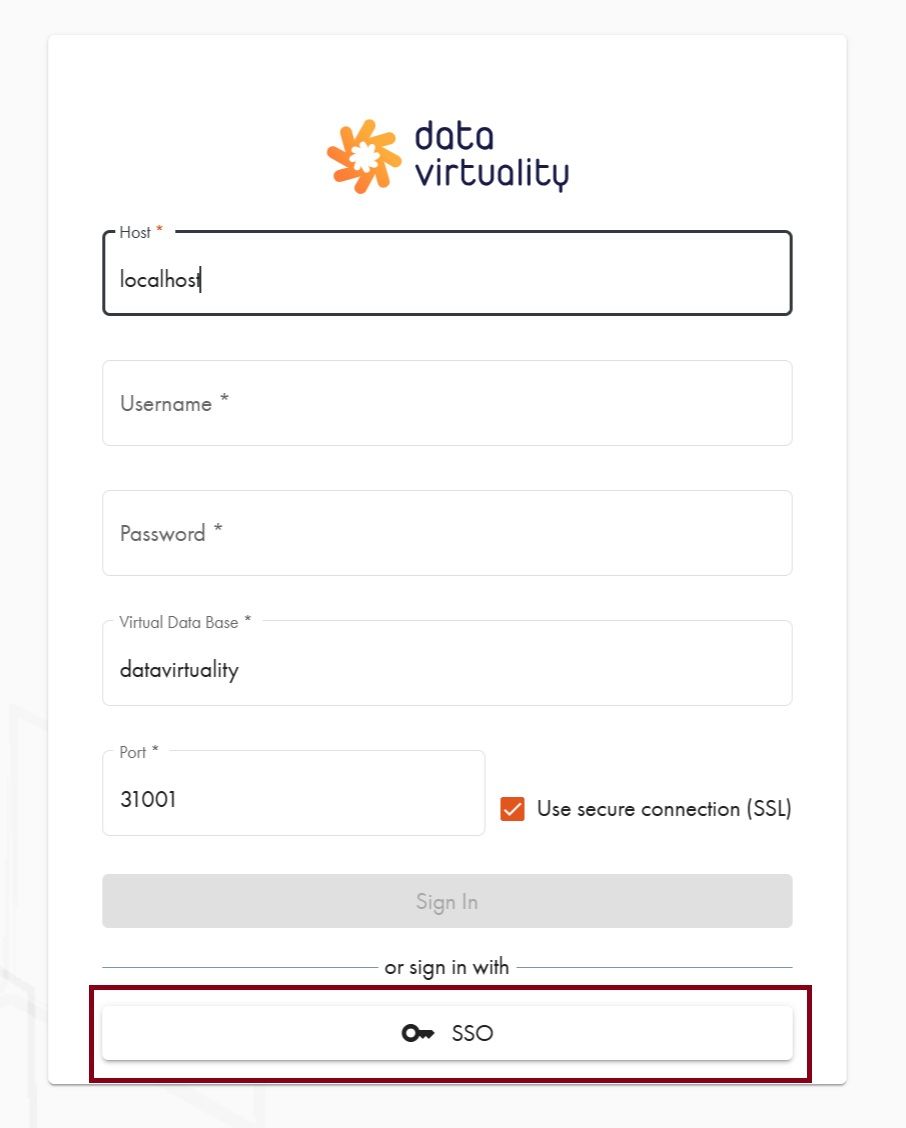
User Visibility
Okta users become visible in the CData Virtuality Server after their first login. They also appear in the list of users in the CData Virtuality Authentication Management Component. If none of the users have logged in at least once, they will not be visible and running SYSADMIN.refreshSSOUserCache will not load them.
Obtaining Access and Refresh Tokens
To obtain access and refresh tokens for Okta users, configure the following parameters for the Client in the CData Virtuality Authentication Management Component:
- Select your Realm;
- Navigate to your Client in the Authentication Management Component;
- Configure the following parameters:
Using Okta Access and Refresh Tokens in JDBC and ODBC Clients
To enable connection using Okta user access and refresh tokens in CData Virtuality Studio and JDBC/ODBC clients, follow these steps:
Load Okta users into the CData Virtuality Authentication Management Component.
Refer to the User Visibility section above for guidance on loading users.Obtain Okta users access and refresh tokens:
- Get authorization code:
- URL to obtain authorization code: <CData Virtuality Authentication Management Component URL>/realms/<your realm name>/protocol/openid-connect/auth?response_type=code&client_id=<your client id>&redirect_uri=http://localhost/;
- Select Okta and login using standard Okta authorization;
- Copy code from the redirected URL:

- Get access and refresh tokens:
- URL to get tokens: <CData Virtuality Authentication Management Component URL>/realms/<your realm name>/protocol/openid-connect/token;
- Parameters in request body:
- grant_type = authorization_code
- client_id = <your client id>
- client_secret = <your client secret>
- redirect_uri = http://localhost/
- code = from Step a
- Use the returned access and refresh tokens while connecting via CData Virtuality Studio and JDBC/ODBC clients.
- Get authorization code: