CSV Query Builder
You are looking at an older version of the documentation. The latest version is found here.
Starting the Builder in Data Virtuality Studio
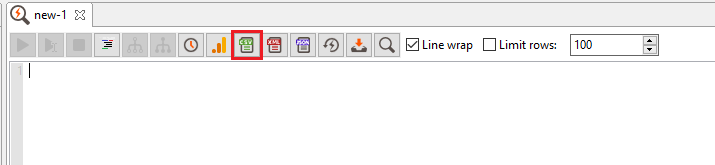
You can start the query builder from any SQL tab by clicking on the CSV icon bar:
Builder Elements
This is what a full query builder looks like:
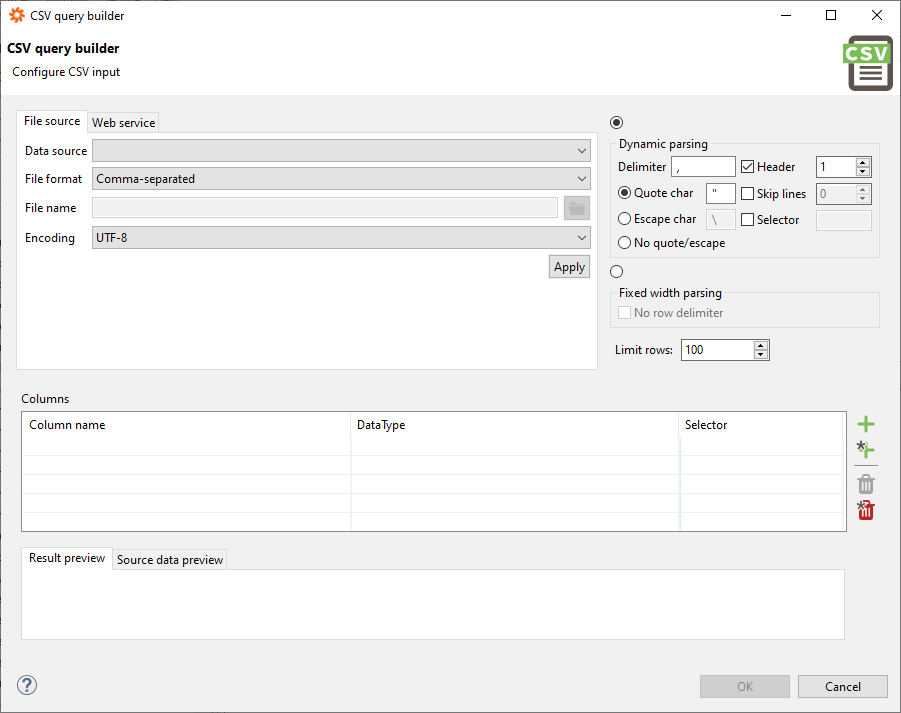
The builder consists of several panes described below.
Source Pane
The most important part of the builder is the source pane. You have two options to choose from:
- Select the File source tab and get your data from an accessible file in your file system. To use this, you must have a data source of type File connected and the appropriate right to read files in this directory.
- Select the Web service tab and get your data from a REST API which allows you to retrieve data via URL and maybe some additional parameters (please refer to the section Communicating with Web Services to see how to set the parameters for Web Service access). To get the data, you must have a data source of type Web service.
After selecting the correct data source, click on the folder icon and select a file from the opening dialogue:
Parsing Pane
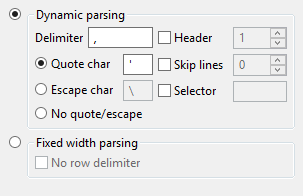
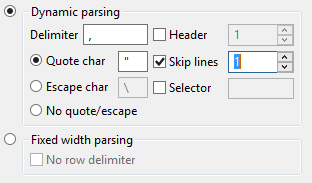
To have CSV data correctly mapped to a table, use the parsing pane to specify the parameters that determine how to parse the data and create the table based on it. The most frequent settings here are:
- Delimiter (character marking a new column)
- Quote char (special character to designate text)
- Header (line or row containing the column names)
- Skip Lines (only import the data starting from line x+1)
Always choose the data types for your columns carefully to avoid getting errors. The safest option is to select the type STRING if you are not sure.
Preview Pane
This pane contains two tabs that help you get the query builder to do as you wish. You can use the tab labelled Source data preview to check what the actual data looks like. The data will be presented as a simple text file. You can use this tab to see what you need to specify as a delimiter, quote char, and if you have a header line.
The Result preview tab shows you what you would get if you finished your work right now and executed the statement that the builder generated. If you are not satisfied with the result, re-check your parsing settings and your column settings:

Using the Query Builder to Import CSV Data
Getting the Raw Data (Source Pane)
The first step is to get the raw data from your source (in this guide, we use a file data source and access a local file). If you want to retrieve data from a web service, please check the section Communicating with Web Services first.
Start the query builder, as described earlier, from any open SQL editor tab by clicking on the icon showing a down arrow and selecting Open CSV query builder from the menu. Now you need to get the data. In our example, we assume to have a data source named filer, which points to a file system folder on the system where the Data Virtuality Server runs. After selecting the data source from the list, click on the folder icon and select the file you want to import. In this example, the selected file is forecast_canonical.csv (it can be obtained here) and contains some weather information.
You also need to specify an encoding for your data:

Please note that no matter how you get the desired data, you always have to specify an encoding; the most frequently used ones are UTF-8 and windows-1252.
When you are finished, click OK and proceed.
Viewing Data and Setting Parsing Options (Preview Pane and Parsing Pane)
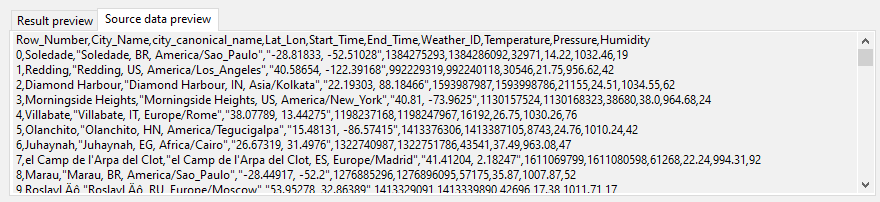
After clicking OK, the Data Virtuality Studio will automatically try to detect the columns based on the set parsing options. If you are unsure about the parsing options, switch to the tab Source data preview. As you can see from the screenshot below, this is ideal to see how the CSV has the columns separated and to see if any quotation character is used:
Now we can set the parsing options to have ',' as a column delimiter and ' " ' as a quote character. We also see that the first line contains the column names, but we will ignore this for now. The settings in the parsing pane should look, according to the data, as follows:
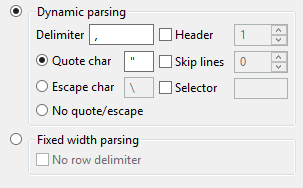
Note that the delimiter '\t' is used if a TAB character separates the columns.
Autodetecting Columns (Column Pane and Preview Pane)
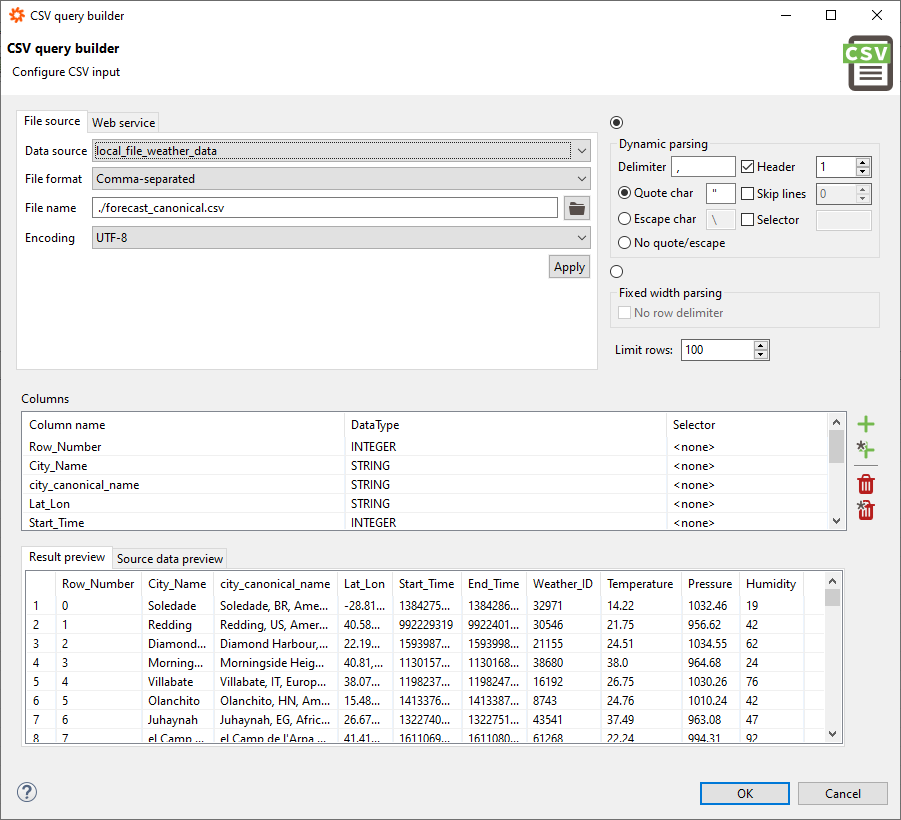
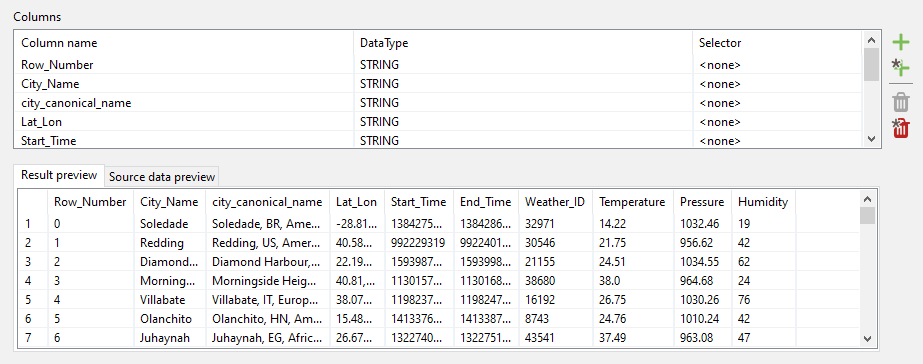
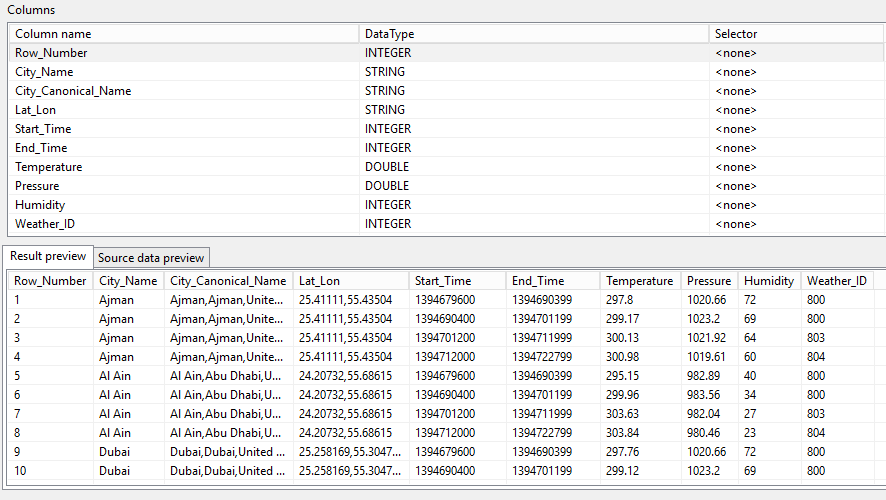
If we have selected everything correctly, we go to the column pane and click on the small plus icon with the asterisk. This will automatically detect all columns according to the parsing option we have just set. Note that the first row of data is implicitly always considered to contain the column names. Also, all columns are by default set to STRING data type. In the preview pane, we can go back to the tab Result preview and check what the table would look like if we finished right now:
Adjusting Column Data Types (Column Pane and Parsing Pane)
Before changing the columns' data types, we need to remove the first line we see in the preview pane. This line contains strict text, and trying to cast data to anything which is not text-based would fail with an error similar to this one:

We go to the parsing pane and tick the Skip lines checkbox, ensuring that the number 1 is in it. This way, the first line of the CSV file will not be imported as data:
Now we are free to change the data types as we can.
Be cautious when selecting the data types. The whole import will fail if a single data record cannot be cast to the set type. The most secure option is STRING.
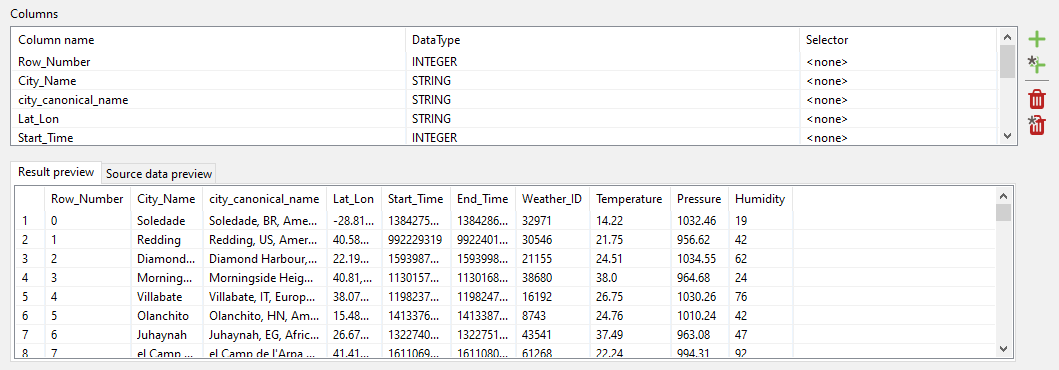
The screenshot above shows how we could specify the sample data types.
Reviewing and Finishing the Settings
We are now done and can double-check if everything is correct before finishing:
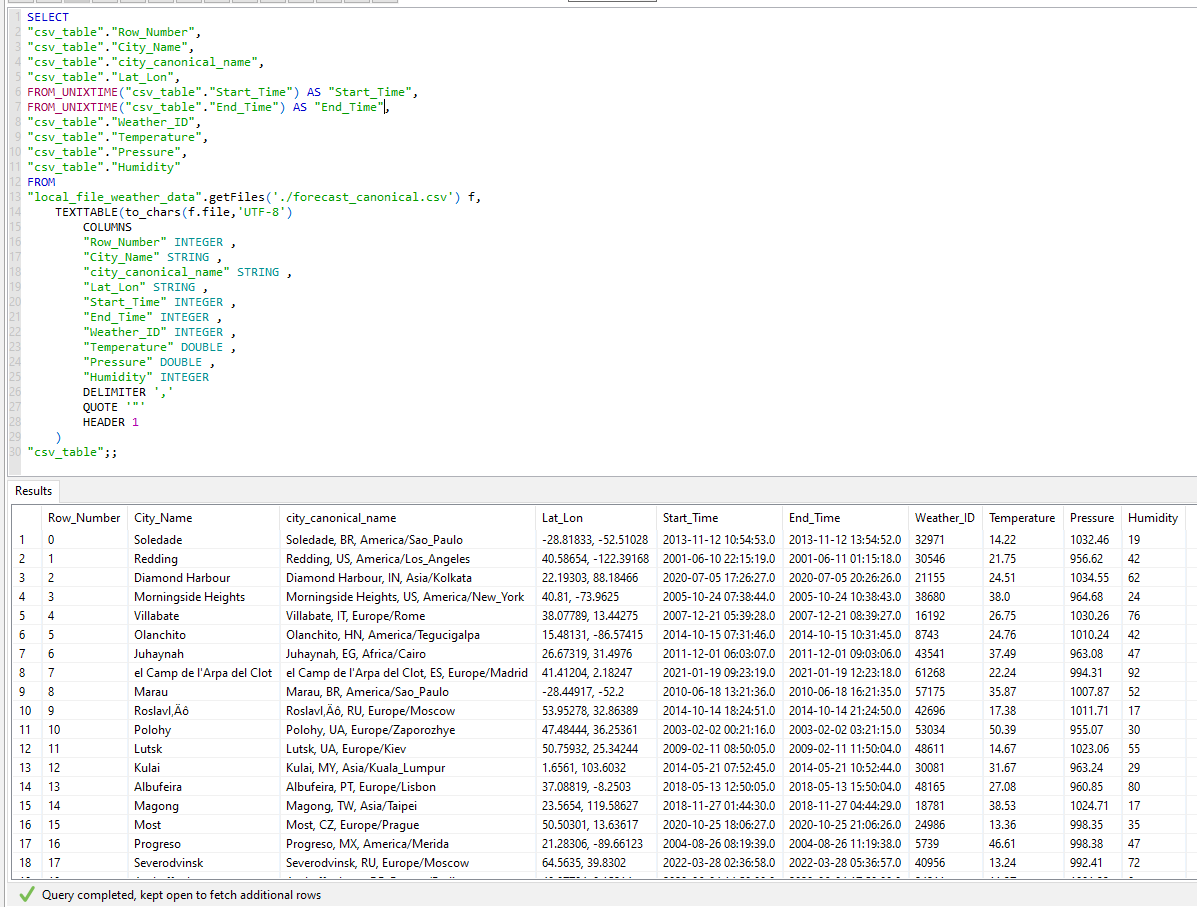
All is good, so we click OK to confirm that we now want the code for the CSV import generated. The Data Virtuality Studio will show the following code for the generated SQL statement:
SELECT
"xmlTable.idColumn",
"xmlTable.Row_Number",
"xmlTable.City_Name",
"xmlTable.city_canonical_name",
"xmlTable.Lat_Lon",
from_unixtime("xmlTable.Start_Time") as Start_Time,
from_unixtime("xmlTable.End_Time") as End_Time,
"xmlTable.Weather_ID",
"xmlTable.Temperature",
"xmlTable.Pressure",
"xmlTable.Humidity"
FROM
"local_file_weather_data".getFiles('./forecast_canonical.xml') f,
XMLTABLE('/data/row' PASSING XMLPARSE(DOCUMENT f.file )
	COLUMNS
	"idColumn" FOR ORDINALITY,
	"Row_Number" INTEGER  PATH 'Row_Number',
	"City_Name" STRING  PATH 'City_Name',
	"city_canonical_name" STRING  PATH 'city_canonical_name',
	"Lat_Lon" STRING  PATH 'Lat_Lon',
	"Start_Time" INTEGER  PATH 'Start_Time',
	"End_Time" INTEGER  PATH 'End_Time',
	"Weather_ID" INTEGER  PATH 'Weather_ID',
	"Temperature" DOUBLE  PATH 'Temperature',
	"Pressure" DOUBLE  PATH 'Pressure',
	"Humidity" INTEGER  PATH 'Humidity'
) "xmlTable"
;;
Now we can omit unwanted columns from the SELECT clause or apply built-in functions to them. For example, we can use the FROM_UNIXTIME function to convert the data of the columns Start_Time and End_Time to 'real' timestamps. This is now our final result: