
Connecting Analytical Storage
While CData Virtuality is primarily a data virtualization solution that typically does not require analytical storage, it can be configured as the destination for materialization and replication. This step step-by-step guide explains how to set up analytical storage using either the CData Virtuality Web UI or CData Virtuality Studio.
For a list of supported databases, refer to the Data Warehouses list.
Please note that Microsoft SQL Server and MySQL are deprecated. For more details, see the documentation: Connecting to Analytical Storage.
Configuring Analytical Storage (CData Virtuality Web UI and SaaS)
Start the web browser, navigate to http://localhost:8080/, and open the WEB INTERFACE on the WELCOME screen.
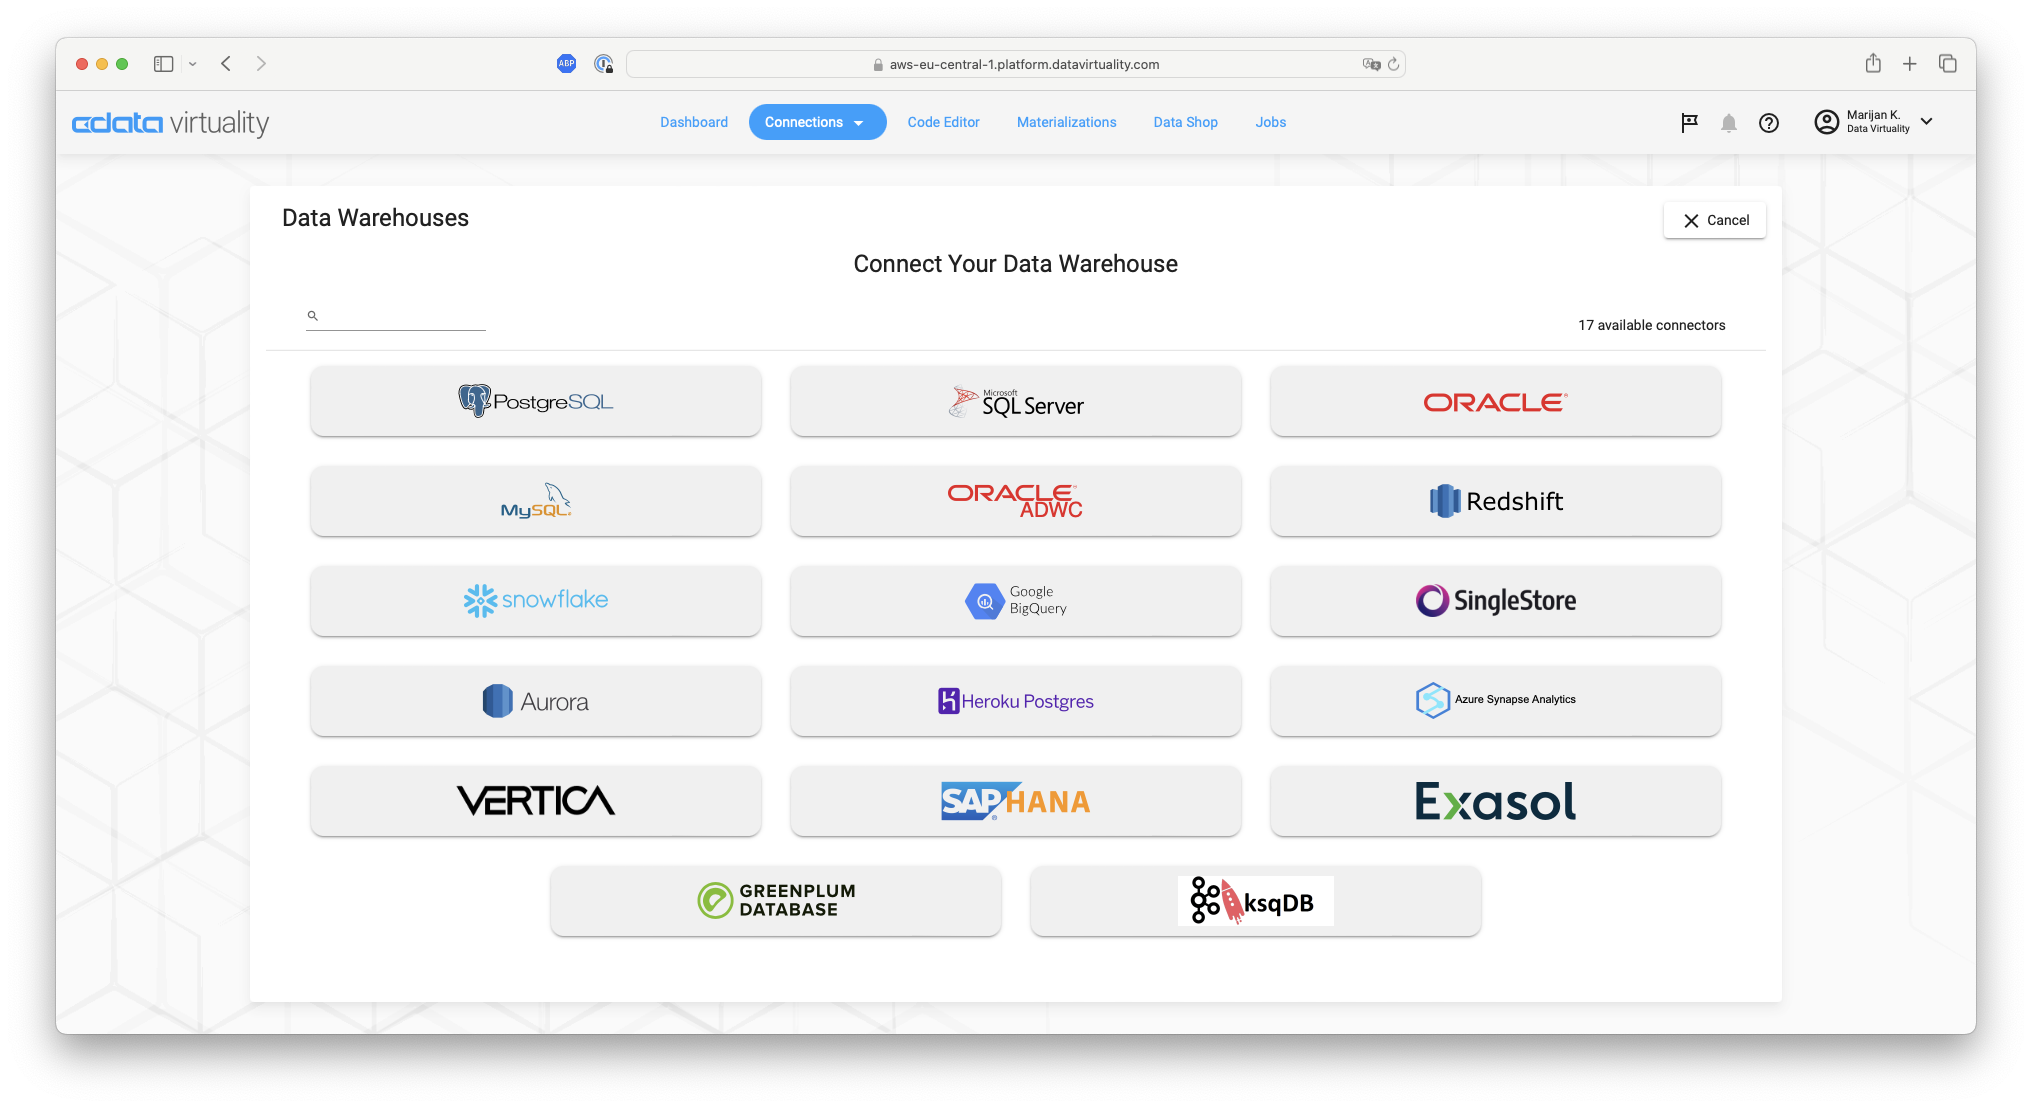
In the CData Virtuality Web UI, click on the Data Warehouses tab:

Click the +Connect button to view a list of available Analytics Storage options. For this example, select Snowflake as the analytical storage:
Enter the connection details for Snowflake:
Parameter | Description |
|---|---|
Data source name | Name of the data source; optional |
URL | URL to connect to Snowflake (e.g. https://xxxx.xxxx.xxxx.snowflakecomputing.com ) |
User | Your username for Snowflake |
Password | Your password for Snowflake |
Warehouse | The data warehouse you want to use |
Database | The database you want to use |
Schema | PUBLIC (default value) |
Default Schema | PUBLIC (default value) |
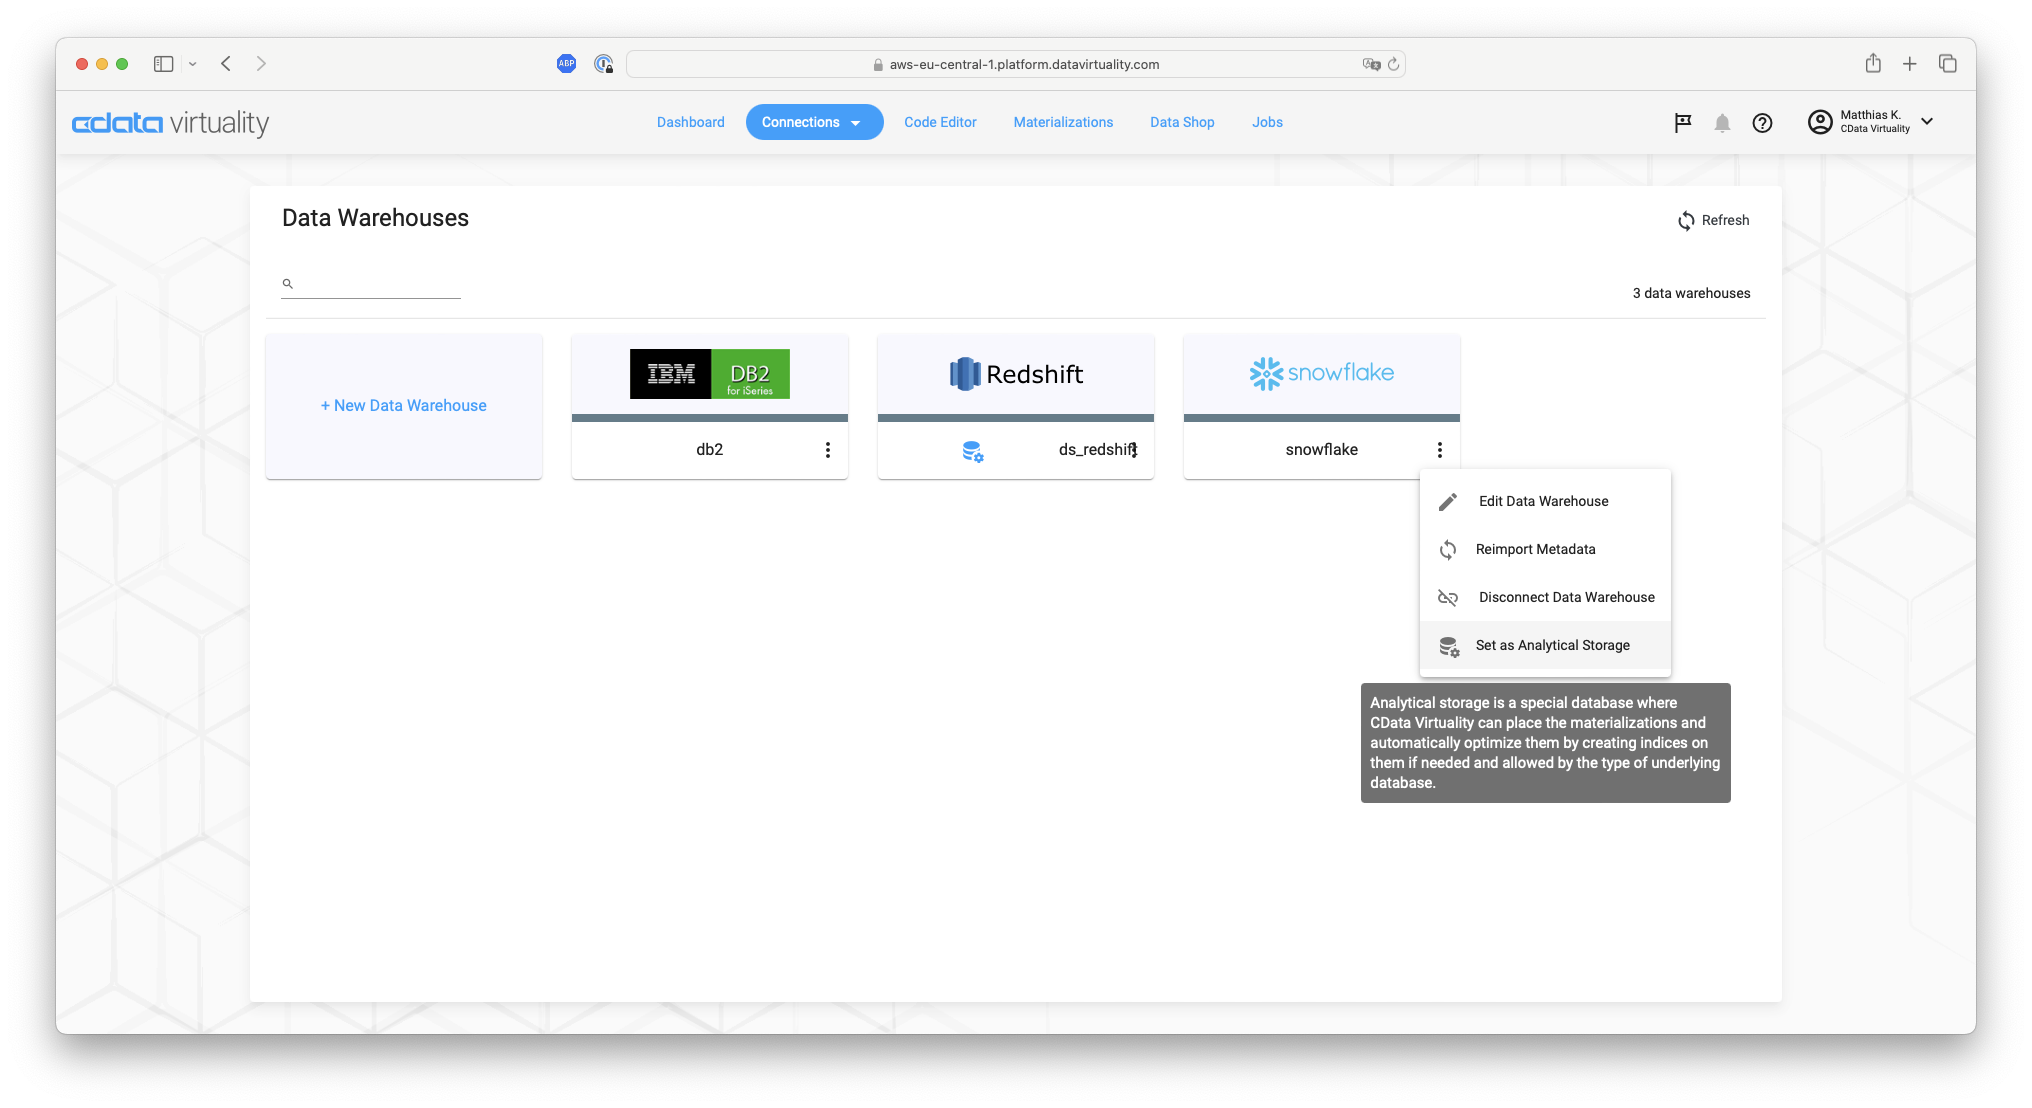
After entering the connection details, click Connect. Once the connection is established, Snowflake will appear in the list of data warehouses under the Data Warehouse tab:

Click the vertical dots in the lower right corner of the Snowflake icon and select Set as Analytical Storage from the context menu:
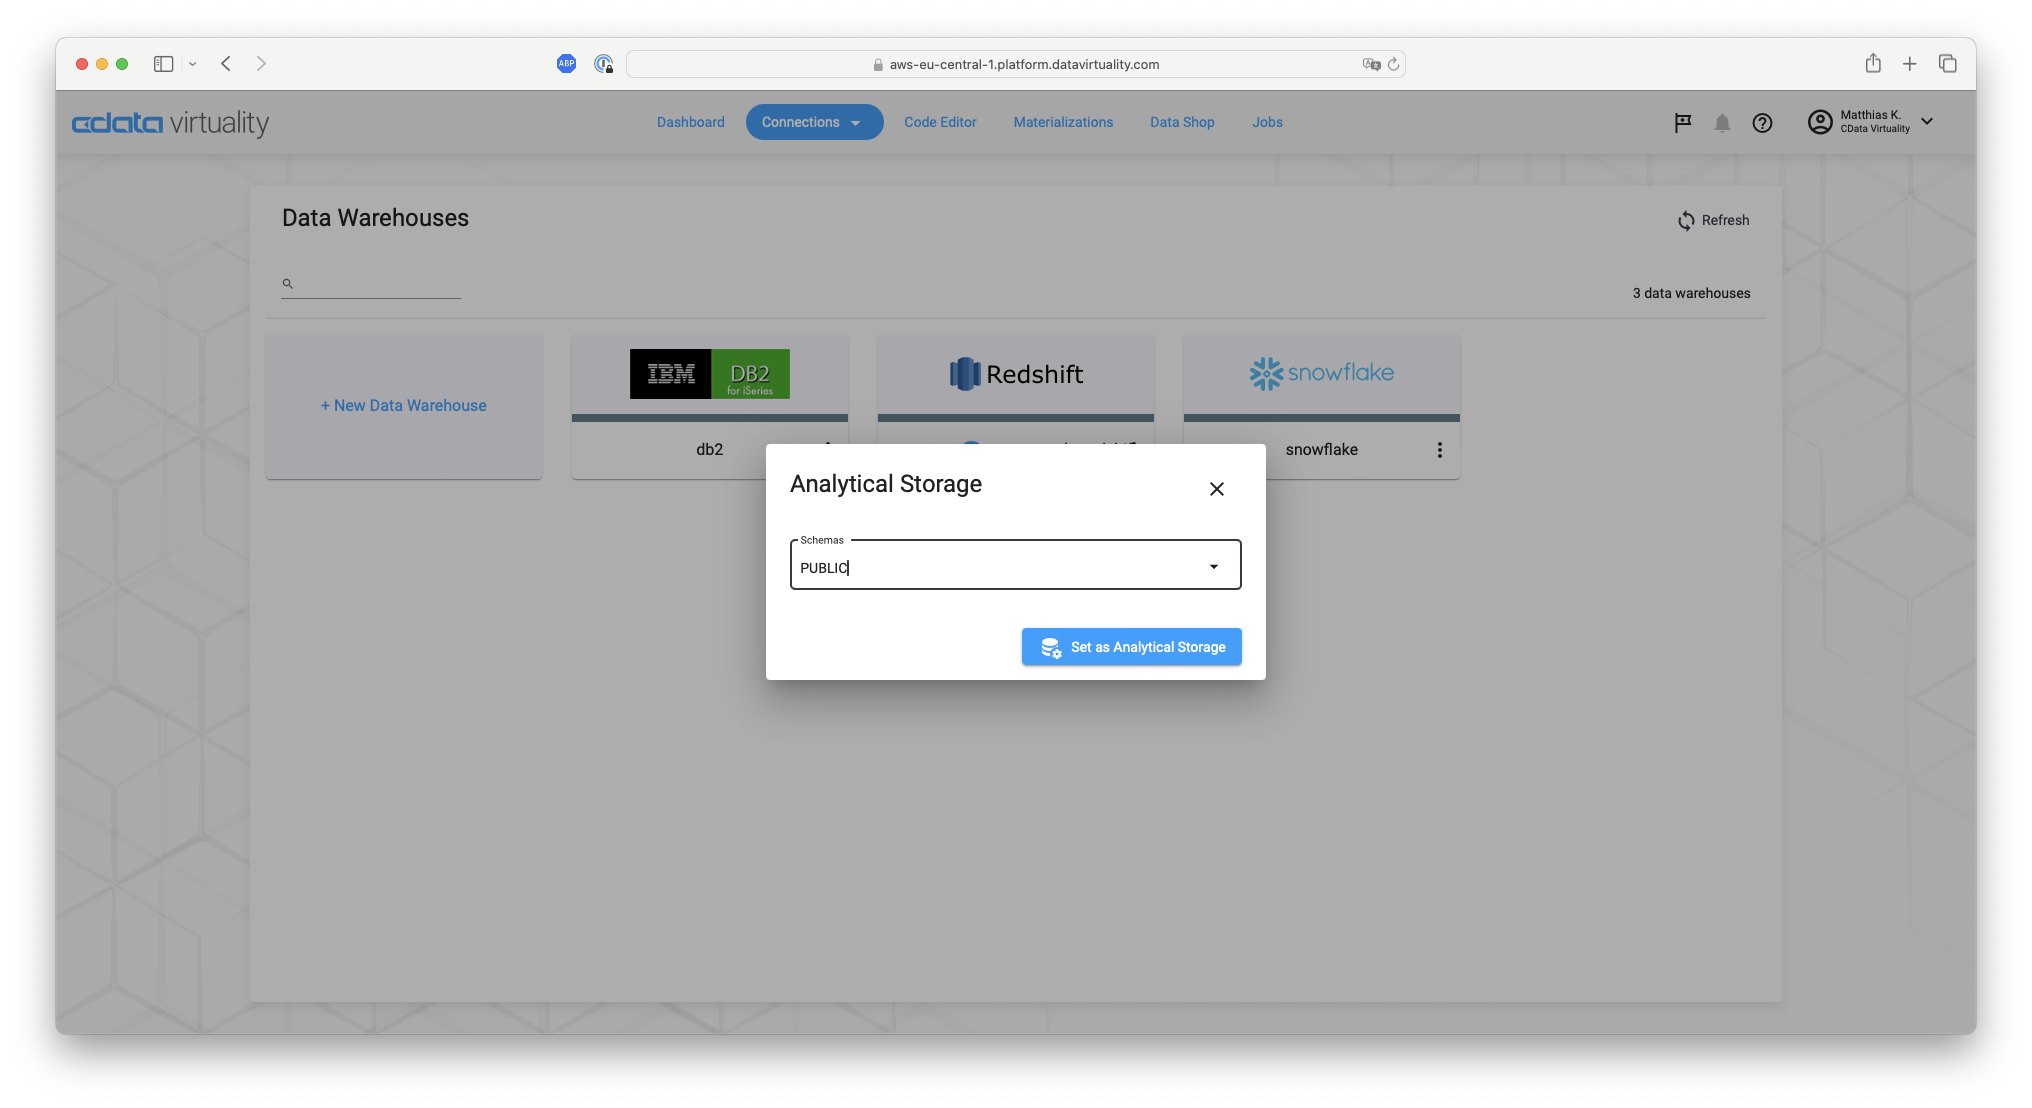
Type in the desired Schema (e.g., PUBLIC) and click the Set as Analytical Storage button finalize the configuration:
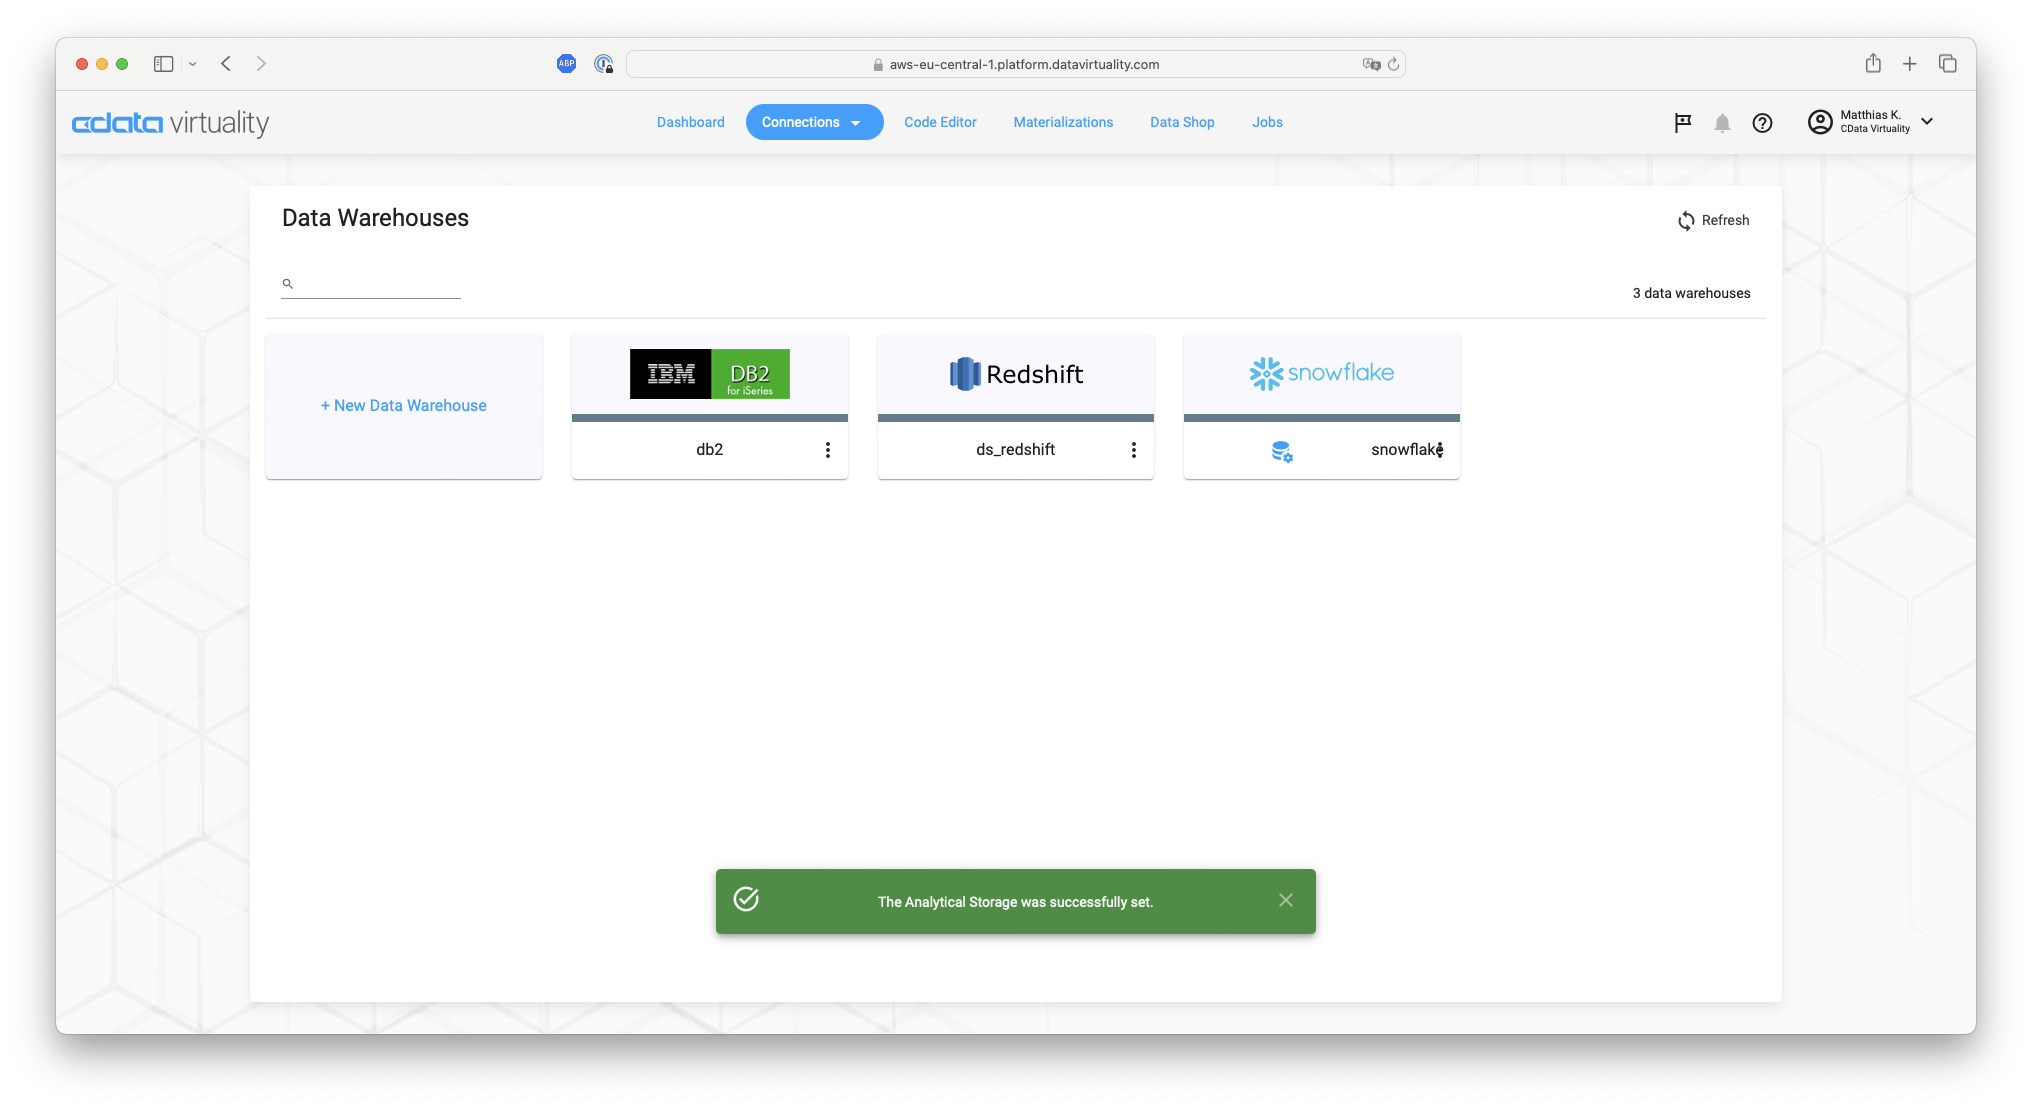
Once the green bar with the message The Analytical Storage was successfully set appears, the analytical storage configuration is complete:
Configuring Analytical Storage (CData Virtuality Studio; On-premise)
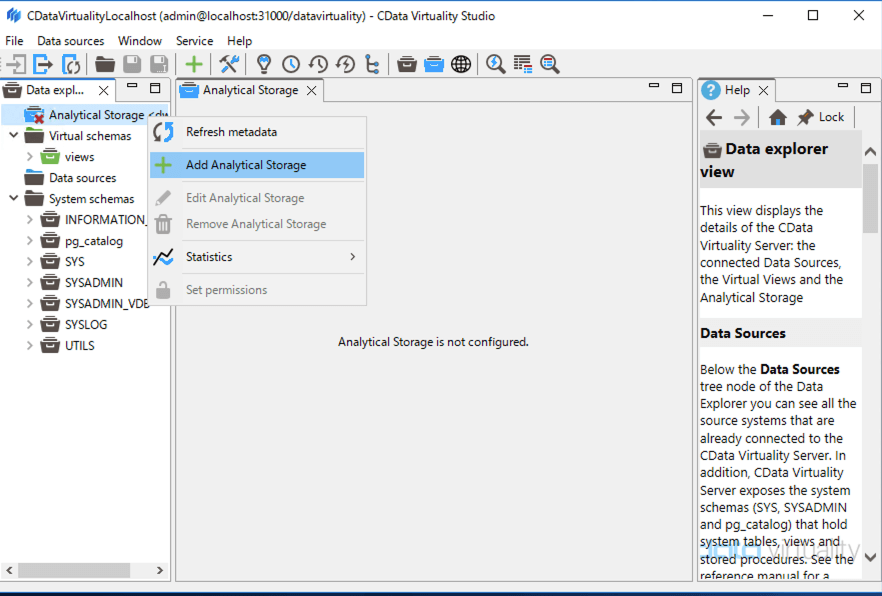
In the Data explorer, right click on Analytical Storage<dwh> and select the Add Analytics Storage button from the context menu:
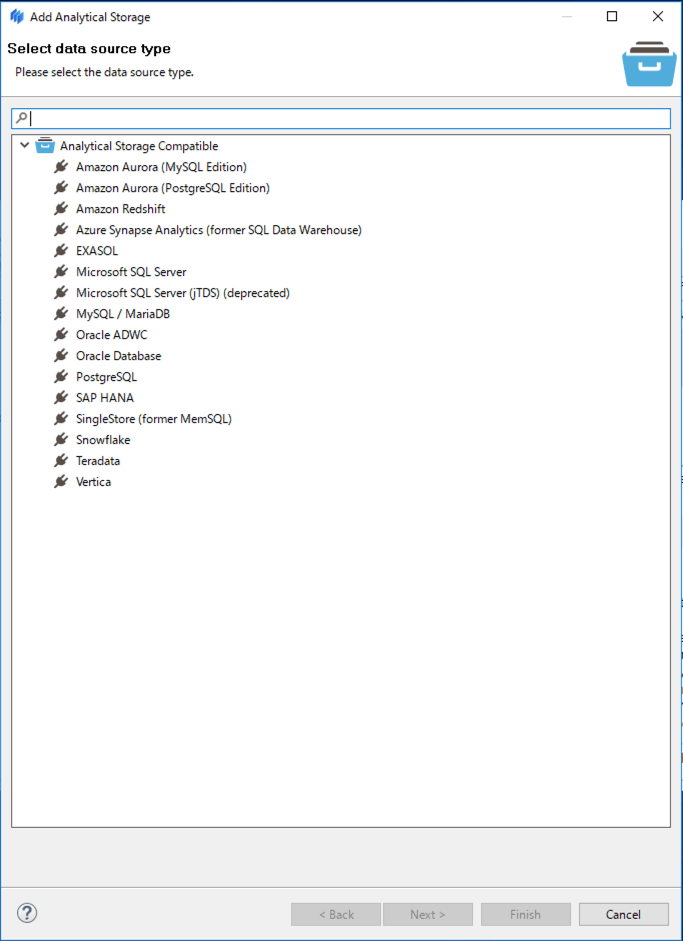
A list of available Analytical Storage options will appear. For this example, select Snowflake from the list as the analytical storage:
Enter the required connection details for Snowflake to configure it as the analytical storage:
Parameter | Description |
|---|---|
Host | URL to connect to Snowflake (e.g. https://xxxx.xxxx.xxxx.snowflakecomputing.com ) |
Database | The database you want to use |
Schema | PUBLIC (default value) |
User name | Your user name for Snowflake |
Password | Your password for Snowflake |
Warehouse | The data warehouse you want to use |
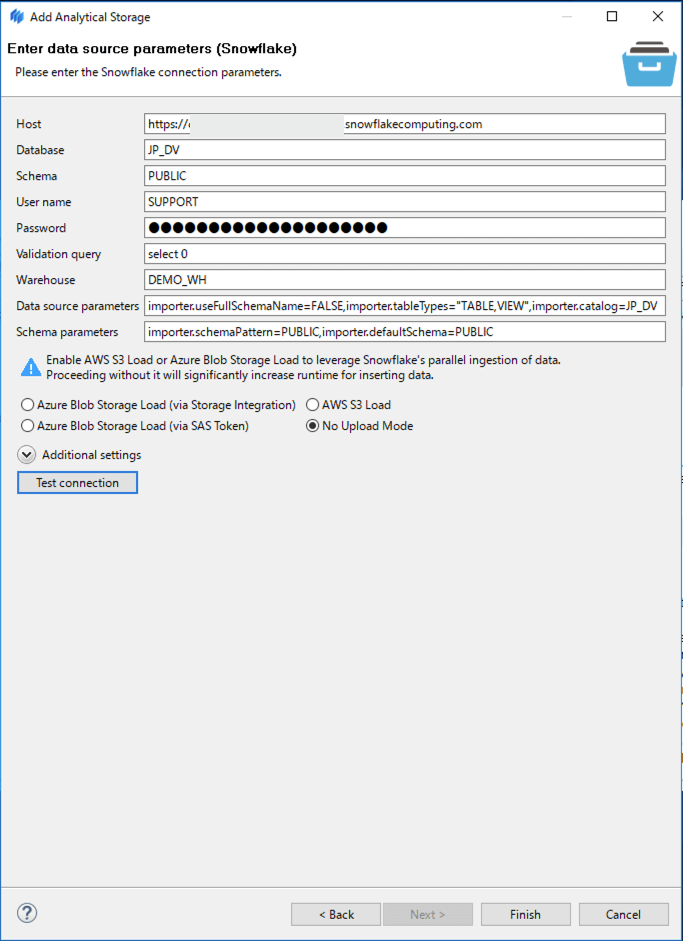
After entering the connection details, click the Test connection button to verify the connection to Snowflake. Once the connection is confirmed, click the Finish button.
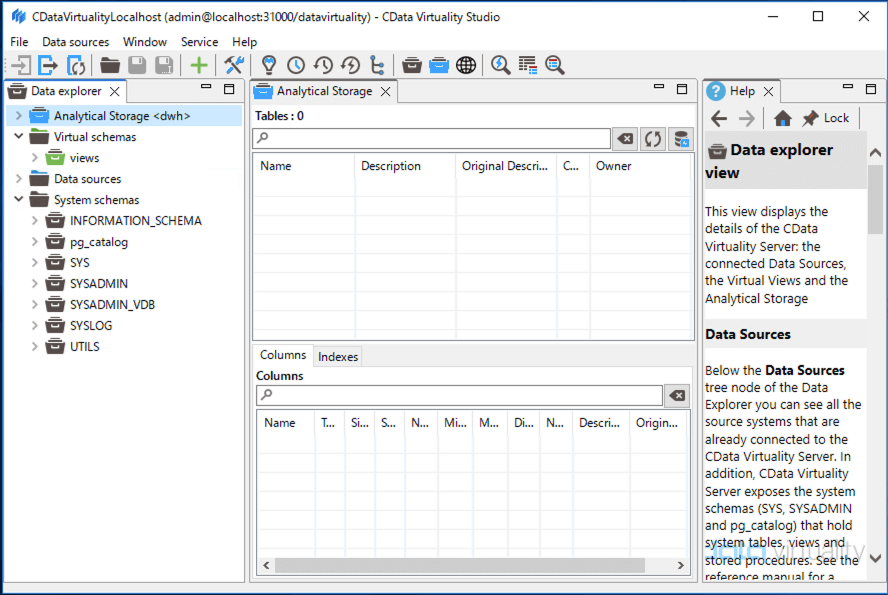
Check that the red X on Analytical Storage<dwh> in the Data explorer has disappeared. If it does, the connection to the analytical storage has been successfully set up:
See Also
Connecting to Analytical Storage for more technical details on how to connect to Analytical Storage and some examples