
Connecting with JDBC
CData Virtuality provides a standard JDBC driver that enables external Java applications and Java-based tools to access data in virtual databases hosted on the CData Virtuality Server using SQL. This guide uses DbVisualizer as an example to demonstrate the connection process, but you can use other tools, such as DBeaver or SQuirrel which offer similar functionality for interacting with data.
For installation instructions for the JDBC Driver for Windows, please refer to the relevant section of the Windows installation guide.
For instructions for the JDBC Driver for SaaS, please contact the support team.
DbVisualizer
DB Visualizer can be downloaded here for free.
Driver Manager Settings
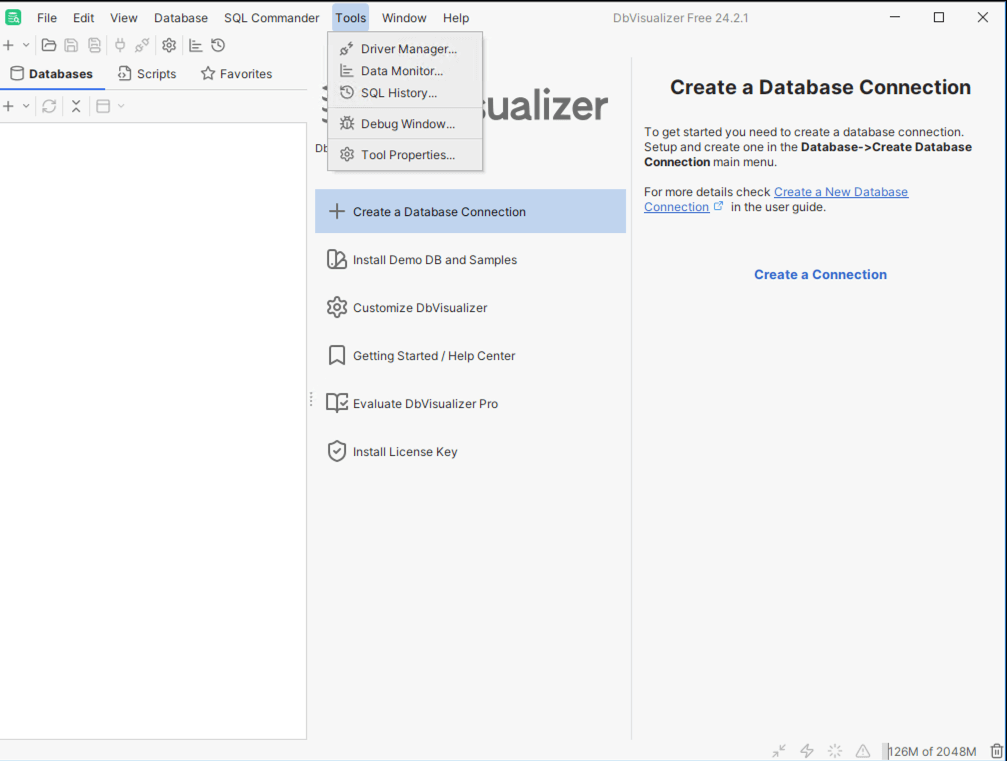
Start DbVisualizer and open the menu Tools → Driver Manager:
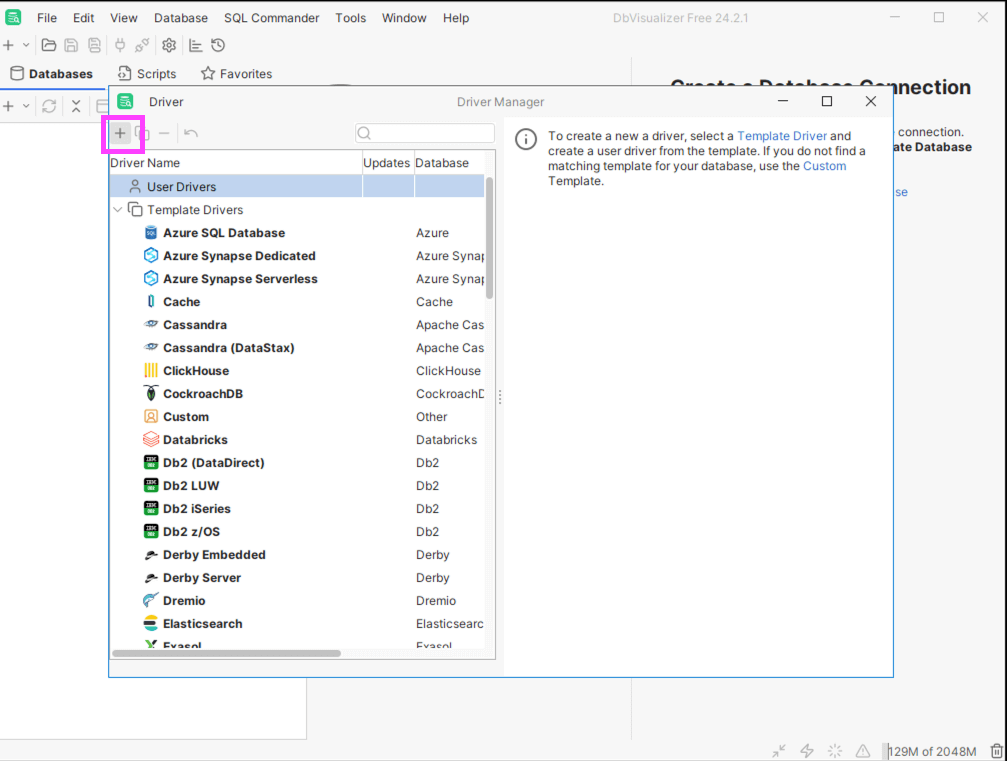
When the Driver Manager opens, click + button in the upper left corner, then select Create a New Driver from Template button. Choose Custom from the list of templates and double-click it to proceed:
Custom will be added under User Drivers in the Driver Manager:
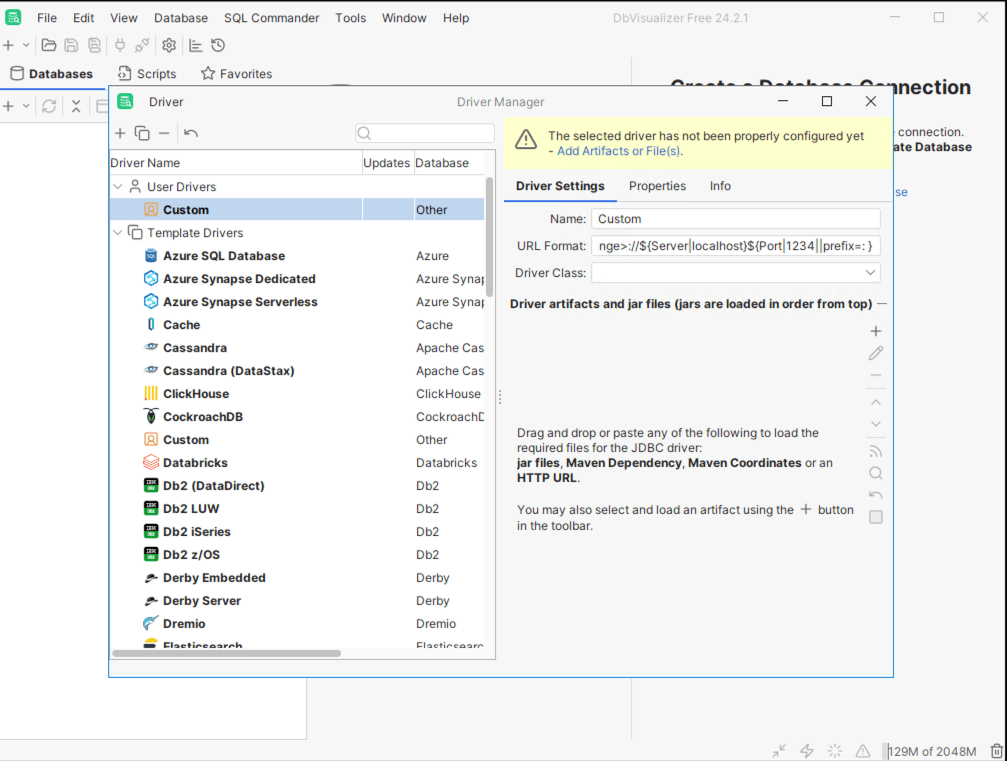
In the Driver Settings tab, enter CData Virtuality under Name. Under Driver artifacts and jar files, click the + button. Select Add Files... to locate and upload the required JAR file.:
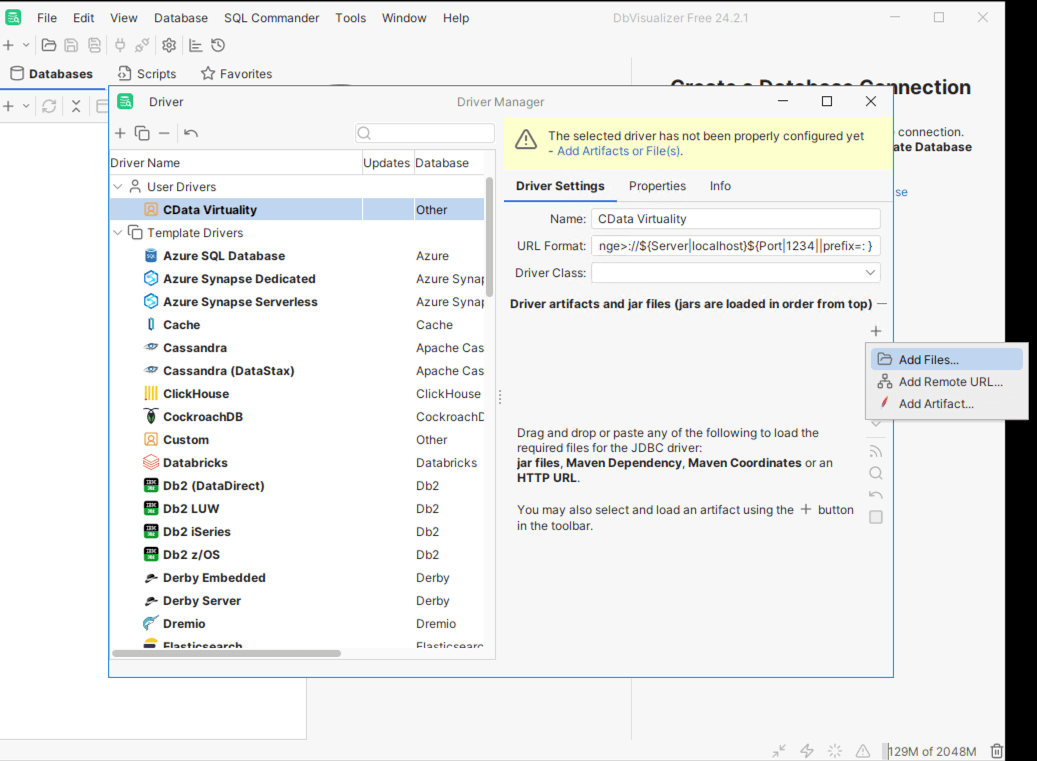
Select the JDBC Driver file (datavirtuality-jdbc.jar):
.png?inst-v=b7cca245-8ad0-4916-9770-6aae808a8d96)
The default location for the drivers in the on-premise version is C:\CData_Virtuality_Suite\Drivers.
Confirm that the DriverClass has been loaded correctly. Close the Driver Manager by clicking the X button in the upper right corner:

Creating a Connection
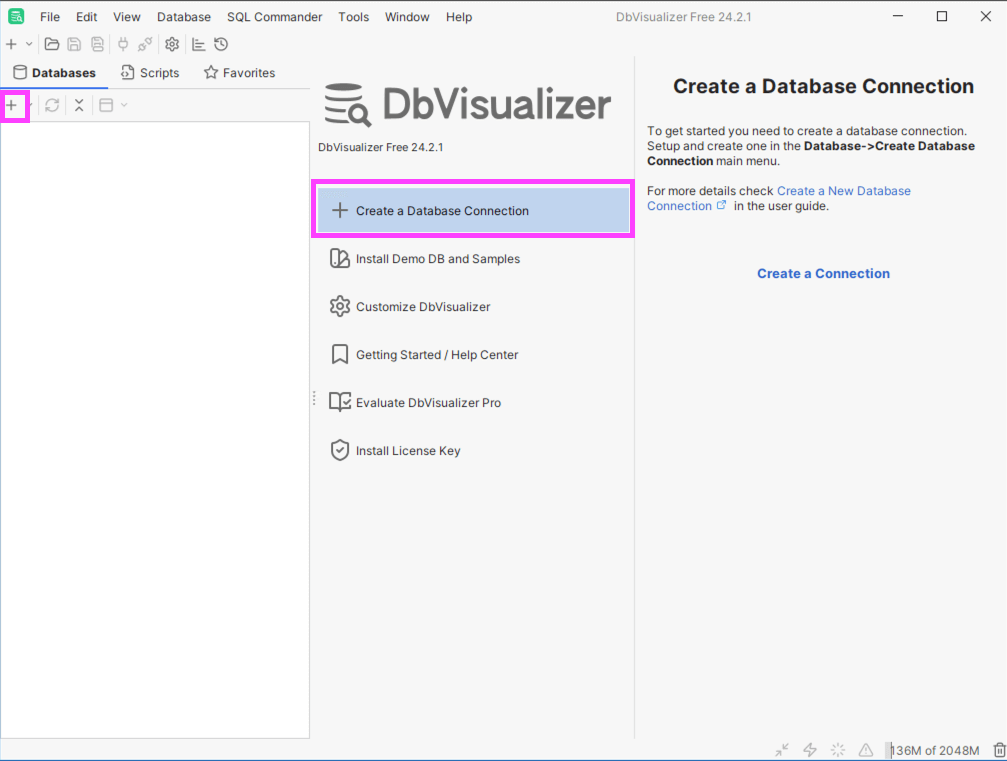
Click + Create a Database Connection then Create a Connection or the + button under the Databases tab on the left:
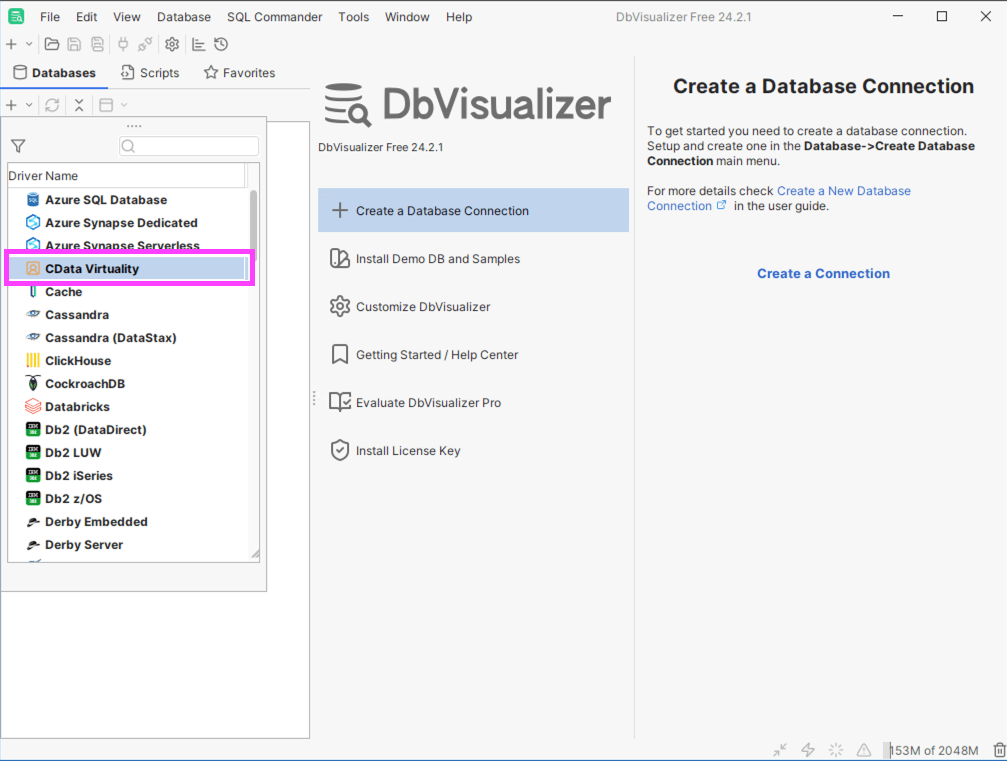
Select CData Virtuality from the Driver Name list:
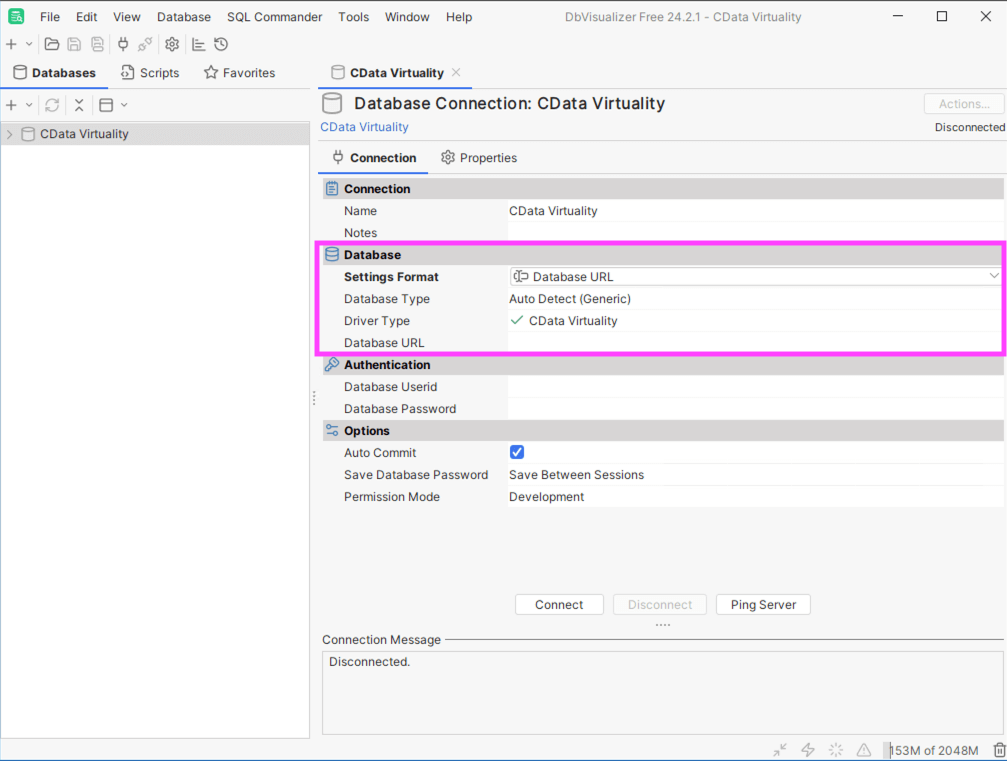
On the Connection tab, navigate to the Database → Settings Format section. In the Settings Format, change Server Info to Database URL:
The step-by-step guide below provides detailed instructions for configuring JDBC in both Windows and SaaS environments.
JDBC Configuration in Windows
JDBC URL Configuration for localhost Specification
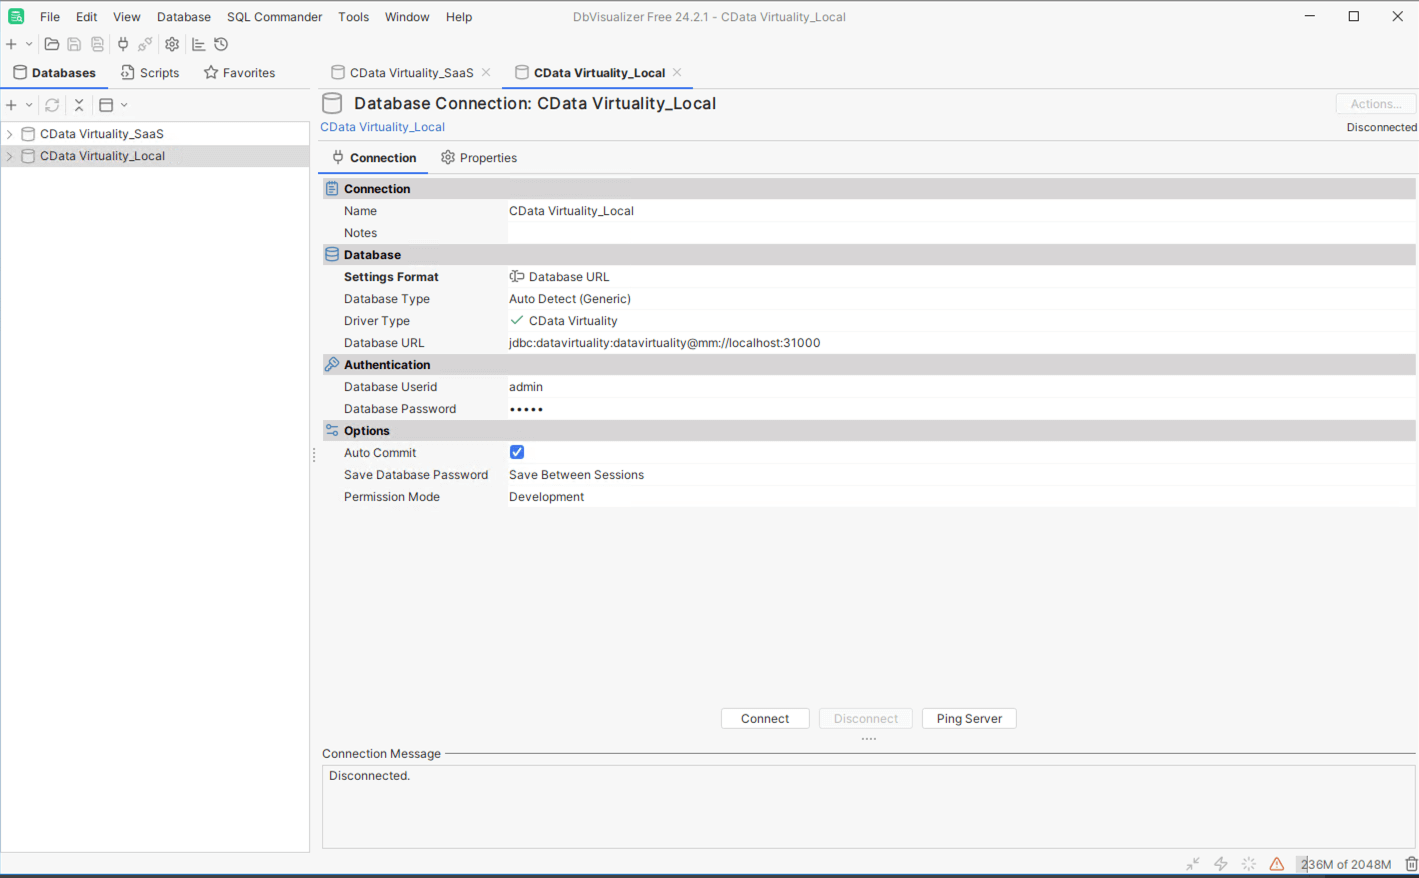
Set the following details to configure the connection:
Database URL: jdbc:datavirtuality:datavirtuality@mm://localhost:31000
Database Userid: CData Virtuality Server user (for example, admin)
Database Password: User password for CData Virtuality Server (for example, admin)
JDBC URL Configuration for Host Specification
Set the following details to configure the connection:
Database URL: jdbc:datavirtuality:datavirtuality@mm://{Host}:31000
For SSL connections, use @mms instead of @mm;Database Userid: CData Virtuality Server user (for example, admin);
Database Password: User password for CData Virtuality Server (for example, admin)
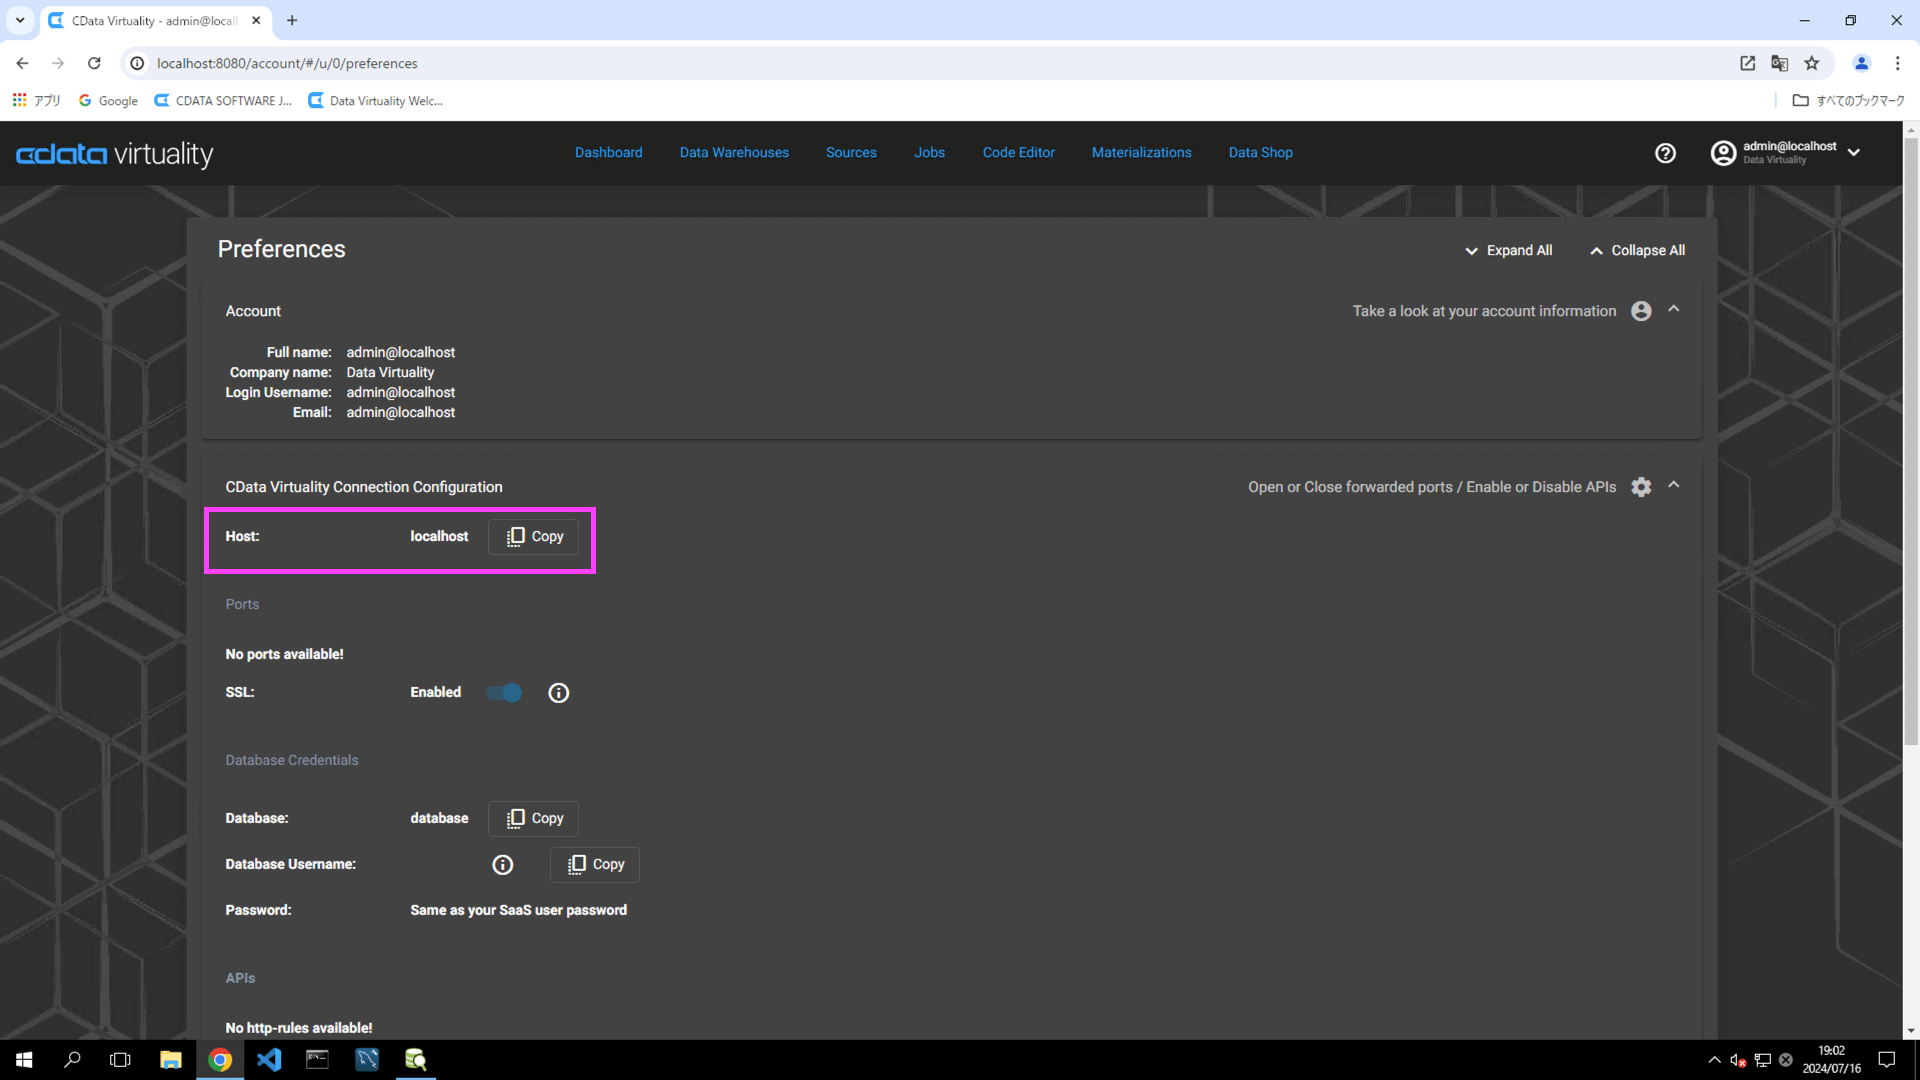
Host name can be checked in the Preferences section:
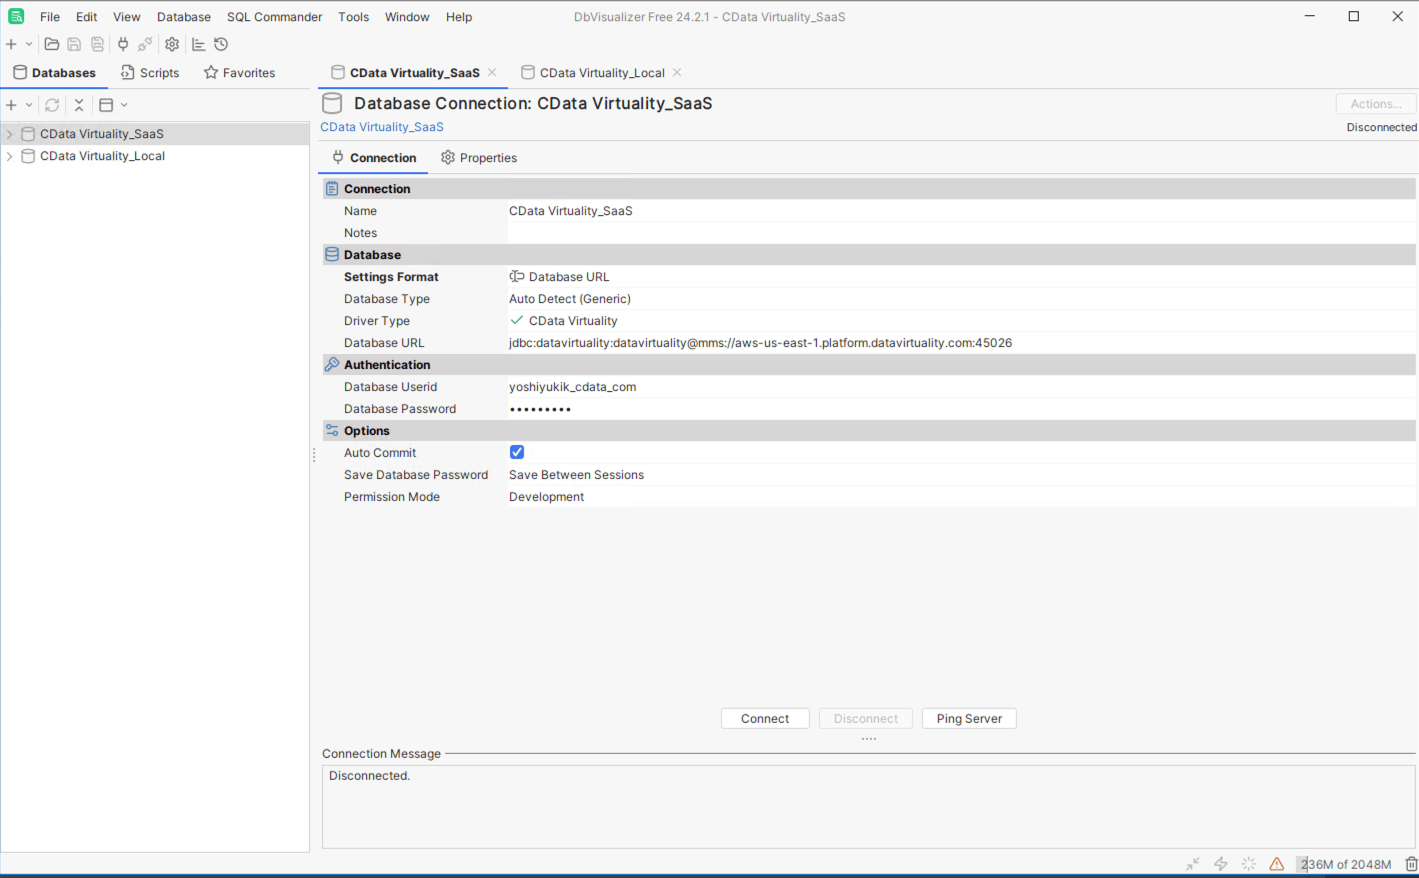
JDBC Configuration in SaaS
Specifying JDBC URLs in SaaS
Set the following details to configure your connection:
Driver URL: jdbc:datavirtuality:datavirtuality@mms://{Host}:{Port}
(for example, jdbc:datavirtuality@mms://aws-us-east-1.platform.datavirtuality.com:45026)
For SSL connections, use @mms instead of @mm;Database Userid: Database Username (for example, support_cdata_com);
Database Password: User password for the CData Virtuality Server
Details about Host can be found in the Preferences section:

Ensure that JDBC is enabled under Ports.
Connection Test
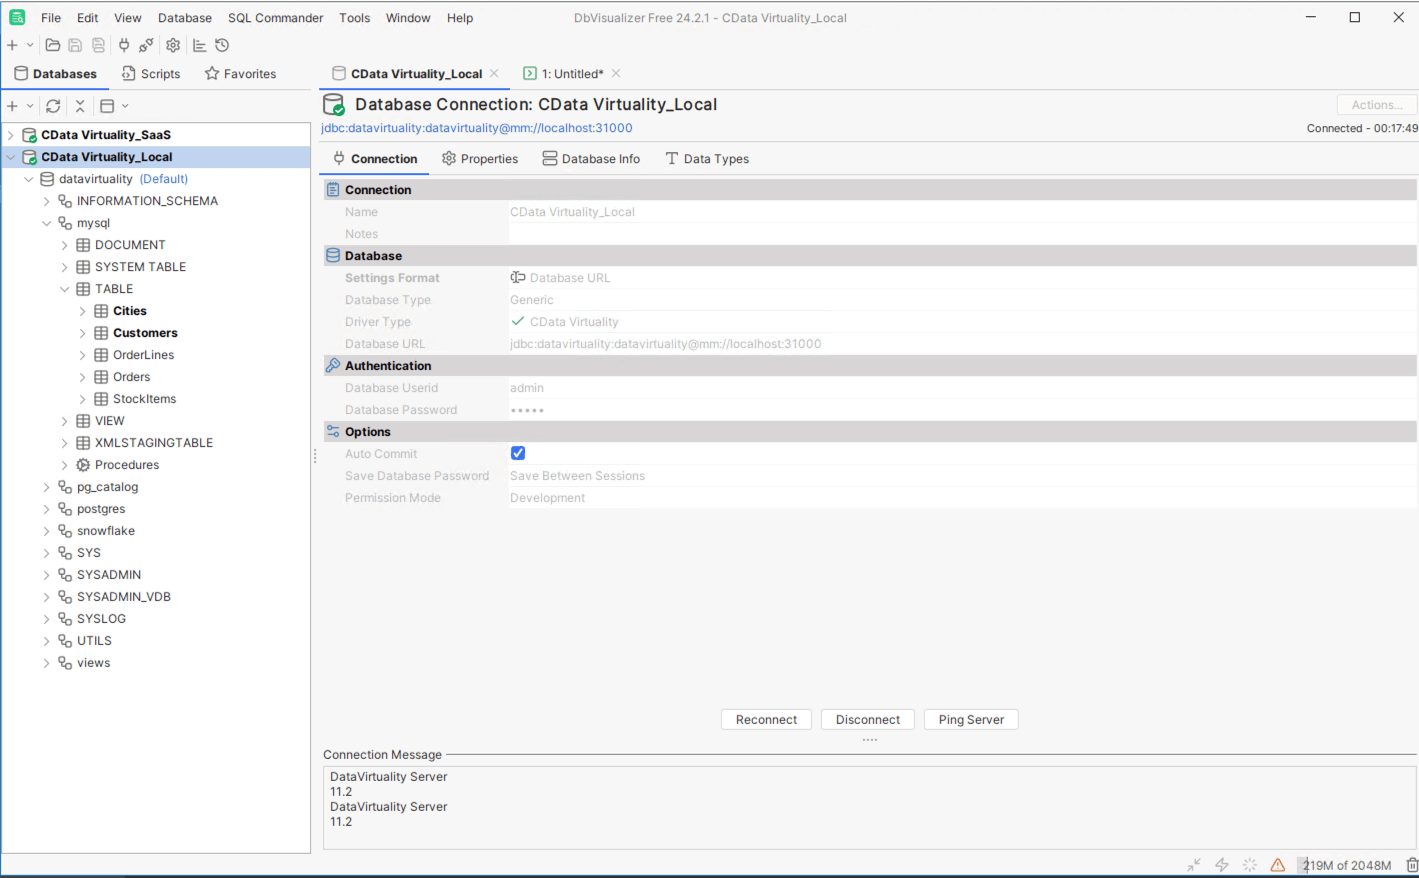
Click the Connect button to establish a connection to the CData Virtuality Server.
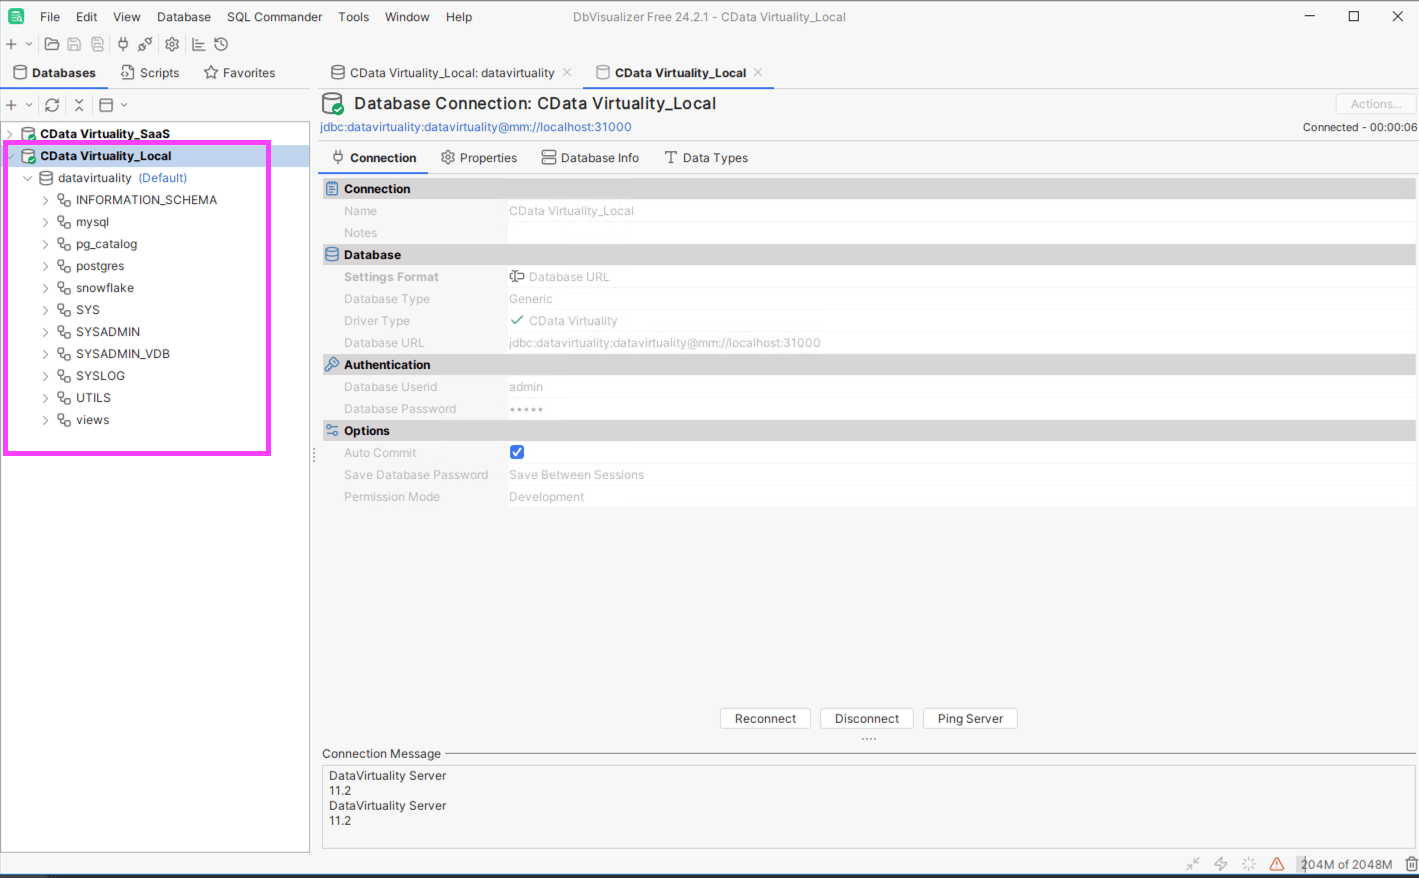
Verify that the connection is successful.
Navigate to the Databases tab on the left side and open the Connection name (for example, CData Virtuality) → datavirtuality.
Several schemas should be visible, including:
INFORMATION_SCHEMA
Data sources such as mysql and postgres
SYS systems
Views and more:
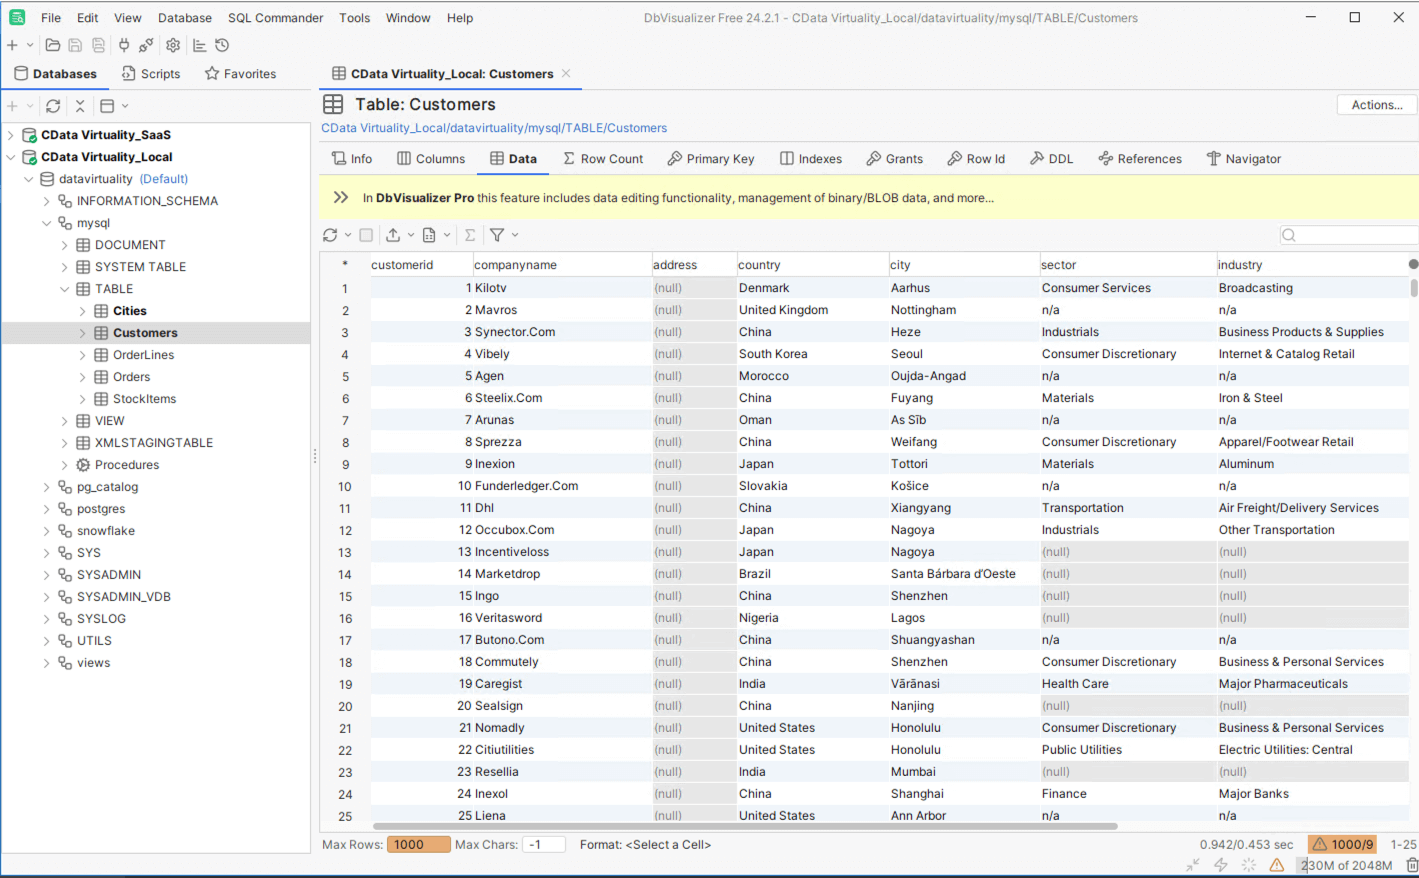
Data Acquisition
Open the mysql schema of the sample database.
To connect to the sample database, follow the instructions here.
Select TABLE → Customers and double-click it.
The information for the Customers table will be displayed on the right side:
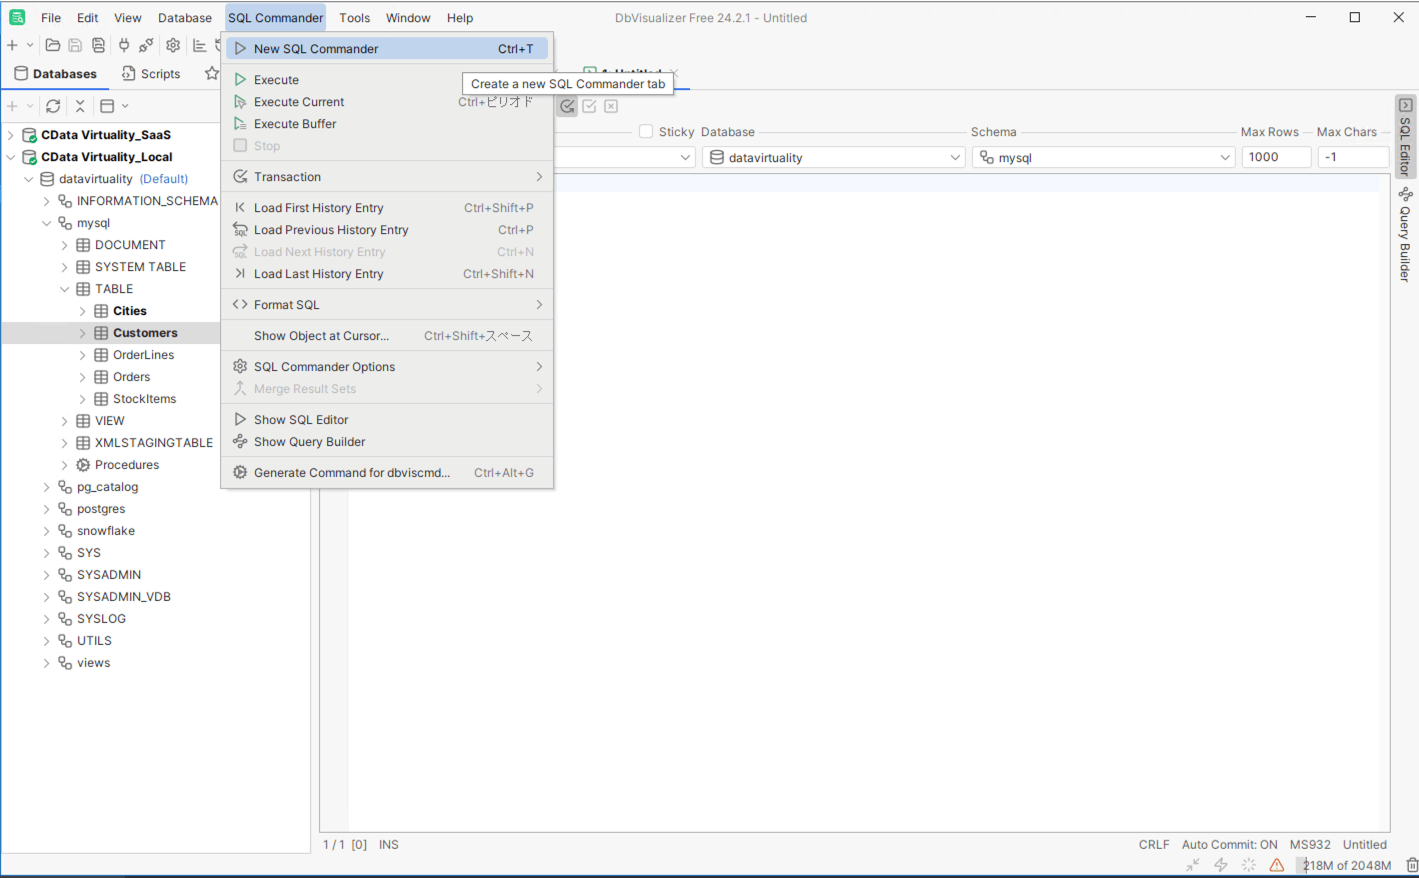
Next, try running an SQL query that joins tables from multiple data sources. In the menu bar, select SQL Commander → New SQL Commander:
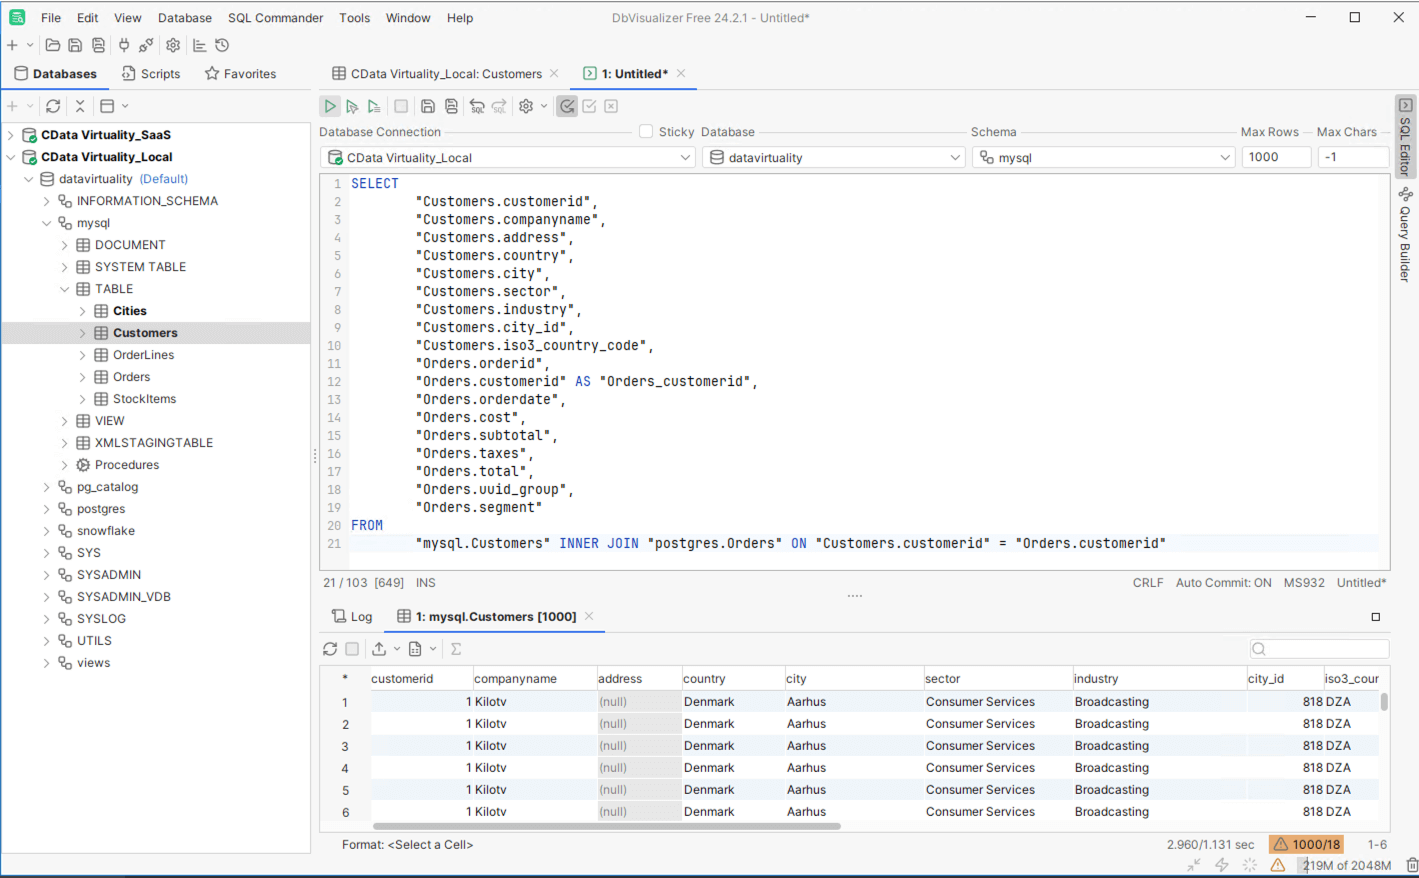
Copy and paste the following SQL query into the SQL Editor. This query joins the Customers table from MySQL and the Orders table from PostgreSQL:
SELECT
"Customers.customerid", "customerid".
"Customers.companyname", "Customers.
"Customers.address", "Customers.address".
"Customers.country", "Customers".
"Customers.city", "Customers".
"Customers.sector", "Customers.sector".
"Customers.industry", "Customers".
"Customers.city_id", "Customers.
"Customers.iso3_country_code", "iso3_country_code".
"Orders.orderid", "orderid".
"Orders.customerid" AS "Orders_customerid", "Orders.
"Orders.orderdate", "orderdate".
"Orders.cost", "Orders.cost".
"Orders.subtotal", "Orders.subtotal".
"Orders.taxes", "Orders.taxes".
"Orders.total", "Orders.total".
"Orders.uuid_group", "Orders.
"Orders.segment".
FROM
"mysql.Customers" INNER JOIN "postgres.Orders" ON "Customers.customerid" = "Orders.customerid"
Click the Play (Execute the buffer as an SQL script) button to run the SQL query. If the query executes successfully, a preview of the data will appear at the bottom of the editor:
After finishing the session, double-click the connection name to return to the connection screen. Click the Disconnect button to terminate the connection and exit:
Installing Additional JDBC Drivers
For instructions on installing JDBC drivers that are not included in the CData Virtuality installation package, such as Microsoft Dataverse, NetSuite, SAP ADS, SAP HANA, Sybase ASE and Sybase IQ, and Teradata, please refer to Installing JDBC Drivers.
JDBC connection string changed in v4.10: both jdbc:datavirtuality and jdbc:cdatavirtuality are acceptable