
Creating Replication
This guide explains the types of replication available in CData Virtuality and provides step-by-step instructions for setting them up.
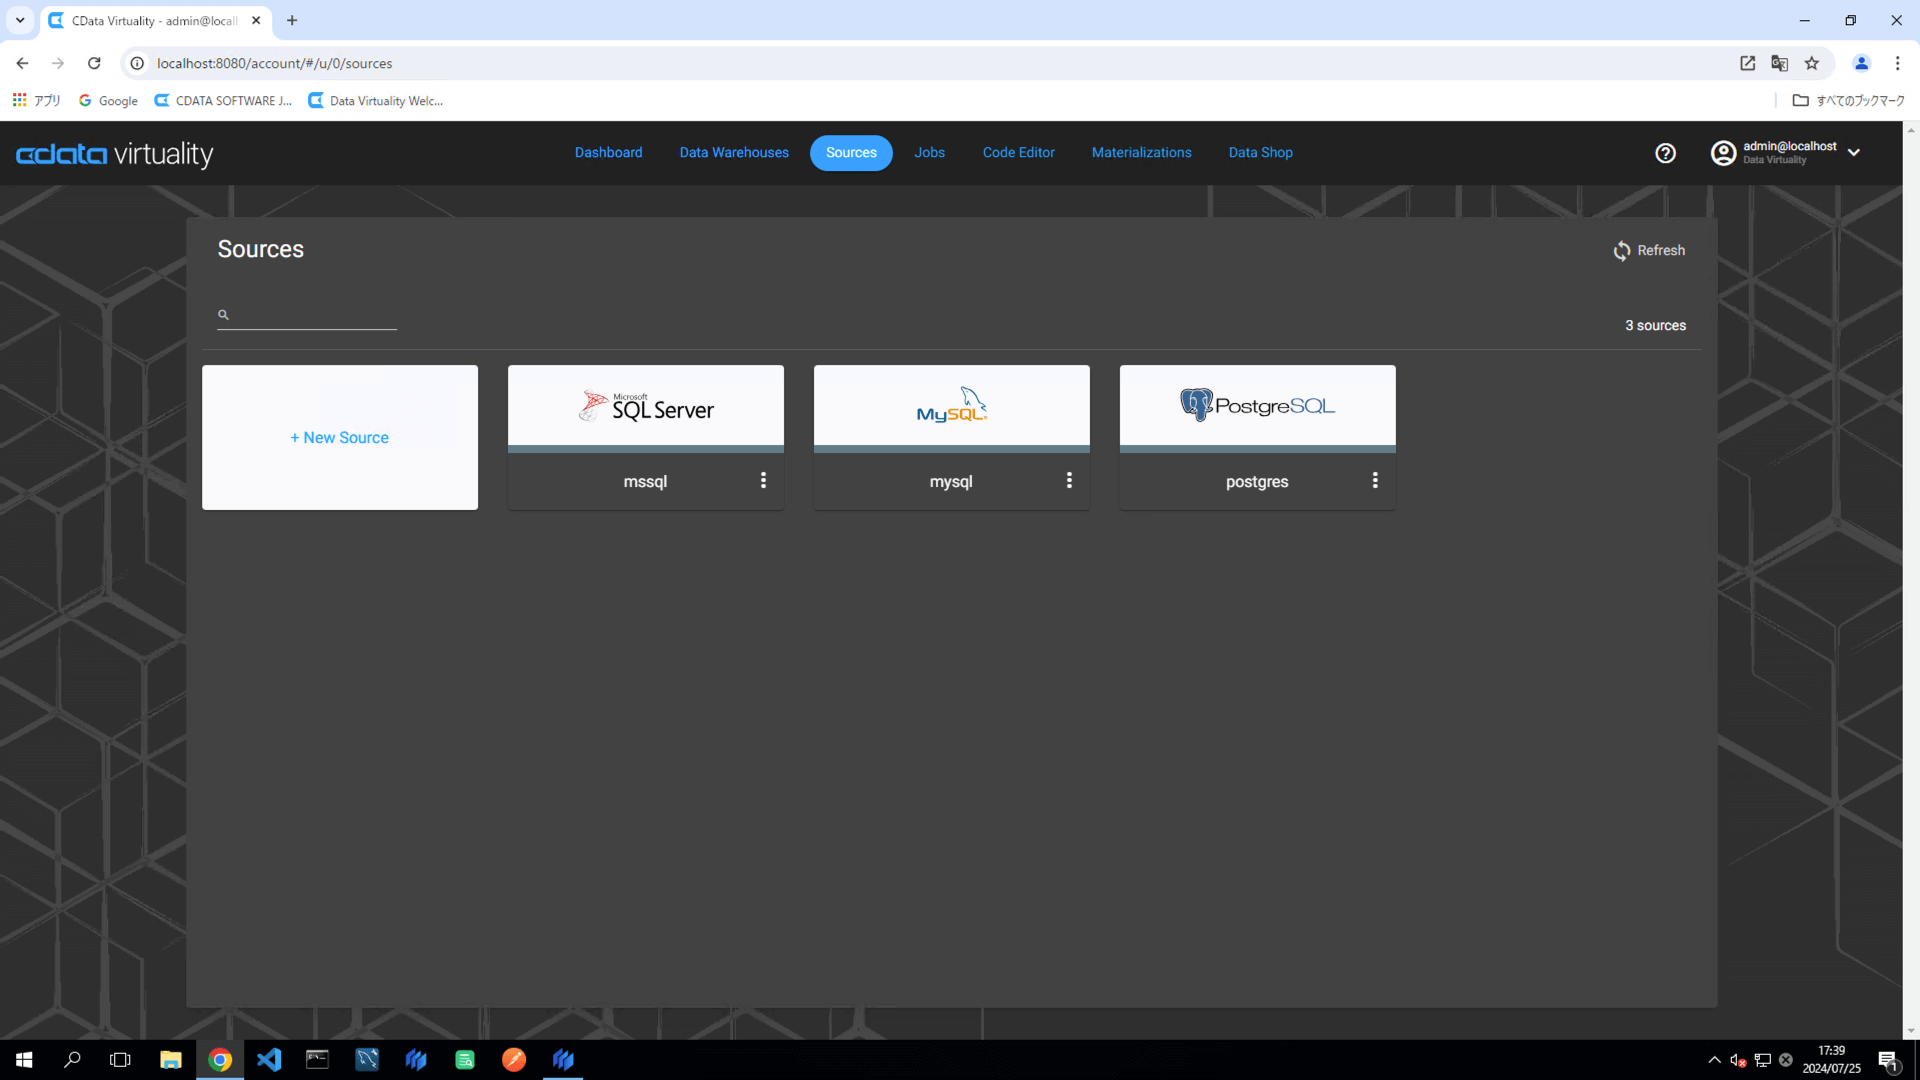
The guide uses sample data from the MySQL and PostgreSQL sample databases. See this guide for instructions on connecting to the sample databases to use the provided sample data. Additionally, since this procedure involves adding records to the data source, an external Microsoft SQL Server (Northwind database) is added to the data sources.
The replication process in this guide will use Snowflake as the data warehouse.
About Replication
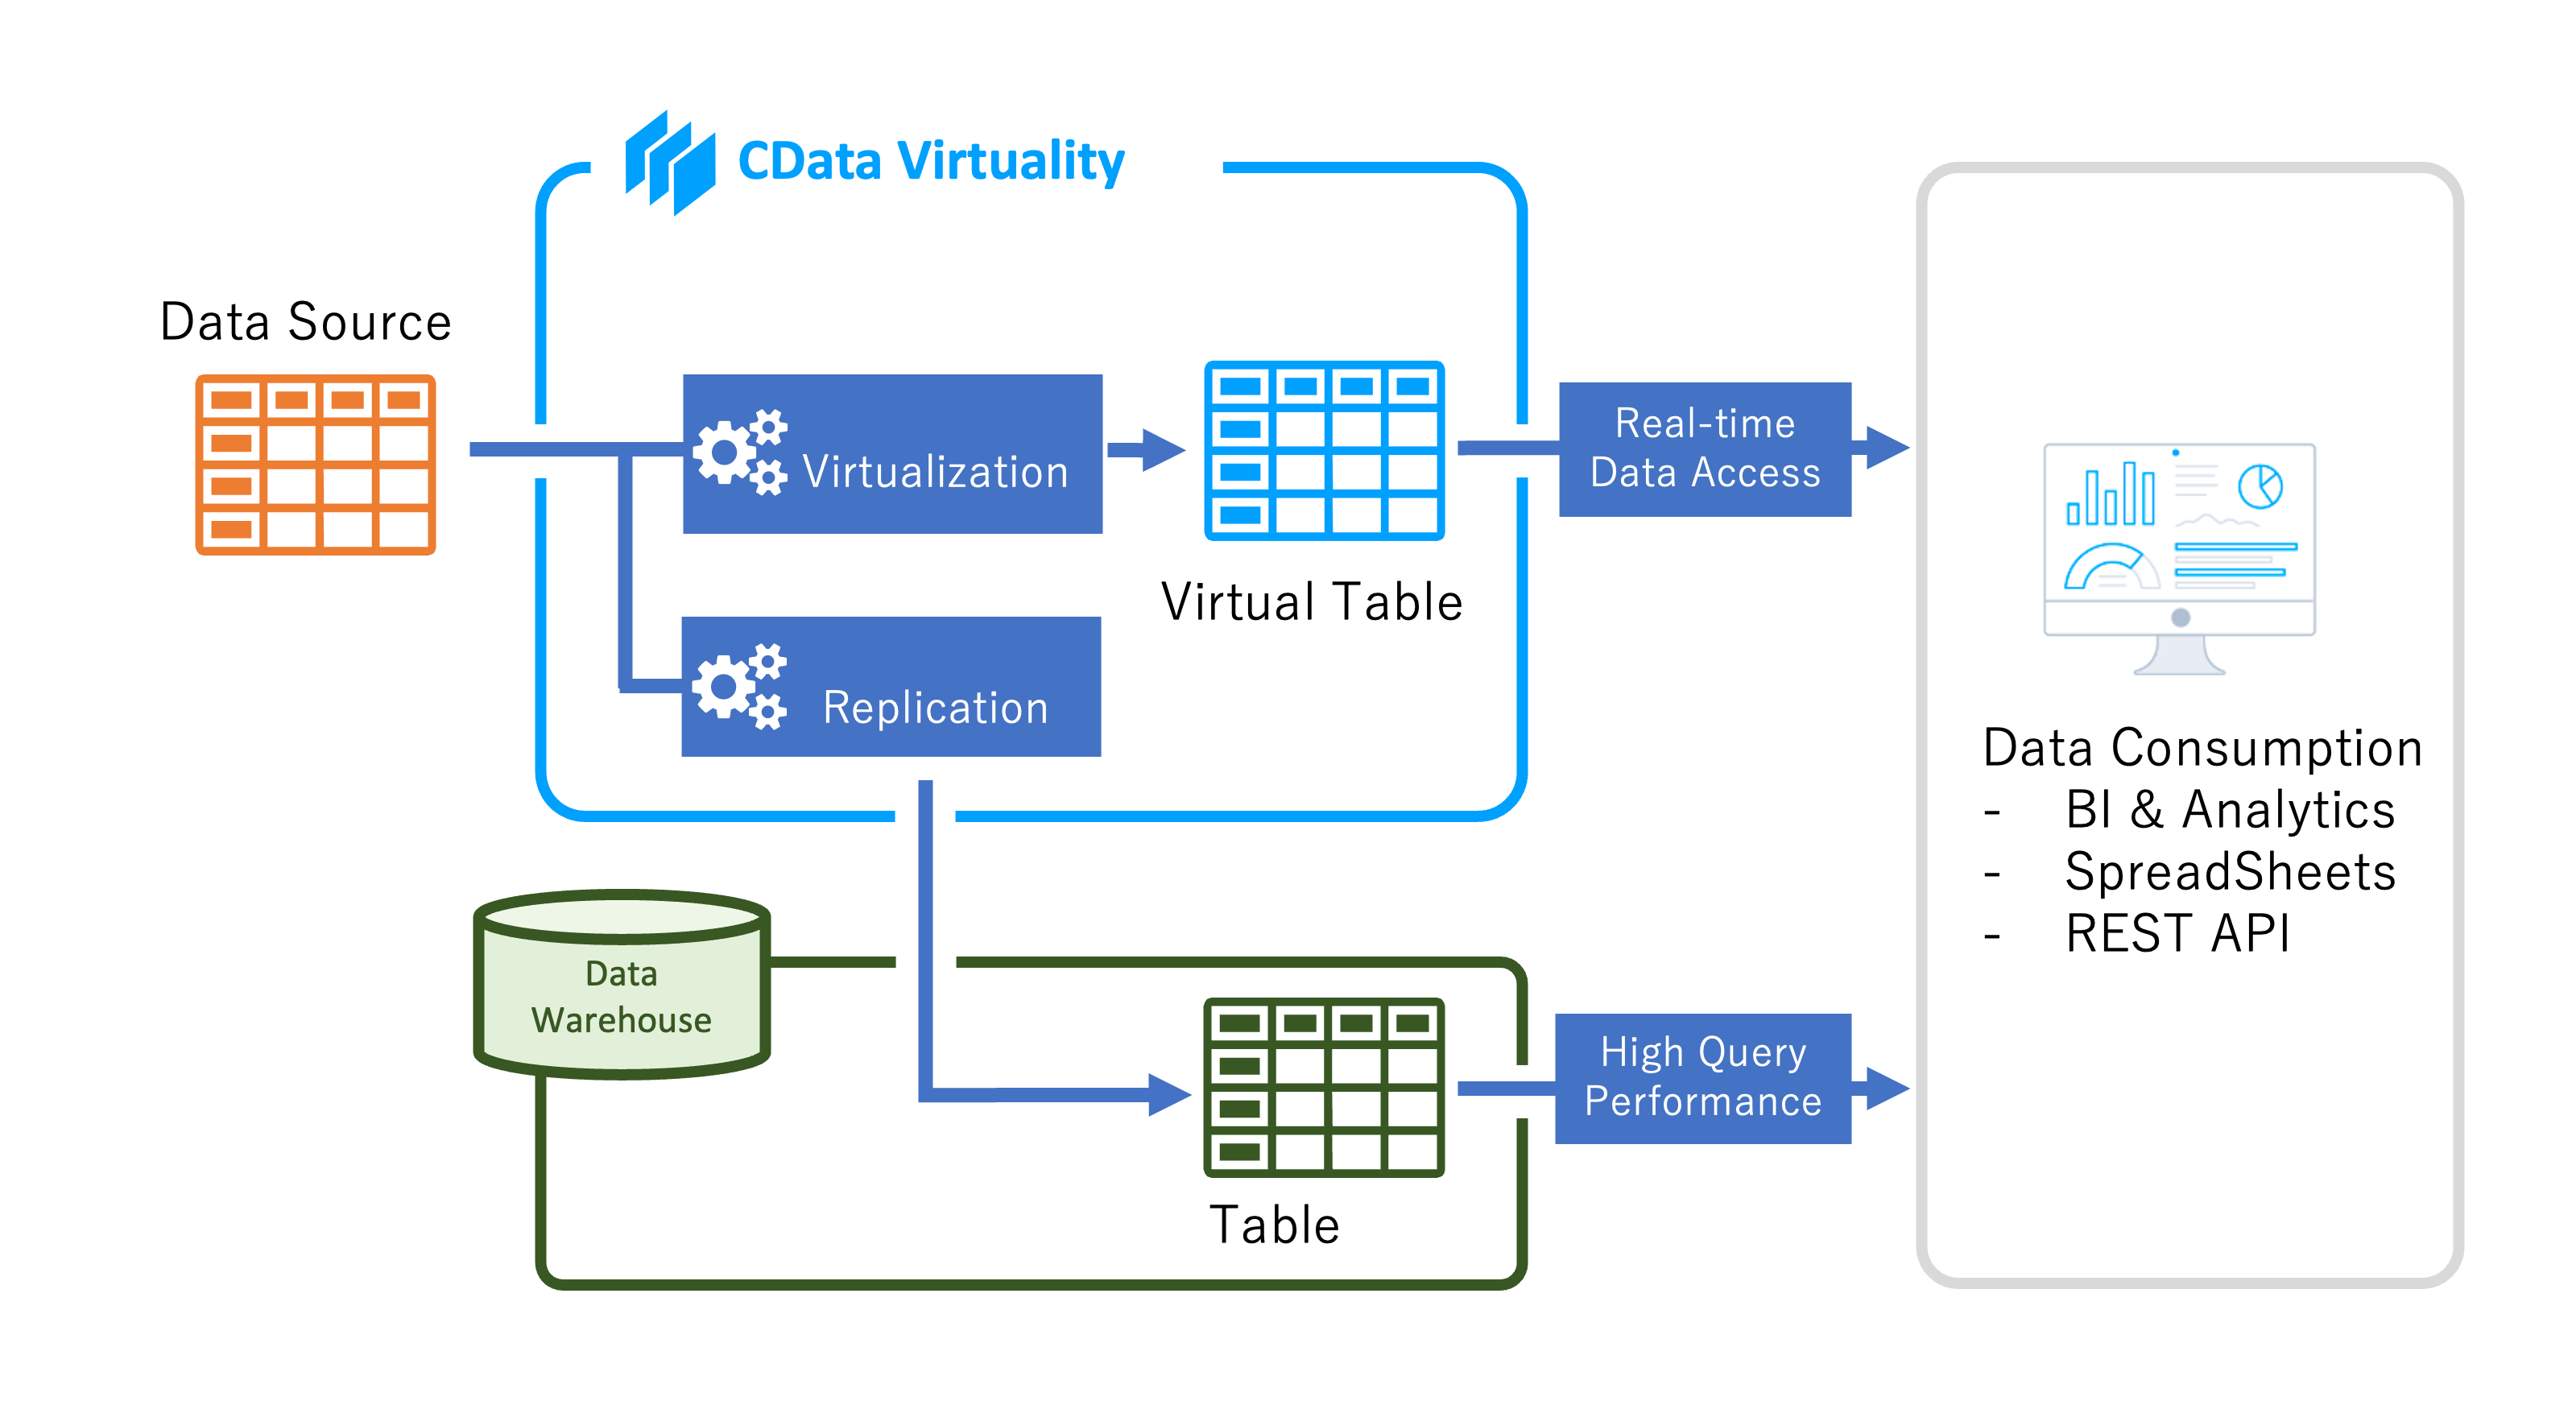
In addition to real-time data access enabled by its data virtualization capabilities, CData Virtuality supports data collaboration through bimodal data replication, offering ETL/ELT.
While replication and materialization share similarities, they serve distinct purposes:
Materialization: A caching and temporary storage mechanism designed for performance optimization. It allows data access without impacting performance (response time) and the data source side (high load).
Replication: A process for storing and accumulating data by copying data from a source to a data store, such as a data warehouse.
This is how the replication process in CData Virtuality works:
Replication Types
CData Virtuality offers five types of replication. This guide will cover the setup for each patterns using the CData Virtuality Web UI:
Copy Over/Full (Update All): Re-import all records. If a table with the same name already exists in the data warehouse, it is processed using the selected method (Drop or Delete).
Incremental: Copies only newly added records to the destination data warehouse.
Batch (batch update): Updates existing tables in the data warehouse each time the replication job is executed.
History update: Stores a history of changes made to the data.
Upsert update: Updates existing rows and inserts new rows.
Copy Over/Full (Update All)
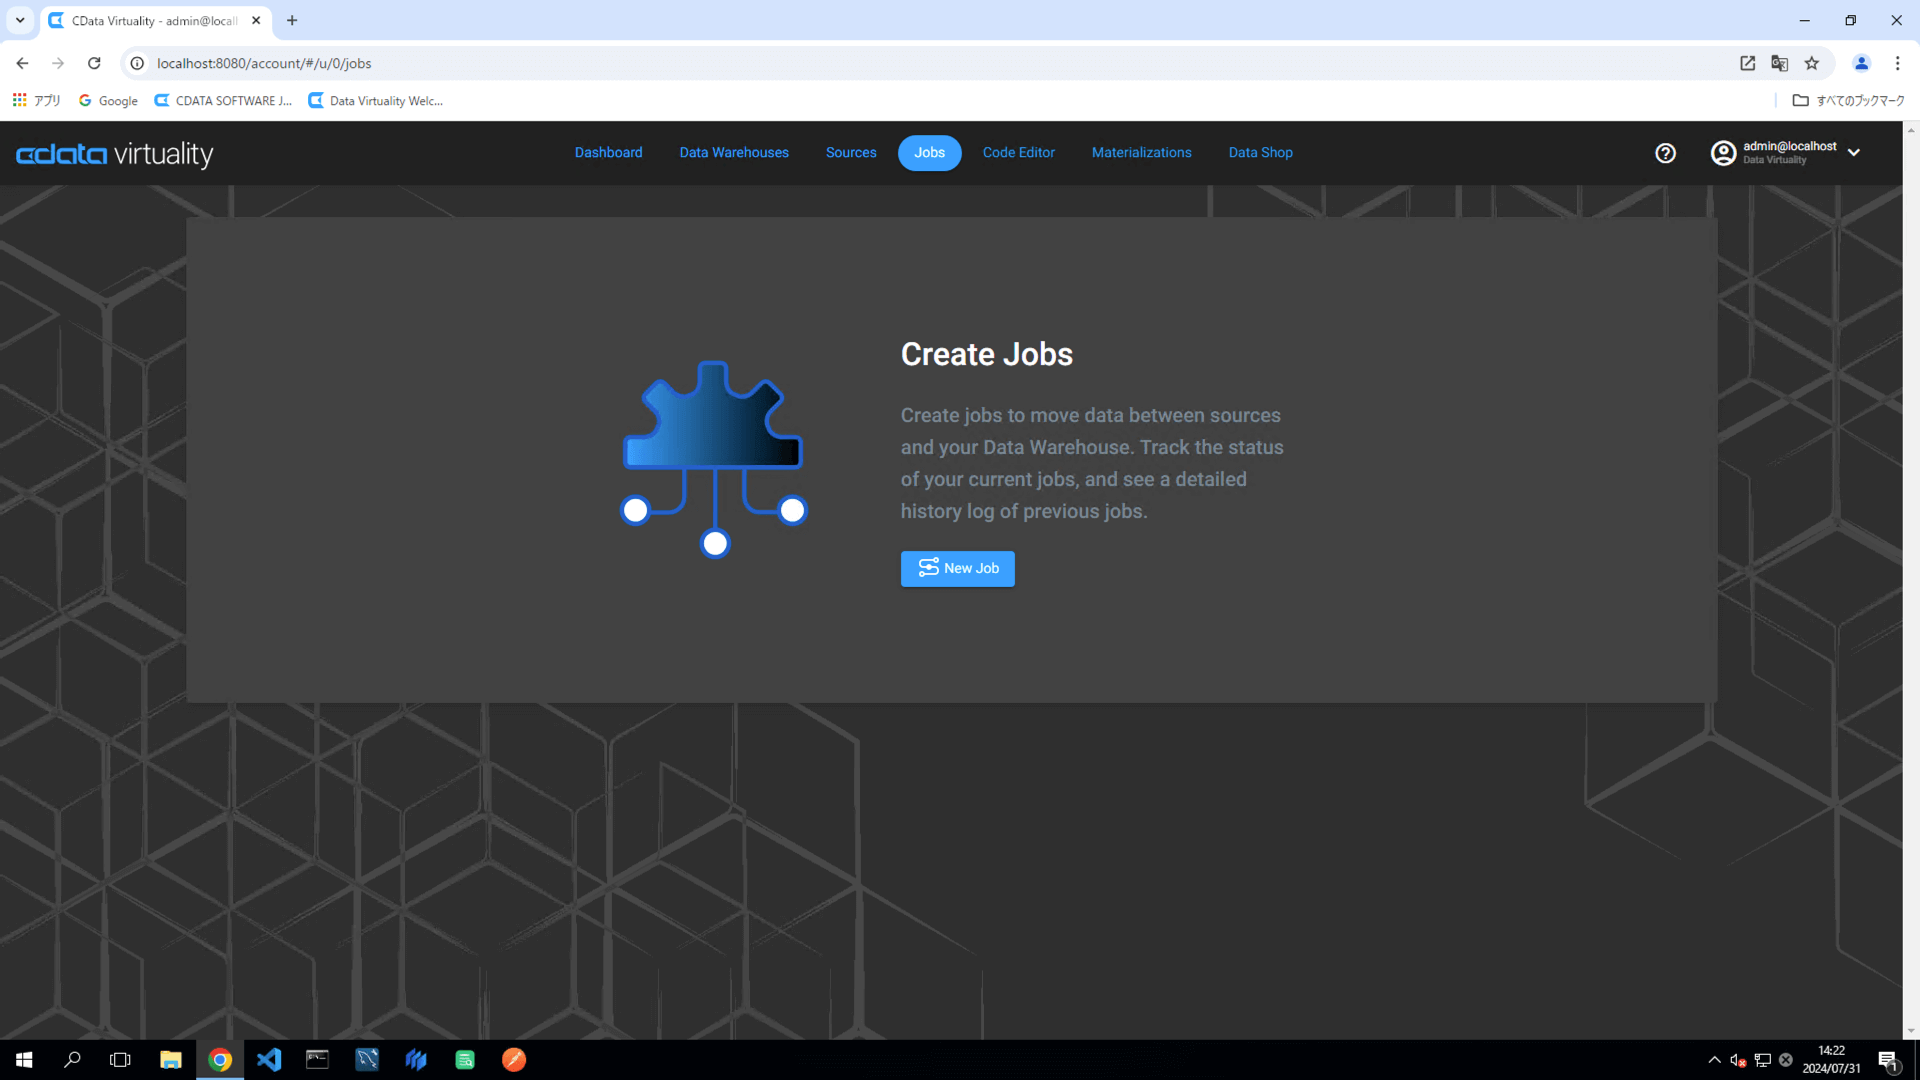
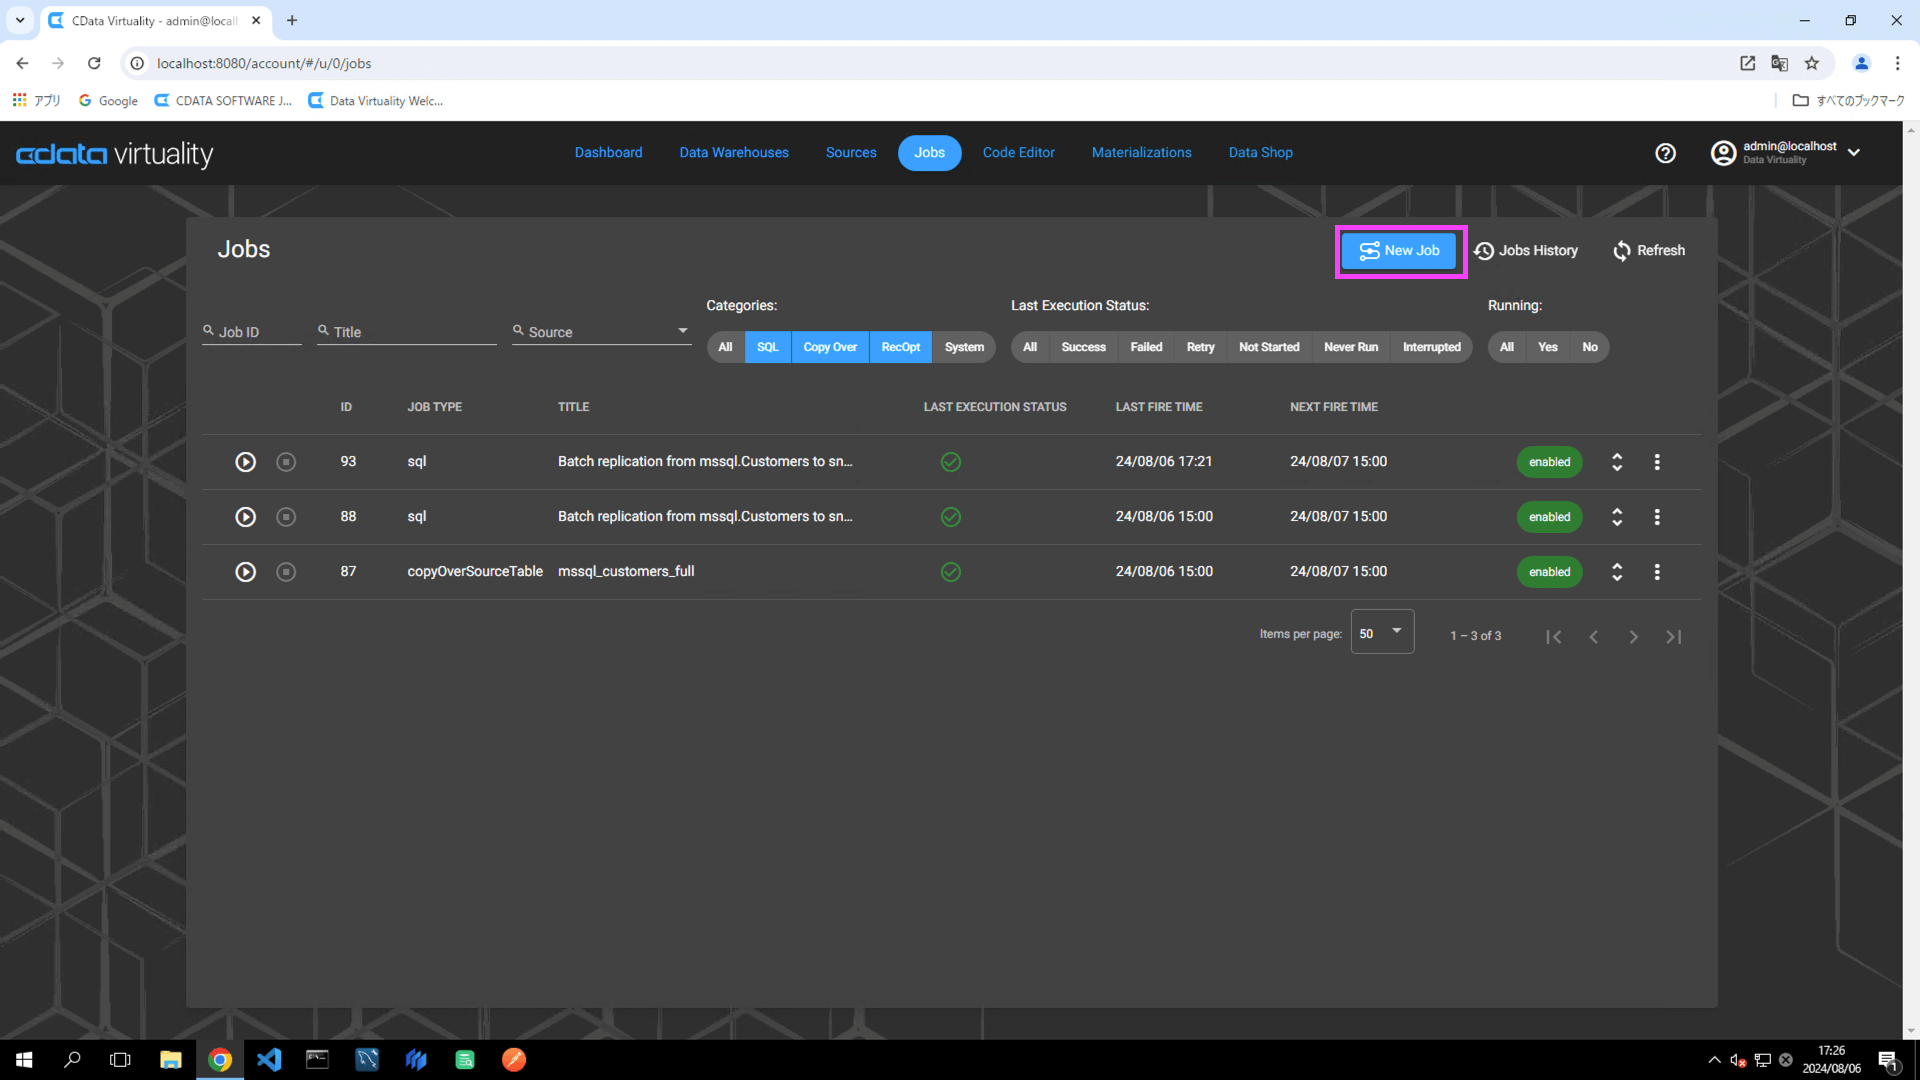
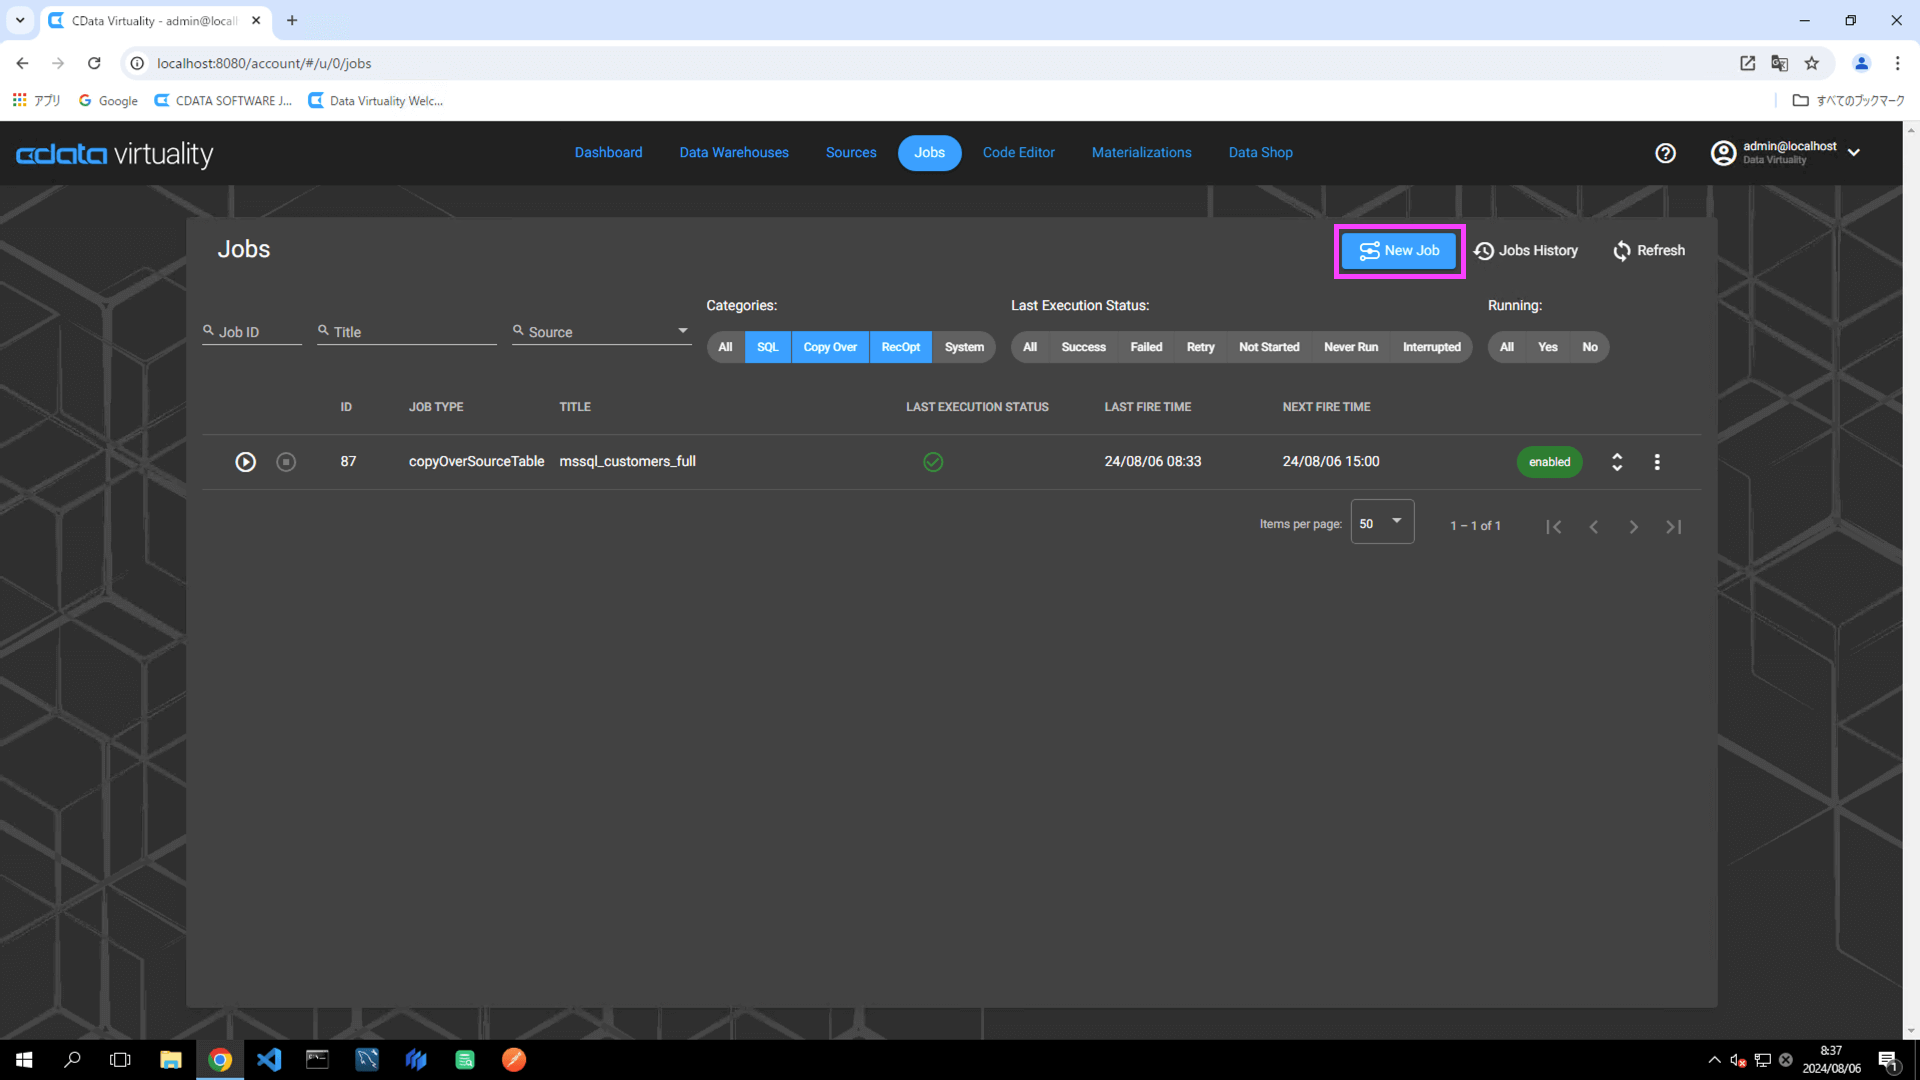
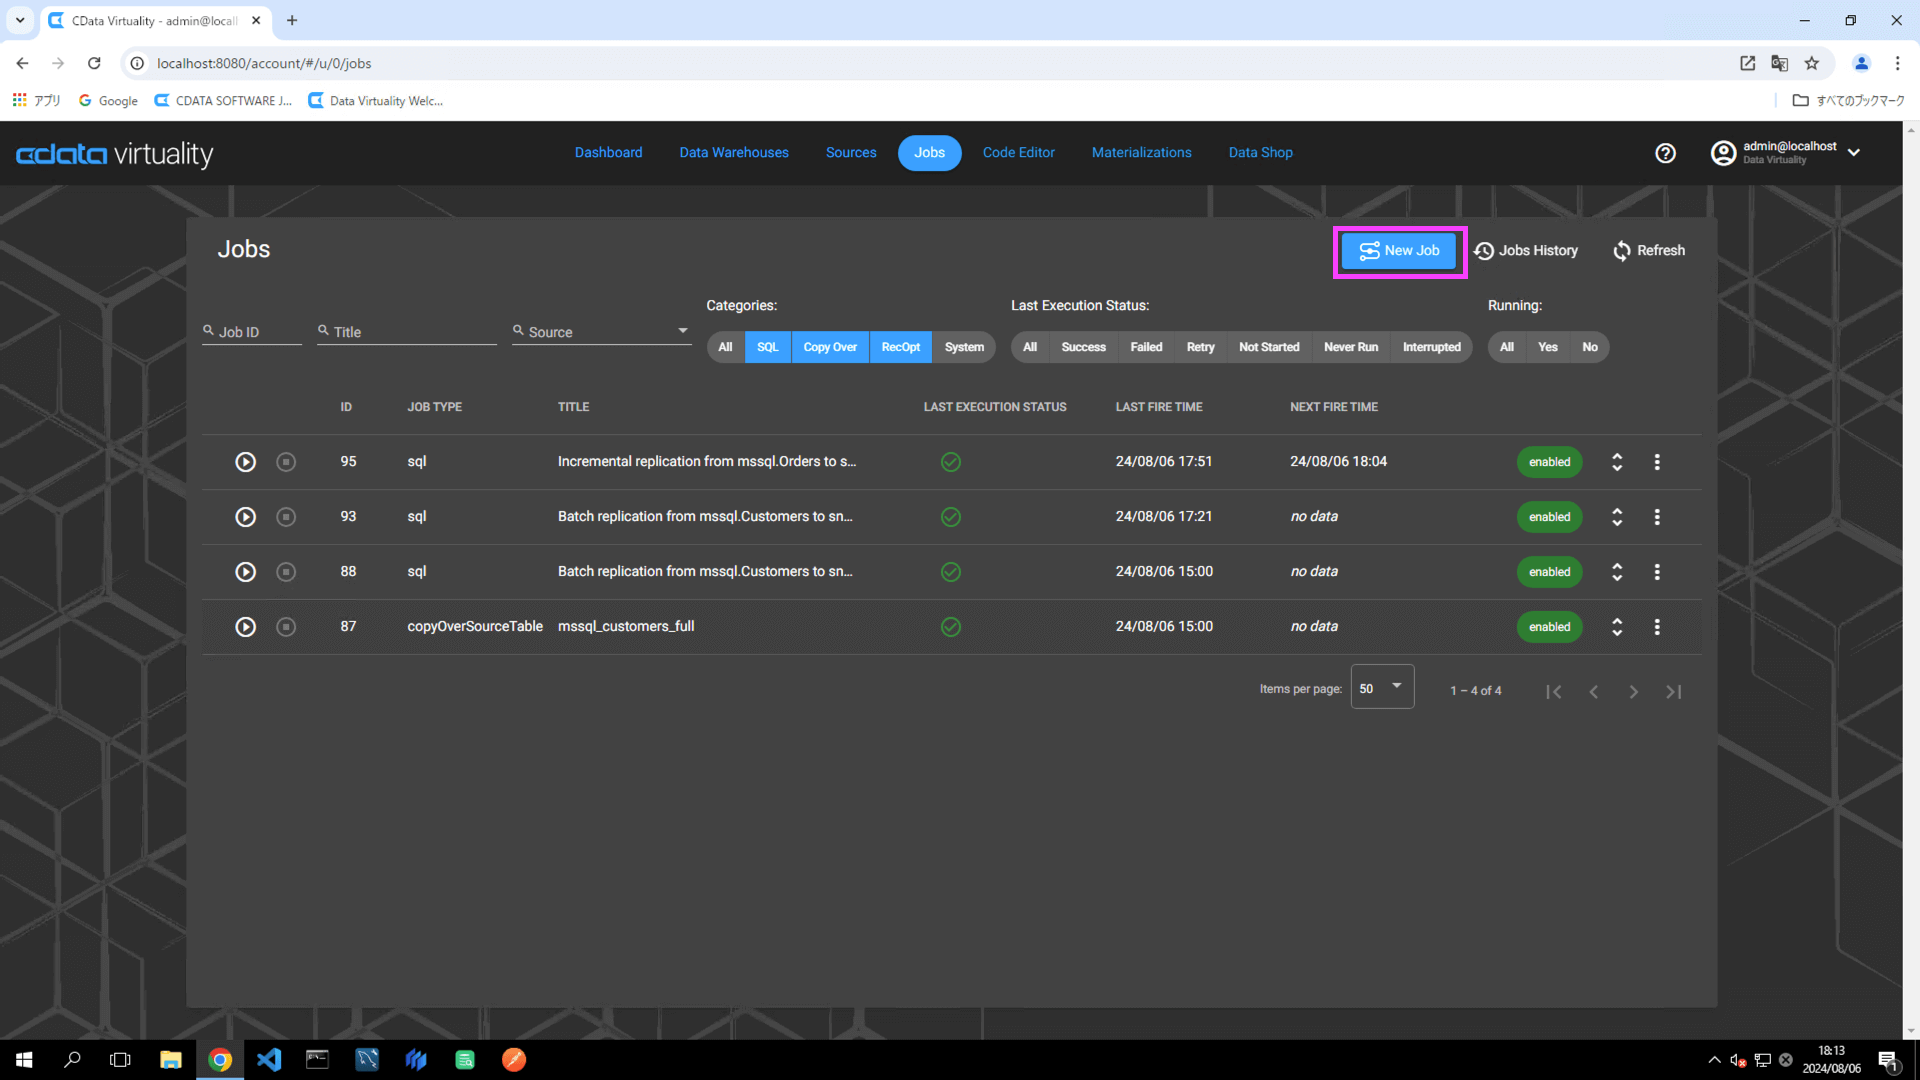
Open Jobs and click the New Job button:
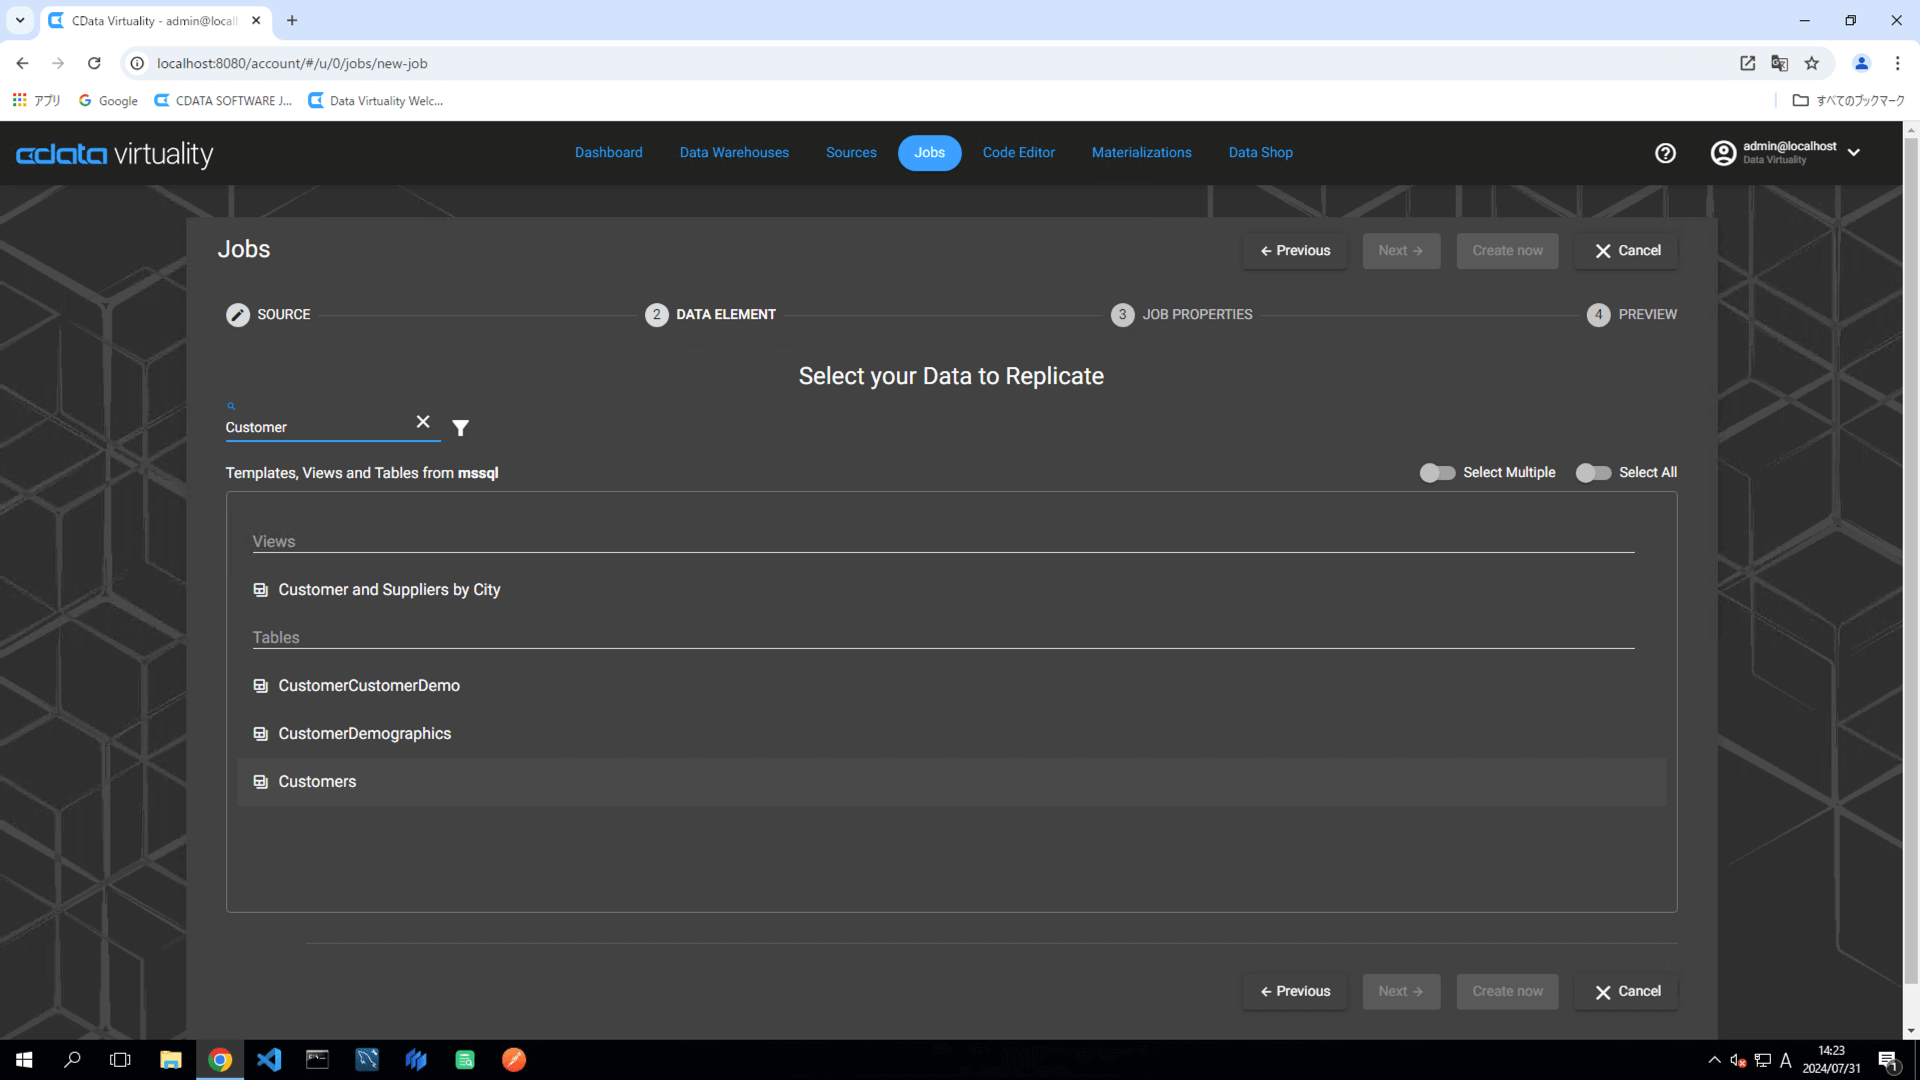
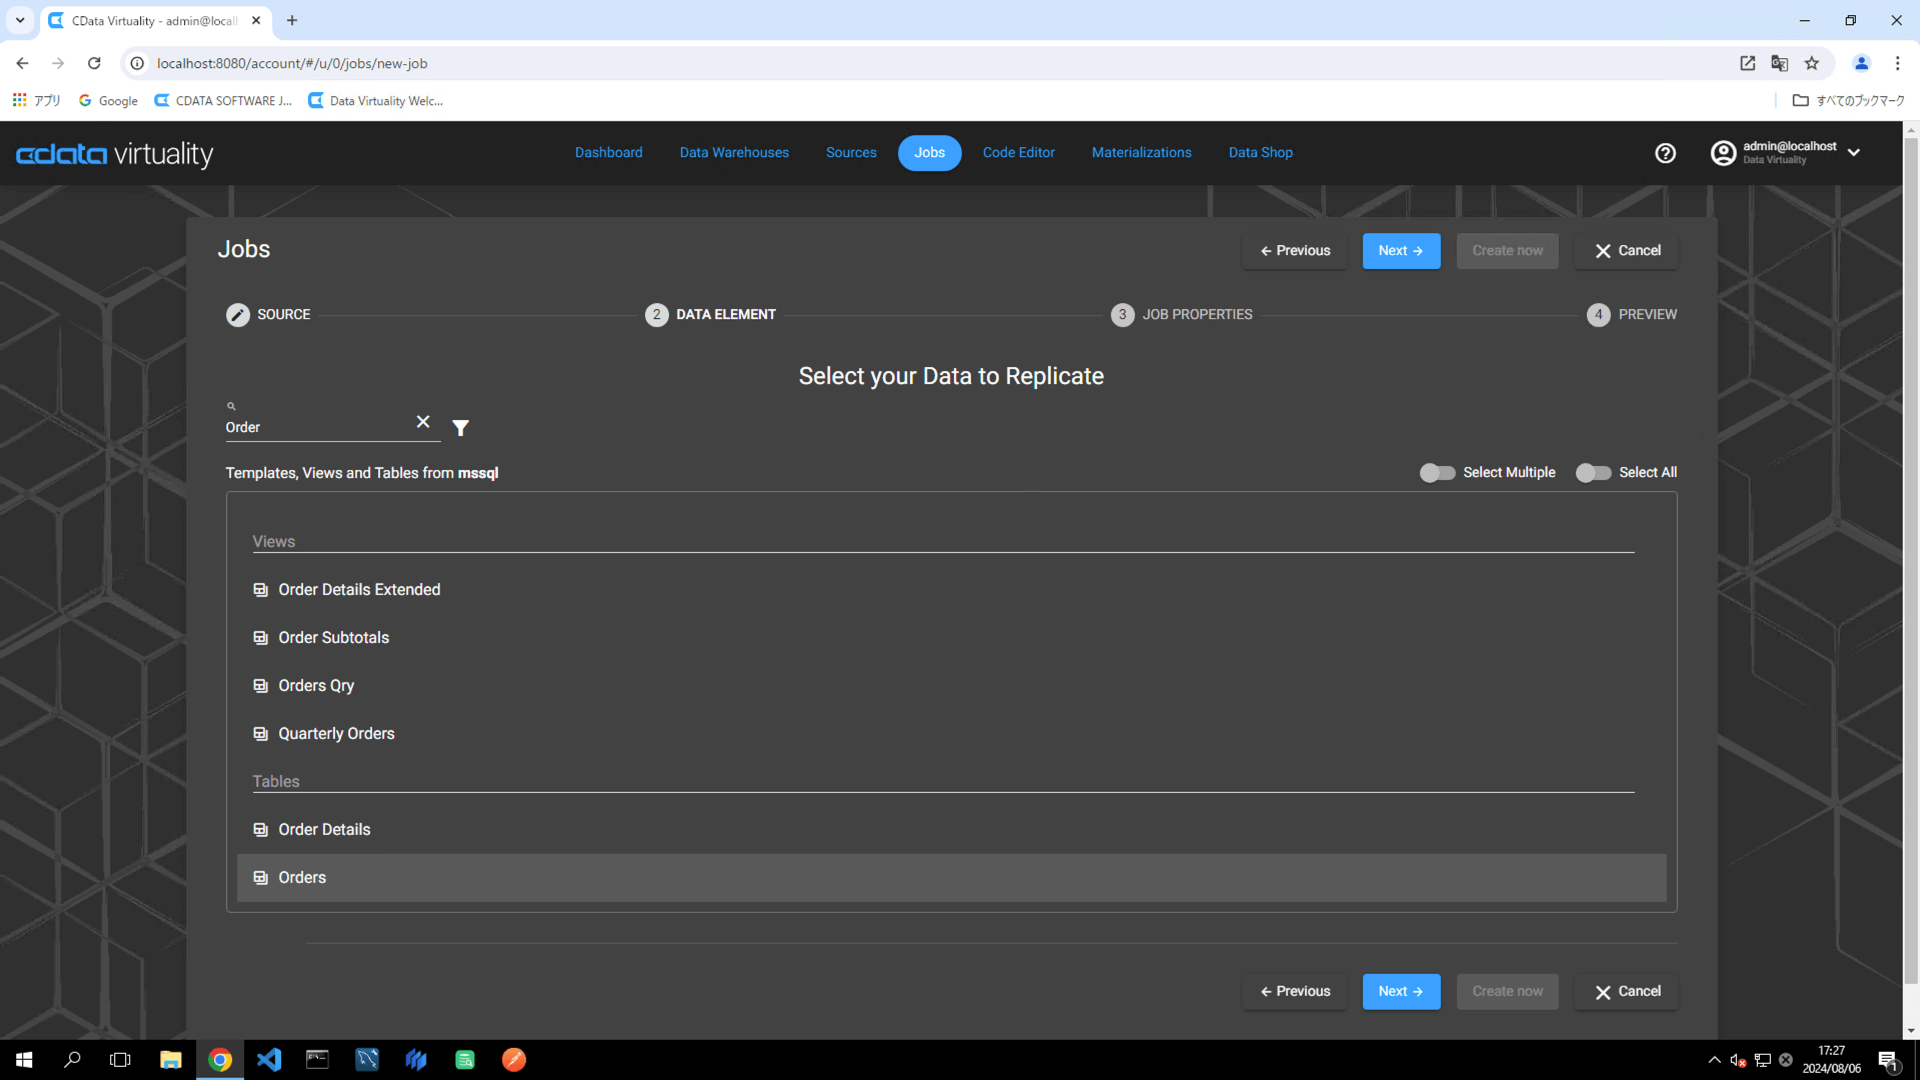
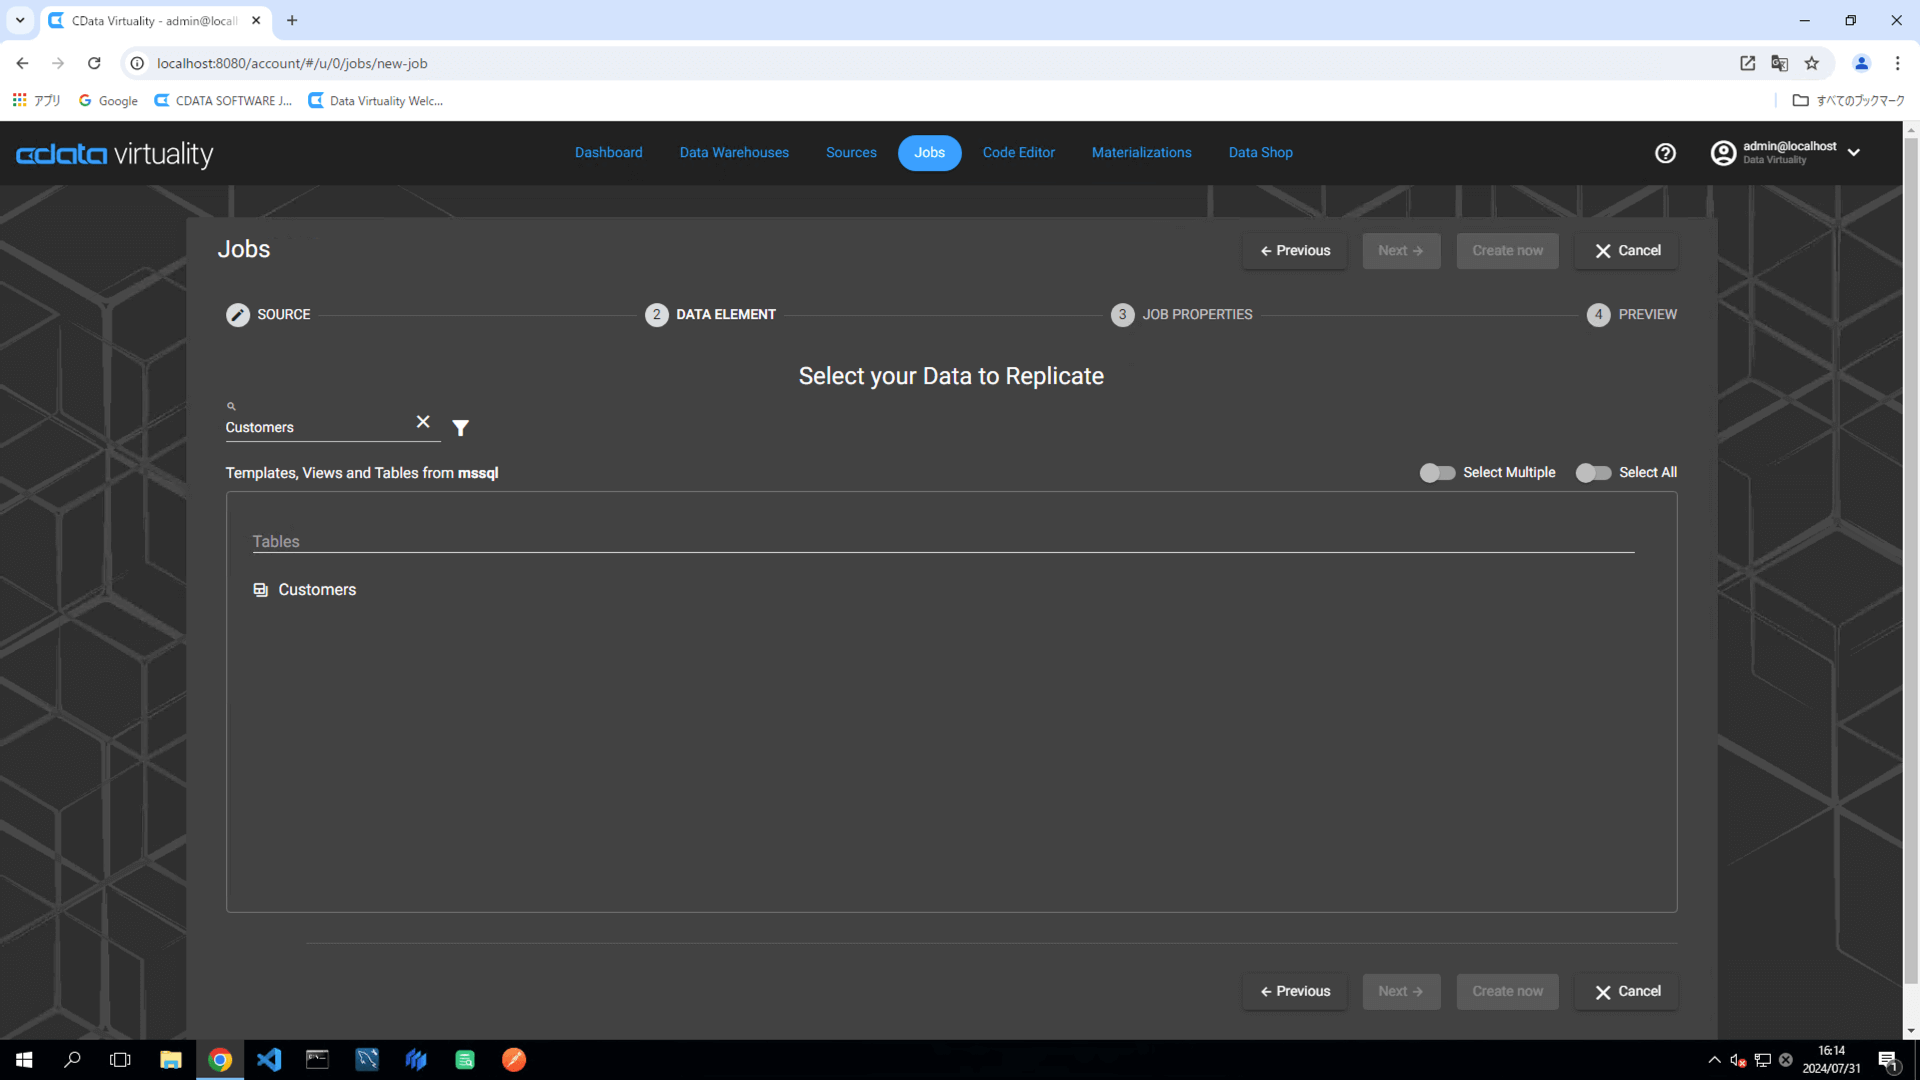
On the Select your Data to Replicate screen, choose the table to be replicated, and click the Next button:
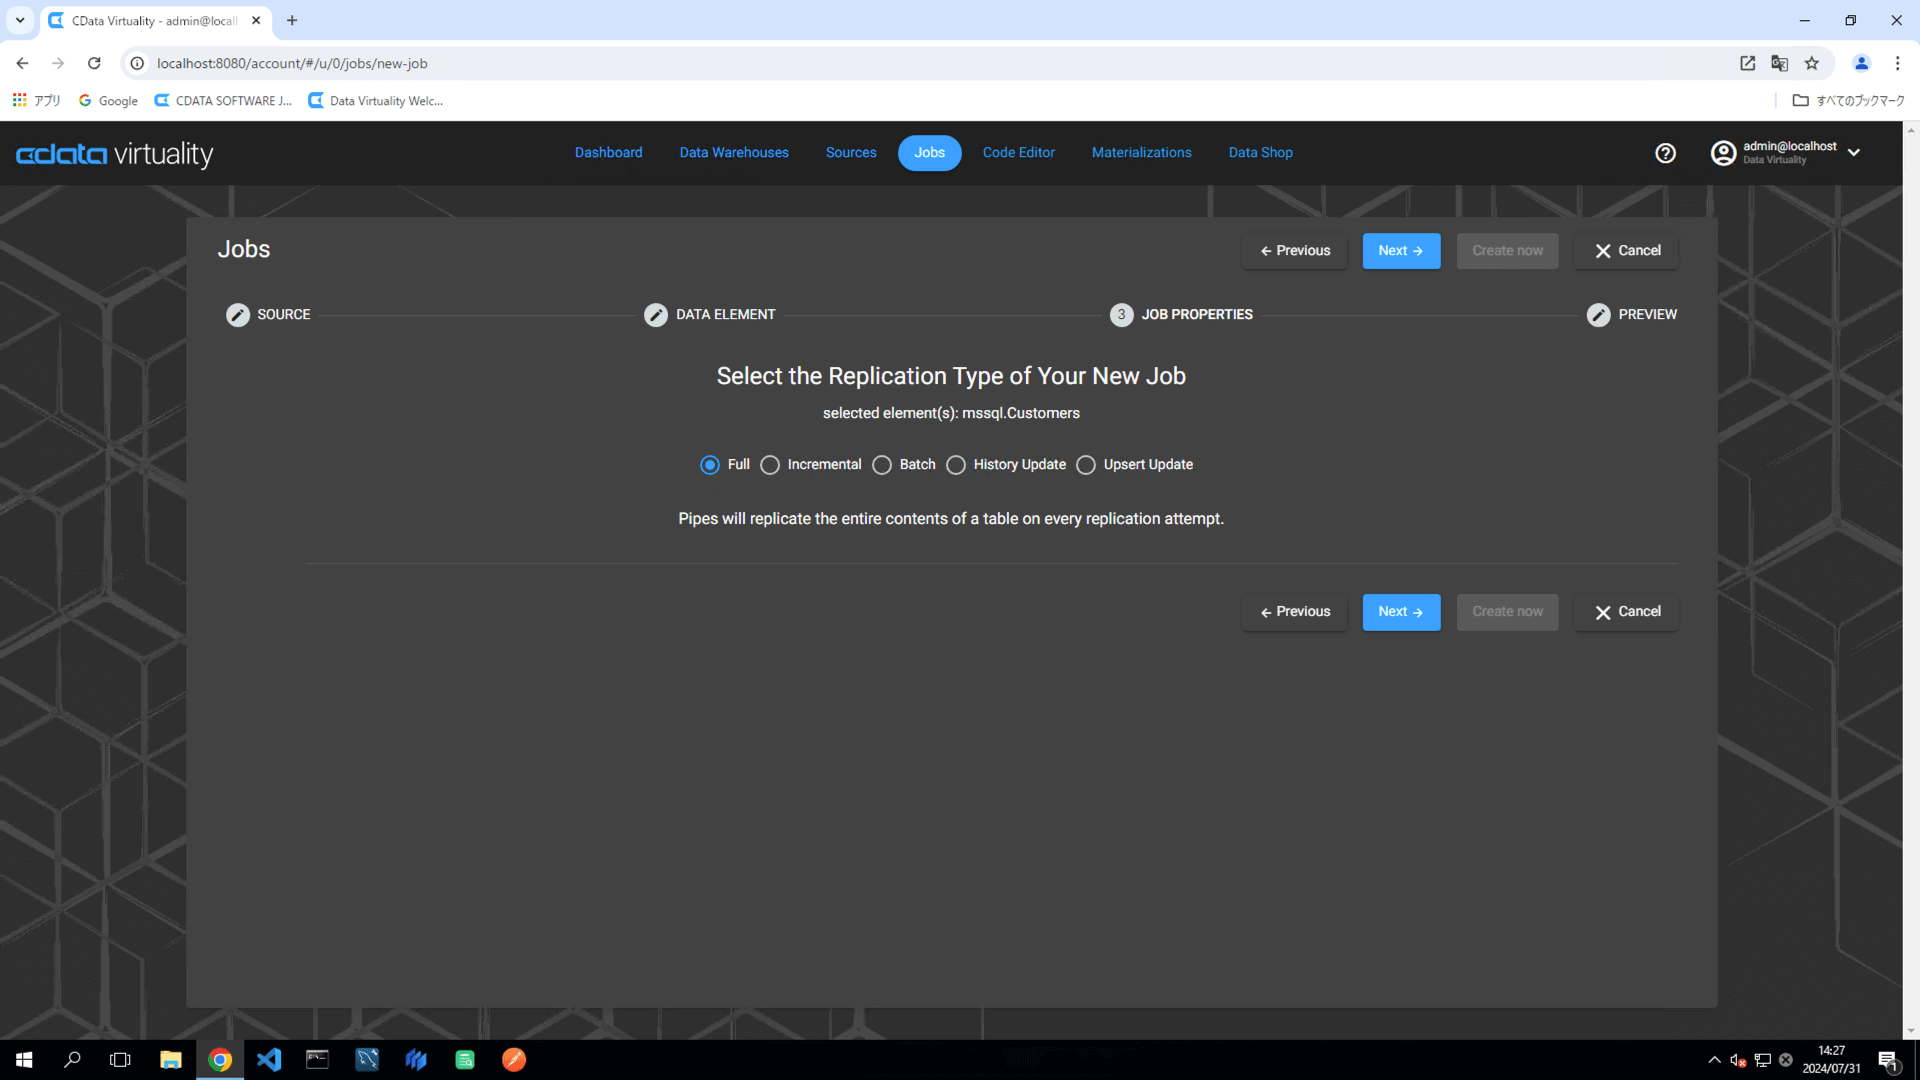
For this example, the Customers table in Microsoft SQL Server is selected.
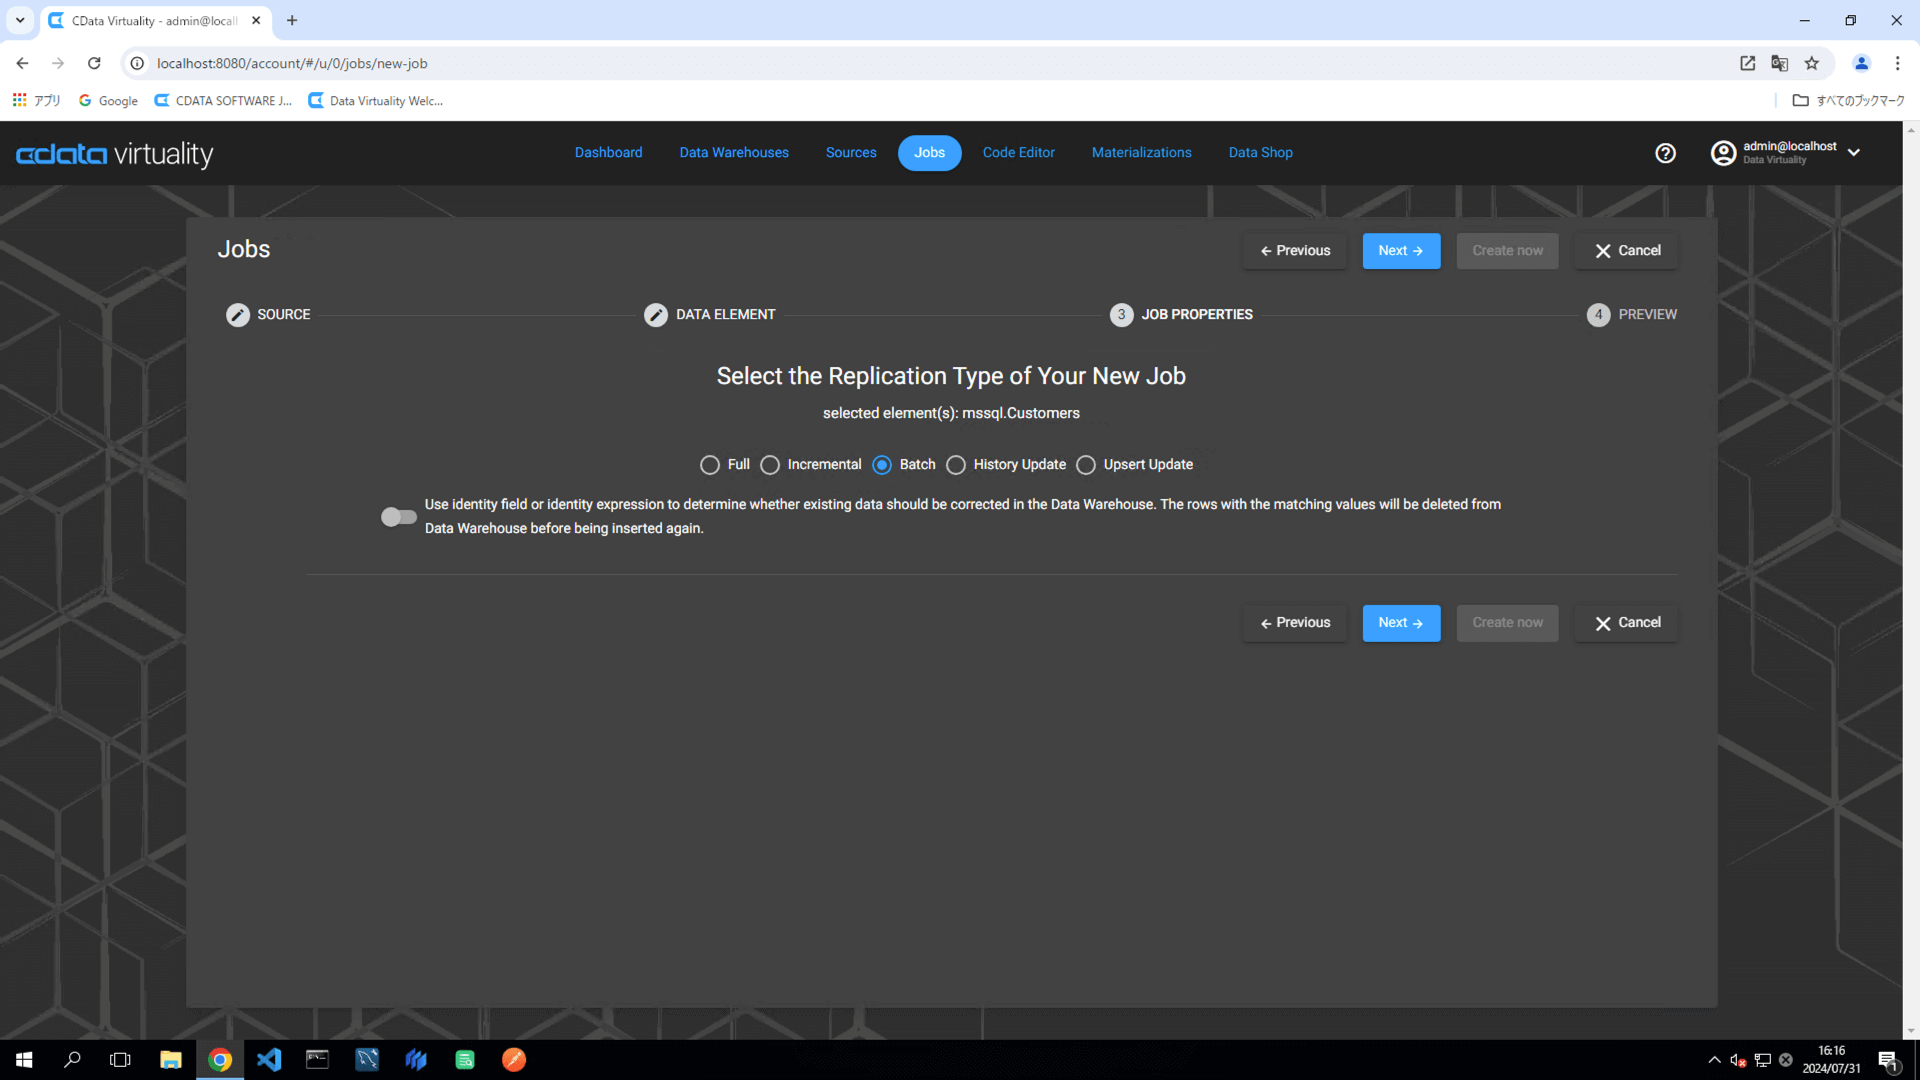
Choose Full as the replication type and proceed:
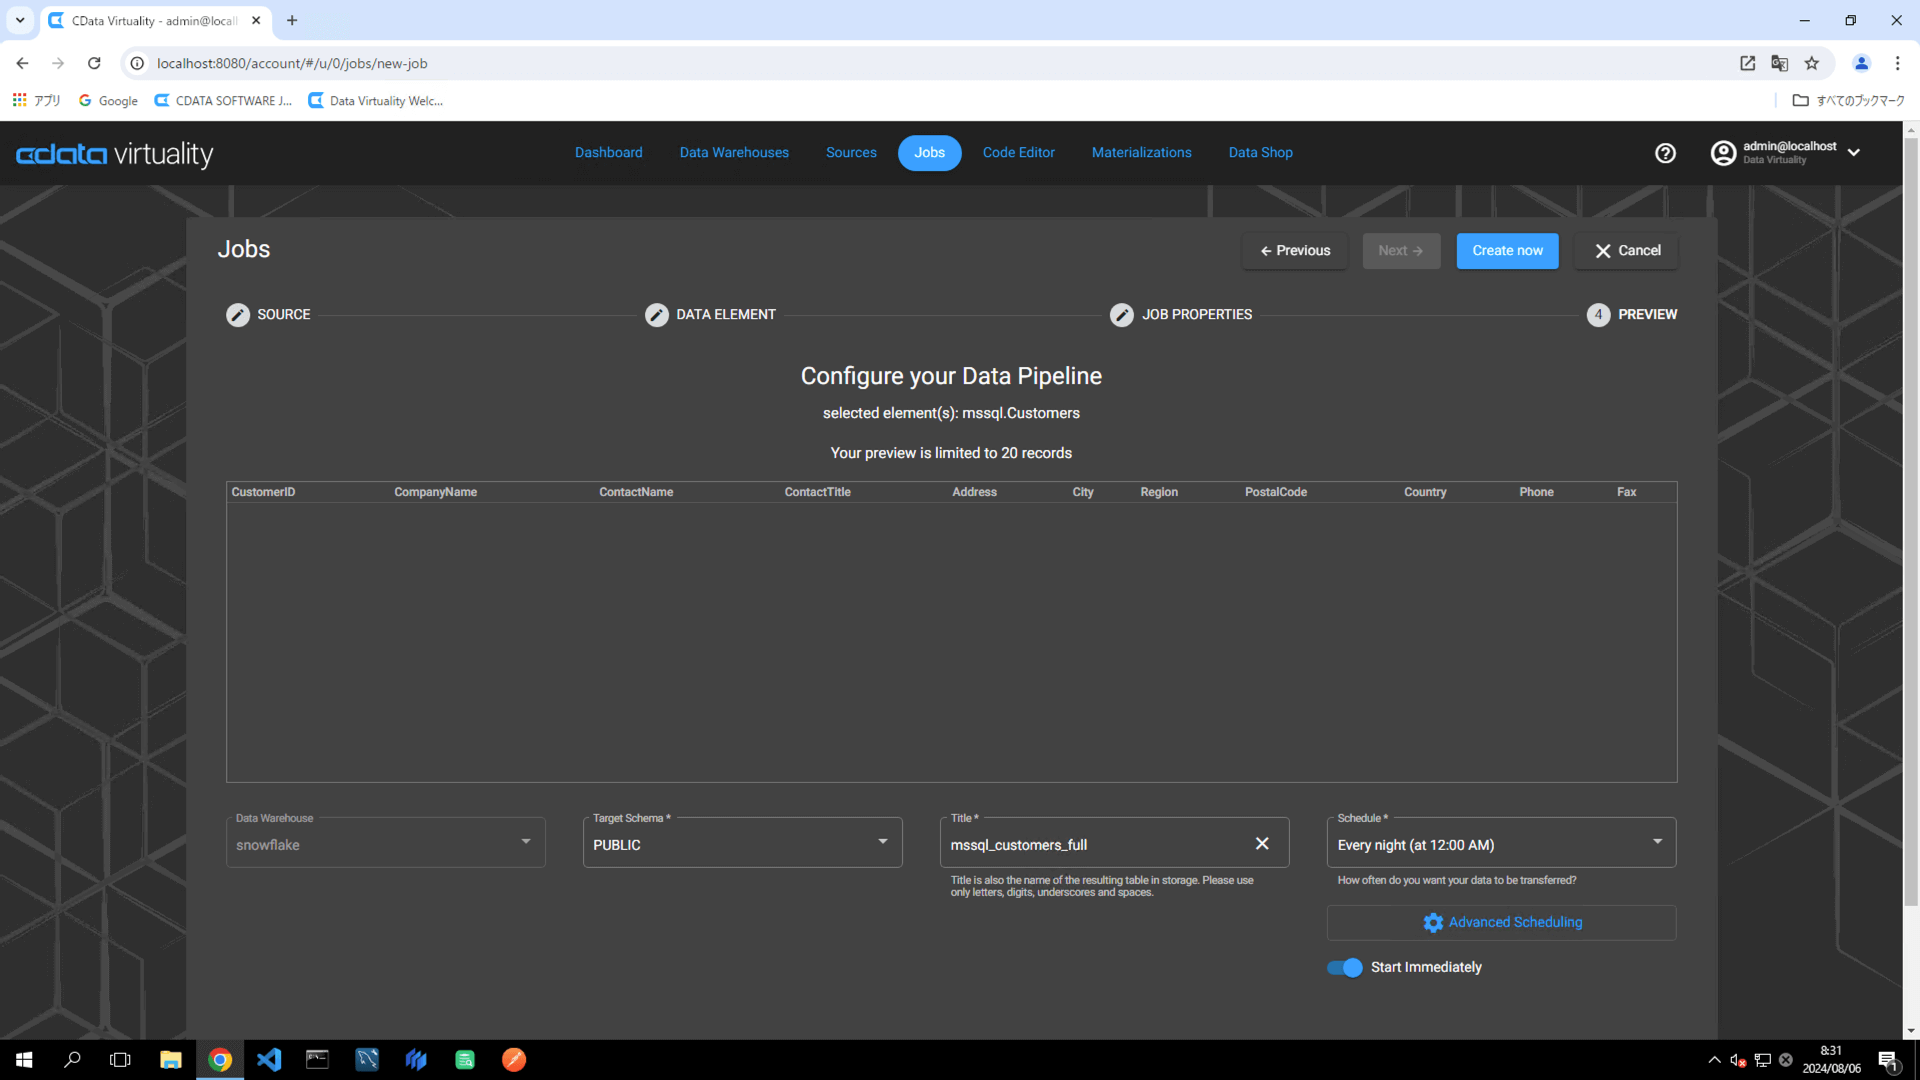
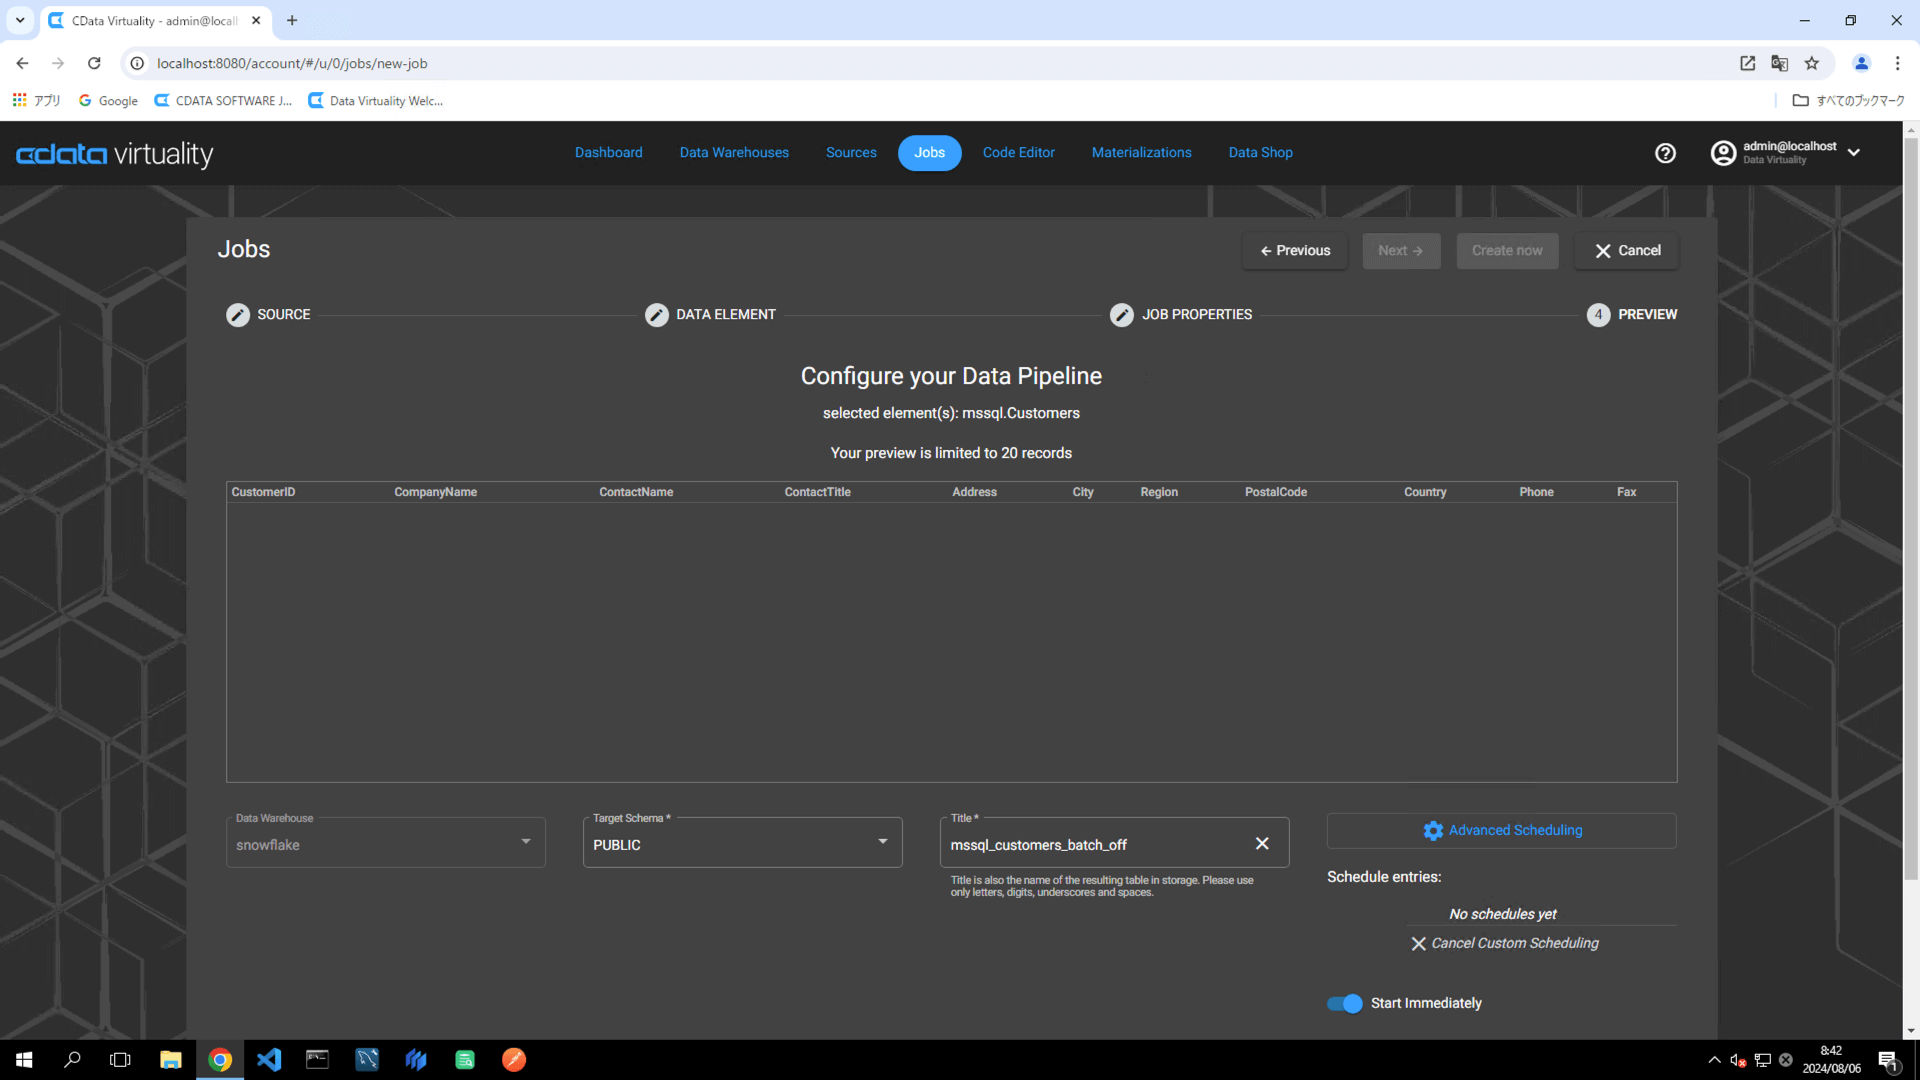
Set the following elements in the pipeline configuration:
Data Warehouse: Select the target data warehouse.
Target Schema: Specify the target schema.
Title: Rename the pipeline to
mssql_customers_full.Schedule: Set the desired execution schedule.
Start Immediately: Toggle on for immediate execution.
For more flexible scheduling options, click the Advanced Scheduling button.
Click the Create now button to run the replication job.
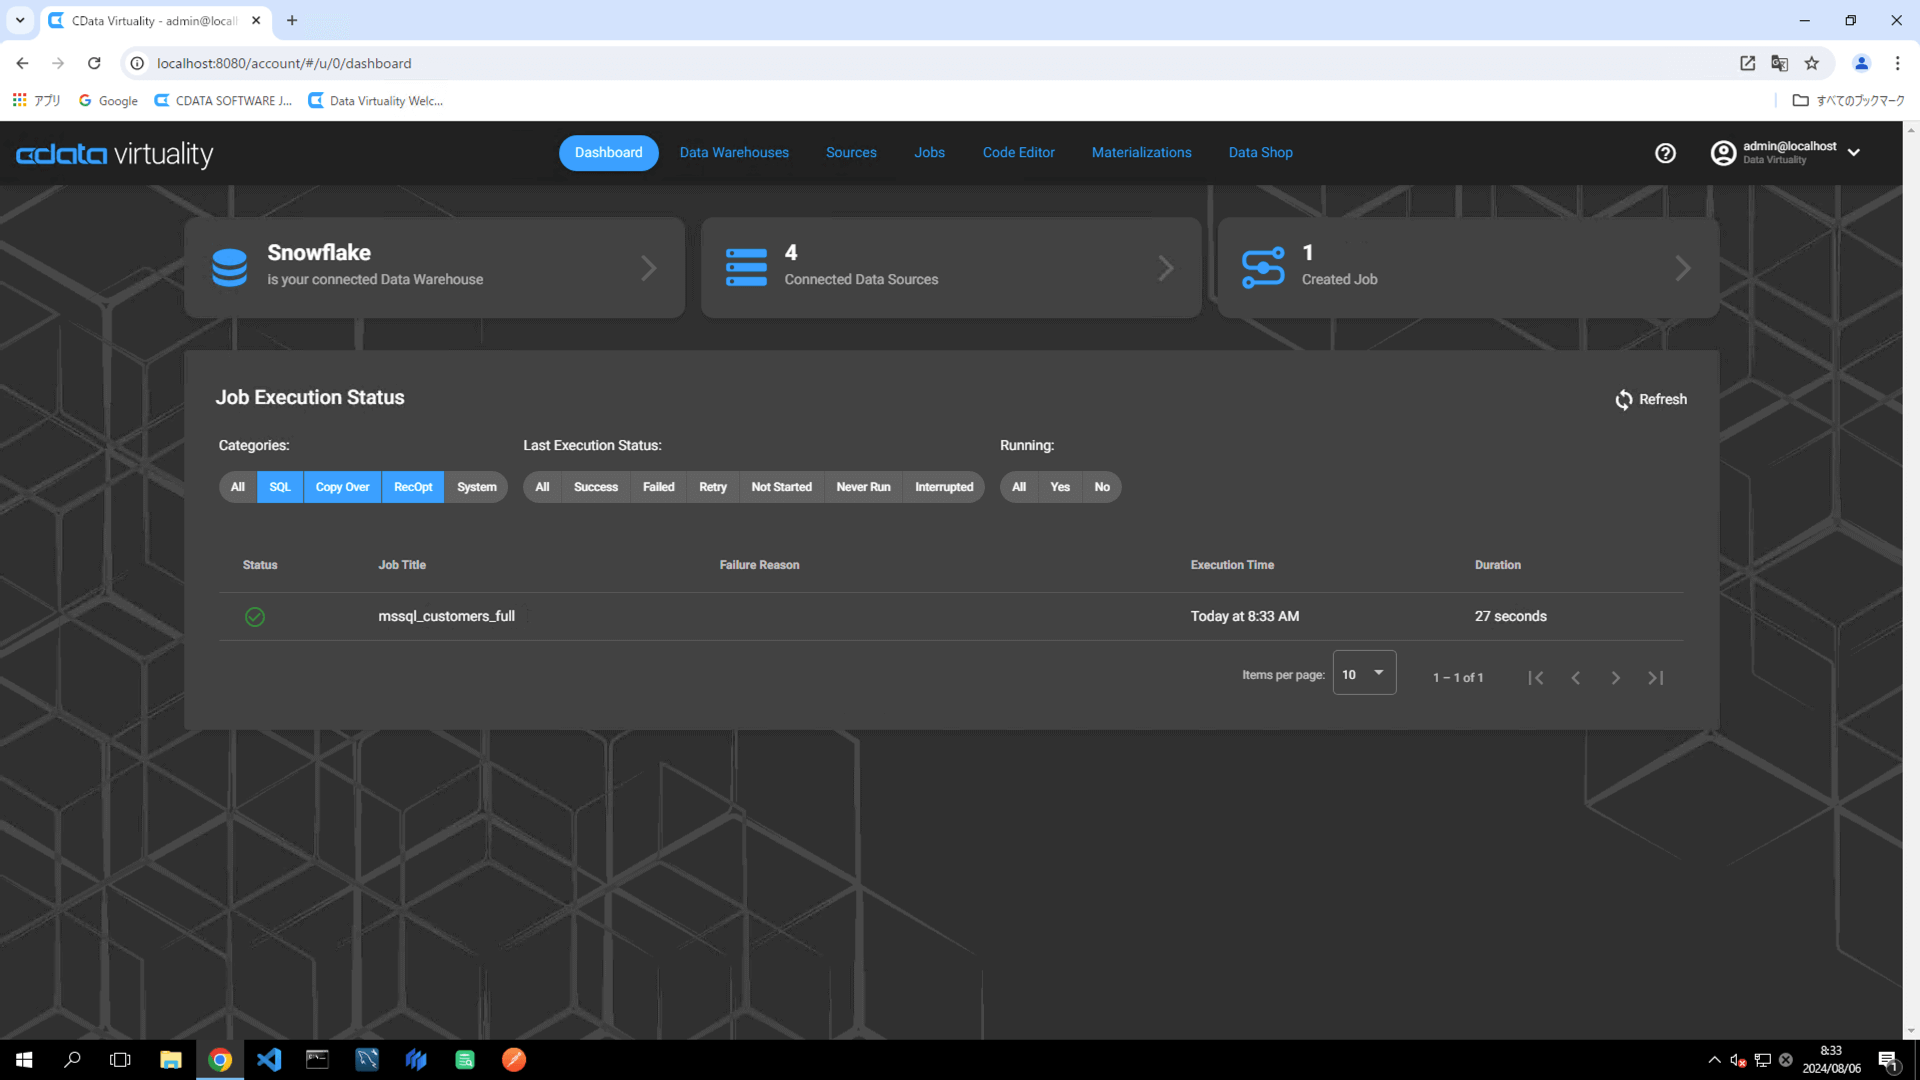
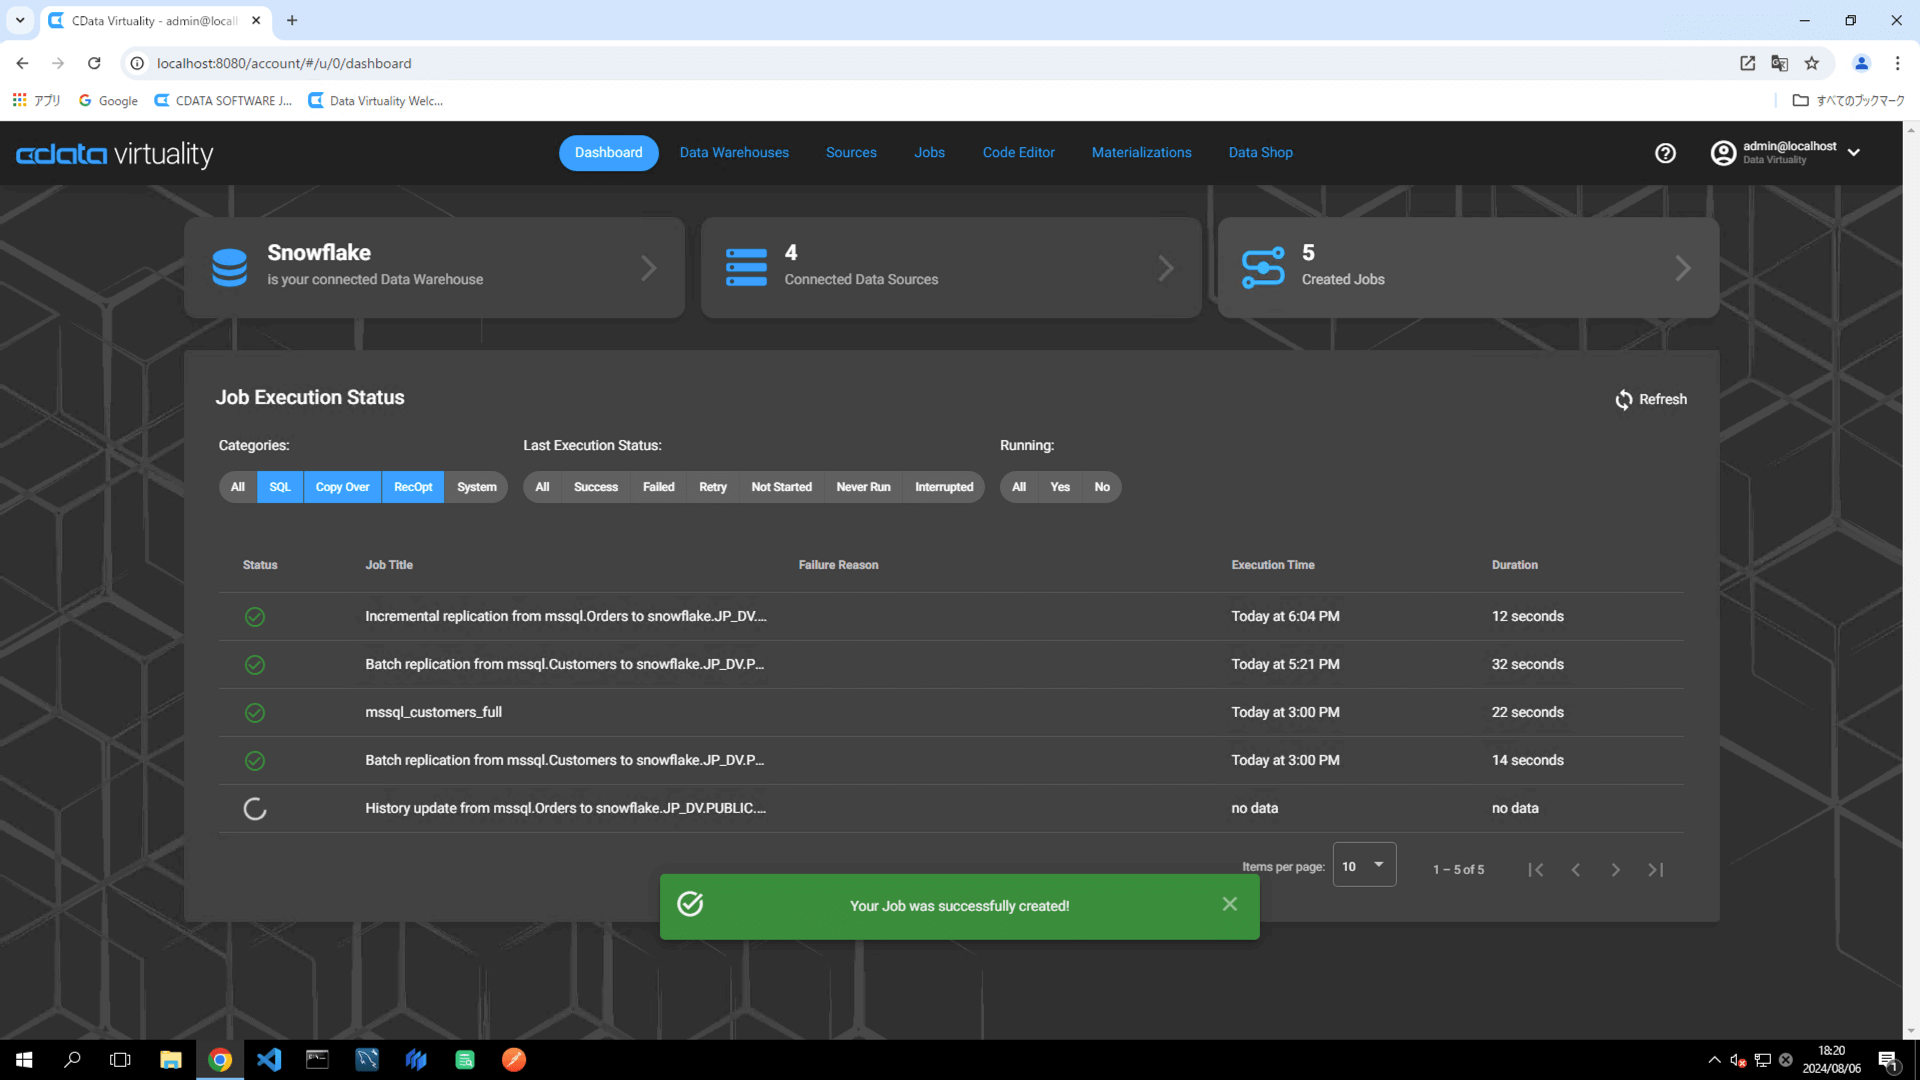
The Dashboard screen will open. The green bar will confirm that the job was created successfully:

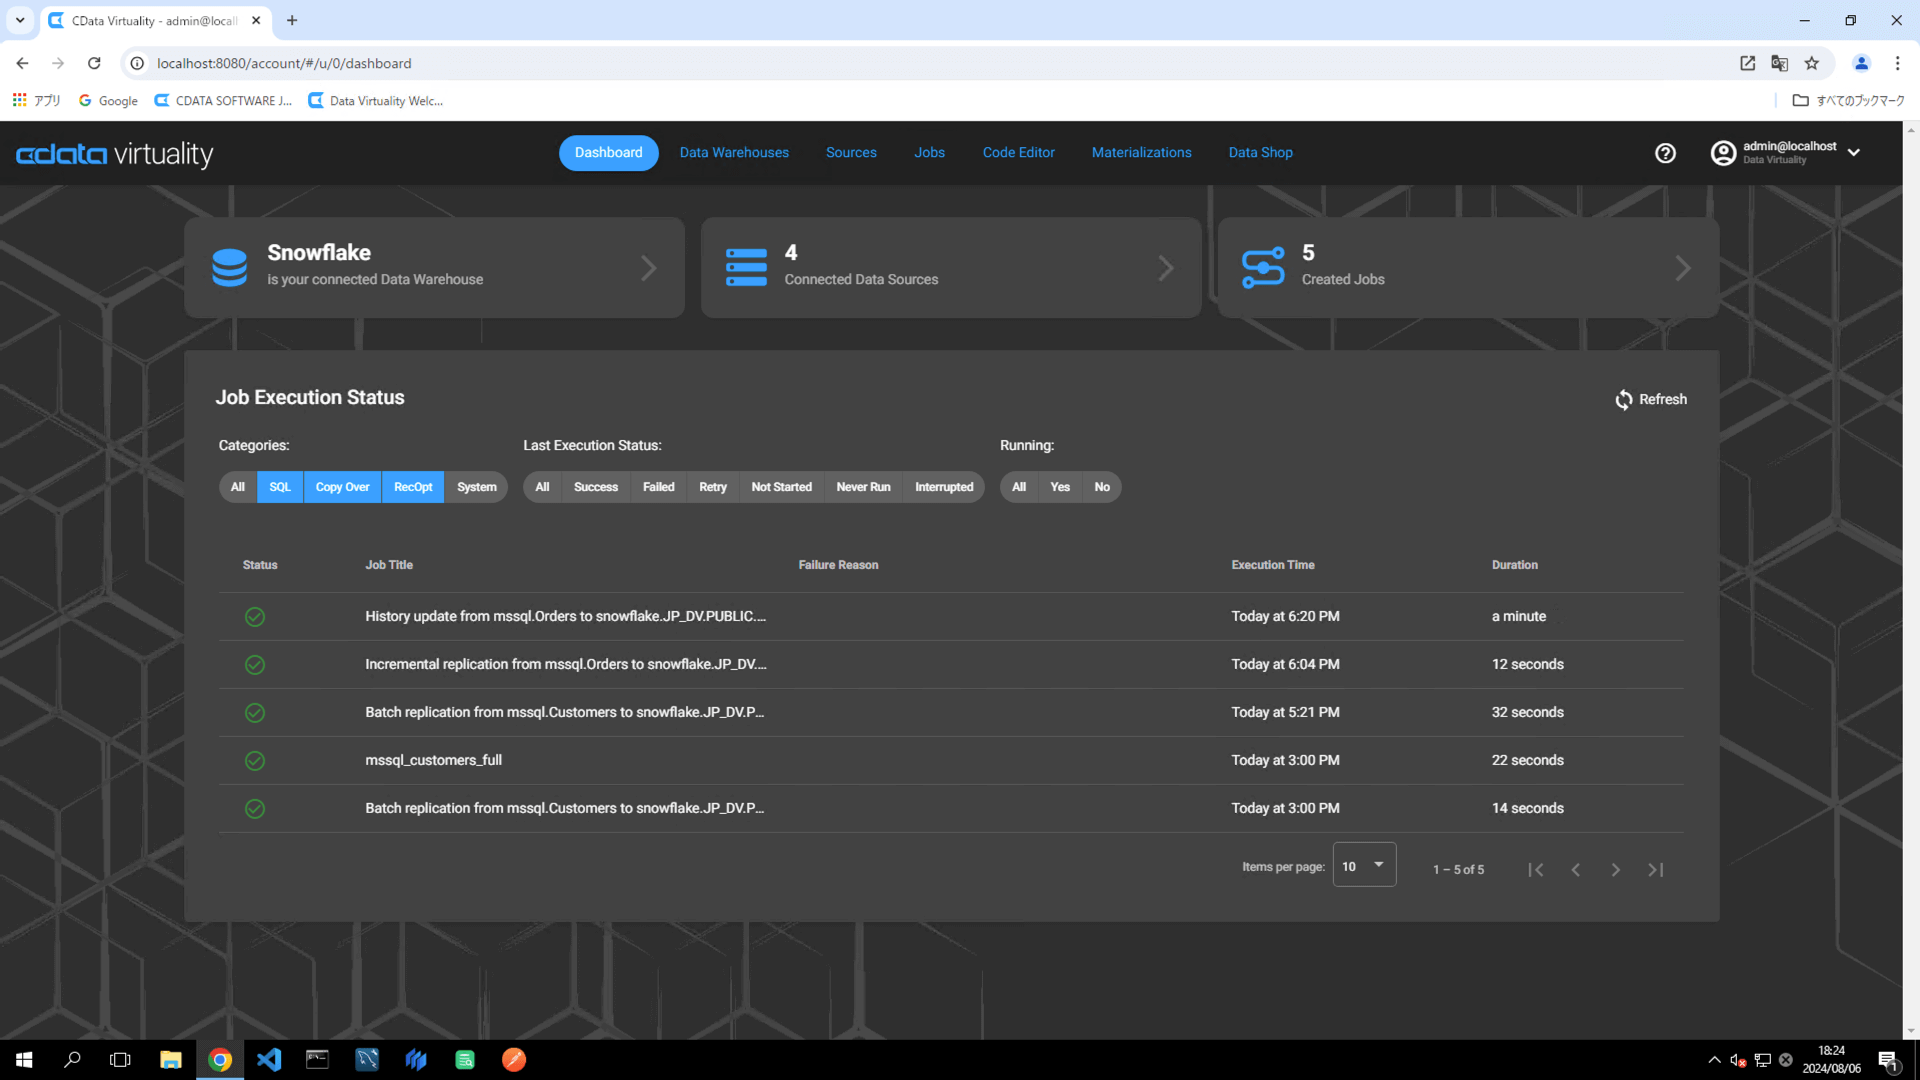
Once the job has executed, confirm that the Status is marked as Successful on the Dashboard screen. If the status doesn’t update automatically, click the Refresh button to refresh the screen:
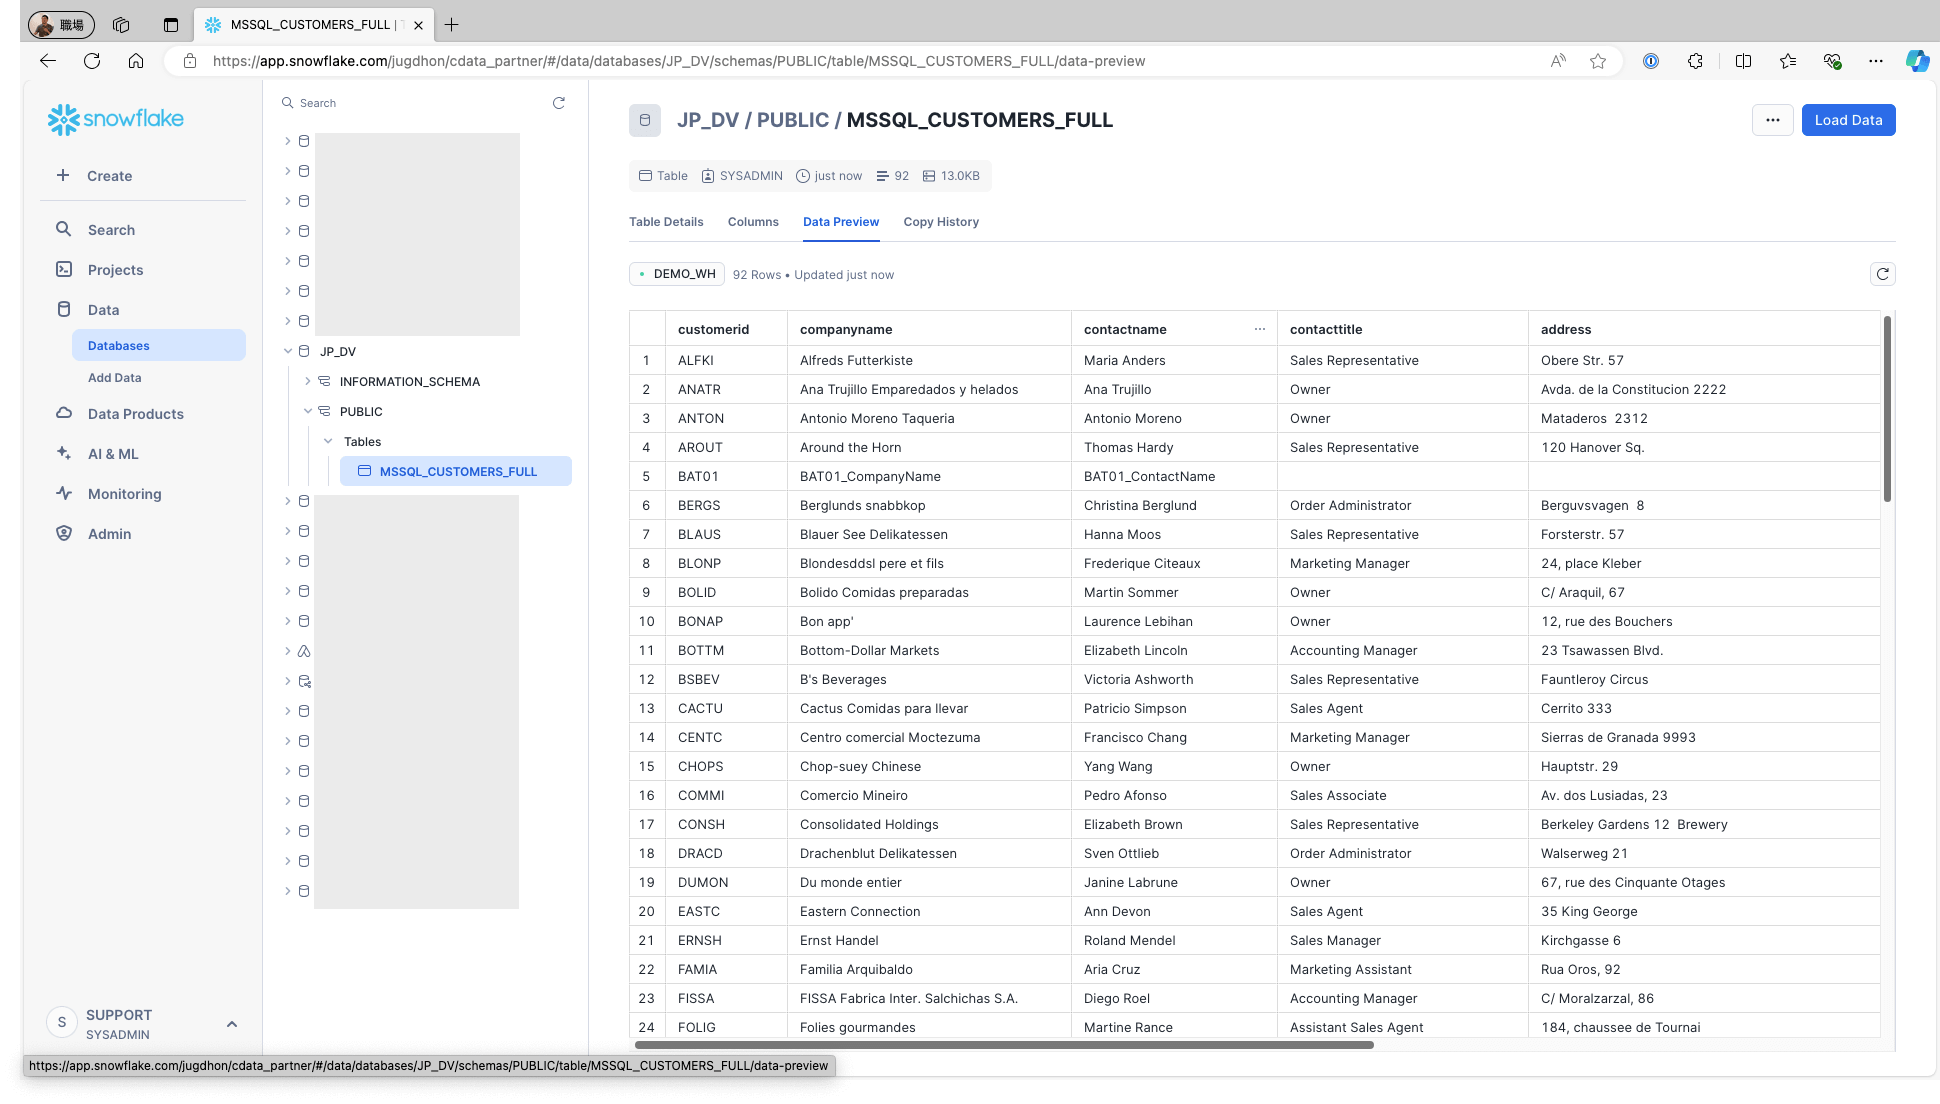
Access Snowflake and confirm that the data is stored in the respective tables:
On the Jobs screen, the JOB TYPE will appear as copyOverSourceTable, which is synonymous with Copy Over or Full replication:
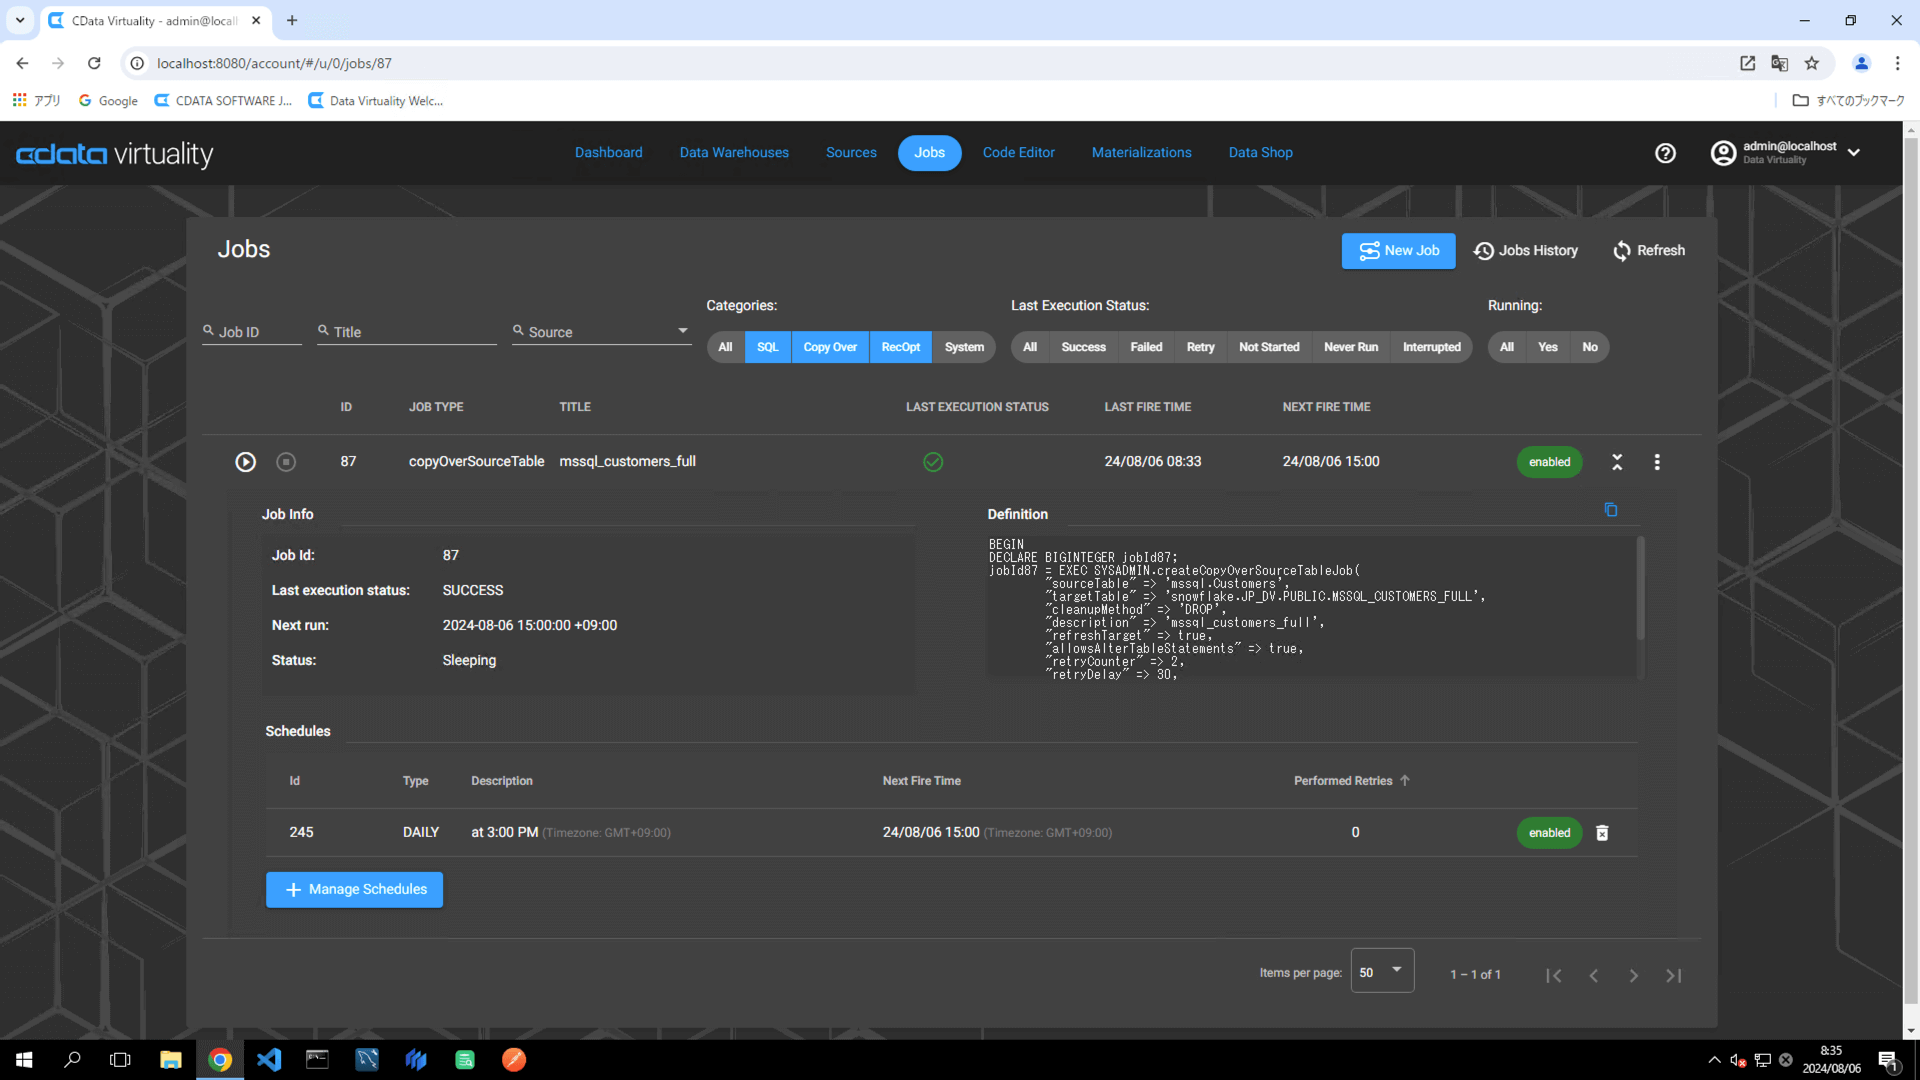
To edit job settings, locate the desired job, and click the three vertical dots next to the job. Select Edit Job from the context menu:
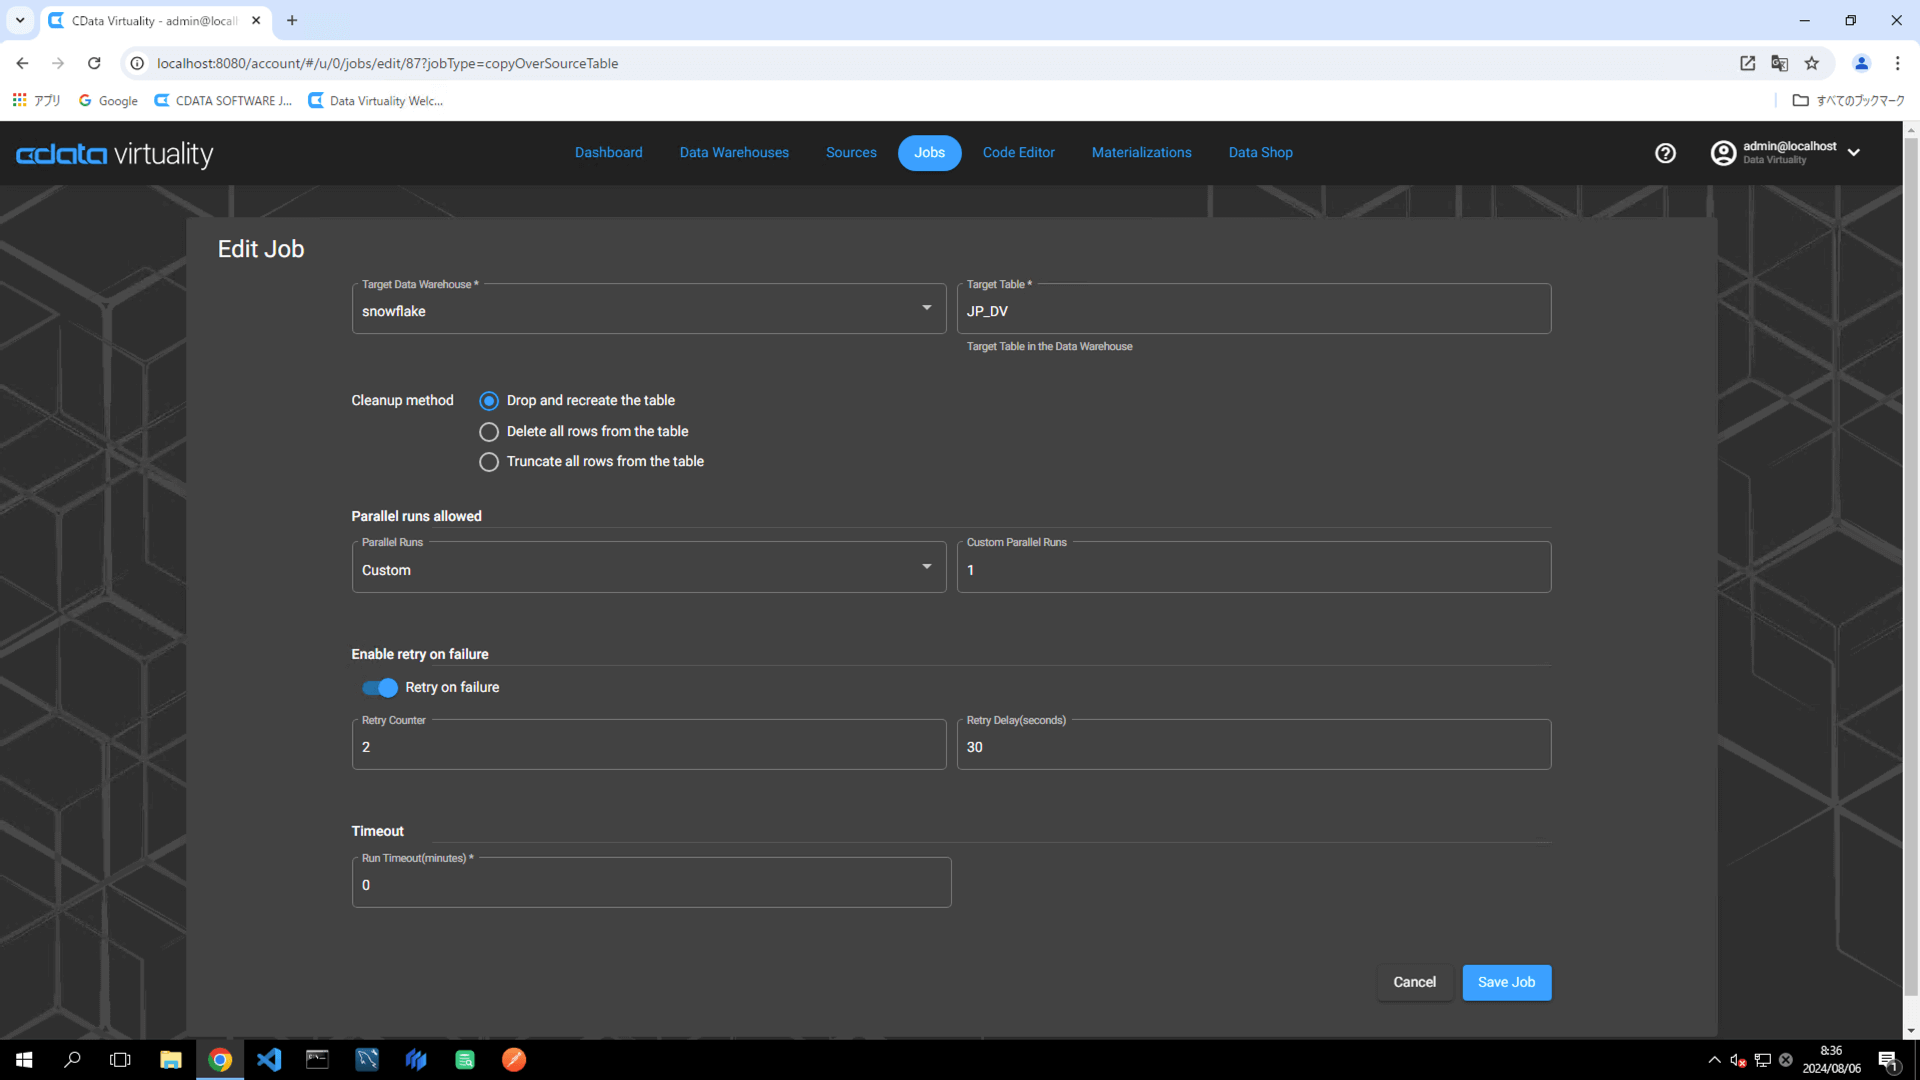
The cleanup method for the replication job can be selected from the following three options:
Drop and recreate the table
Delete all rows from the table
Truncate all rows from the table
The default setting is Drop and recreate the table, which deletes the table in the data warehouse and creates a new table when the job is executed.
Incremental
Open Jobs and click the New Job button:
On the Select your Data to Replicate screen, choose the table to be replicated, and click the Next button:
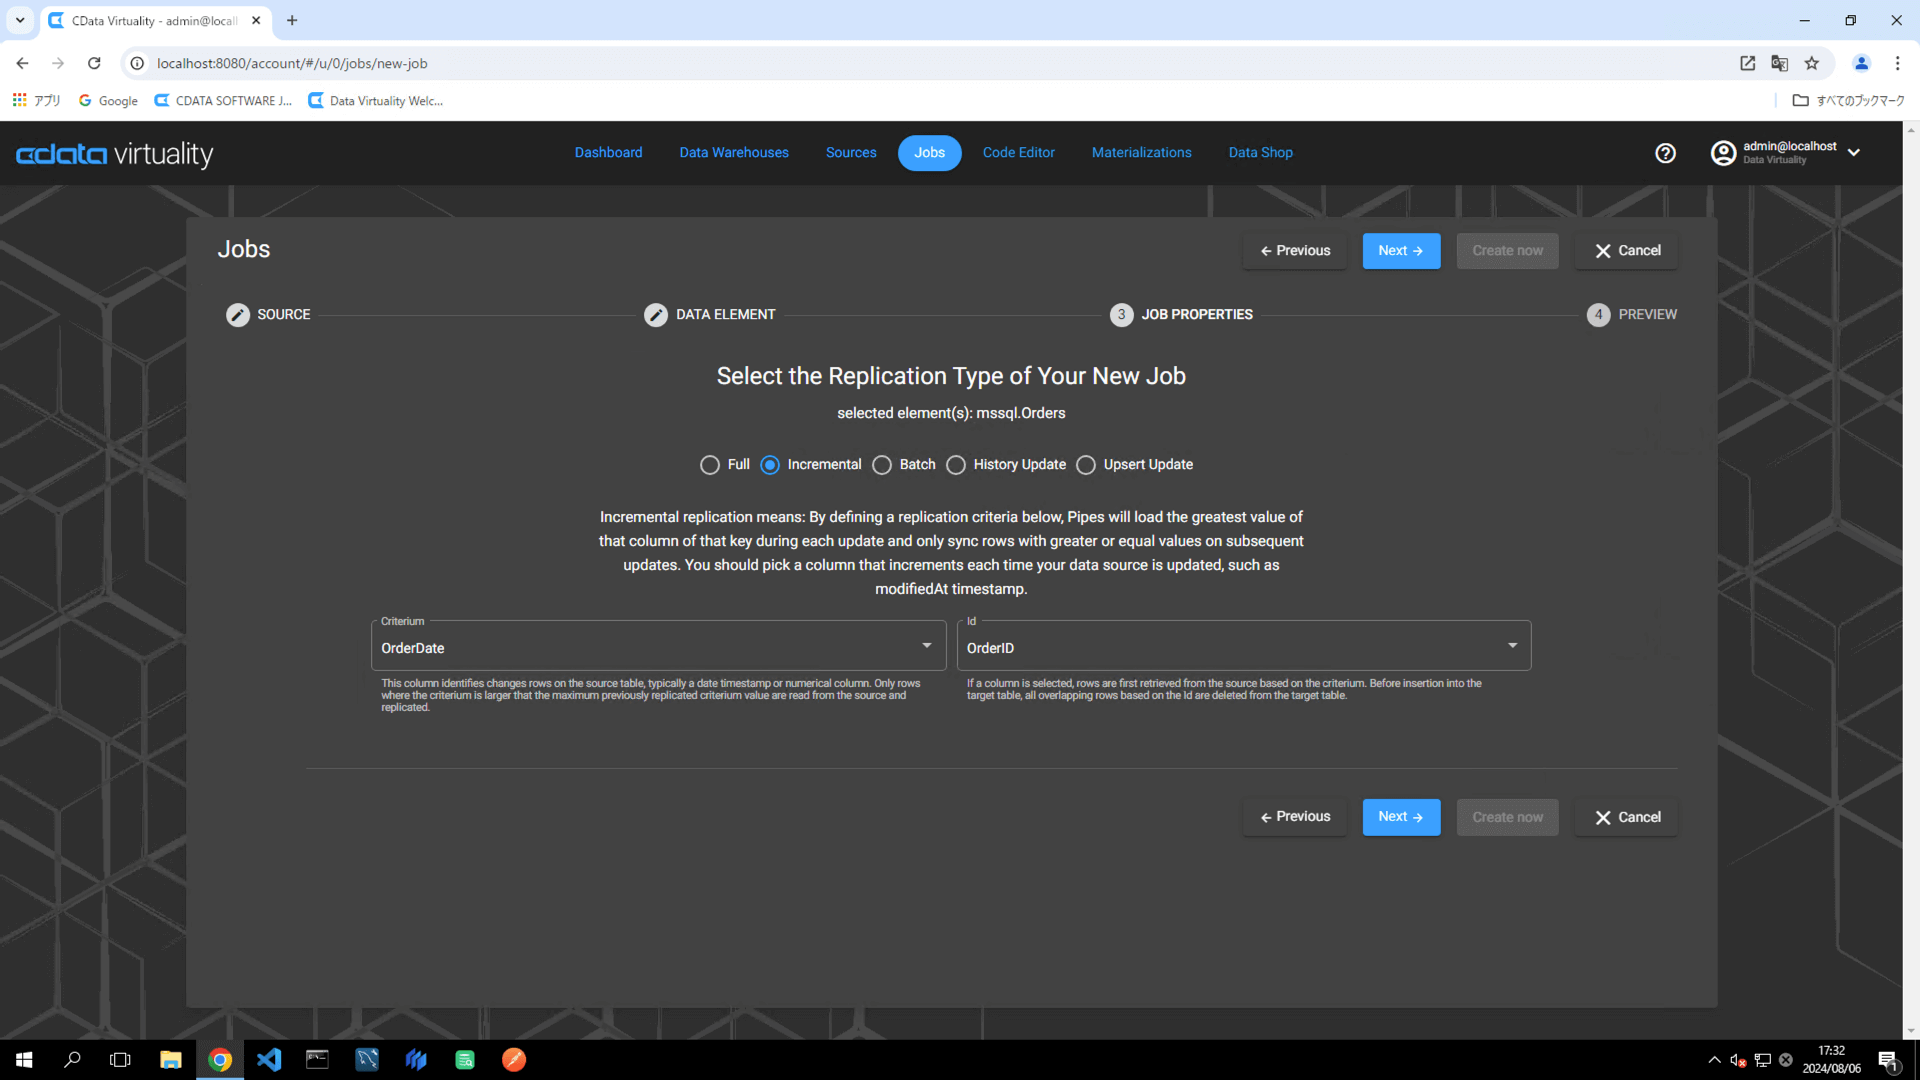
For this example, the Orders table in Microsoft SQL Server is selected.
For incremental replication, two field is required:
A field to identify the modified row, typically a date timestamp or numeric column (e.g., OrderDate)
An ID field to uniquely identify each record (e.g., OrderID):
Set the following elements in the pipeline configuration:
Data Warehouse: Select the target data warehouse.
Target Schema: Specify the target schema.
Title: Rename the pipeline to
mssql_orders_incremental.Schedule: Set the desired execution schedule.
Start Immediately: Toggle on for immediate execution.
For more flexible scheduling options, click the Advanced Scheduling button.
Click the Create now button to run the replication job:

The Dashboard screen will open. The green bar will confirm that the job was created successfully:
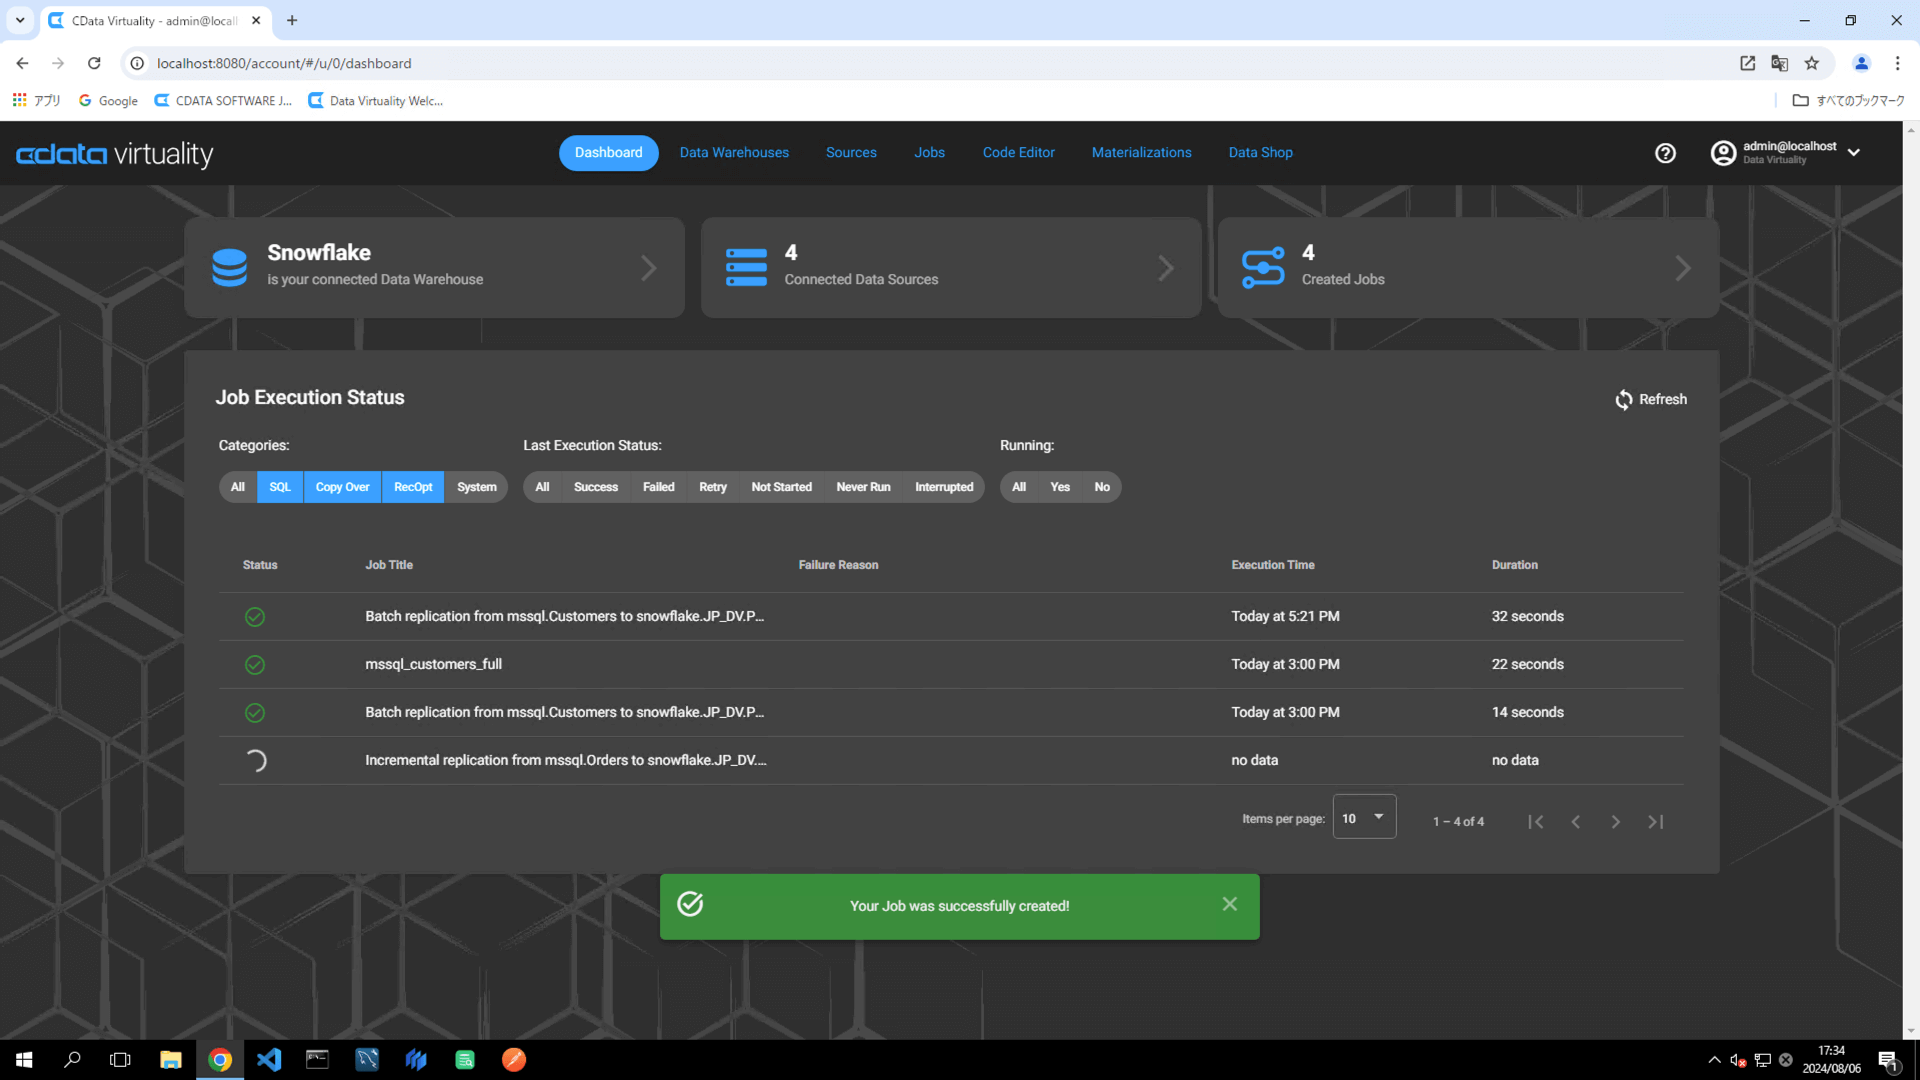
Once the job has executed, confirm that the Status is marked as Successful on the Dashboard screen. If the status doesn’t update automatically, click the Refresh button to refresh the screen:

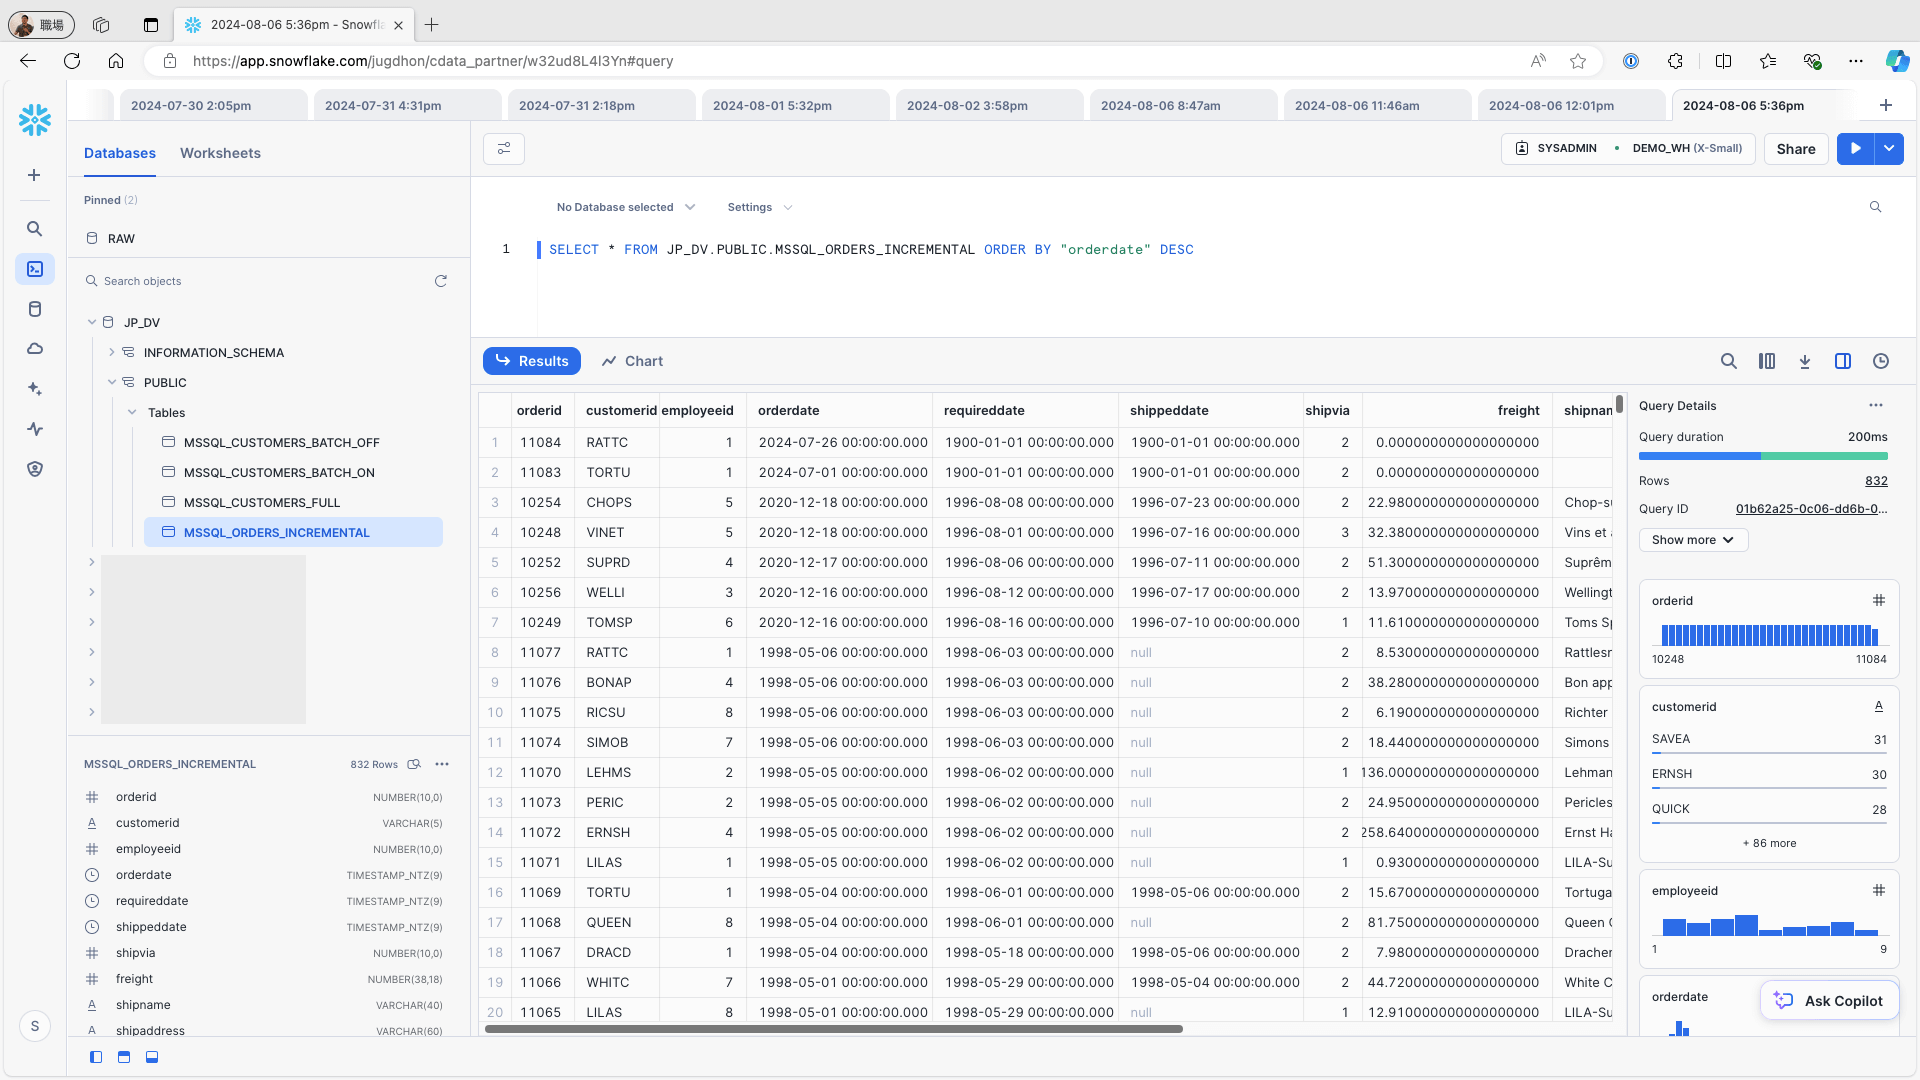
Access Snowflake and confirm that the data is stored in the respective tables:
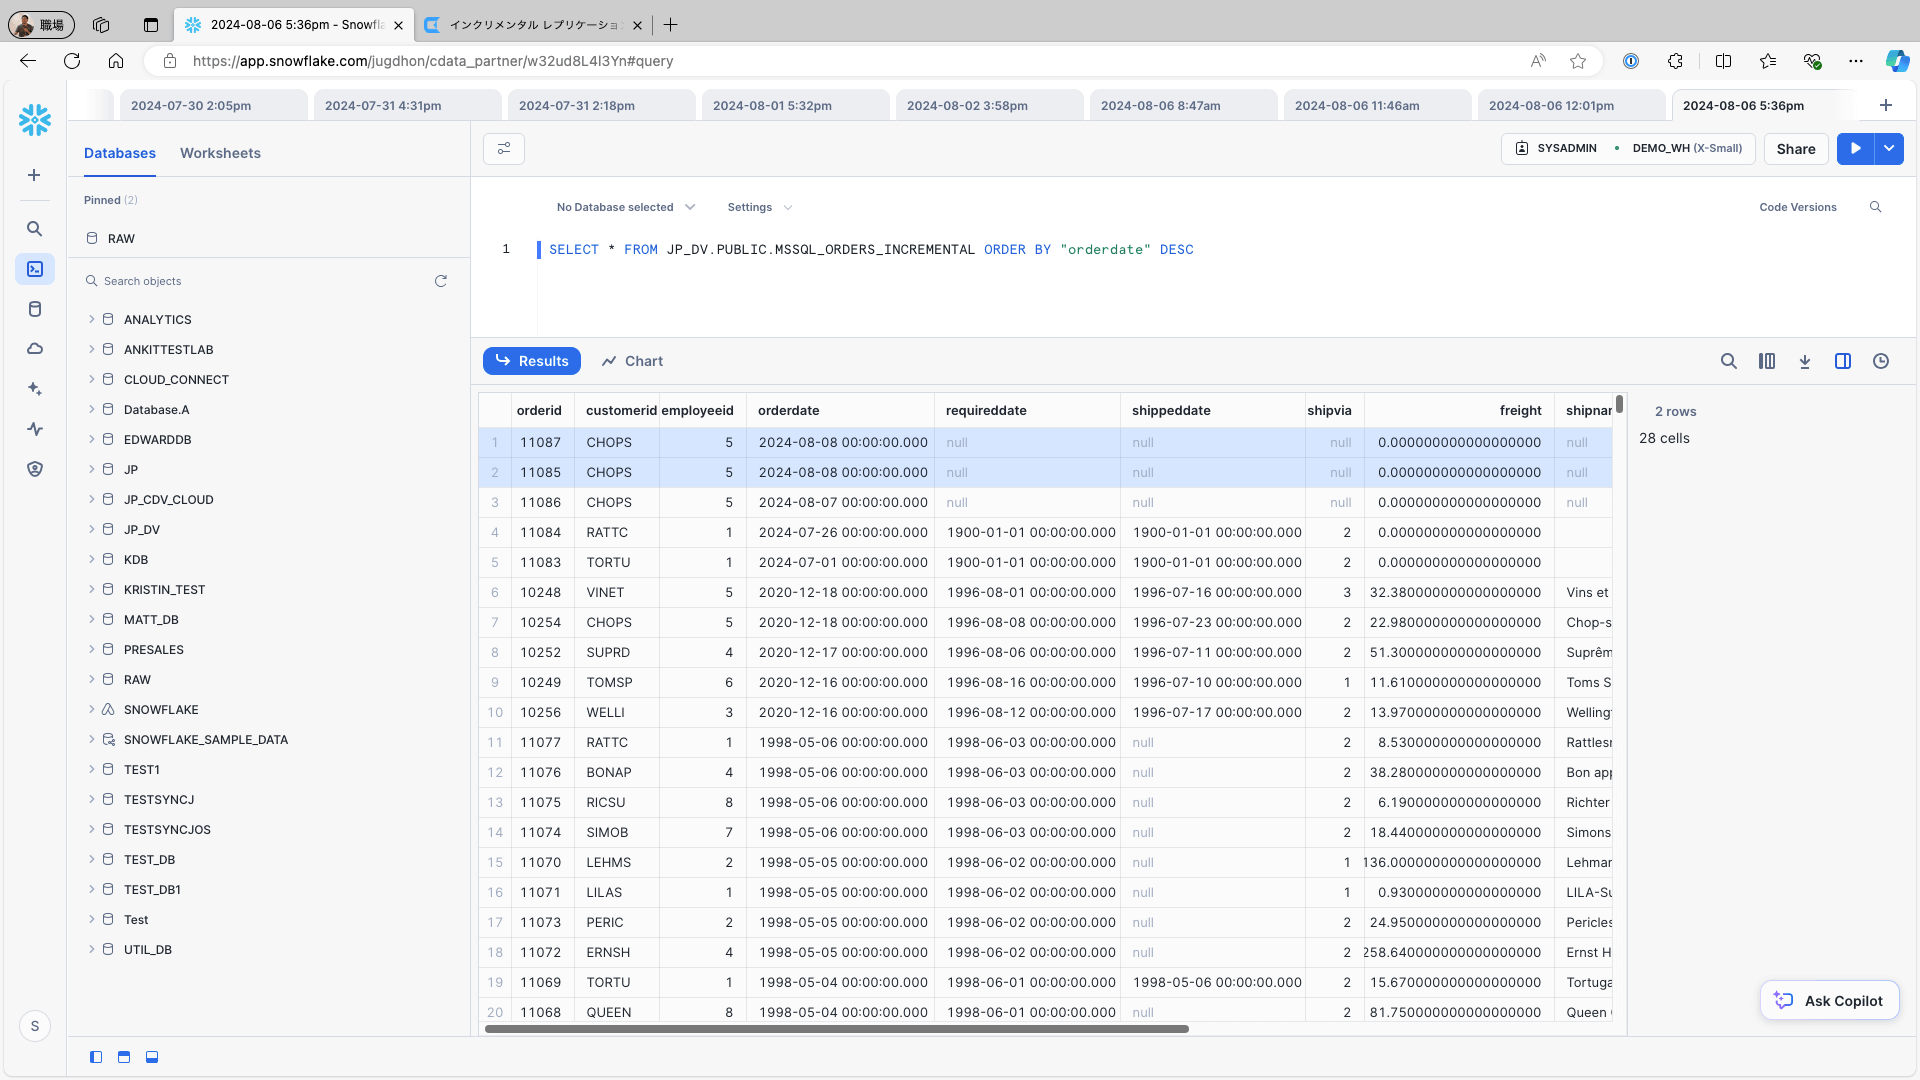
To add a new record to the data source (e.g., the Orders table in Microsoft SQL Server), change one record by using the following query and re-run the replication job:
INSERT INTO Orders (CustomerID, EmployeeID, OrderDate,ShipCountry) VALUES ('CHOPS', 5, '2024/08/08', 'USA');

UPDATE Orders SET OrderDate = '2024/08/08' WHERE OrderID = 11085;
Access Snowflake and check the replication destination table. Confirm that the newly added and updated records from the data source are accurately reflected in the replication destination table, and ensure that the records are properly linked to the replication destination:
Batch Update
Navigate to Jobs and click the New Job button:
On the Select your Data to Replicate screen, choose the table to be replicated, and click the Next button:
For this example, the Customers table in Microsoft SQL Server is selected.
Select Batch as the replication type and ensure that Use identity field... toggled off.
Set the following elements in the pipeline configuration:
Data Warehouse: Select the target data warehouse.
Target Schema: Specify the target schema.
Title: Rename the pipeline to
mssql_customers_batch_off.Schedule: Set the desired execution schedule.
Start Immediately: Toggle on for immediate execution.
For more flexible scheduling options, click the Advanced Scheduling button.
Click the Create now button to run the replication job.
The Dashboard screen will open. The green bar will confirm that the job was created successfully:
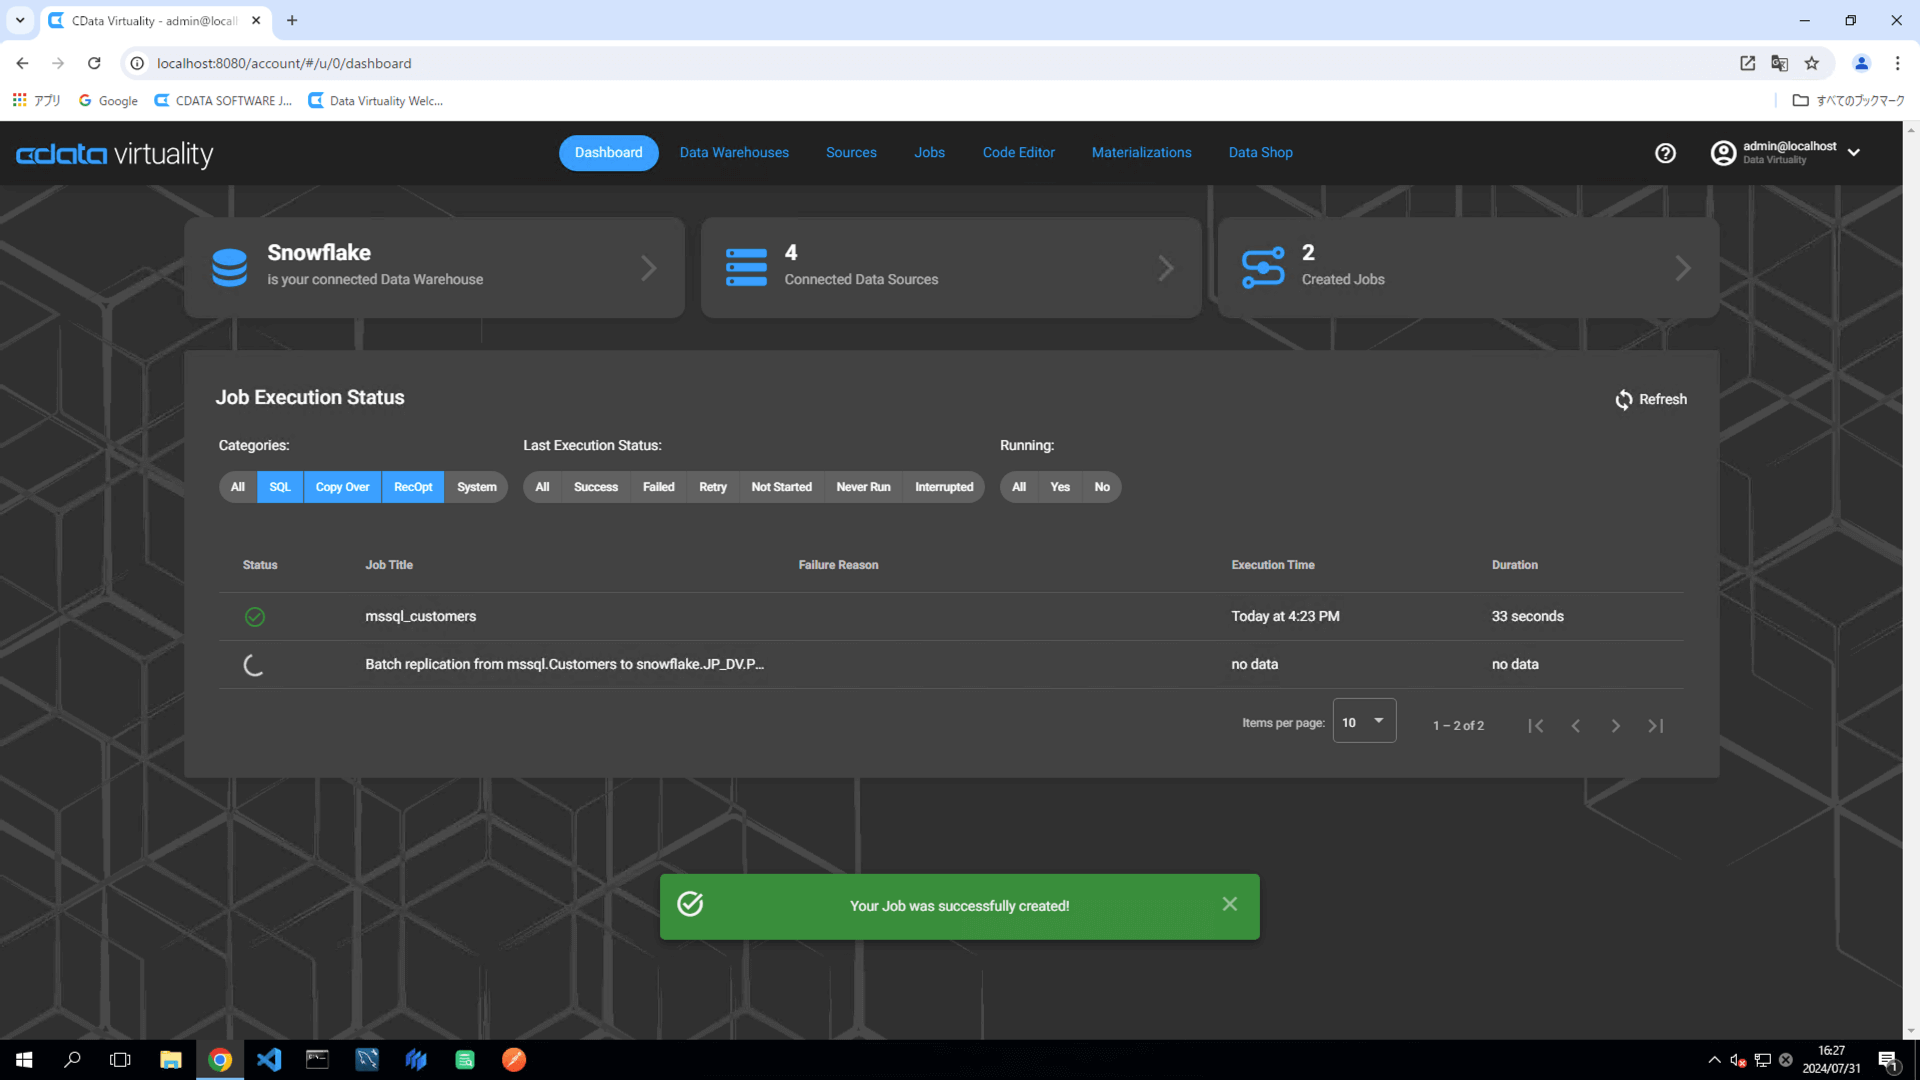
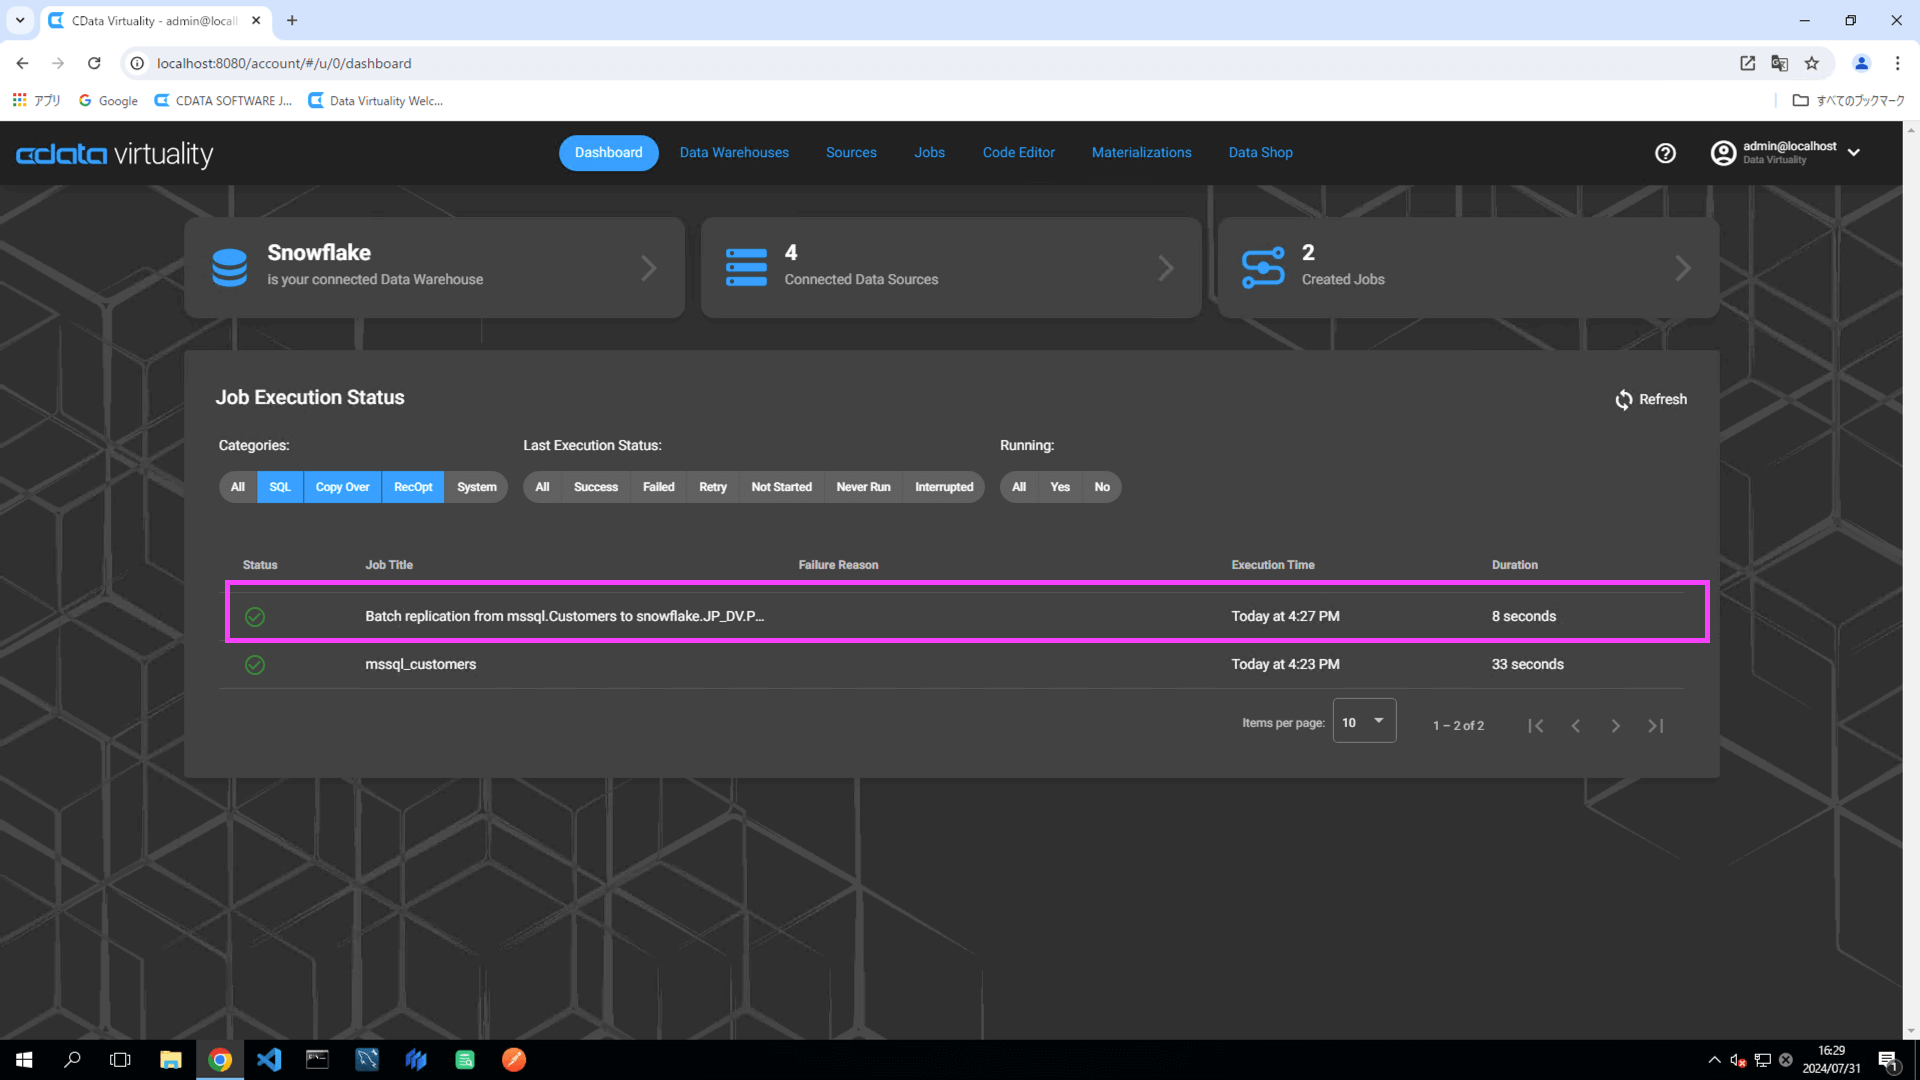
Once the job has executed, confirm that the Status is marked as Successful on the Dashboard screen. If the status doesn’t update automatically, click the Refresh button to refresh the screen:
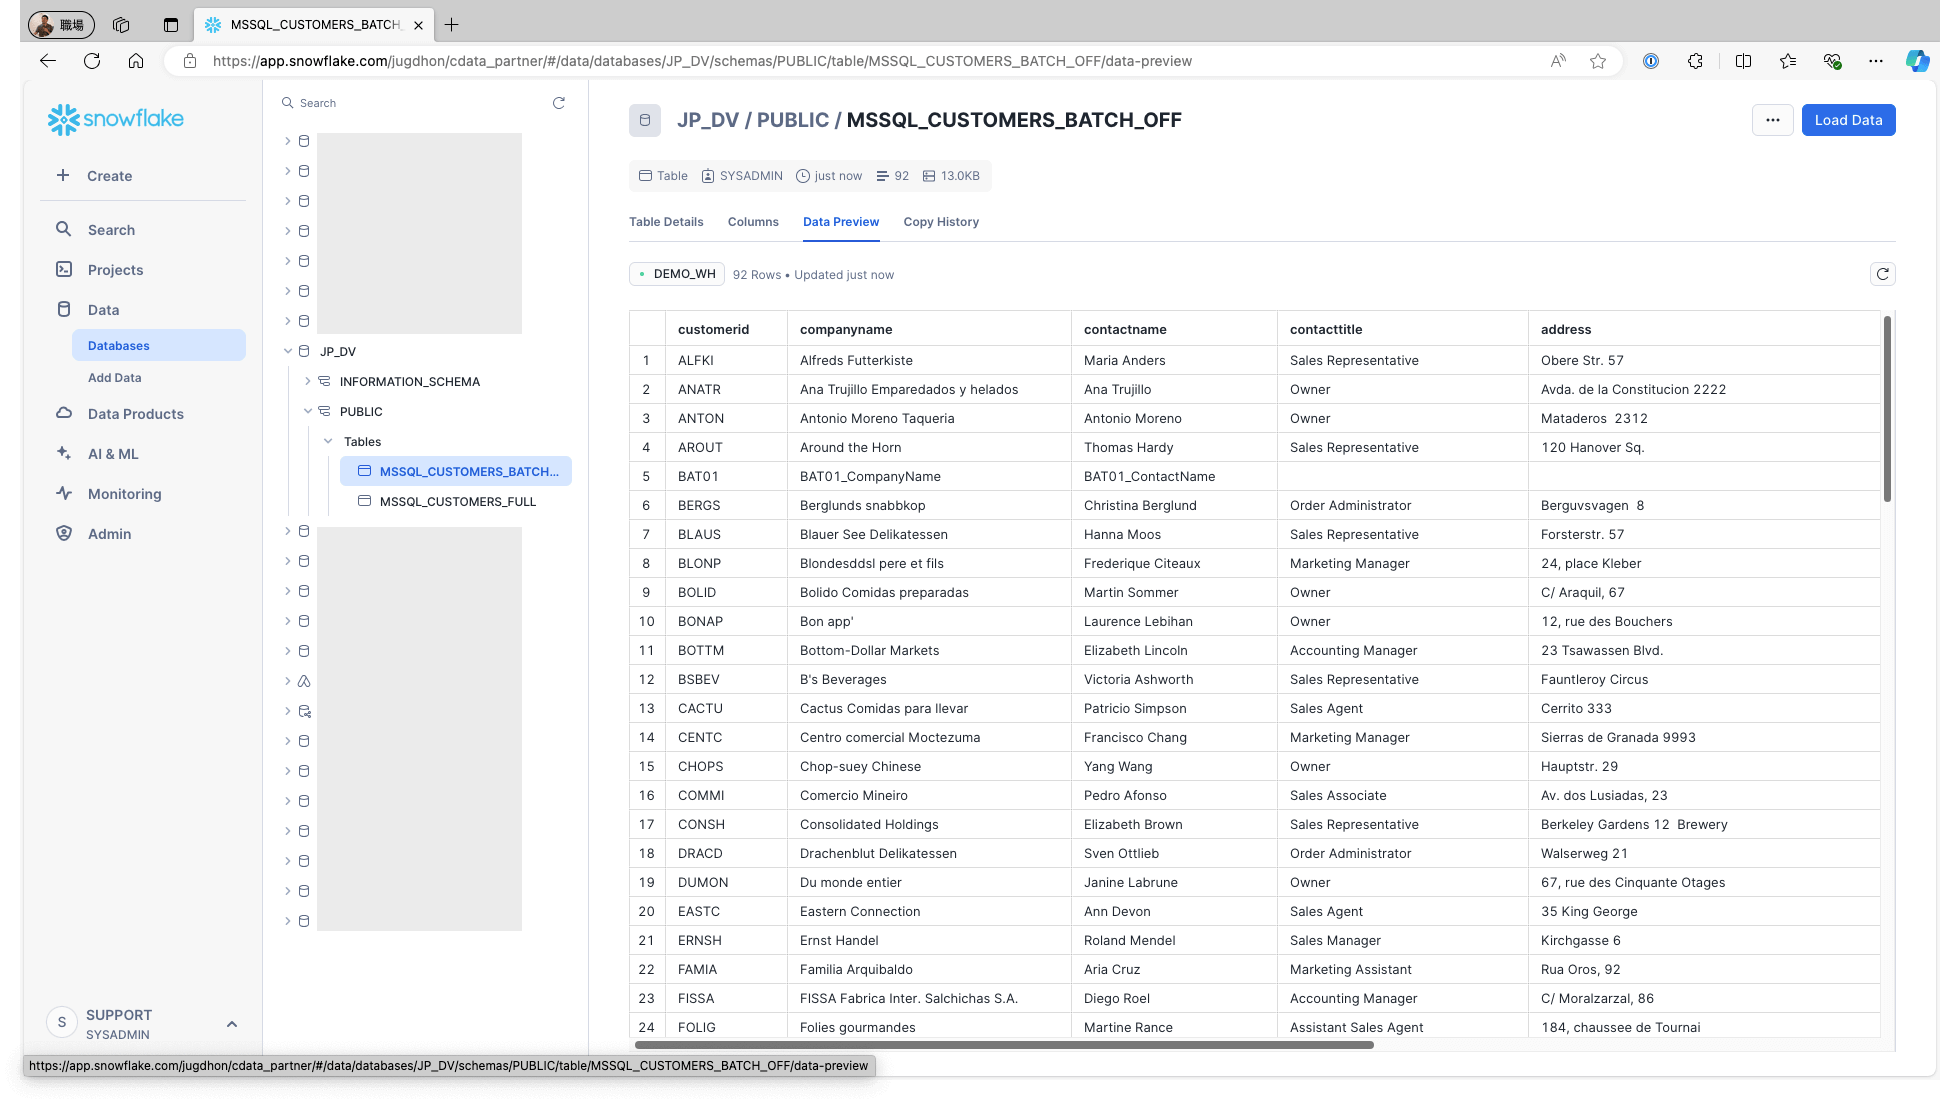
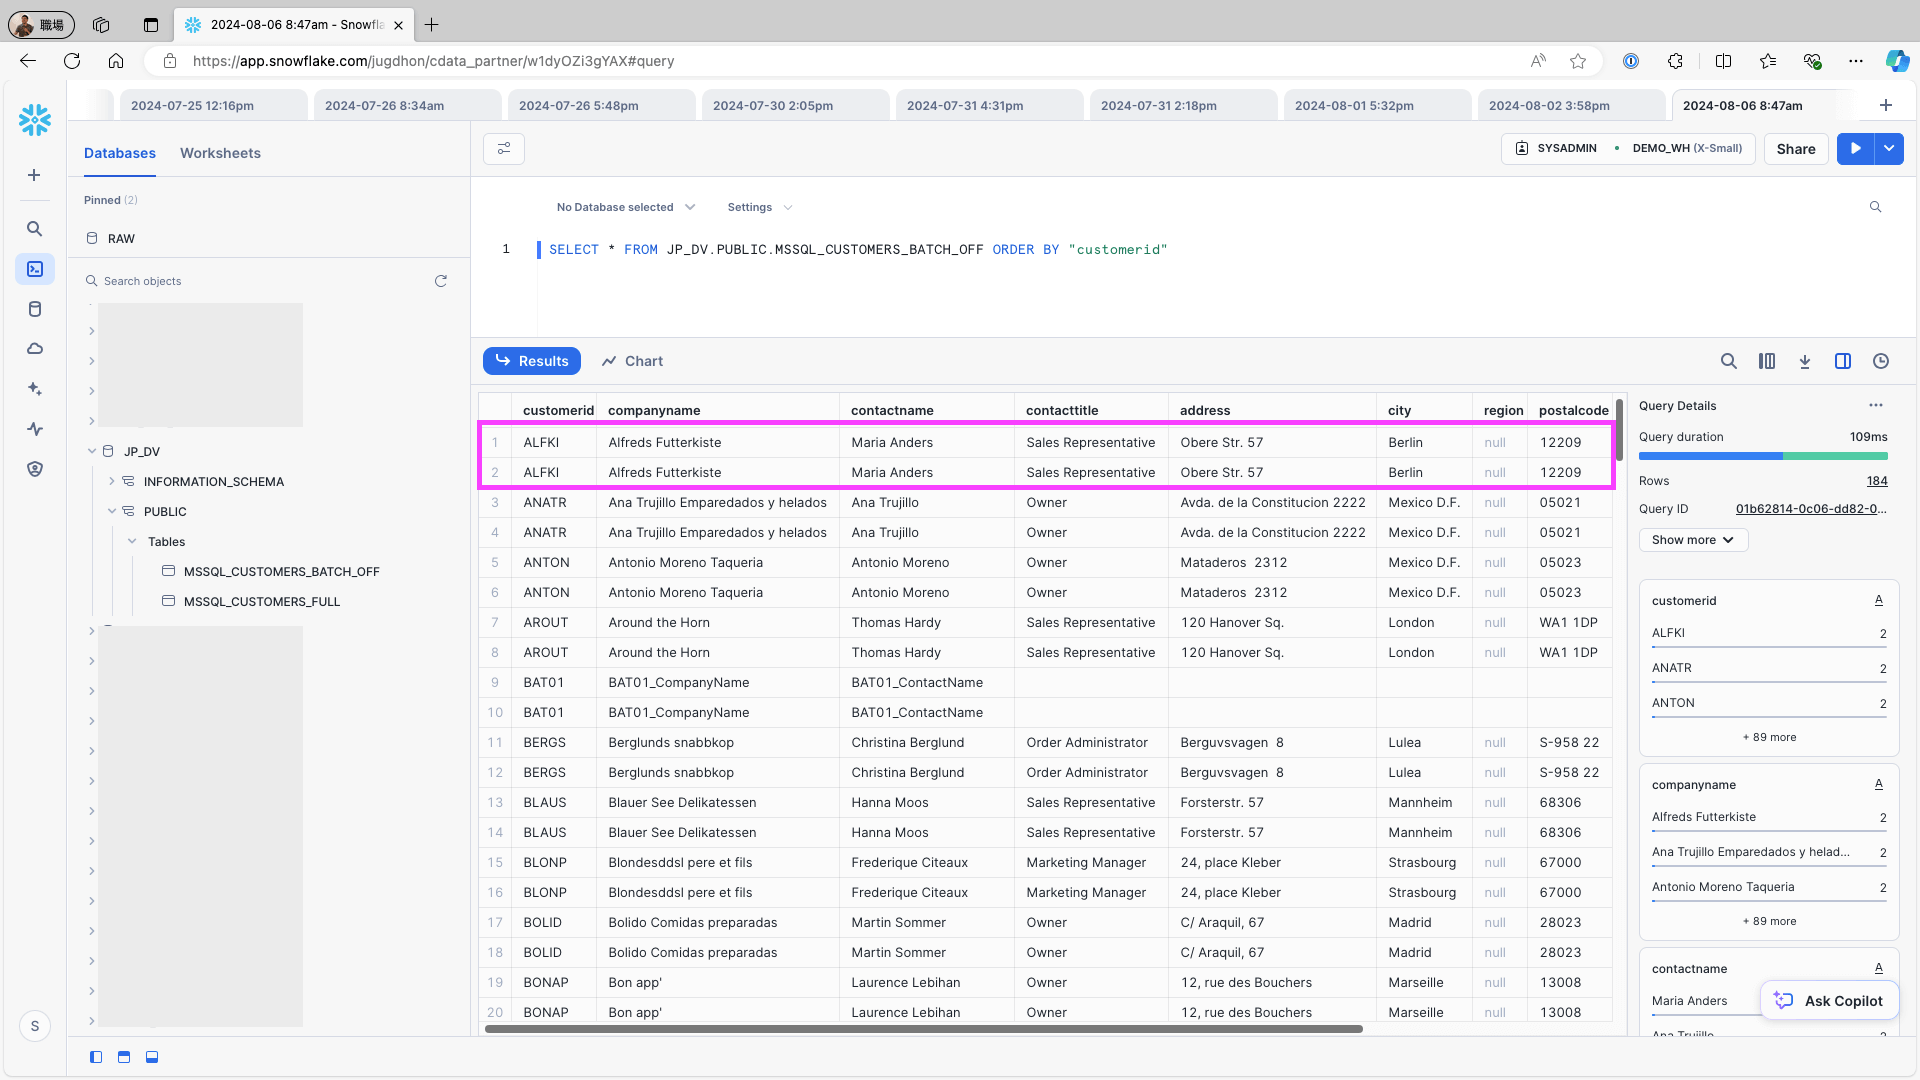
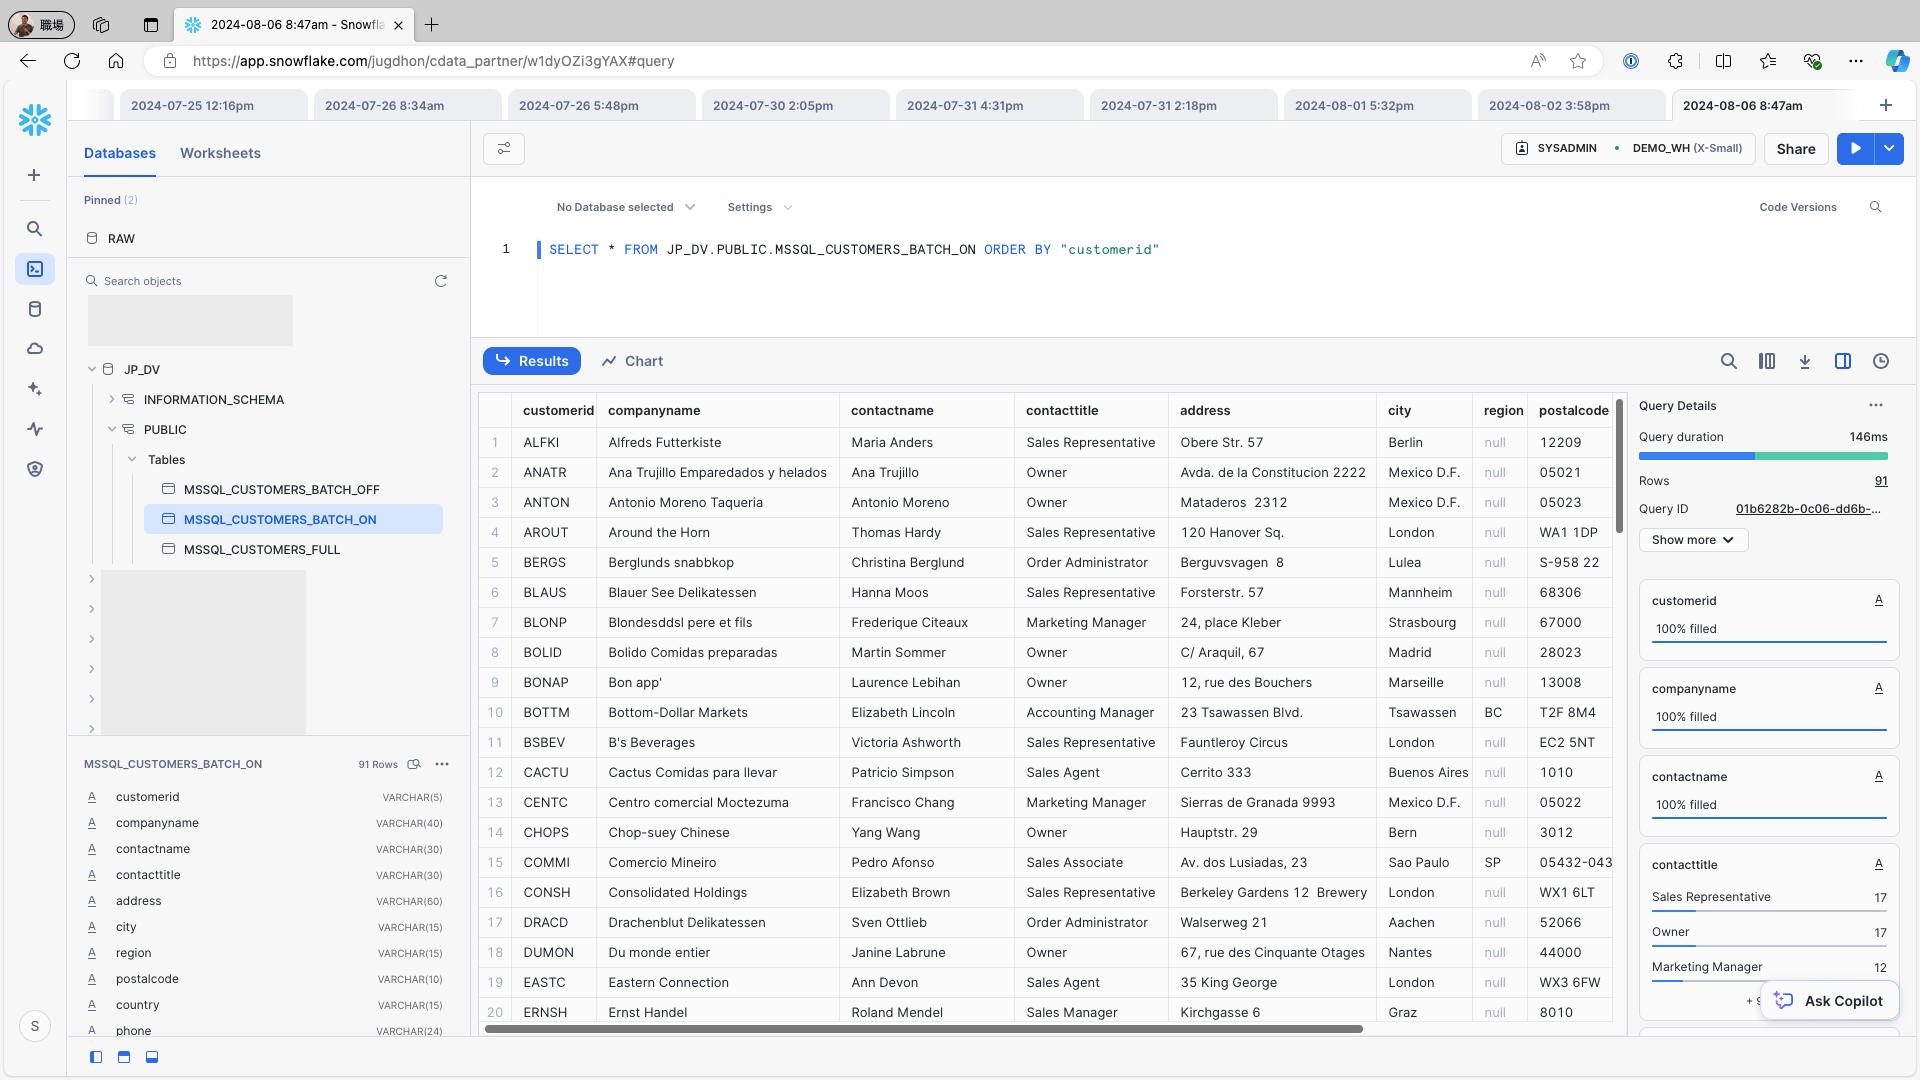
Access Snowflake and confirm that the data is stored in the respective tables:
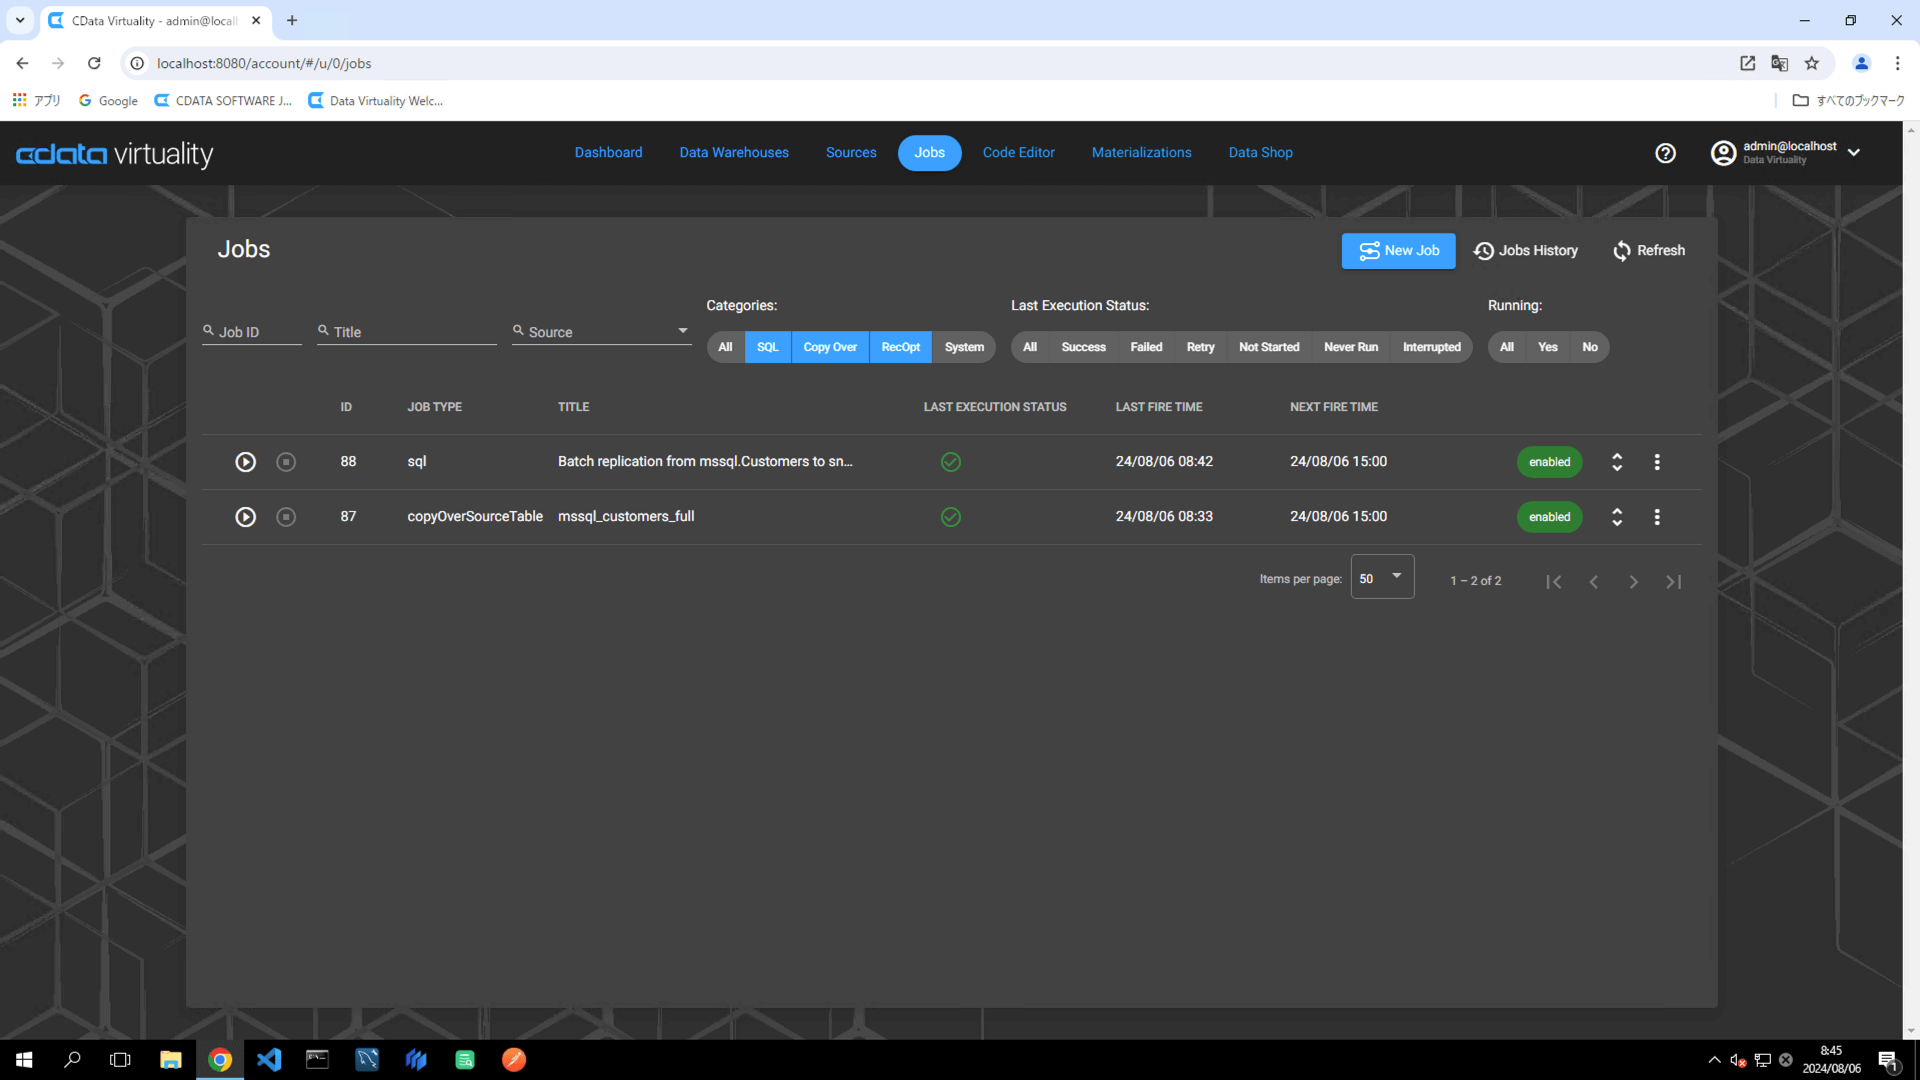
The details of the created job can be accessed and modified from the Jobs screen. The job will have the JOB TYPE set to sql and the TITLE as Batch replication from mssql.Customers to snowfl:
To test that the data is stored in the data warehouse (e.g., Snowflake) correctly, re-run the same job. If the job is executed with Use identity field... toggled on, duplicate records will be registered because all records are added to the existing table each time the job is executed.
To test what happens when Use identify field… is toggled ON, configure the job as follows:
On the Create Job screen, select a table (e.g., the Customers table in Microsoft SQL Server).
Set the replication type to Batch (batch update).
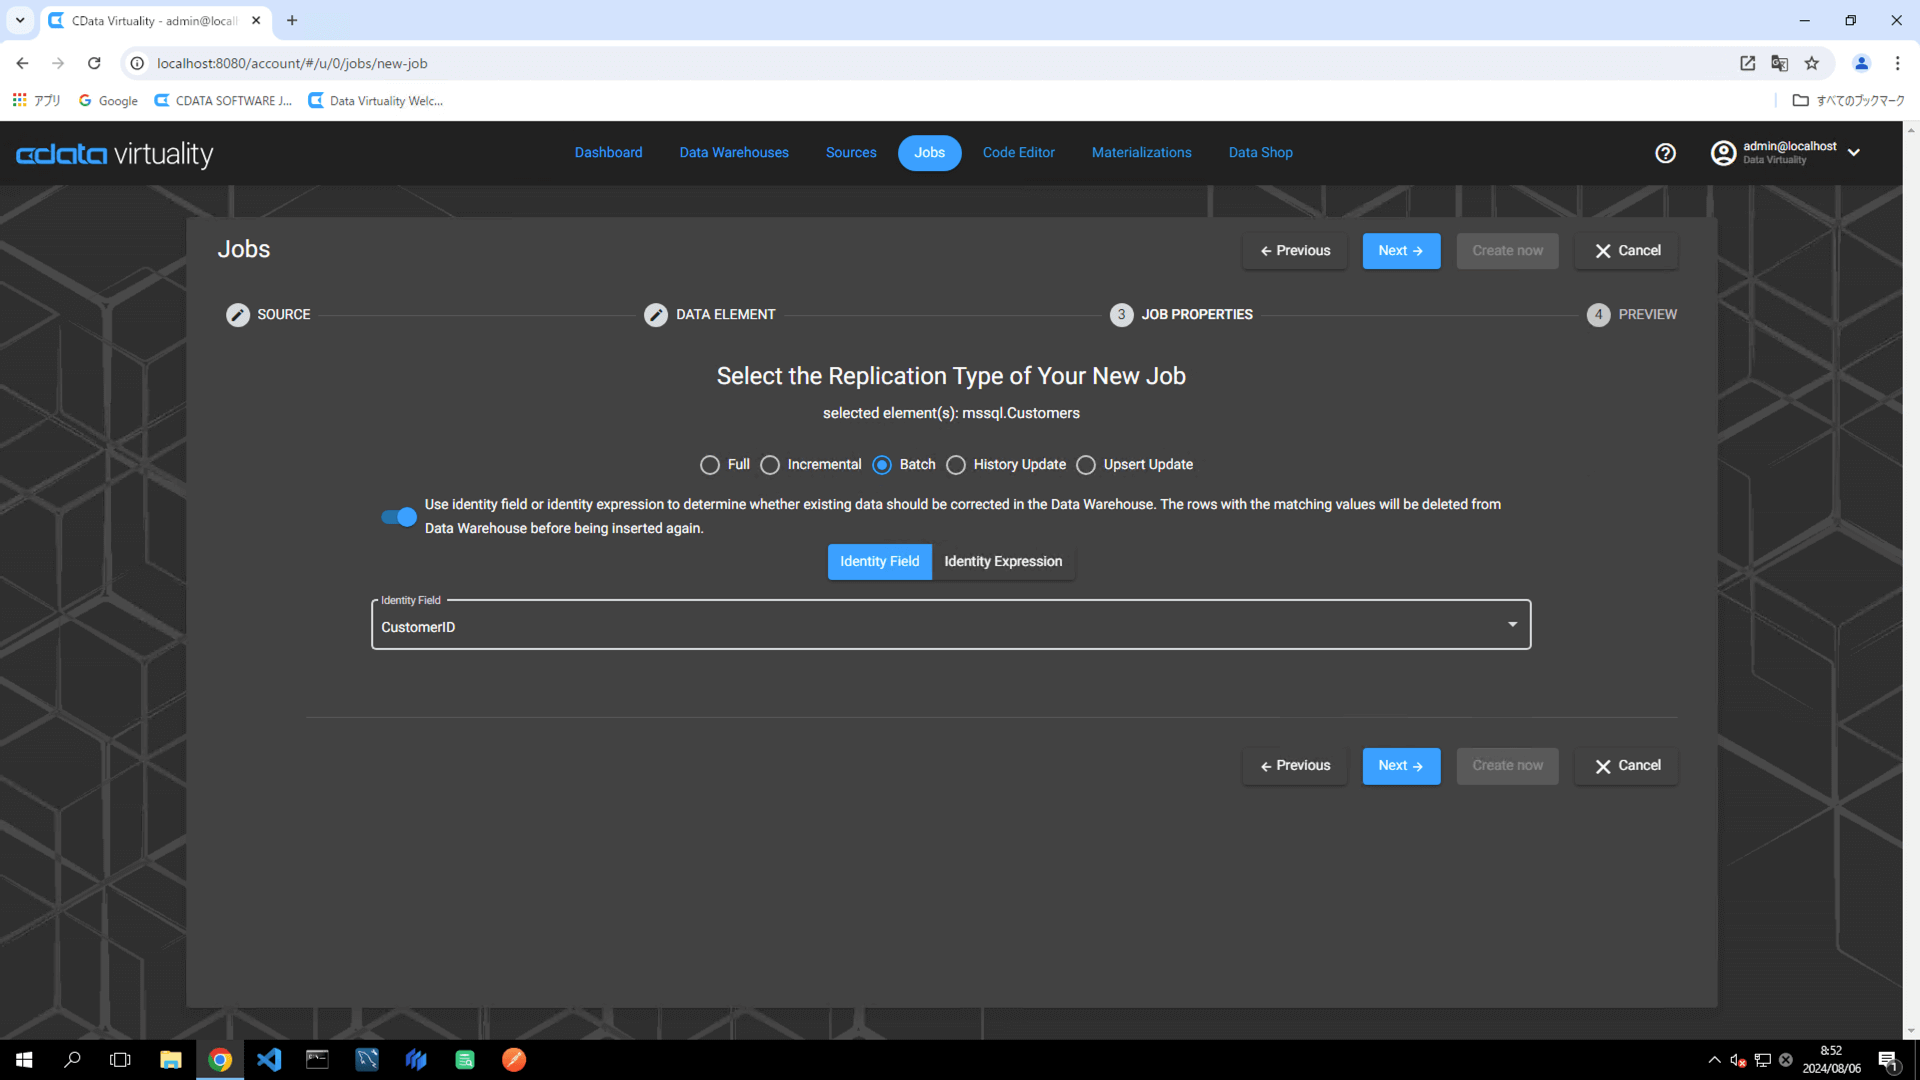
Toggle Use identity field... to ON.
Specify the Identity Field as the field that generates a unique ID number in the data source table (e.g., CustomerID) and proceed.
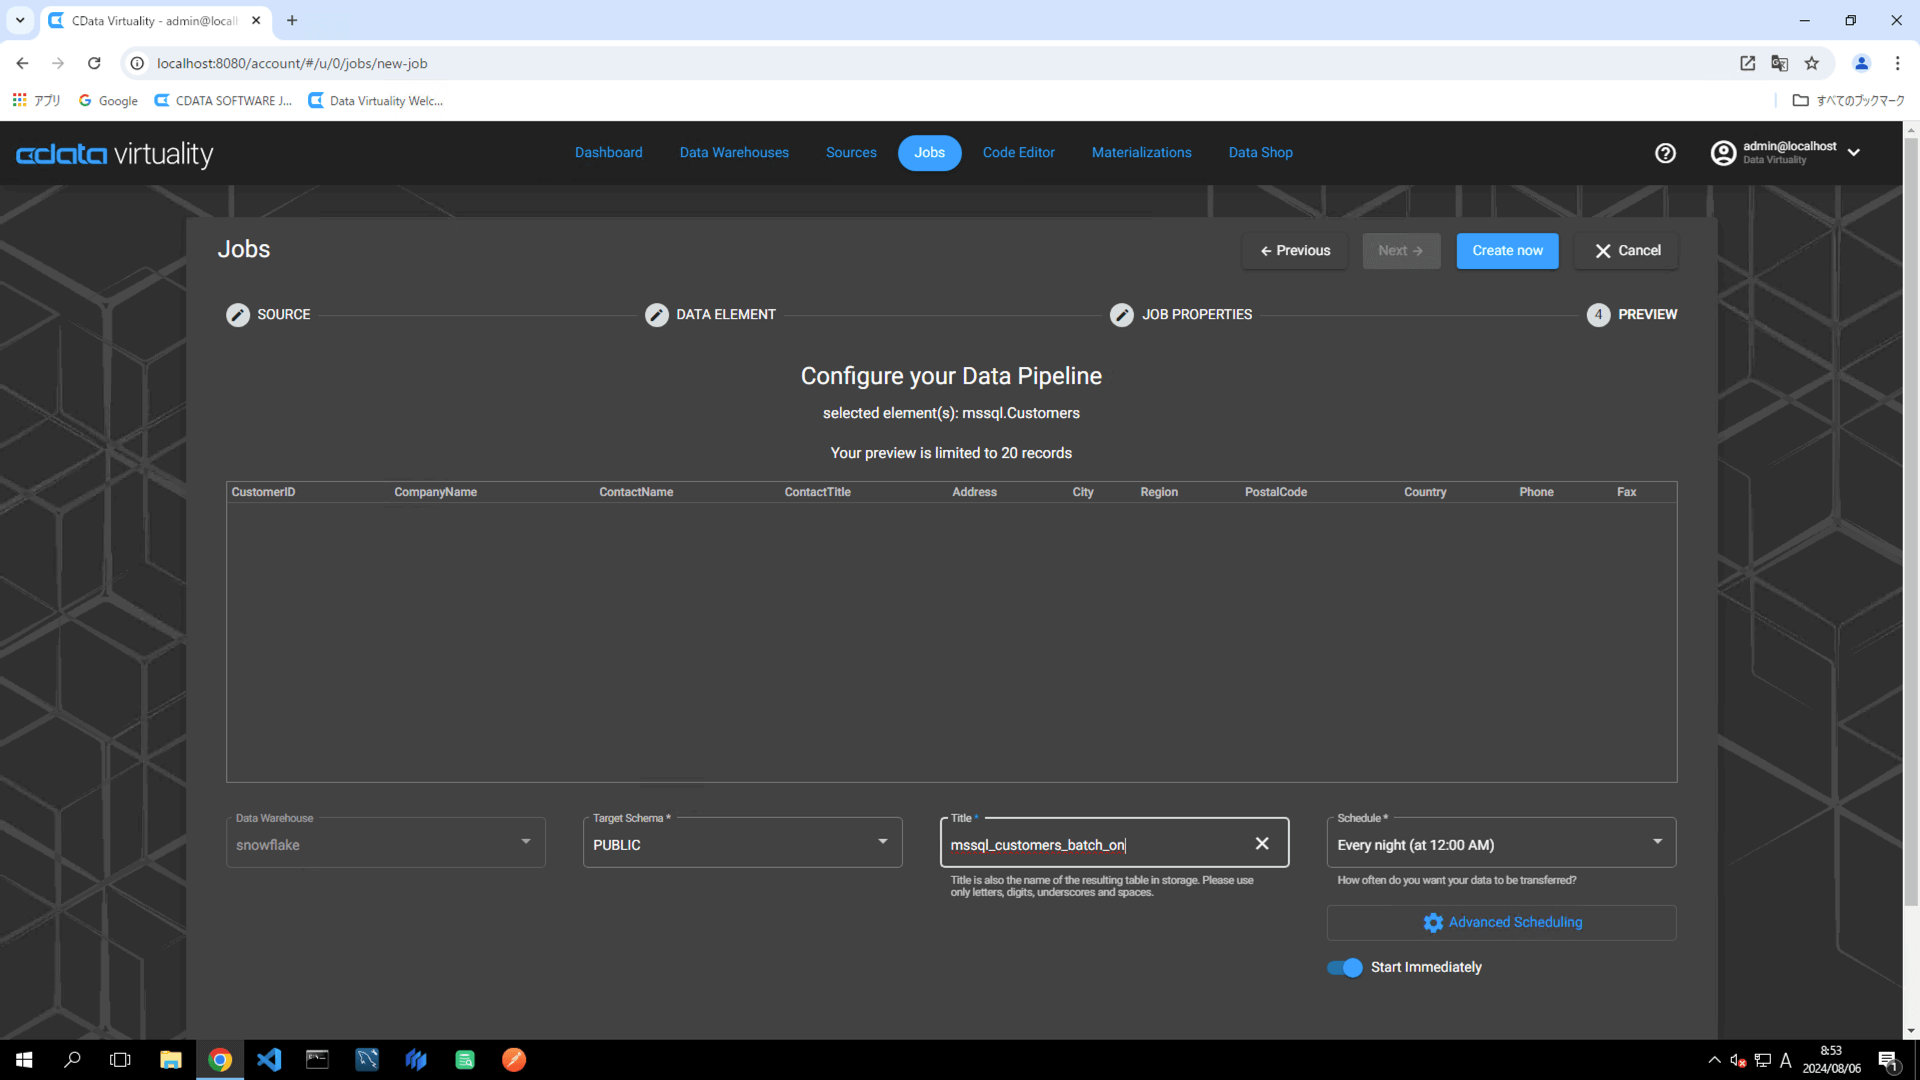
Set the following elements in the pipeline configuration:
Data Warehouse: Select the target data warehouse.
Target Schema: Specify the target schema.
Title: Rename the pipeline to
mssql_customers_batch_on.Schedule: Set the desired execution schedule.
Start Immediately: Toggle on for immediate execution.
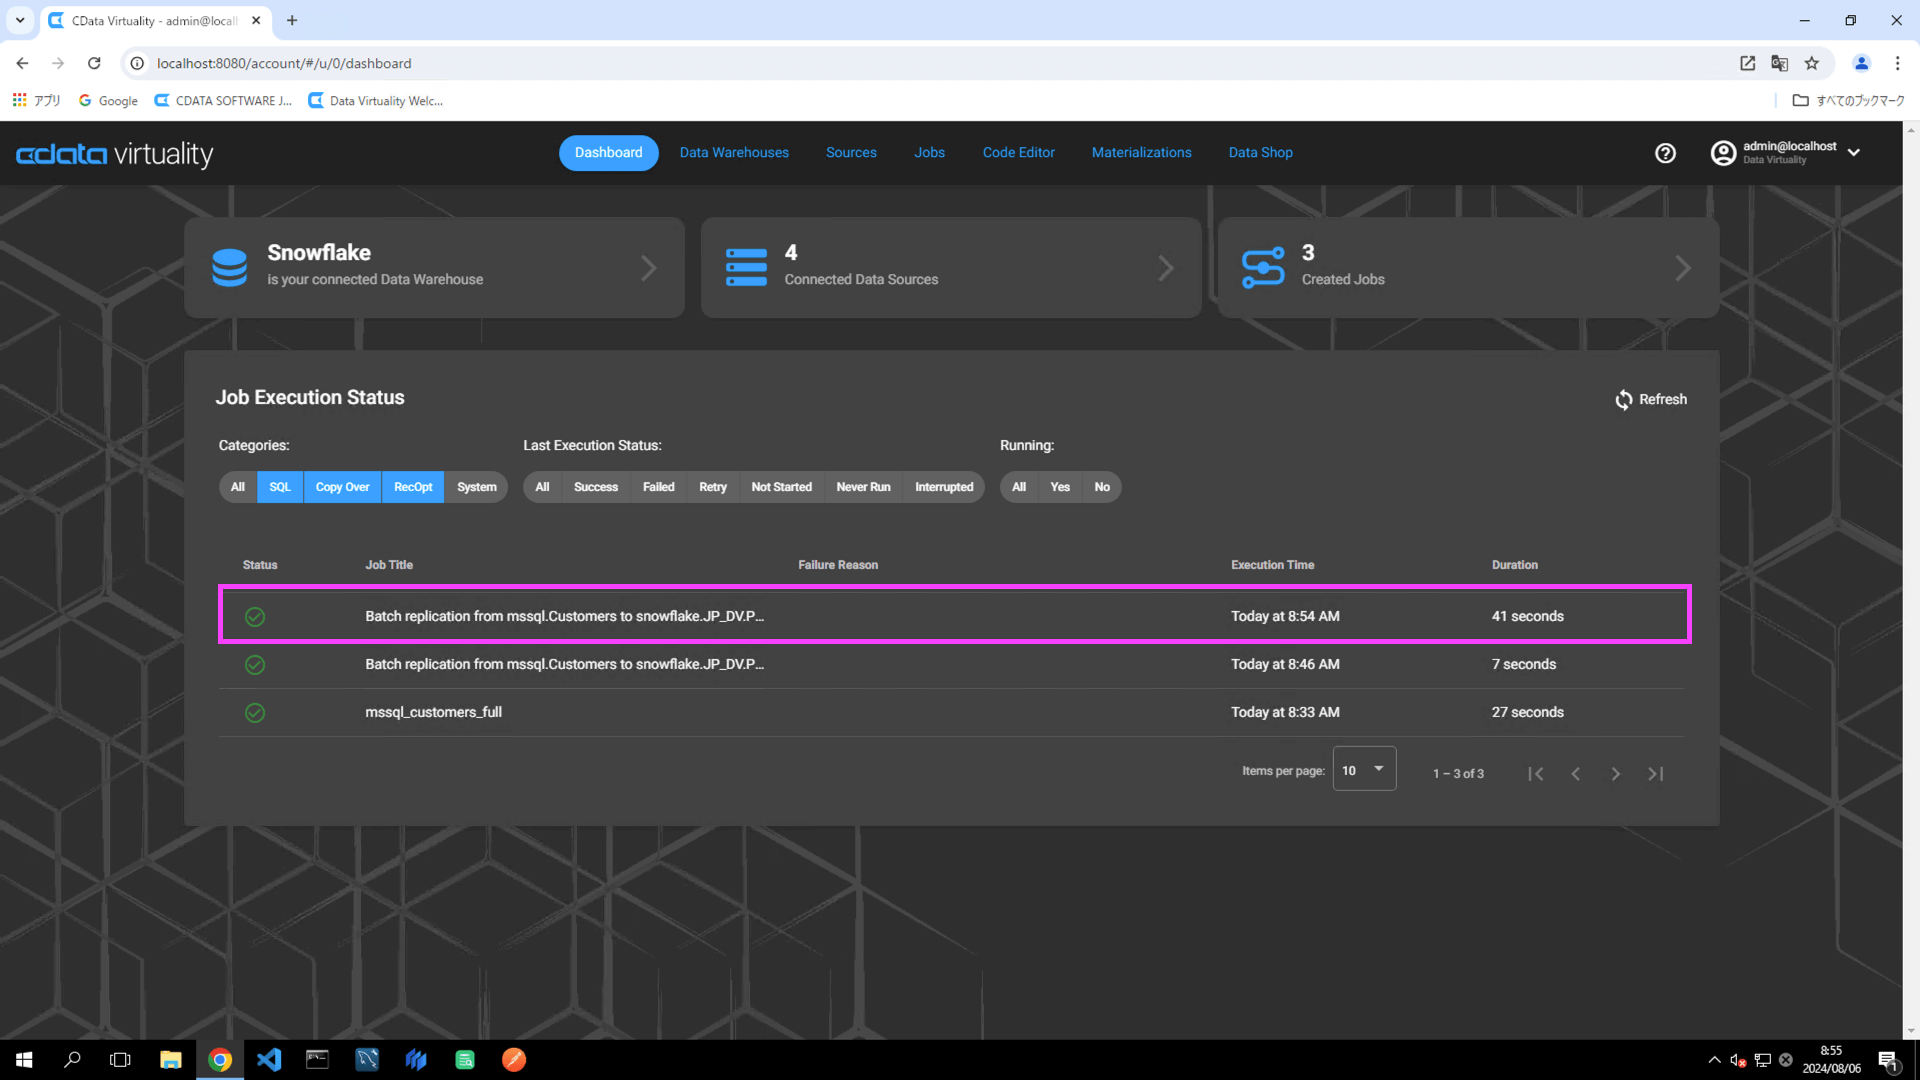
Click the Create now button to execute the replication job. Navigate to the Dashboard screen and confirm that the job execution has completed successfully:
Access Snowflake and check the replication destination table to ensure the data has been successfully replicated.
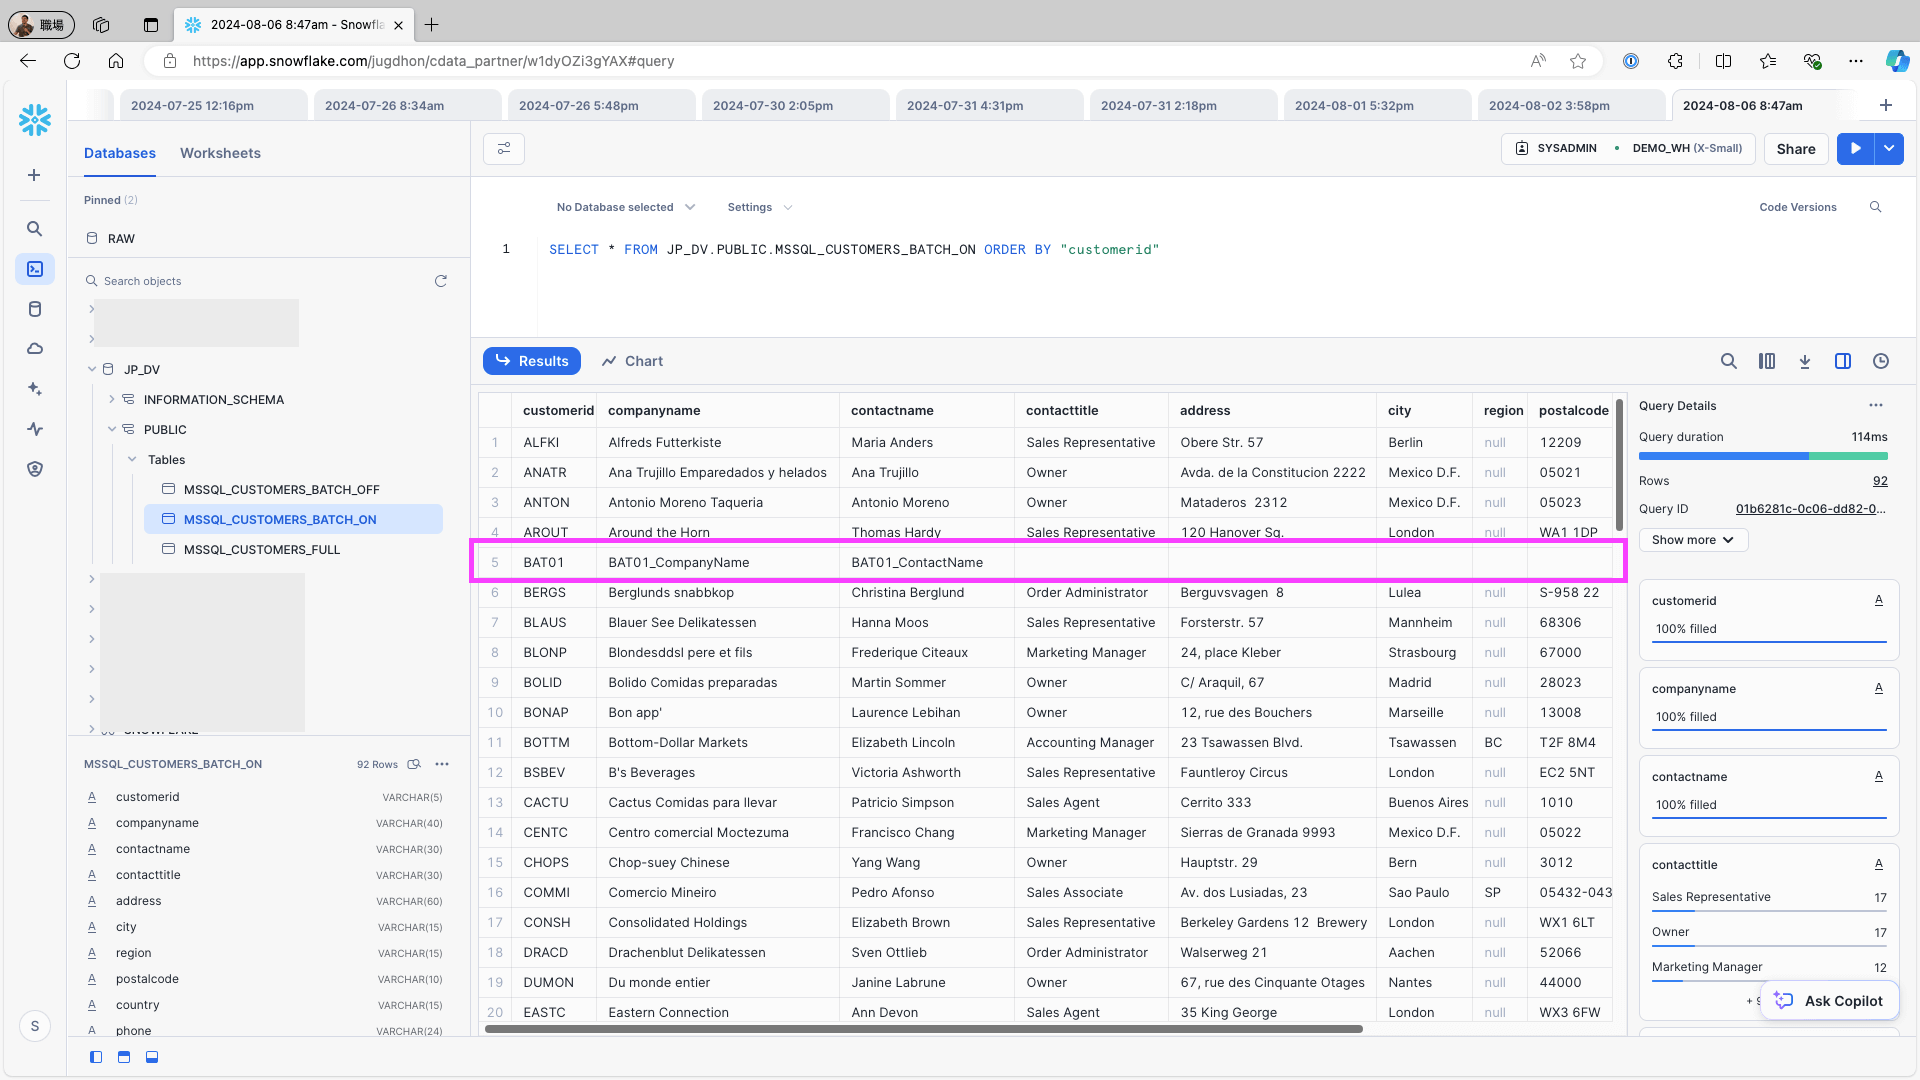
To add a new record to the data source (e.g., the Customers table in Microsoft SQL Server), use the following query and re-run the replication job:
INSERT INTO Customers (CustomerID, CompanyName, ContactName, ContactTitle, Address, City, Region, PostalCode, Country, Phone, Fax) VALUES ('BAT01 ', 'BAT01_CompanyName', 'BAT01_ContactName', '', '', '', '', '', '');Access Snowflake and check the replication destination table. Confirm that the newly added record in the data source is reflected in the replication destination table and verify that no duplicate records have been generated:
History Update
Open Jobs and click the New Job button:
On the Select your Data to Replicate screen, choose the table to be replicated, and click the Next button:
For this example, the Orders table in Microsoft SQL Server is selected.

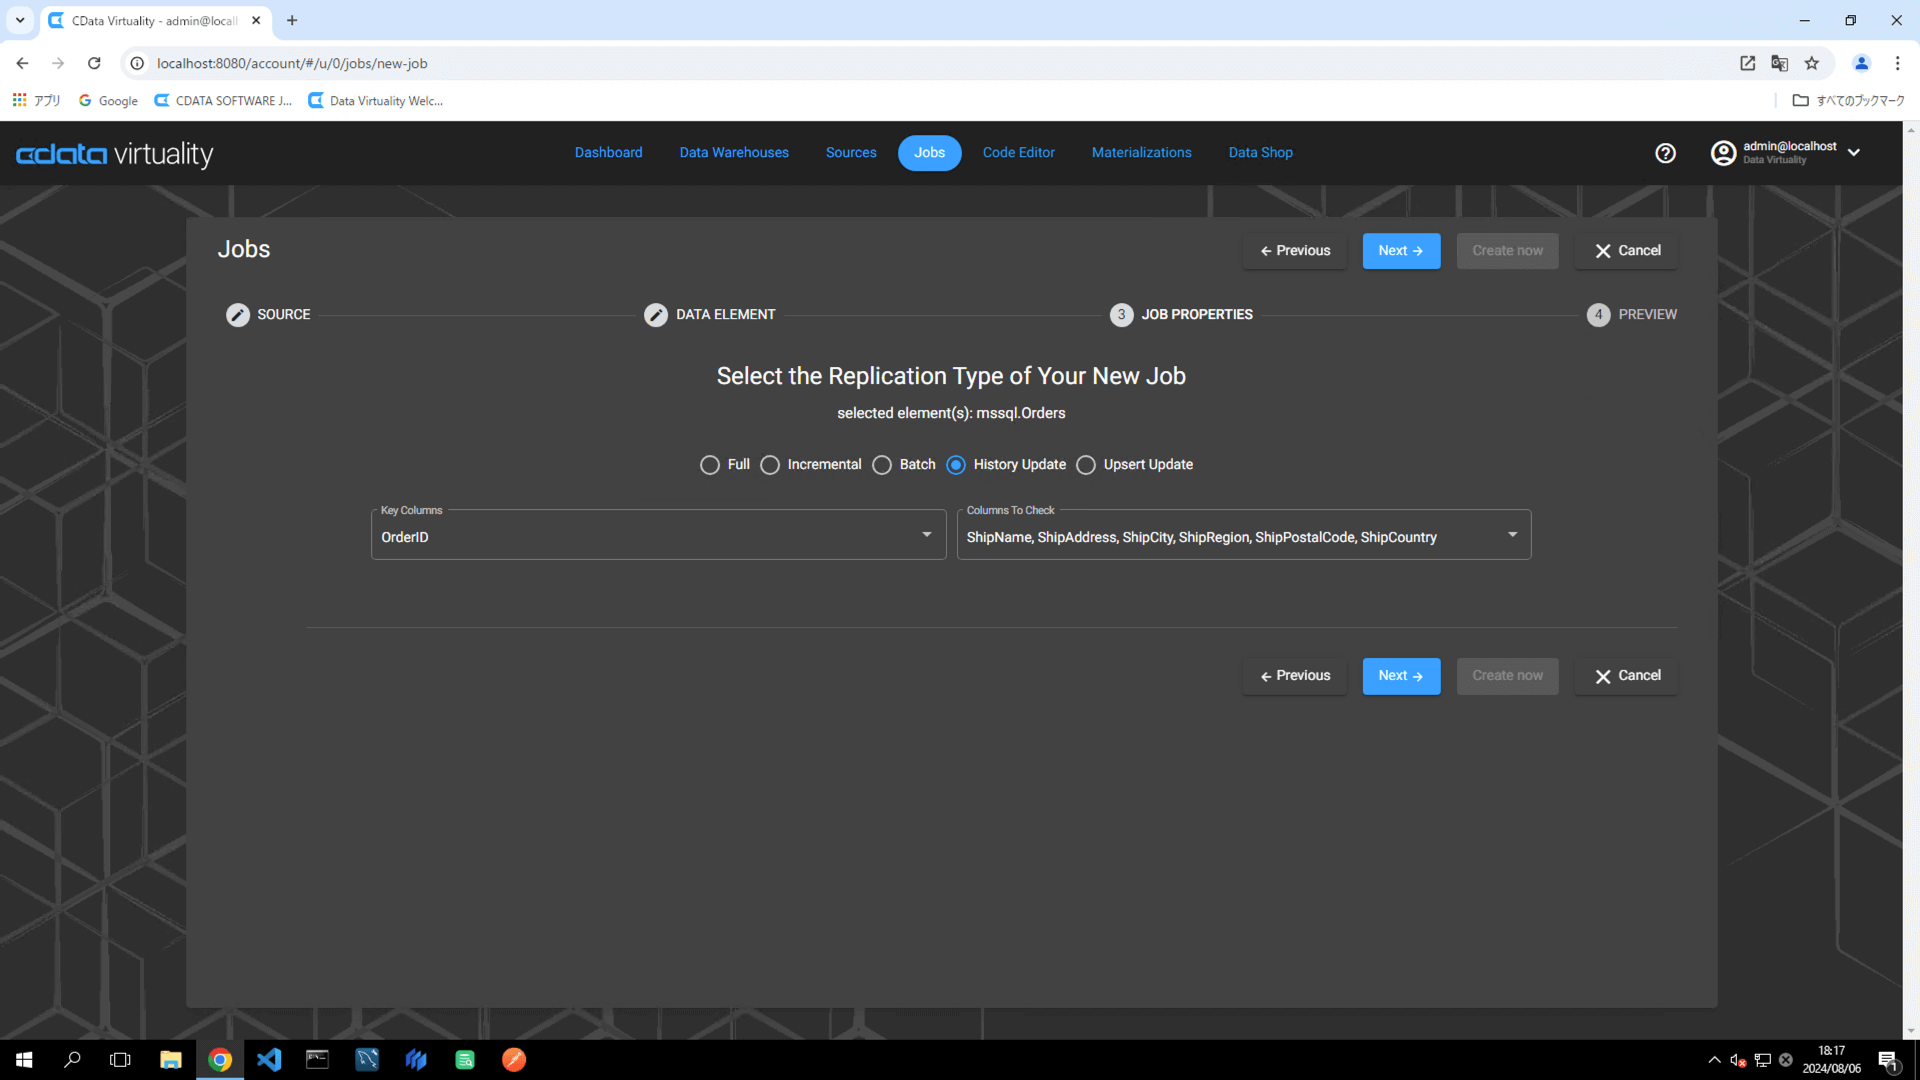
To ensure accurate tracking of updates during replication, the following is needed:
Key Column: A field that uniquely identifies the record (e.g., OrderID)
Columns To Check: A field to monitor for changes in the data (e.g., multiple fields starting with Ship).
Set the following elements in the pipeline configuration:
Data Warehouse: Select the target data warehouse.
Target Schema: Specify the target schema.
Title: Rename the pipeline to
mssql_orders_history_update.Schedule: Set the desired execution schedule.
Start Immediately: Toggle on for immediate execution.
For more flexible scheduling options, click the Advanced Scheduling button.
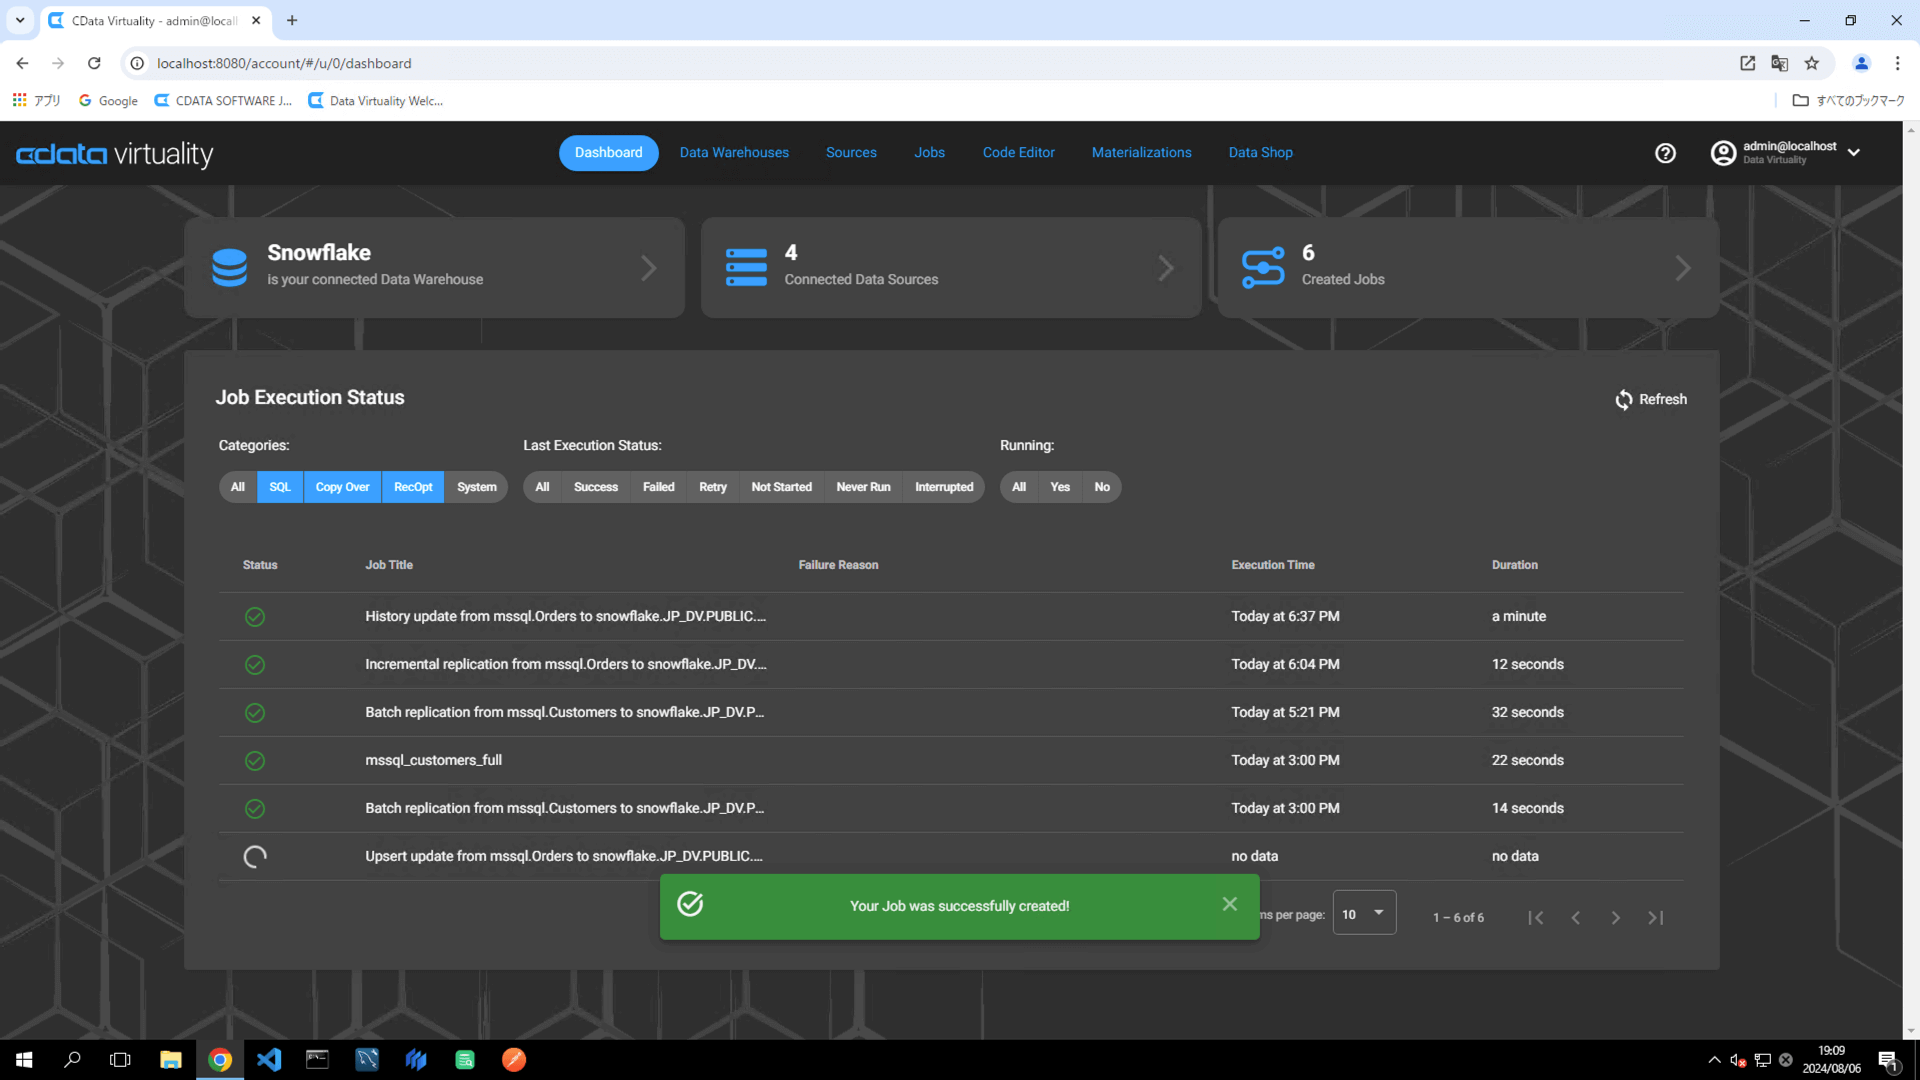
Click the Create now button to run the replication job.

The Dashboard screen will open. The green bar will confirm that the job was created successfully:
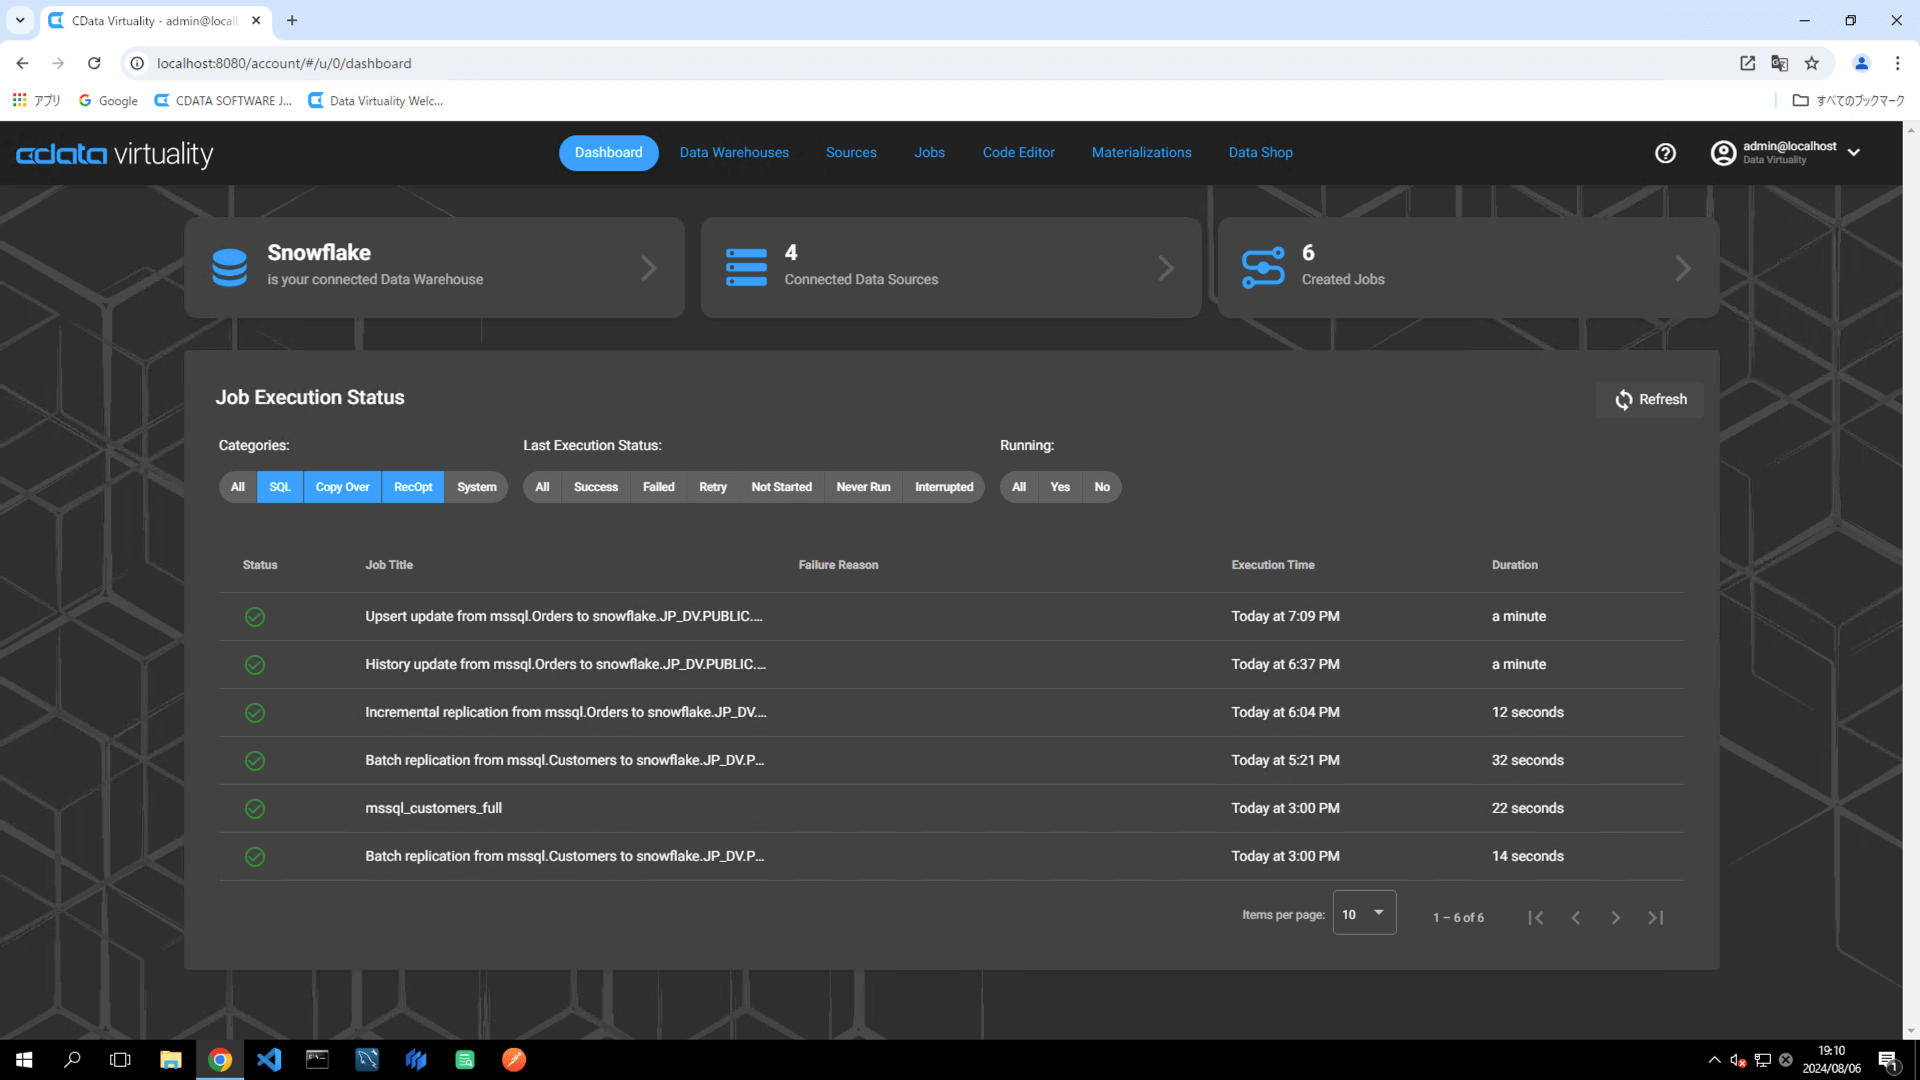
Once the job has executed, confirm that the Status is marked as Successful on the Dashboard screen. If the status doesn’t update automatically, click the Refresh button to refresh the screen:
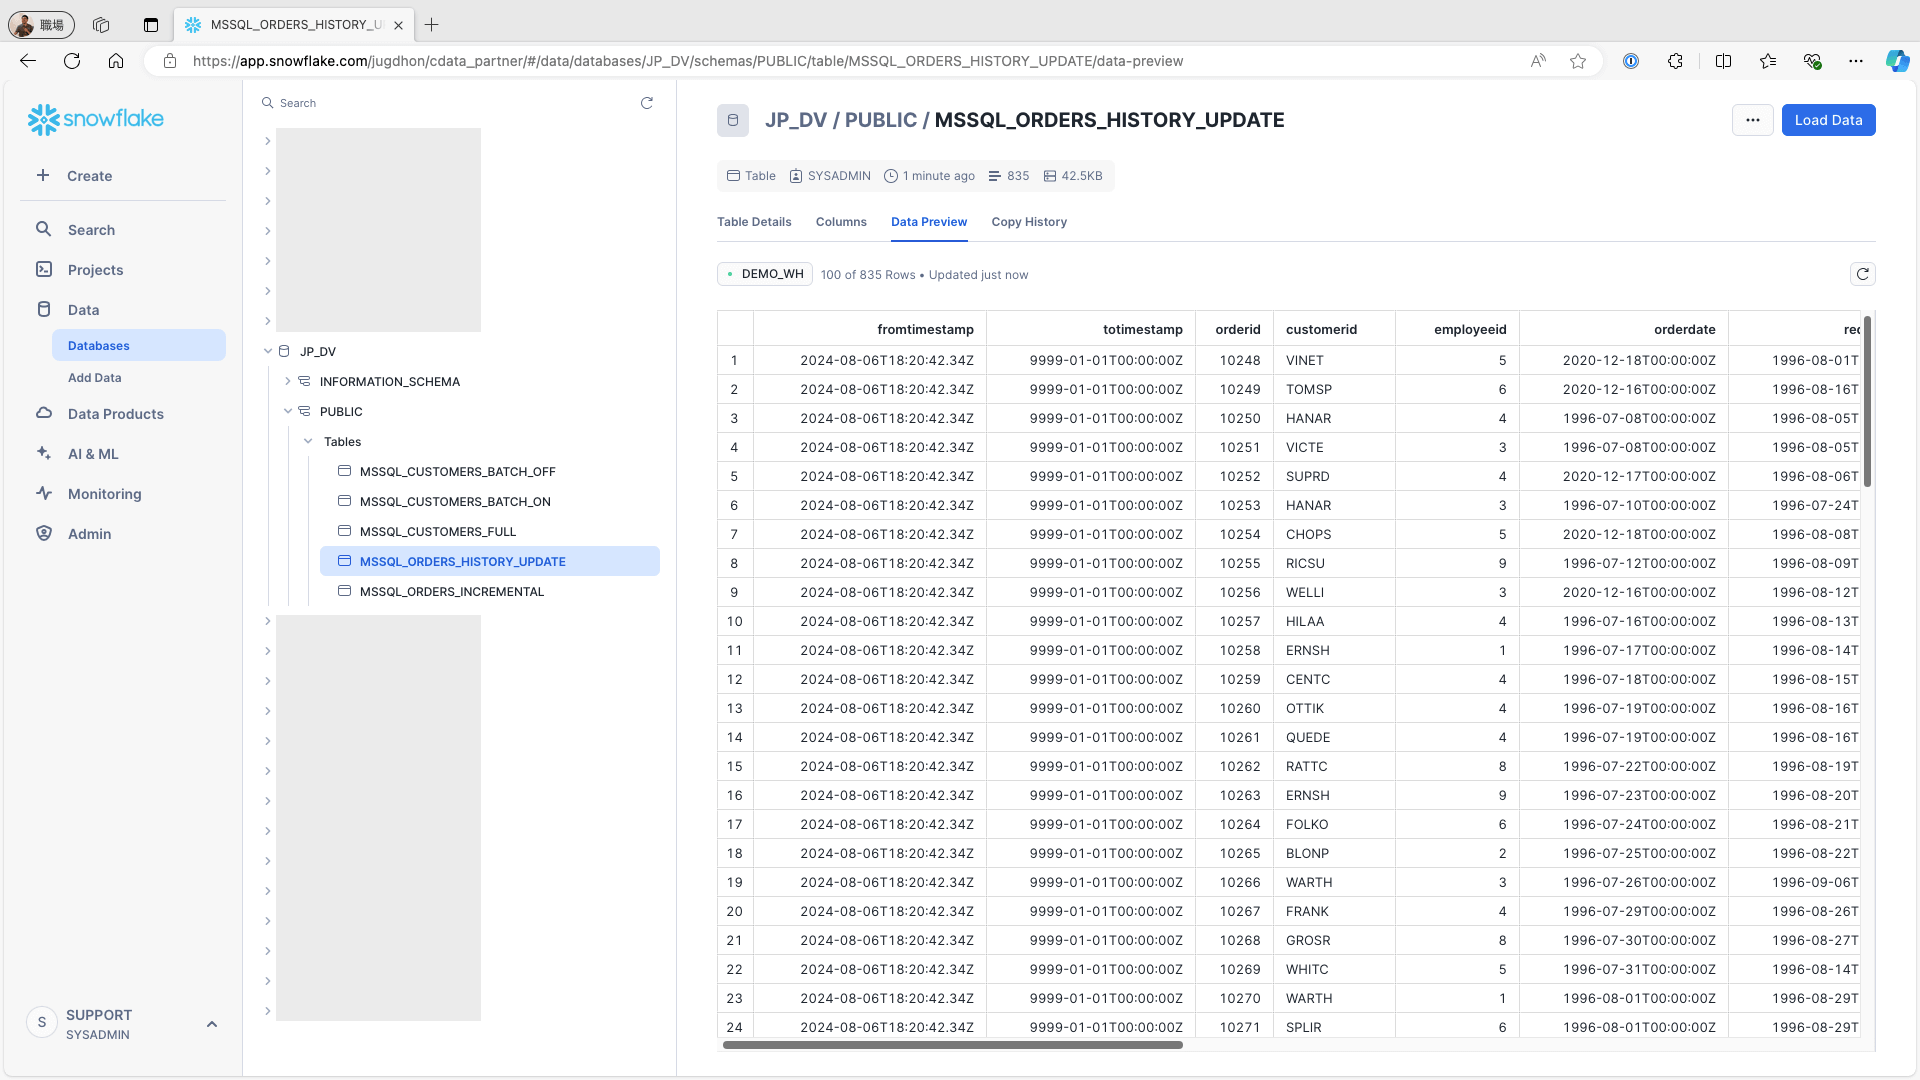
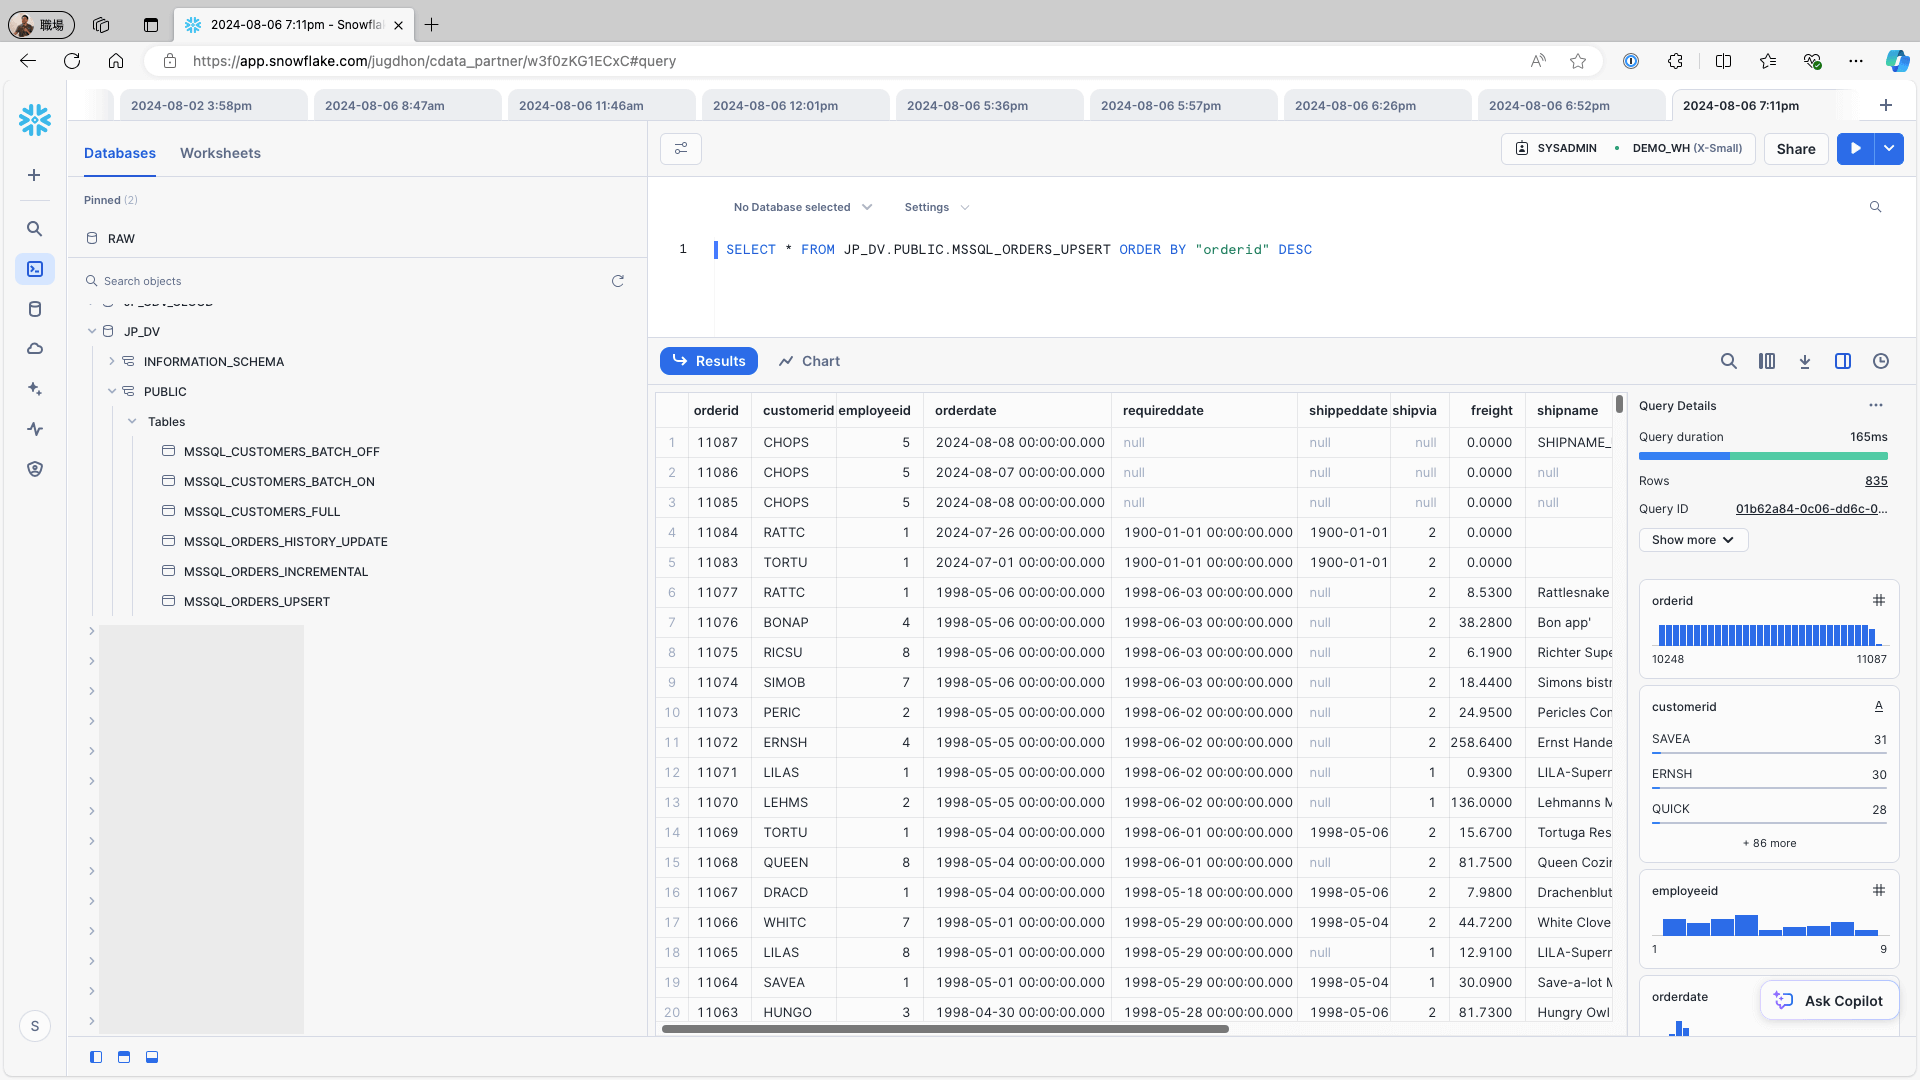
Access Snowflake and confirm that the fromtimestamp and totimestamp fields have been added to the table. Verify that the records are correctly stored:
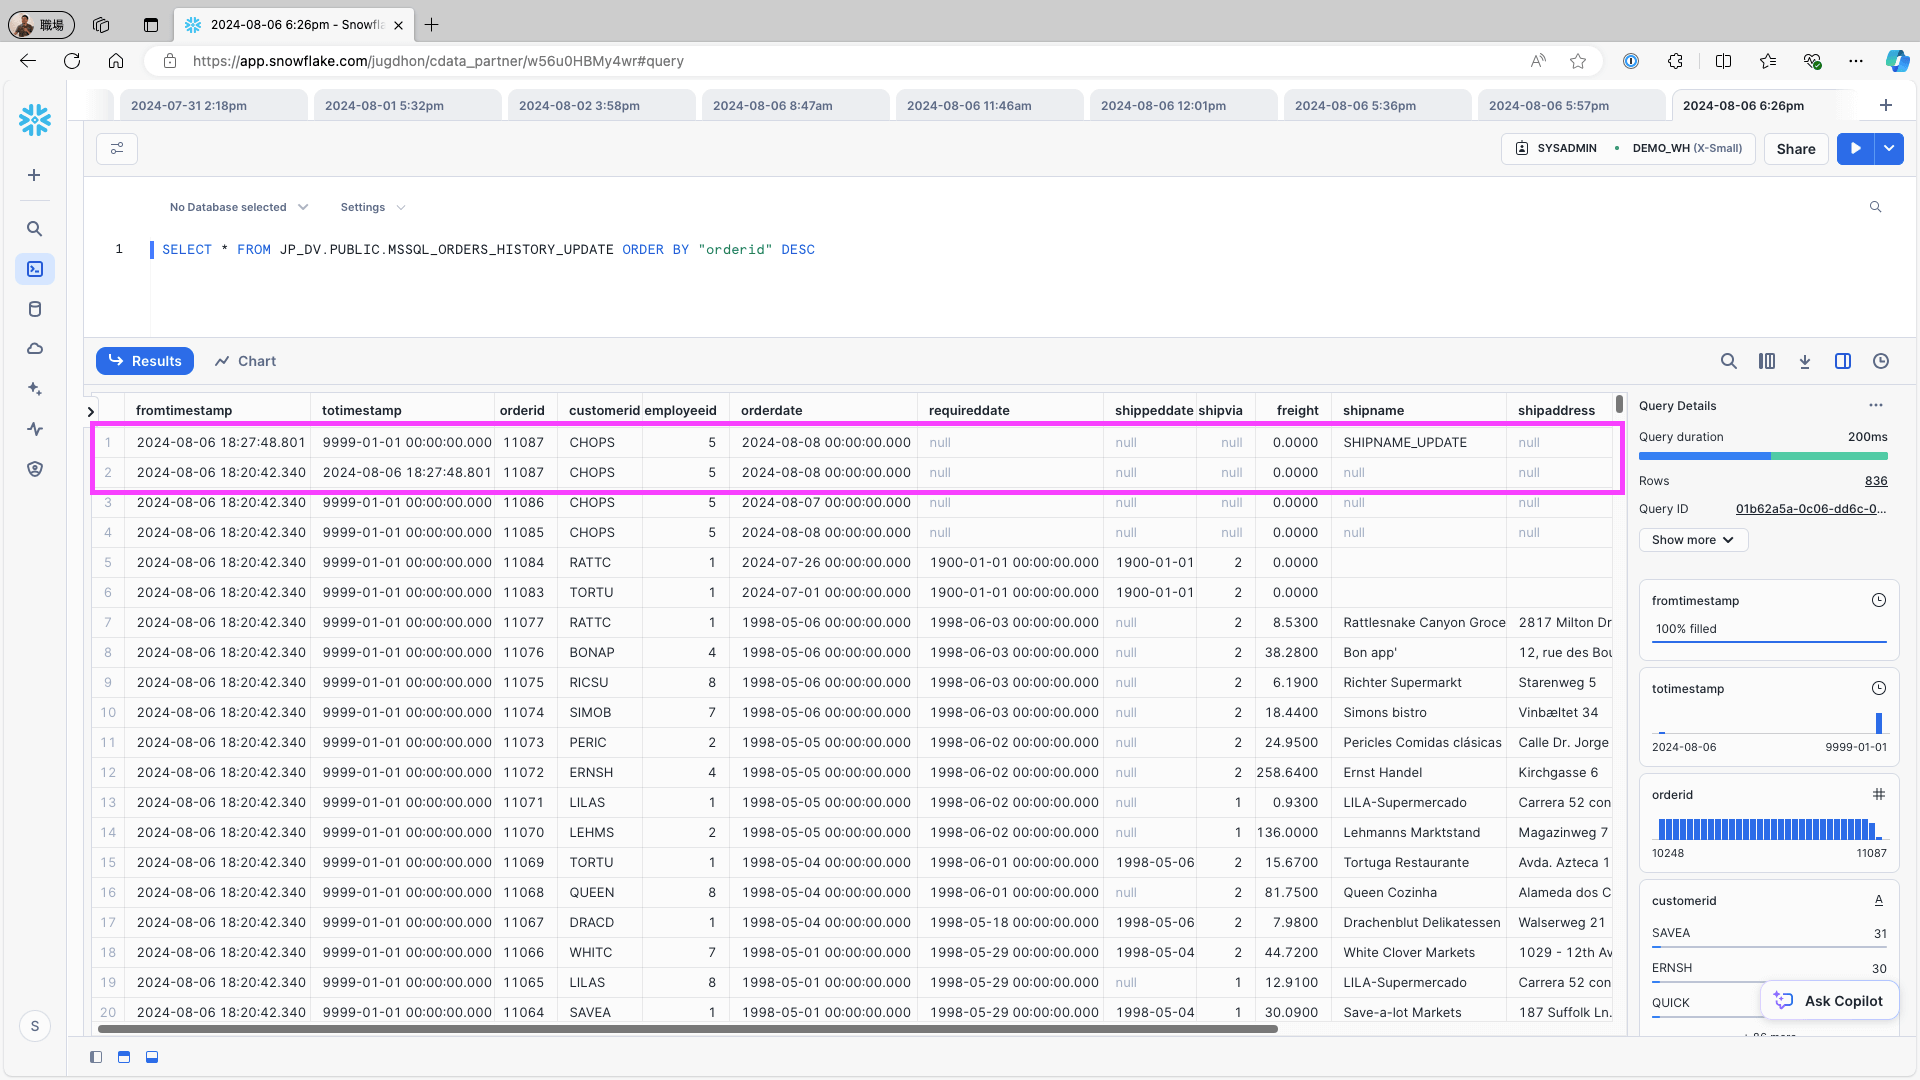
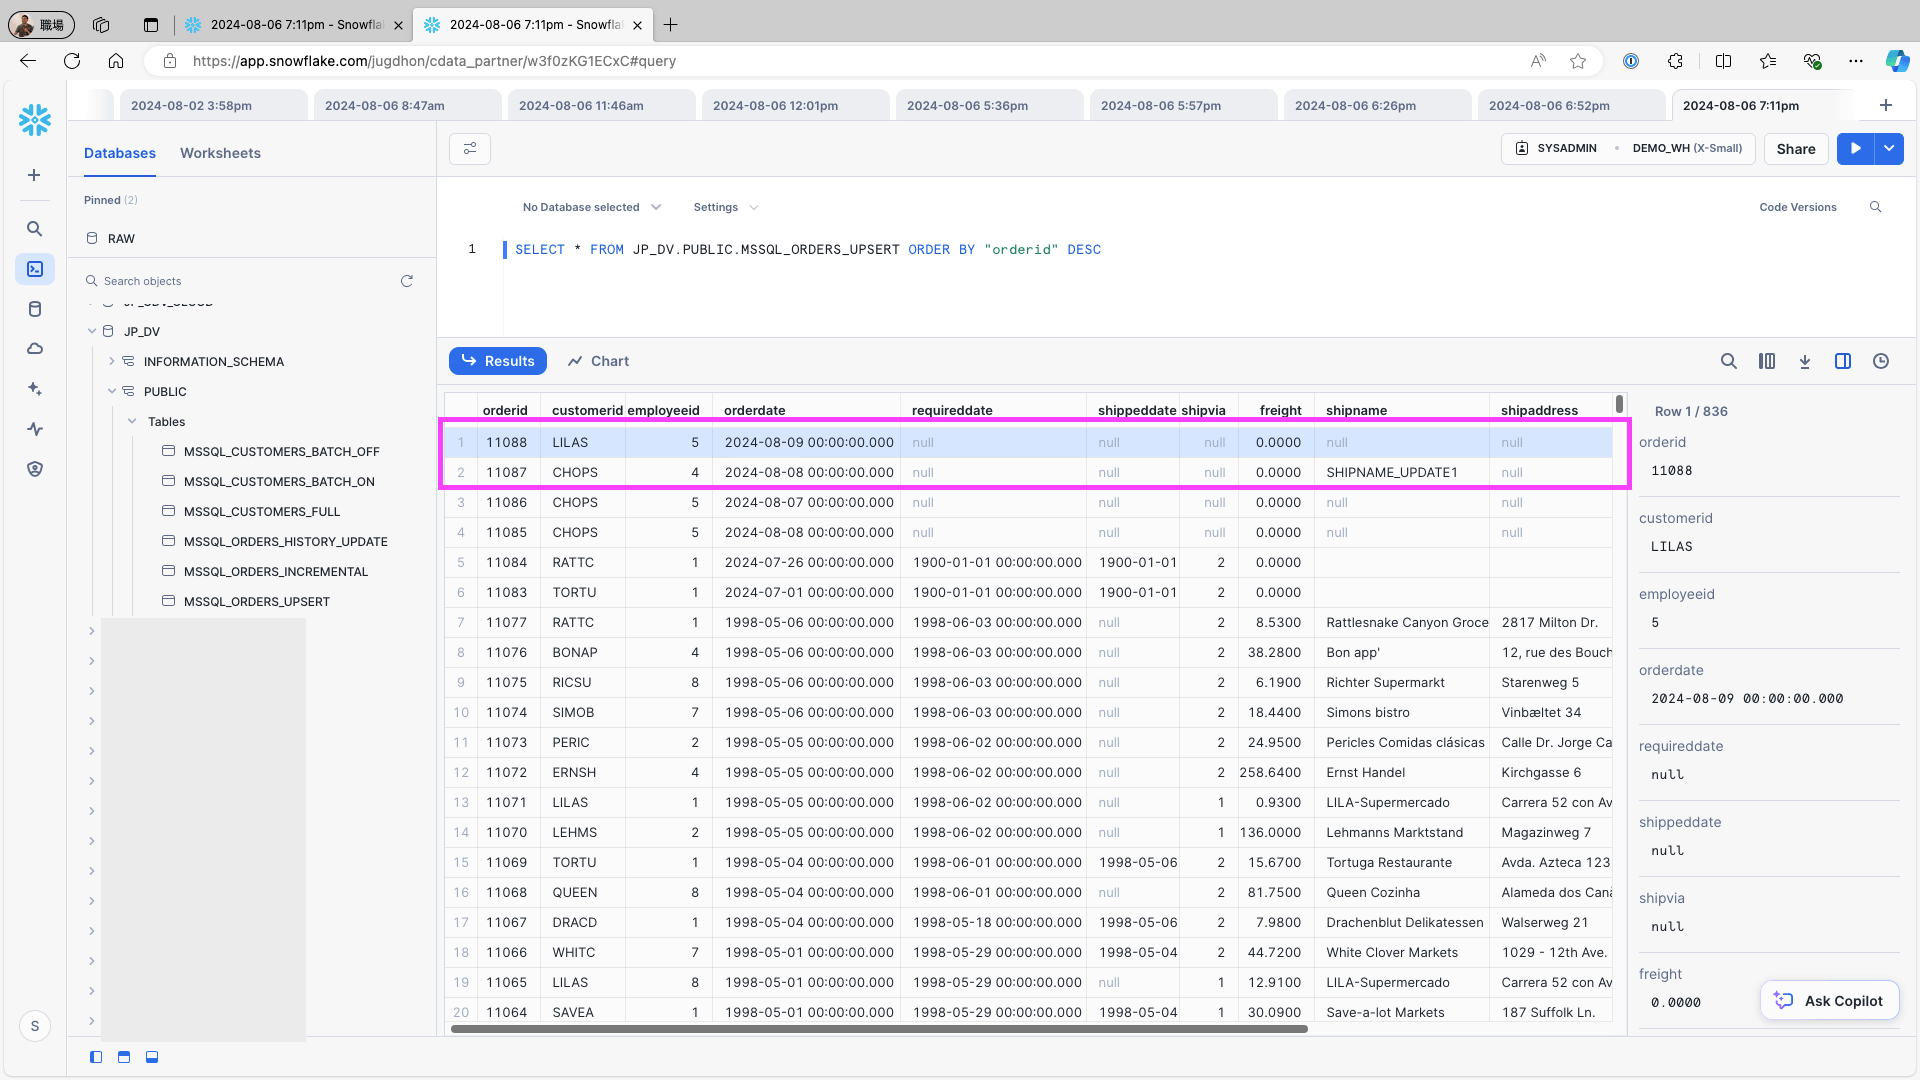
To change one record on the data source (e.g., the Orders table in Microsoft SQL Server), use the following query and re-run the replication job:
UPDATE Orders SET shipname = 'SHIPNAME_UPDATE' WHERE OrderID = 11087;Access Snowflake and check the replication destination table. Confirm that the history of record updates from the data source has been correctly created as records:
Upsert Update
Open Jobs and click the New Job button:
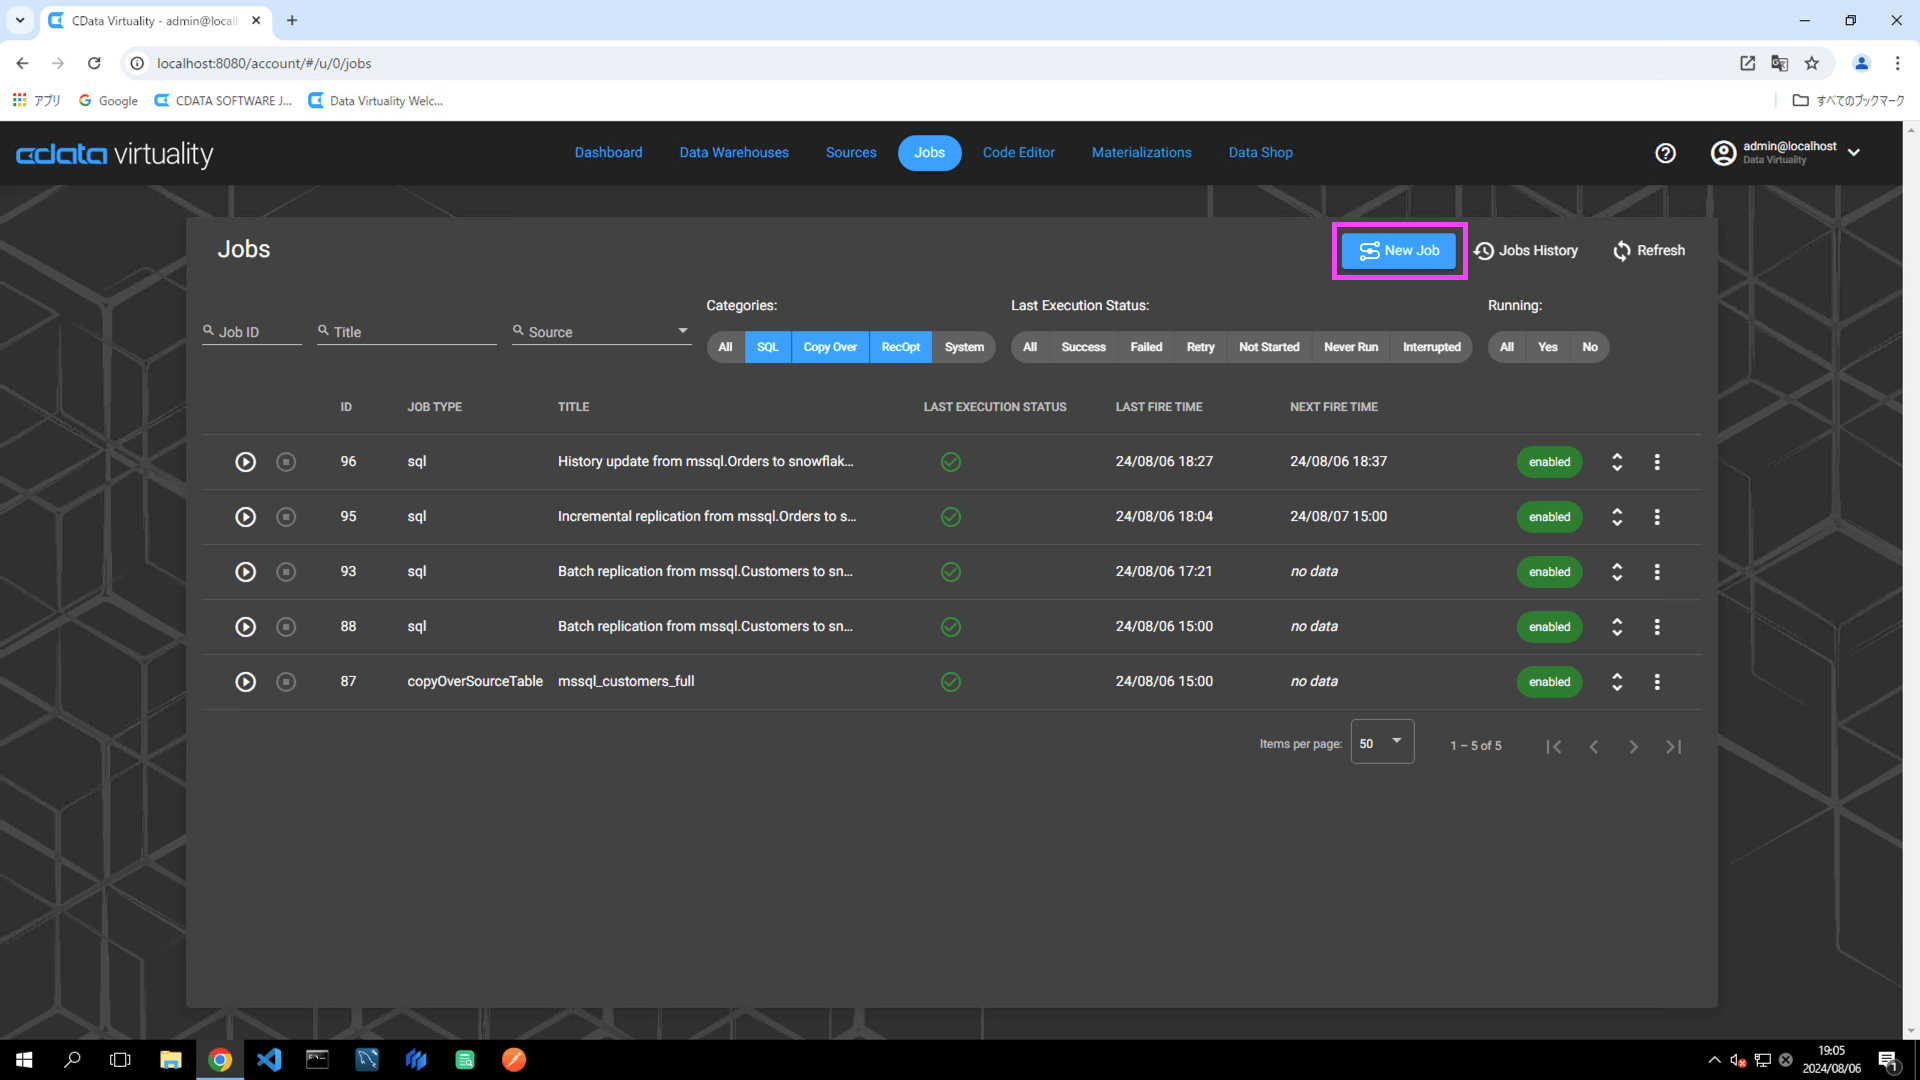
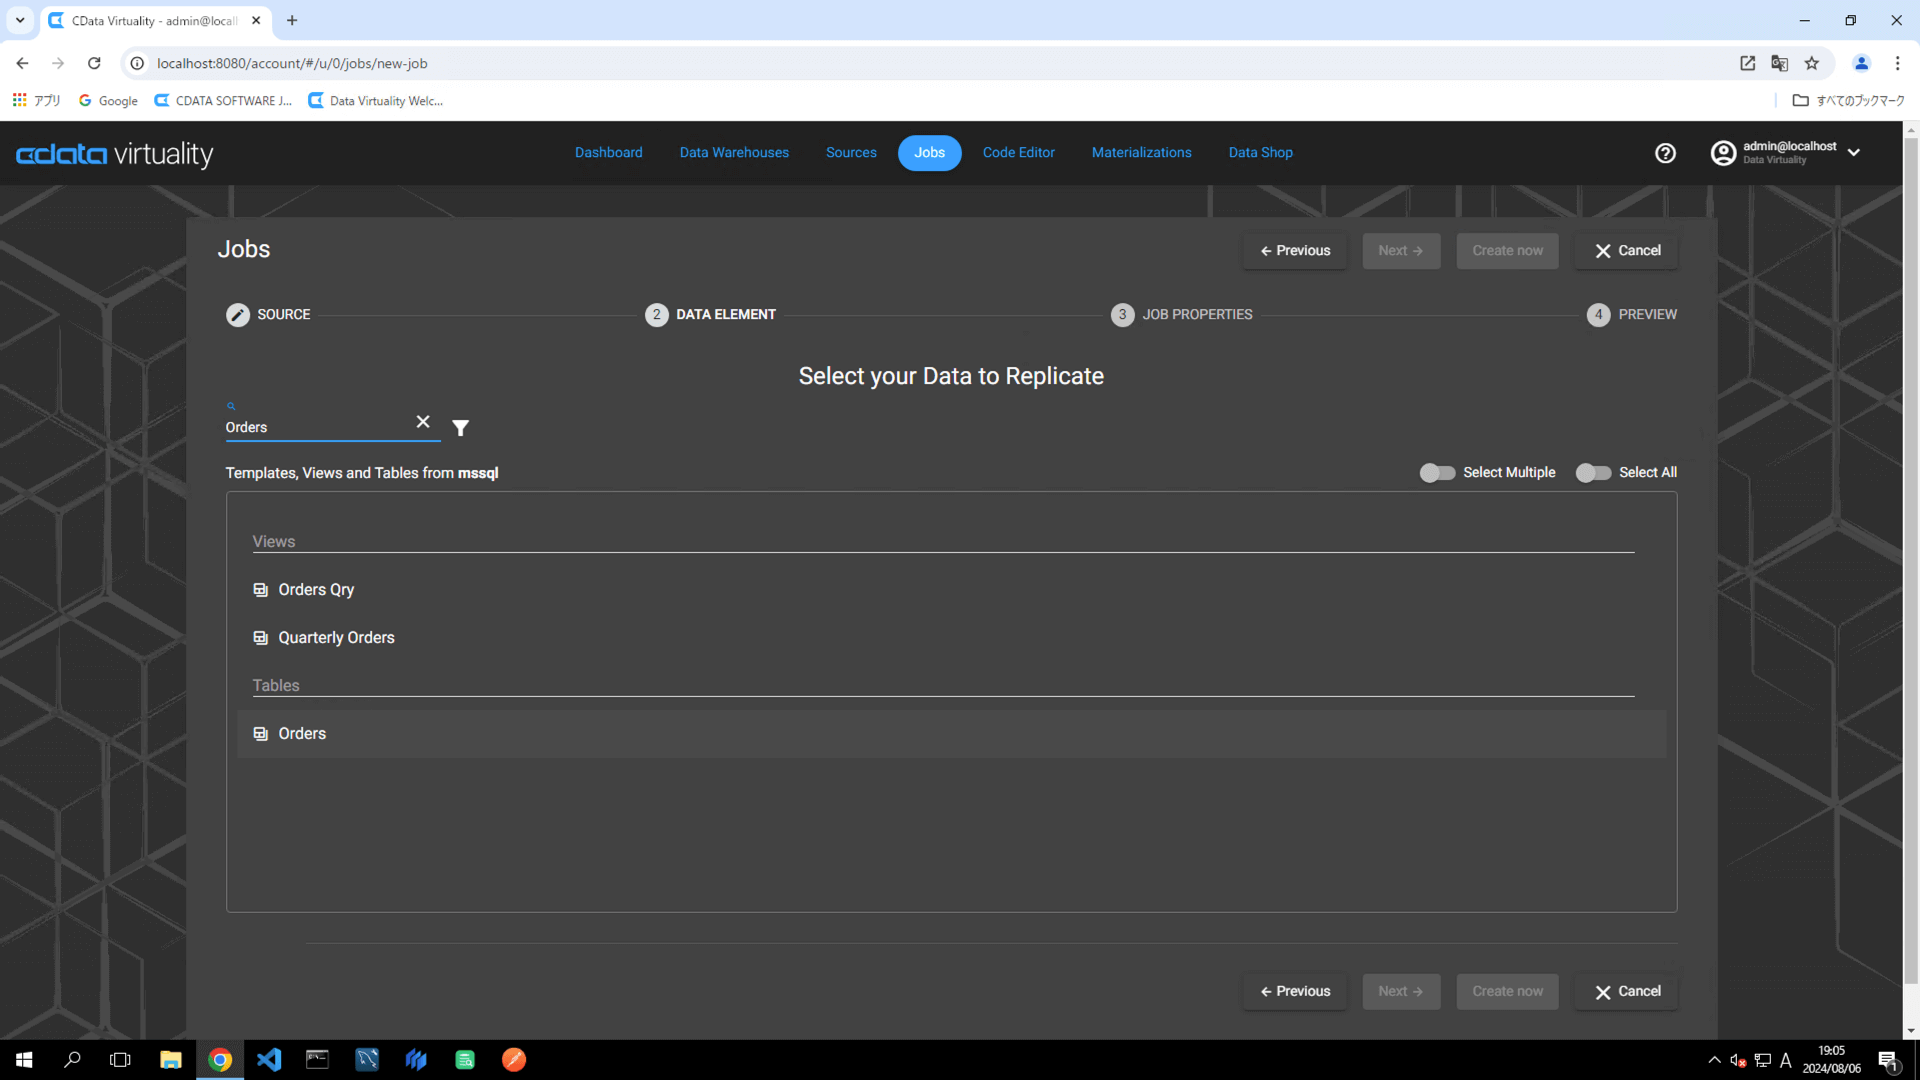
On the Select your Data to Replicate screen, choose the table to be replicated, and click the Next button:
For this example, the Orders table in Microsoft SQL Server is selected.
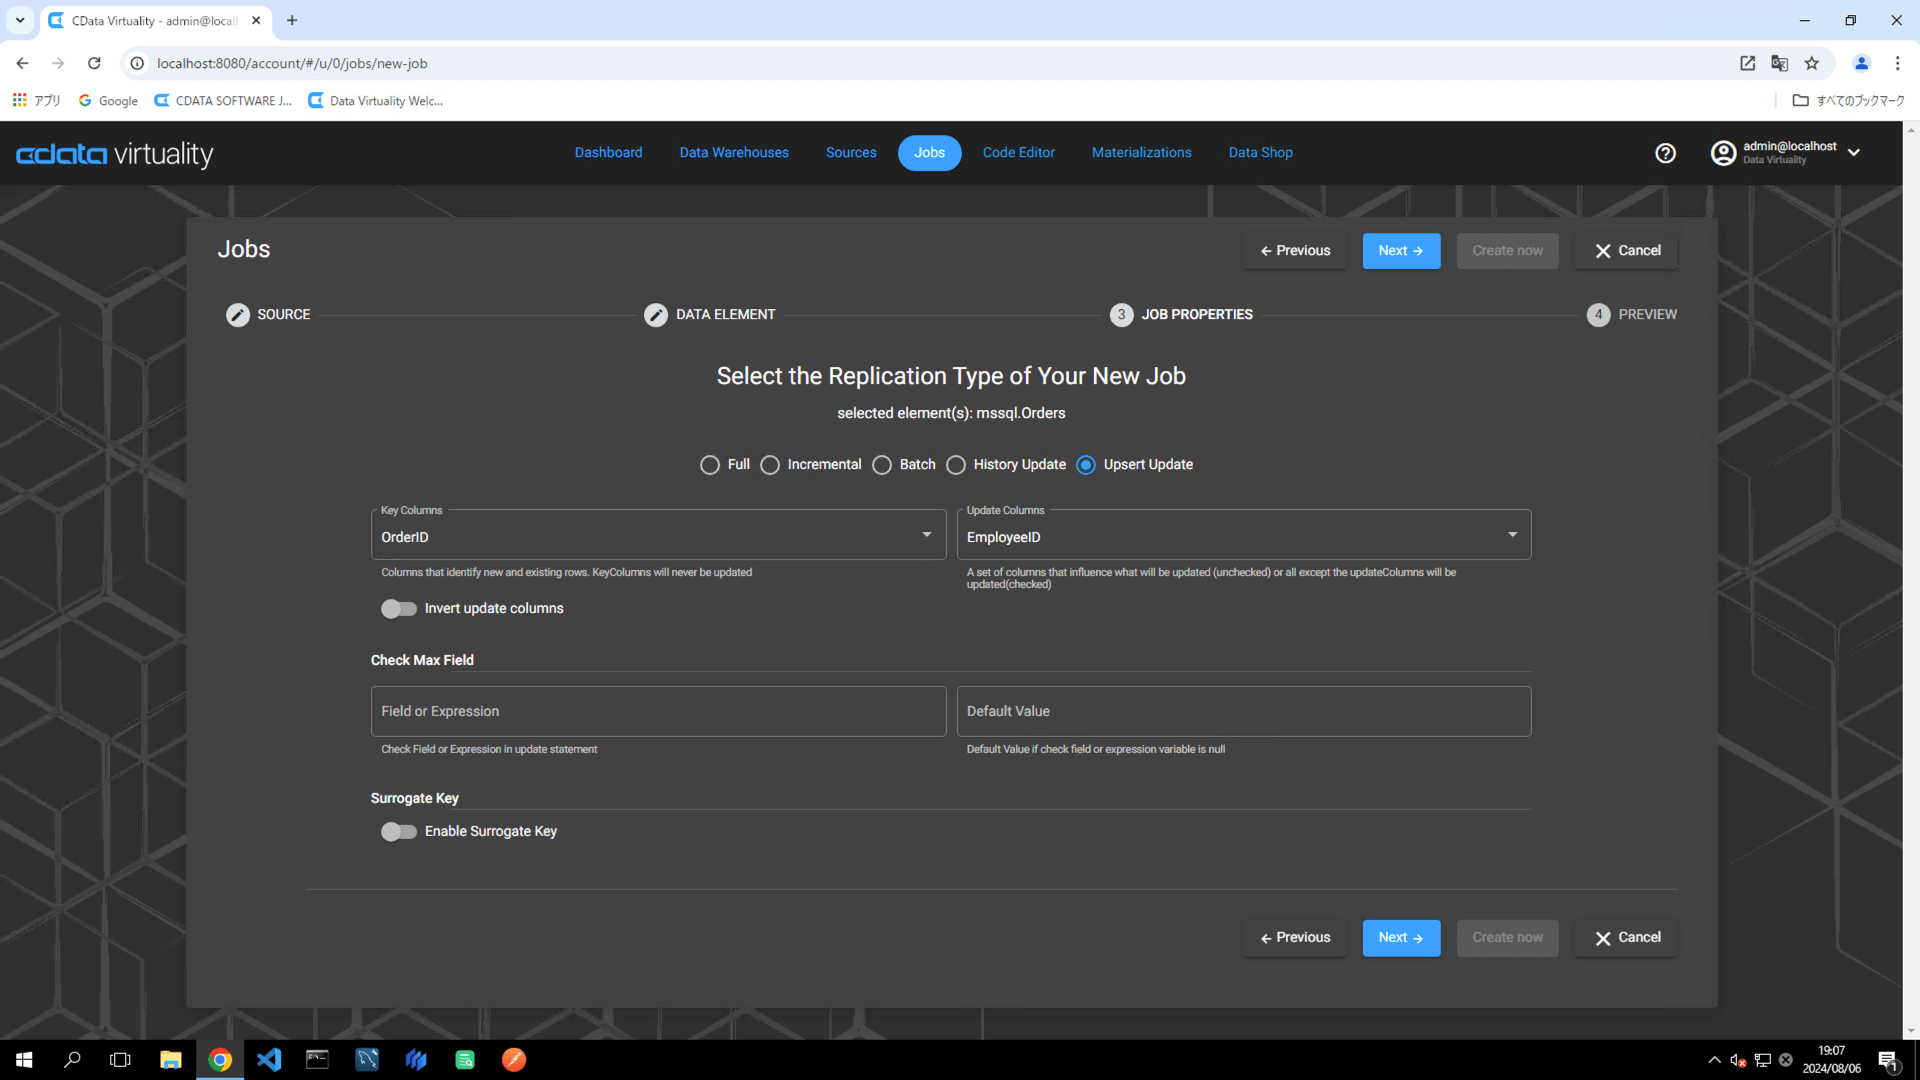
To ensure accurate tracking of updates during replication, the following is needed:
Key Column: A field that uniquely identifies the record (e.g., OrderID)
Columns To Check: A field to monitor for changes in the data (e.g., EmployeeID):
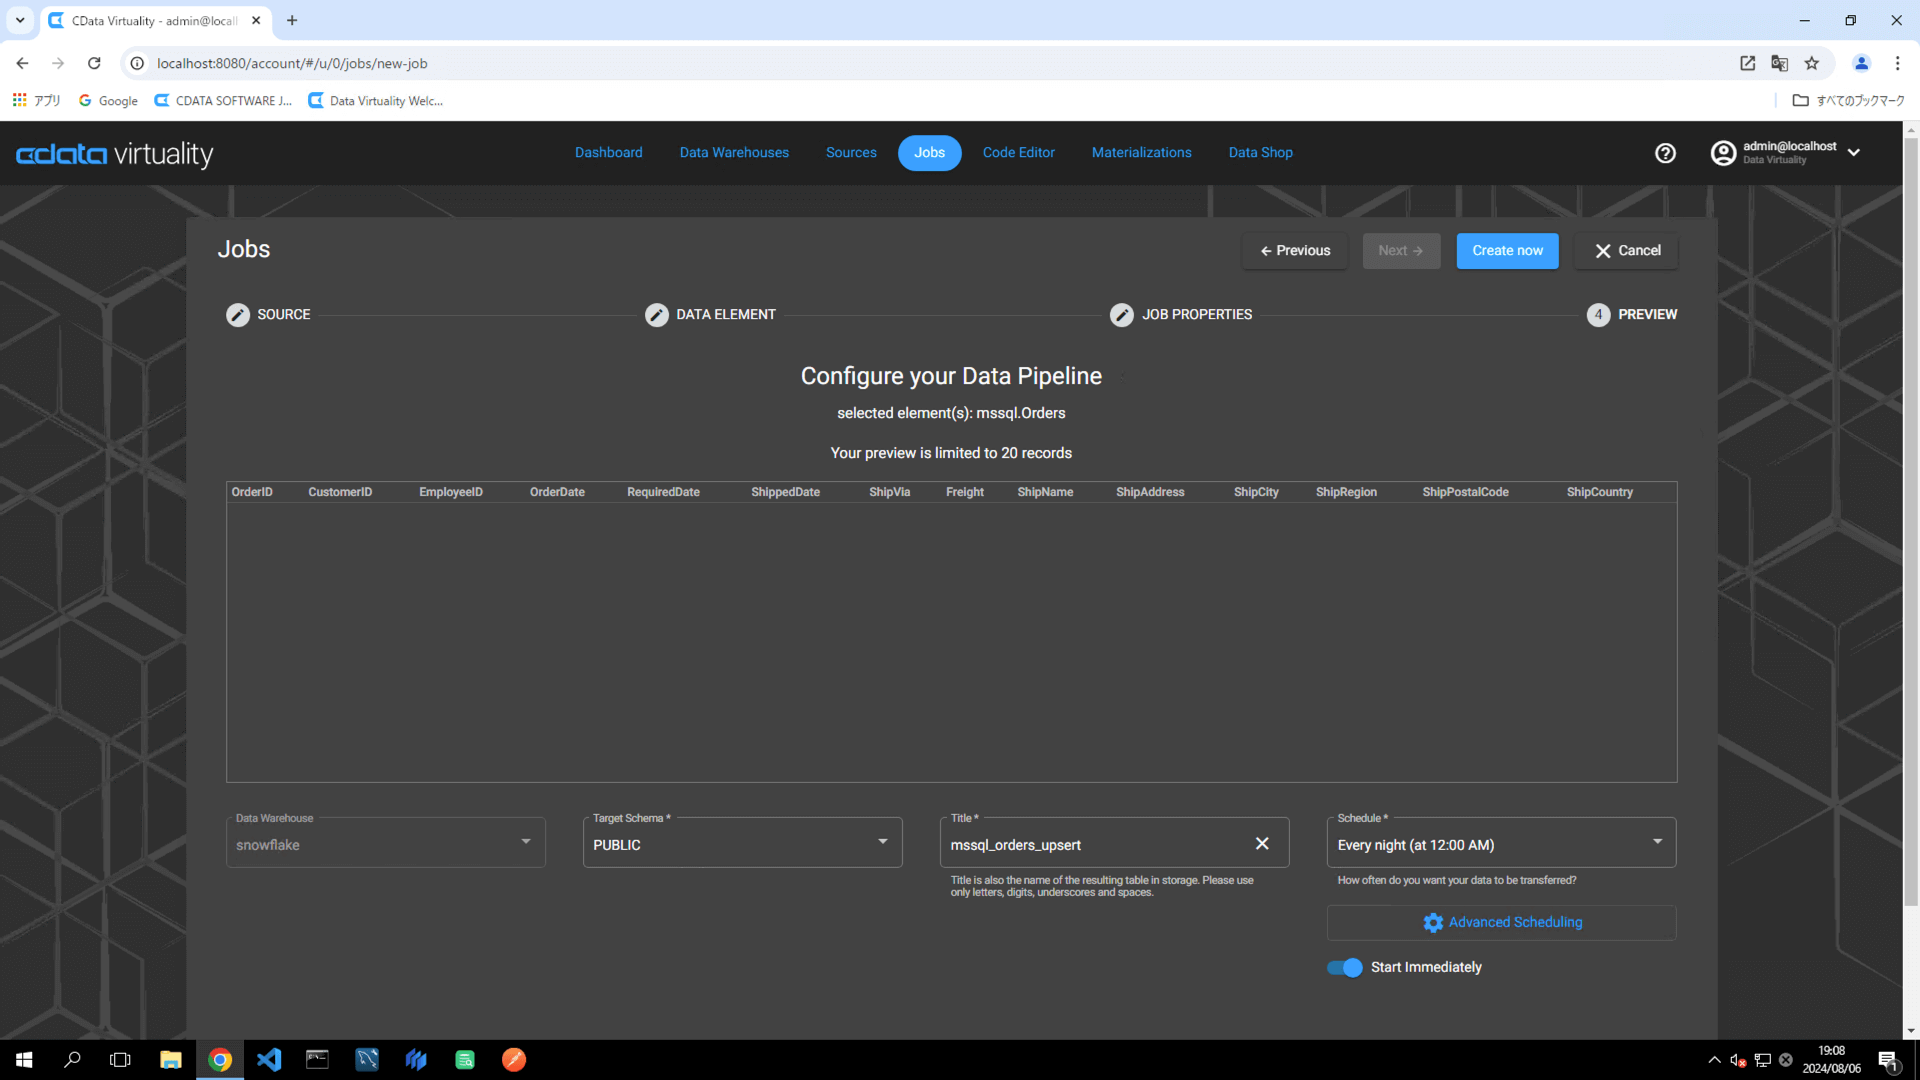
Set the following elements in the pipeline configuration:
Data Warehouse: Select the target data warehouse.
Target Schema: Specify the target schema.
Title: Rename the pipeline to
mssql_orders_upsert.Schedule: Set the desired execution schedule.
Start Immediately: Toggle on for immediate execution.
For more flexible scheduling options, click the Advanced Scheduling button.
Click the Create now button to run the replication job:
The Dashboard screen will open. The green bar will confirm that the job was created successfully:
Once the job has executed, confirm that the Status is marked as Successful on the Dashboard screen. If the status doesn’t update automatically, click the Refresh button to refresh the screen:
Access Snowflake and confirm that the data is stored in the respective tables:
To add and change one record on the data source (e.g., the Orders table in Microsoft SQL Server) use the following query and re-run the replication job:
INSERT INTO Orders (CustomerID, EmployeeID, OrderDate,ShipCountry) VALUES ('LILAS', 5, '2024/08/09', 'USA');

UPDATE Orders SET employeeid = 4 WHERE OrderID = 11087;
Access Snowflake and check the replication destination table. Confirm that the newly added record and updated on the data source are created as records:
See Also
Replication for more information on replication and its types