
Index Management and Recommended Indexes
Indexes in CData Virtuality Server
Indexes are widely used to speed up typical database processes like joining tables or filtering results. The CData Virtuality Server supports using indexes on analytical storage tables (materialized tables) to further improve analytical processes.
In most cases, you might want to use optimizations (and, therefore, materialized tables) instead of live data to increase query performance significantly. For example, if a major analytical report relies on large data, the local content can be analyzed much faster. The system then takes a heavy load by automatically recommending indexes that might improve the performance of queries. Additionally, you can create your indexes or prevent the system from creating physical indexes that are of no practical use.
This is when the CData Virtuality Server comes in: it automatically detects the supported kinds of indexes and recommends them according to the queries. It learns from the queries directly or indirectly (via business intelligence tools like Tableau) sent to it. This section describes how this works and gives an overview of analytical storage platforms and their supported indexes.
How are Indexes Recommended
Whenever a query is sent to the CData Virtuality Server, it automatically checks for specific parts of the query that consume resources and can be improved by indexes. There are three types of indexes:
WHERE: index is recommended based on a query with filtering;JOIN: index is recommended based on a query that joins several objects;Manual: index is defined by the user.
WHERE
If a WHERE clause is used, the Server detects it and recommends one or more indexes from the clause. If an index already exists, the system will update its counter, and you can then see which indexes are used more frequently.
Here is an example query:
SELECT *
FROM "views.foo"
WHERE col1 > 0;;
An index will be recommended for col1.
JOIN
The Server also considers JOIN criteria and recommends indexes accordingly. If a simple JOIN compares one column from a source with a column from another source, both will be recommended as an index. Here is an example of such a query:
SELECT a.col1, b.col2
FROM "views.foo" AS a
INNER JOIN "views.bar" as b ON a.col1 = b.col2;;
Two indexes will be added or updated: "views.foo"."col1" and "views.bar"."col2".
Manual Indexes
Finally, you can create all kinds of indexes (they will be of type manual). Please note that the CData Virtuality Server does not recommend manual indexes.
Multiple Recommendations of Index
One important point to remember is that an index can appear more than once when recommended depending on different system observations. At the same time, a distinct index is never created more than once.
Here is an example query for which the system will recommend the same column twice as an index:
SELECT a.col1, b.col2
FROM "views.foo" AS a
INNER JOIN "views.bar" AS b ON a.col1 = b.col2
WHERE a.col1 > 5;;
Execution of this query yields three index recommendations:
"views.foo"."col1"(typeJOIN)"views.foo"."col1"(typeWHERE)"views.bar"."col2"(typeJOIN)
Kinds of Supported Indexes
The CData Virtuality Server supports the following most common kinds of indexes, depending on the analytical storage platform you are using:
single-column index
multi-column index (sometimes referred to as composite index)
expression index
Single-column and Multi-column Indexes
In addition to automatically detecting where a specific index will be useful, the system recommends the most appropriate one. Here is an example:
SELECT a.col1, b.col2
FROM "views.foo"
WHERE col1 > 0 AND col2 < 9;;
For this query, the system will recommend two single-column and one multi-column indexes:
Single-column indexes:
"views.foo"."col1"and"views.foo"."col2"Multi-column index:
("views.foo"."col1", "views.foo"."col2")
Expression Index
An example of a case when the expression index comes in handy is the use of the YEAR function which returns only the year for the given date or timestamp.
Business intelligence tools often analyze data like sales based on year, month, or some other period. In most cases, however, there is only one column containing the whole timestamp, and if it is indexed as a whole, comparisons like YEAR (someColumn) will not use a single-column index on someColumn. Here, expression indexes come to the rescue: they can store precisely the type of data used for the required comparison.
Here is an example:
SELECT *
FROM "dwh.foo"
WHERE YEAR("someColumn") > 2010;;
Upon execution of this query, the system will recommend the YEAR(someColumn) expression index.
Limitations
The only limitation when using indexes is that the kinds of indexes that can be used depend on the analytical storage you use (or, rather, the technology behind this analytical storage). Here is an overview of platforms and supported kinds of indexes:
Analytical Storage Platform | Single-column Indexes | Multi-column Indexes | Expression Indexes |
|---|---|---|---|
PostgreSQL | + | + | + |
Oracle | + | + | + |
MySQL | + | + | - |
MS SQL Server | + | + | - |
Amazon Redshift | - | - | - |
Snowflake | - | - | - |
Google BigQuery | - | - | - |
Status of Indexes
An index can have one of the following statuses:
NEW: index is recommended by the system; only the CData Virtuality ServerACCEPTED(Enabledin the CData Virtuality Studio): index is recommended by the system and subsequently accepted by the user; all manual indexes also have this status; the index will be createdREJECTED(Disabledin the CData Virtuality Studio): the index will not be created
The REJECTED status has the highest priority. If an index appears in the recommendations several times with different statuses, and one of them is REJECTED, this index will be rejected.
Changing Index Status
Via CData Virtuality Studio
You can easily change the status of an index from the CData Virtuality Studio. Here are the steps to do it:
Go to the Optimizations tab and right-click on the desired optimization.
Select Manage recommended indexes from the context menu. The management dialogue for this optimization will open:

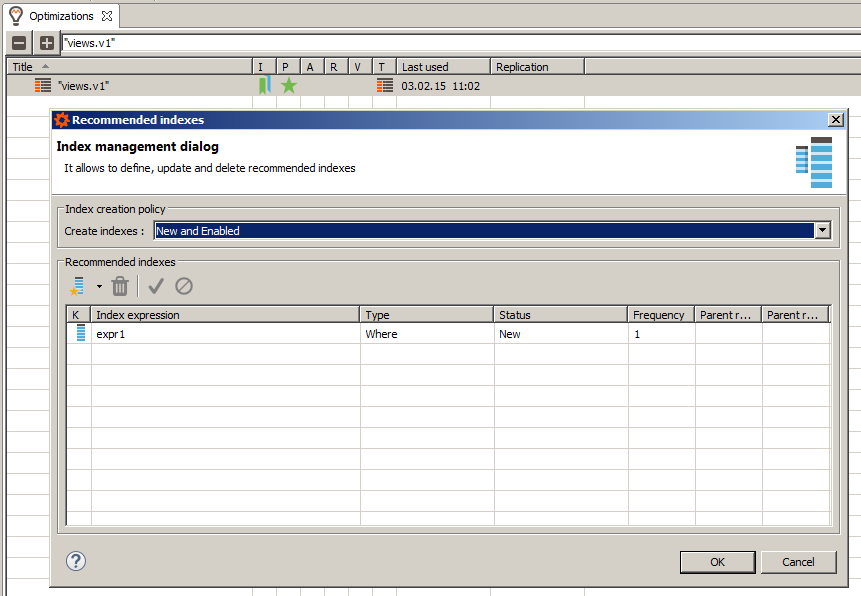
Click on the cell at the intersection of the required index row and Status column and select the desired status (remember that in the CData Virtuality Studio,
Enabledstands forACCEPTEDandDisabledforREJECTED). Confirm by clicking OK: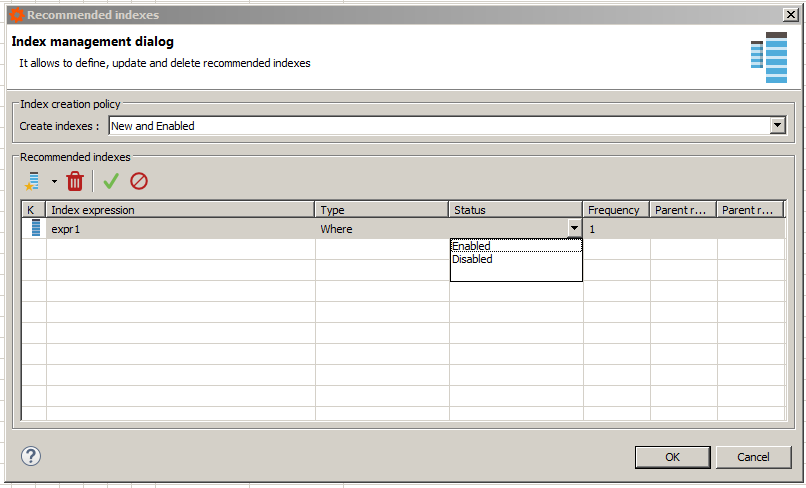
Via SQL
Before changing the status of an index, find its ID by following these steps:
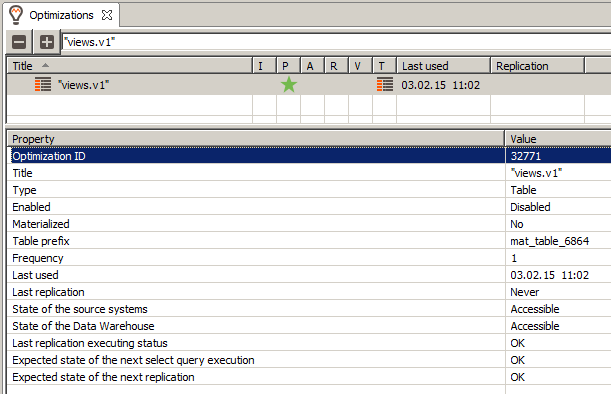
Search within the Optimizations tab for the optimization which includes the index to be changed:
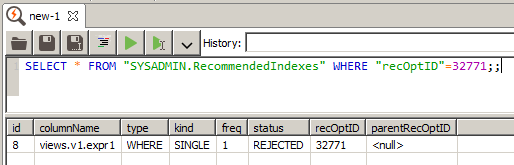
Run the following SQL query where
recOptIDis the Optimization ID:SQLSELECT * FROM "SYSADMIN.RecommendedIndexes" WHERE "recOptID"=32771;;
You may see an index appearing more than once in the resulting list because the system recommends an index based on its usage: for example, if the index is used in a WHERE clause and in a JOIN criteria. You can always distinguish different indexes because they have different parentRecOptIds:
And this is how to change the status of a specific index via an SQL query:
CALL SYSADMIN.setIndexStatus(indexId => <indexId>, indexStatus => <status>);;Remember that an index may have one of the following statuses:
ACCEPTEDREJECTEDNEW
Here are a couple of examples for our index whose ID is 8:
CALL SYSADMIN.setIndexStatus(indexId => 8, indexStatus => 'ACCEPTED');;
CALL SYSADMIN.setIndexStatus(indexId => 8, indexStatus => 'REJECTED');;
The setIndexStatus() procedure can be used with OPTION $NOFAIL . If this option is enabled, the procedure will not throw an exception.
We do not recommend using the NEW status for non-system recommended indexes to have new indexes always come from the CData Virtuality Server.
This status cannot be set via the CData Virtuality Studio, and, for consistency, we do not recommend setting it manually.
Index Creation Policy
The CData Virtuality Server lets you determine how the optimization indexes will be created. You can set and fine-tune settings both globally and for each optimization.
Please note that indexes are only created at replication time, and changes to them take effect next time a full replication of the optimization runs.
Global Policy
The global setting can be used to control multiple optimizations at once. If the global policy changes, all individual policies set to 'default' will change automatically.
The default global setting is to always create all types of settings ('NEW_ACCEPTED').
Individual Policy
Each optimization can also be set individually with a different index creation policy. Individual policies always have higher priority unless the setting is to use the global setting. Otherwise, the setting options are the same, and by default, all optimizations are configured to use the individual policy 'NEW_ACCEPTED'.
Policy Options
The possible policy settings are as follows:
Policy setting | Name in CData Virtuality Studio | Index creation |
|---|---|---|
|
| All indexes, except explicitly disabled, will be created upon the next full replication. This includes both indexes automatically recommended by the CData Virtuality Server and added manually. The number of indexes in the NEW status that will be created for a particular table is controlled by the MAX_AUTO_INDEXES_PER_TABLE default option (default: |
|
| Only enabled indexes will be created. Indexes automatically recommended by the CData Virtuality Server will not be created unless explicitly accepted by manually setting it to |
|
| No indexes will be created |
|
| This setting can be used to configure the individual policy for single optimizations. The setting default automatically applies the global policy |
Setting Global and Individual Policies
Global policy can be set only via SQL, whereas individual policy can be set via SQL and the CData Virtuality Studio.
Setting Global Policy (SQL Only)
At the moment, the global index creation policy can only be changed using an SQL query as follows:
CALL setDefaultOptionValue('INDEX_CREATION_POLICY', <status>);;Here are examples for all three possible statuses:
CALL SYSADMIN.setDefaultOptionValue('INDEX_CREATION_POLICY', 'NEW_ACCEPTED');;
CALL SYSADMIN.setDefaultOptionValue('INDEX_CREATION_POLICY', 'ACCEPTED');;
CALL SYSADMIN.setDefaultOptionValue('INDEX_CREATION_POLICY', 'NONE');;
Setting Individual Policy
Via CData Virtuality Studio
To change the individual policy for a single optimization, follow these steps:
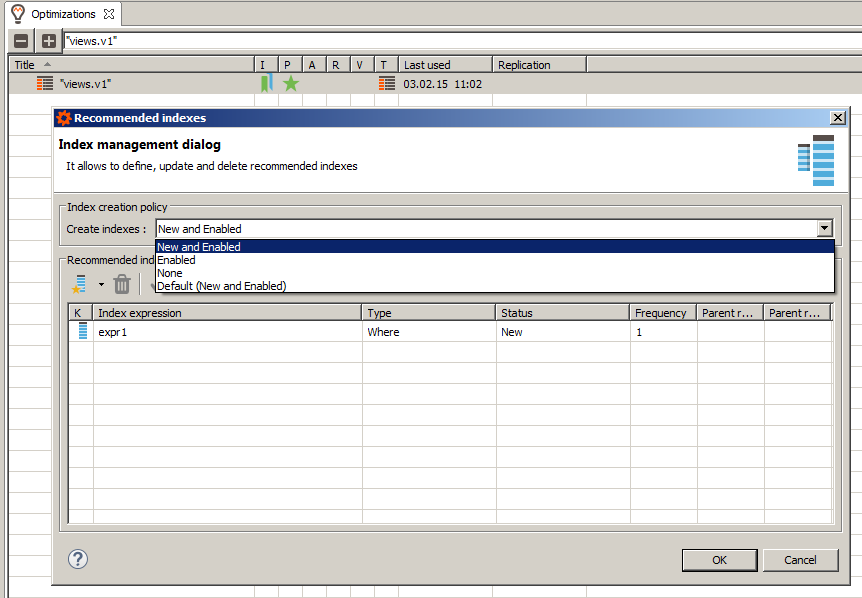
Go to the Optimizations tab and right-click on the desired optimization.
Select Manage recommended indexes from the context menu. The management dialogue for this optimization will open:
Select the desired policy from the Create indexes field. Confirm by clicking OK:
Via SQL
To change individual policy via SQL, you will need the optimization ID (recOptId). This is how the query itself looks like:
CALL SYSADMIN.setRecOptAllowIndexCreationByStatus(recOptId => <id>, allowIndexCreationByStatus => <status>);;Here are examples for all four possible statuses:
CALL SYSADMIN.setRecOptAllowIndexCreationByStatus(recOptId => 32771, allowIndexCreationByStatus => 'NEW_ACCEPTED');;
CALL SYSADMIN.setRecOptAllowIndexCreationByStatus(recOptId => 32771, allowIndexCreationByStatus => 'ACCEPTED');;
CALL SYSADMIN.setRecOptAllowIndexCreationByStatus(recOptId => 32771, allowIndexCreationByStatus => 'NONE');;
CALL SYSADMIN.setRecOptAllowIndexCreationByStatus(recOptId => 32771, allowIndexCreationByStatus => 'DEFAULT');;
Overview of Index Creation
In this table, we show all the statuses with their possible individual and global policy settings and whether or not an index with this status will be created:
Status of index (Studio view) | Individual Policy Setting | Global Policy Setting | Created? |
|---|---|---|---|
|
| ignored | Yes |
|
| ignored | No |
|
| ignored | No |
|
|
| Yes |
|
|
| No |
|
|
| No |
|
| ignored | Yes |
|
| ignored | Yes |
|
| ignored | No |
|
|
| Yes |
|
|
| Yes |
|
|
| No |
|
| ignored | No |
|
| ignored | No |
|
| ignored | No |
|
|
| No |
|
|
| No |
|
|
| No |