Installing CData Virtuality ODBC (Windows)
Installation
To install the ODBC driver on Windows, download the driver from the CData Virtuality web interface, double-click the appropriate installer file (datavirtualityODBC.msi or datavirtualityODBC_x64.msi), and follow the wizard.
Configuration
Launching the Windows Data Source Administration Tool
After installing the driver, create a DSN via the Windows ODBC Administrator Tool.
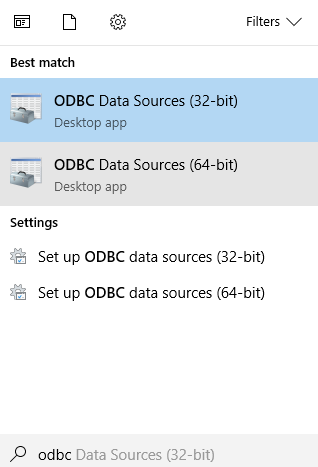
The 64-Bit ODBC Driver needs to be configured in the 64-Bit Version of the ODBC Administrator Tool. The 32-Bit ODBC Driver needs to be configured in the 32-Bit Version of the ODBC Administrator Tool.
To open the ODBC Administrator Tool in Windows, access the Windows search field, search for ODBC, and start the appropriate ODBC Administrator Tool:
Verifying that the CData Virtuality ODBC Driver is Installed
Verify that the CData Virtuality ODBC Driver is correctly installed by opening the Drivers Tab in ODBC Administrator Tool:
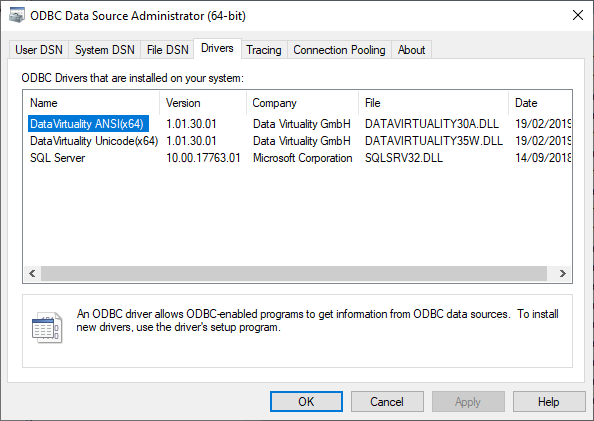
If the CData Virtuality ODBC Driver does not appear in the list, the CData Virtuality ODBC Driver installation did not finish successfully. That needs to be fixed before proceeding with the configuration.
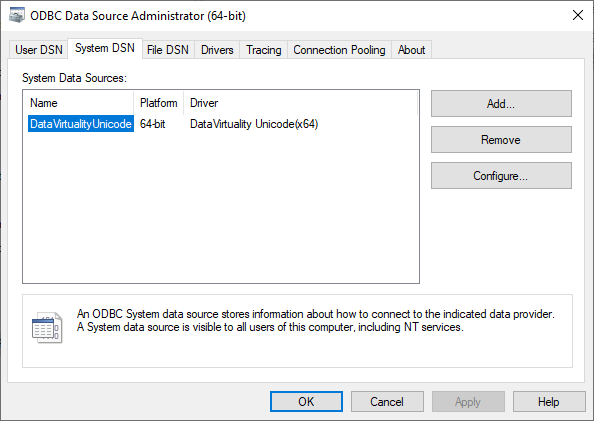
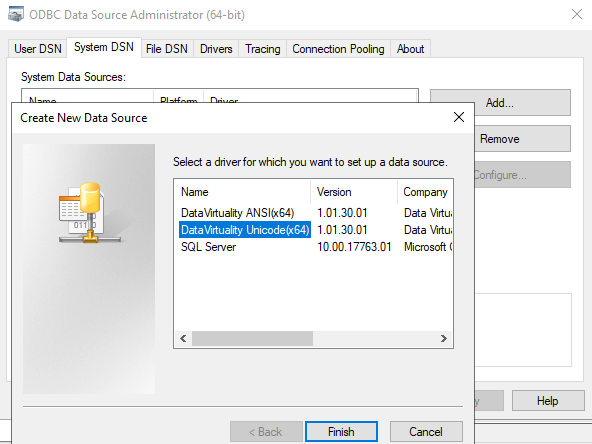
Creating a New DSN
Open either the User DSN or System DSN tab and click the Add button.
Choose the ANSI or the Unicode version of the CData Virtuality ODBC Driver from the list of installed drivers. The ANSI driver version is faster but does not support Unicode characters.
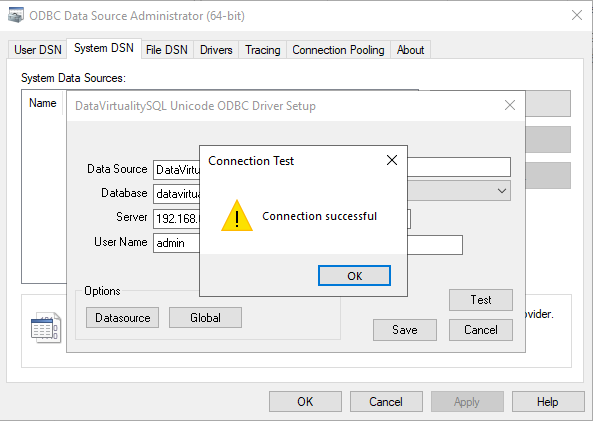
Provide connection parameters for the driver as follows:
Data Source,Database,Server,Port,SSL mode, and user credentials are mandatory;Data Sourceis an arbitrary DSN name;Databasemust be 'datavirtuality';Serveris the URL or IP address of the CData Virtuality Server instance;Portis 35432 (no SSL) or 35433 (SSL) unless configured differently in the CData Virtuality Server;SSL Modeshould be chosen according to the configuration of the CData Virtuality Server to connect to.

Test the connection and then save the created DSN. You can now use the DSN by its name in ODBC clients connecting to the CData Virtuality Server.