REST API
Overview
REST API uses HTTP requests to GET, PUT, POST, and DELETE data. You can use the CData Virtuality REST API to build web services on top of CData Virtuality to develop integrations with other applications.
In this guide, you will find the REST endpoints available in CData Virtuality and expected HTTP response codes, along with examples.
Please note that at the moment, there are two limitations. First, the CData Virtuality REST API only supports JSON content type; if you use an HTTP client (such as Postman), we recommend setting language detection to JSON. Second, the CData Virtuality REST API works only with the default virtual database (datavirtuality); this is why no VDB name or id specification is required in any of the commands.
Authentication (On-premise)
Basic HTTP authentication is the easiest way to authenticate but is rather insecure. Instead, we recommend more secure application authentication using a special app. If you use Postman, open the Authorization tab, select Basic Auth, and enter your credentials. To check that the credentials are correct, you can perform the following call to the status endpoint:
GET http://<datavirtuality-server-address>:8080/rest/api/status/The server then responds with REST API status:
STATUS 200

{ "status": "OK" }
Authentication (SaaS)
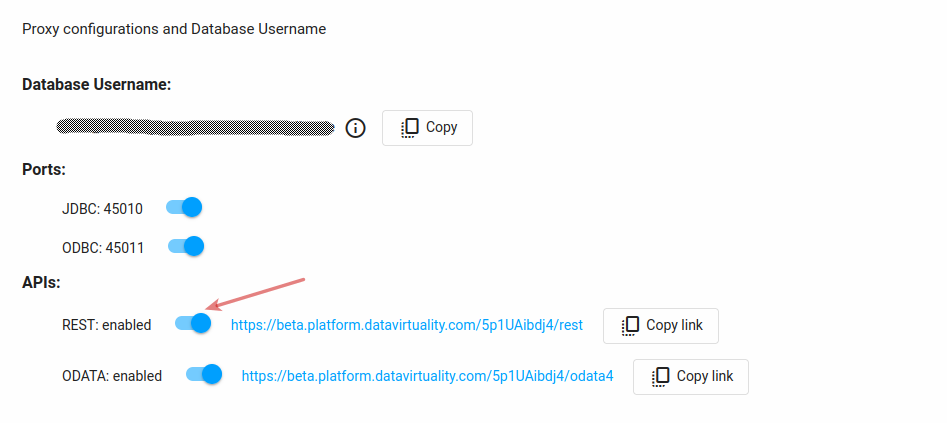
The SaaS version of CData Virtuality uses token-based authentication - for it, you will need the database username and the REST API link including token which you can obtain from the Preferences section in the Web UI. Follow these steps:
1. In Preferences, find the Proxy configurations and Database Username section, and toggle the switch next to REST to enable it (if not enabled already):

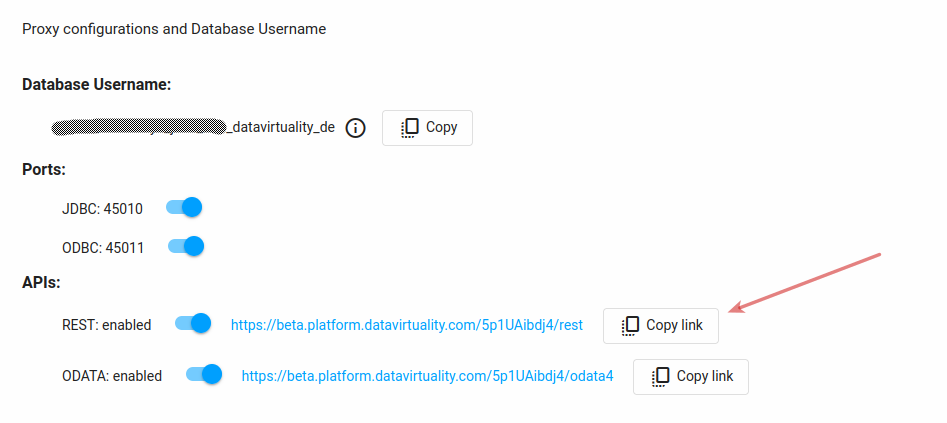
2. Click the Copy button to copy the link with your token:

You will get the following link: https://<cdatavirtuality-address>/XXXXXXXX/rest where XXXXXXXX is your token.
The link is static and does not change. If you disable REST API and enable it again, it will stay the same.
If you are using Postman, go to the Authorization tab, select Basic Auth as the authorization type, and enter your credentials: the database username from the Proxy configurations and Database Username section (see screenshots above) and your Platform account password. You can check if everything is correct by sending the following request:
GET https://<cdatavirtuality-address>/<your-token>/rest/api/status/If all is well, status 200 OK will be returned:

