
Setting Up Materialization
This guide explains the types of materialization available in CData Virtuality and provides step-by-step instructions for setting them up.
The guide uses sample data from the MySQL and PostgreSQL sample databases. See this guide for instructions on connecting to the sample databases to use the provided sample data. Additionally, since this procedure involves adding records to the data source, an external Microsoft SQL Server (Northwind database) is added to the data sources.
The materialization process will use Snowflake as the analytical storage. See this guide for instructions on configuring the analytical storage.
About Materialization
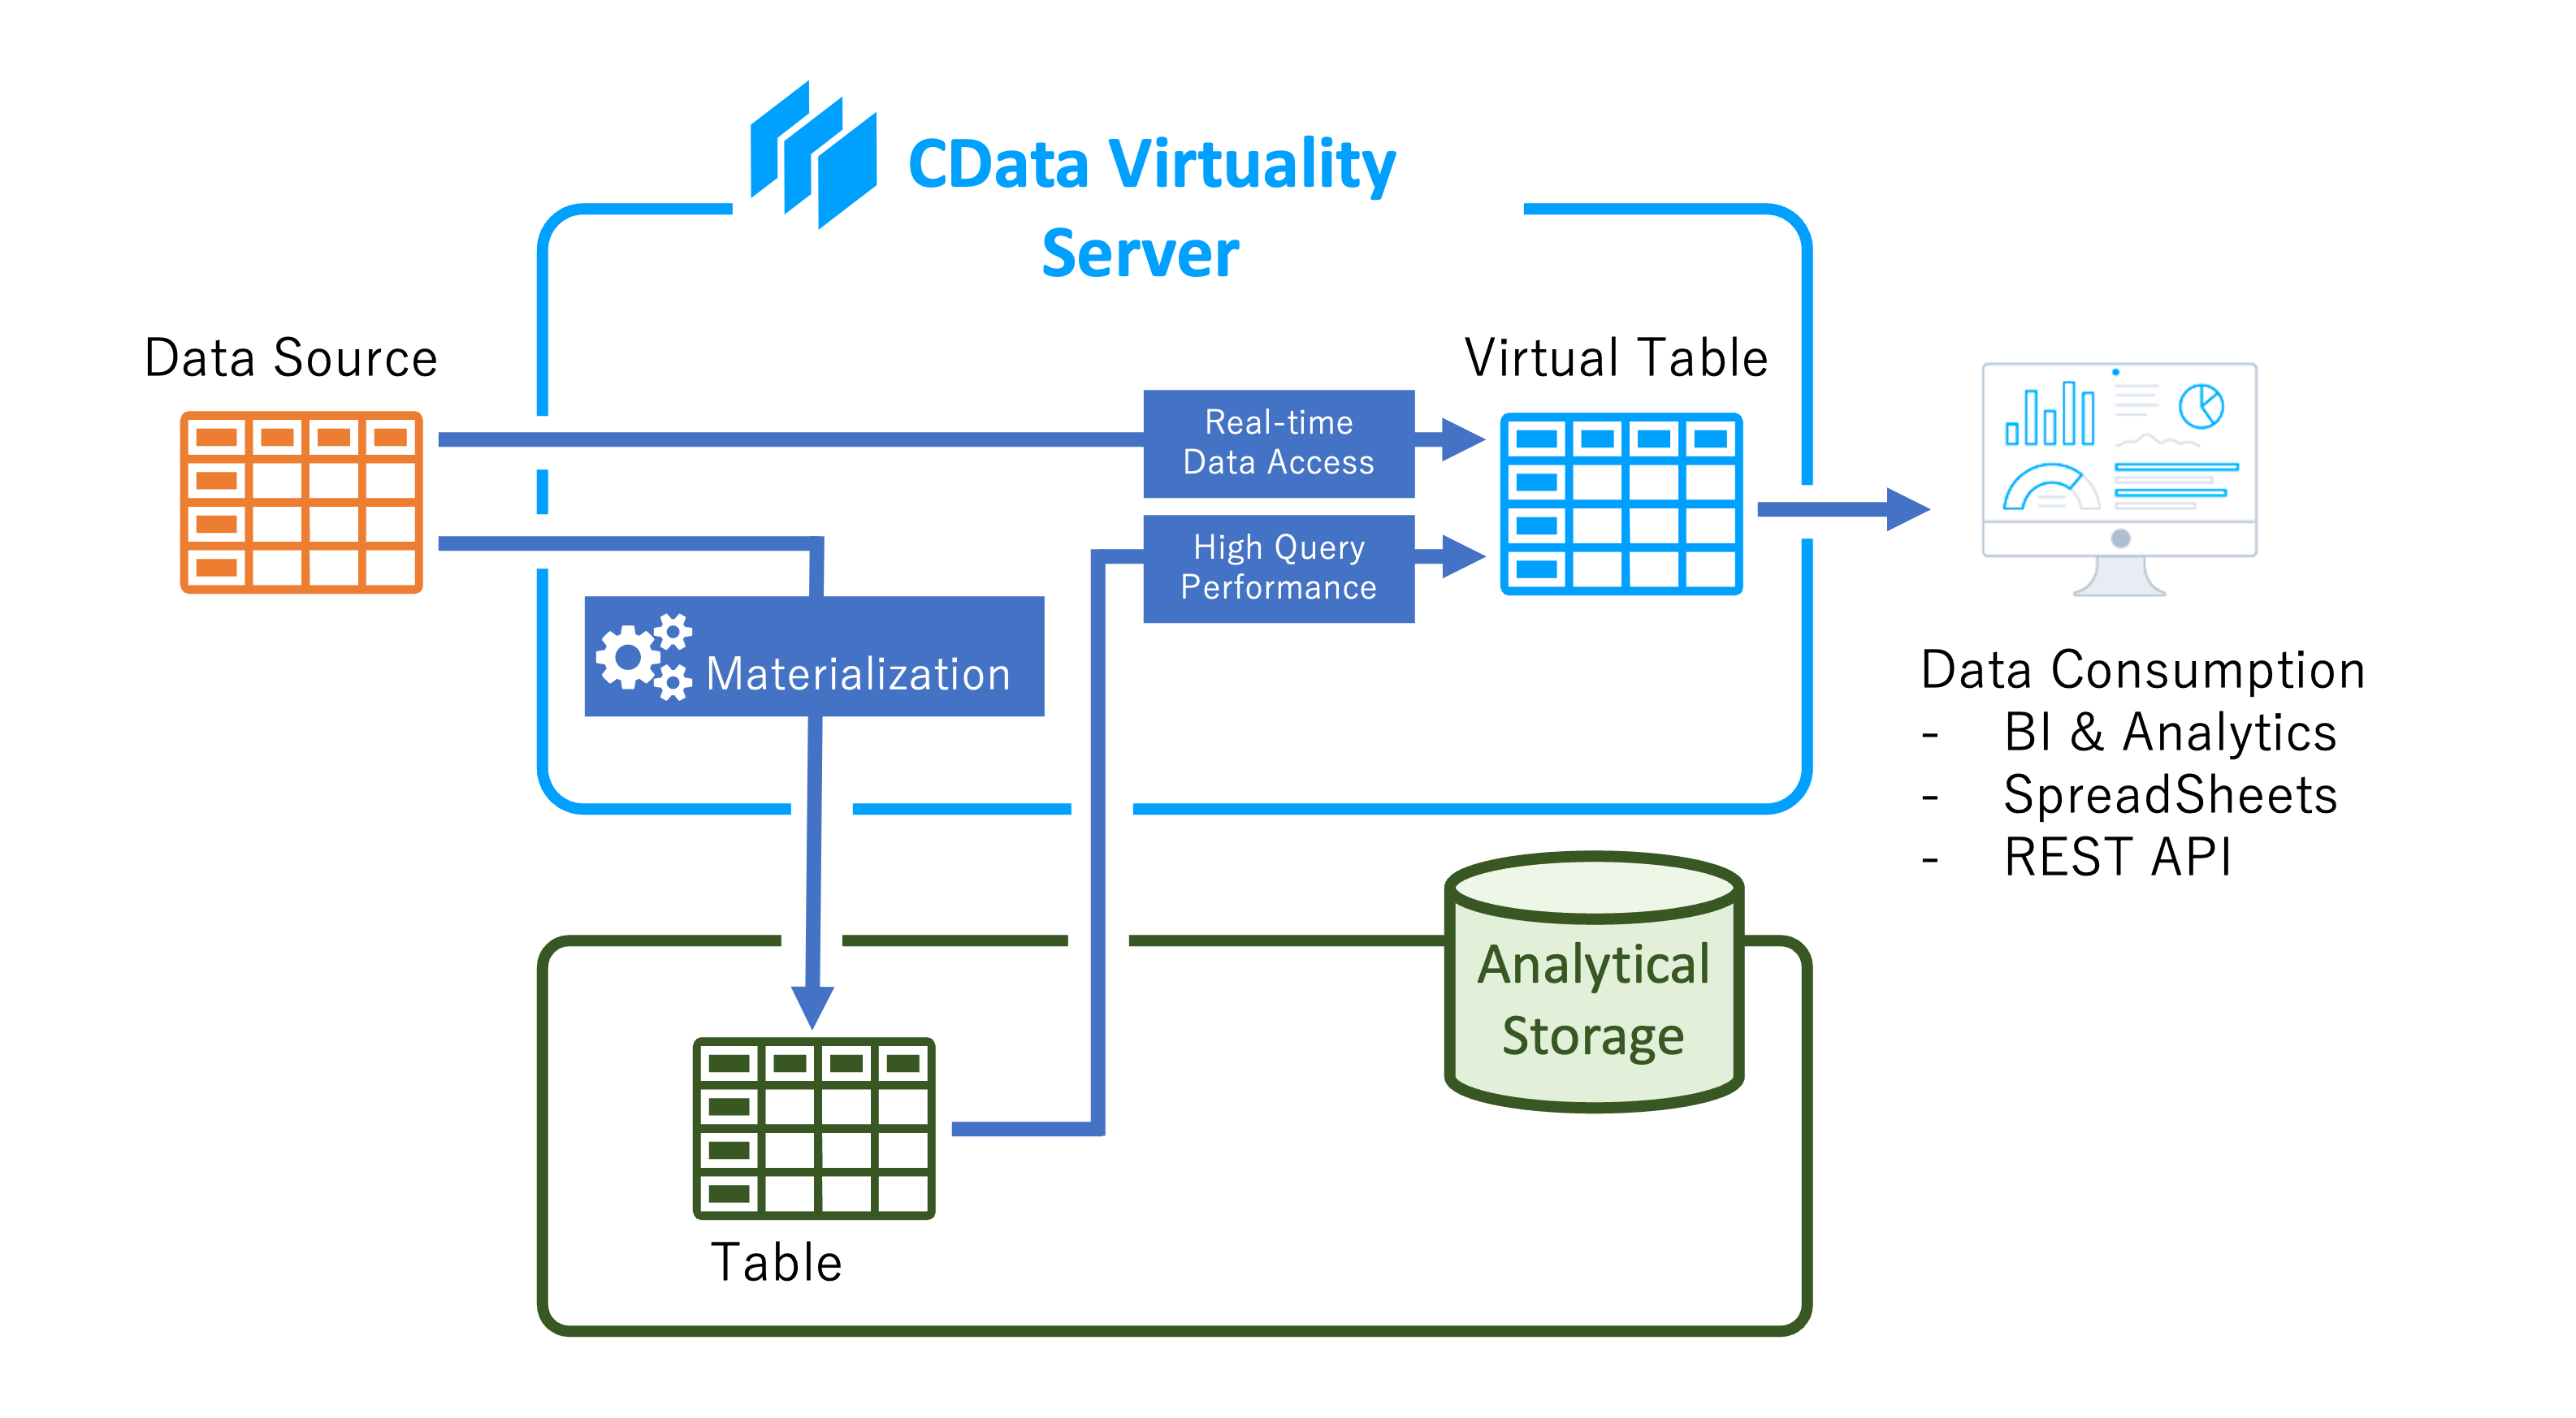
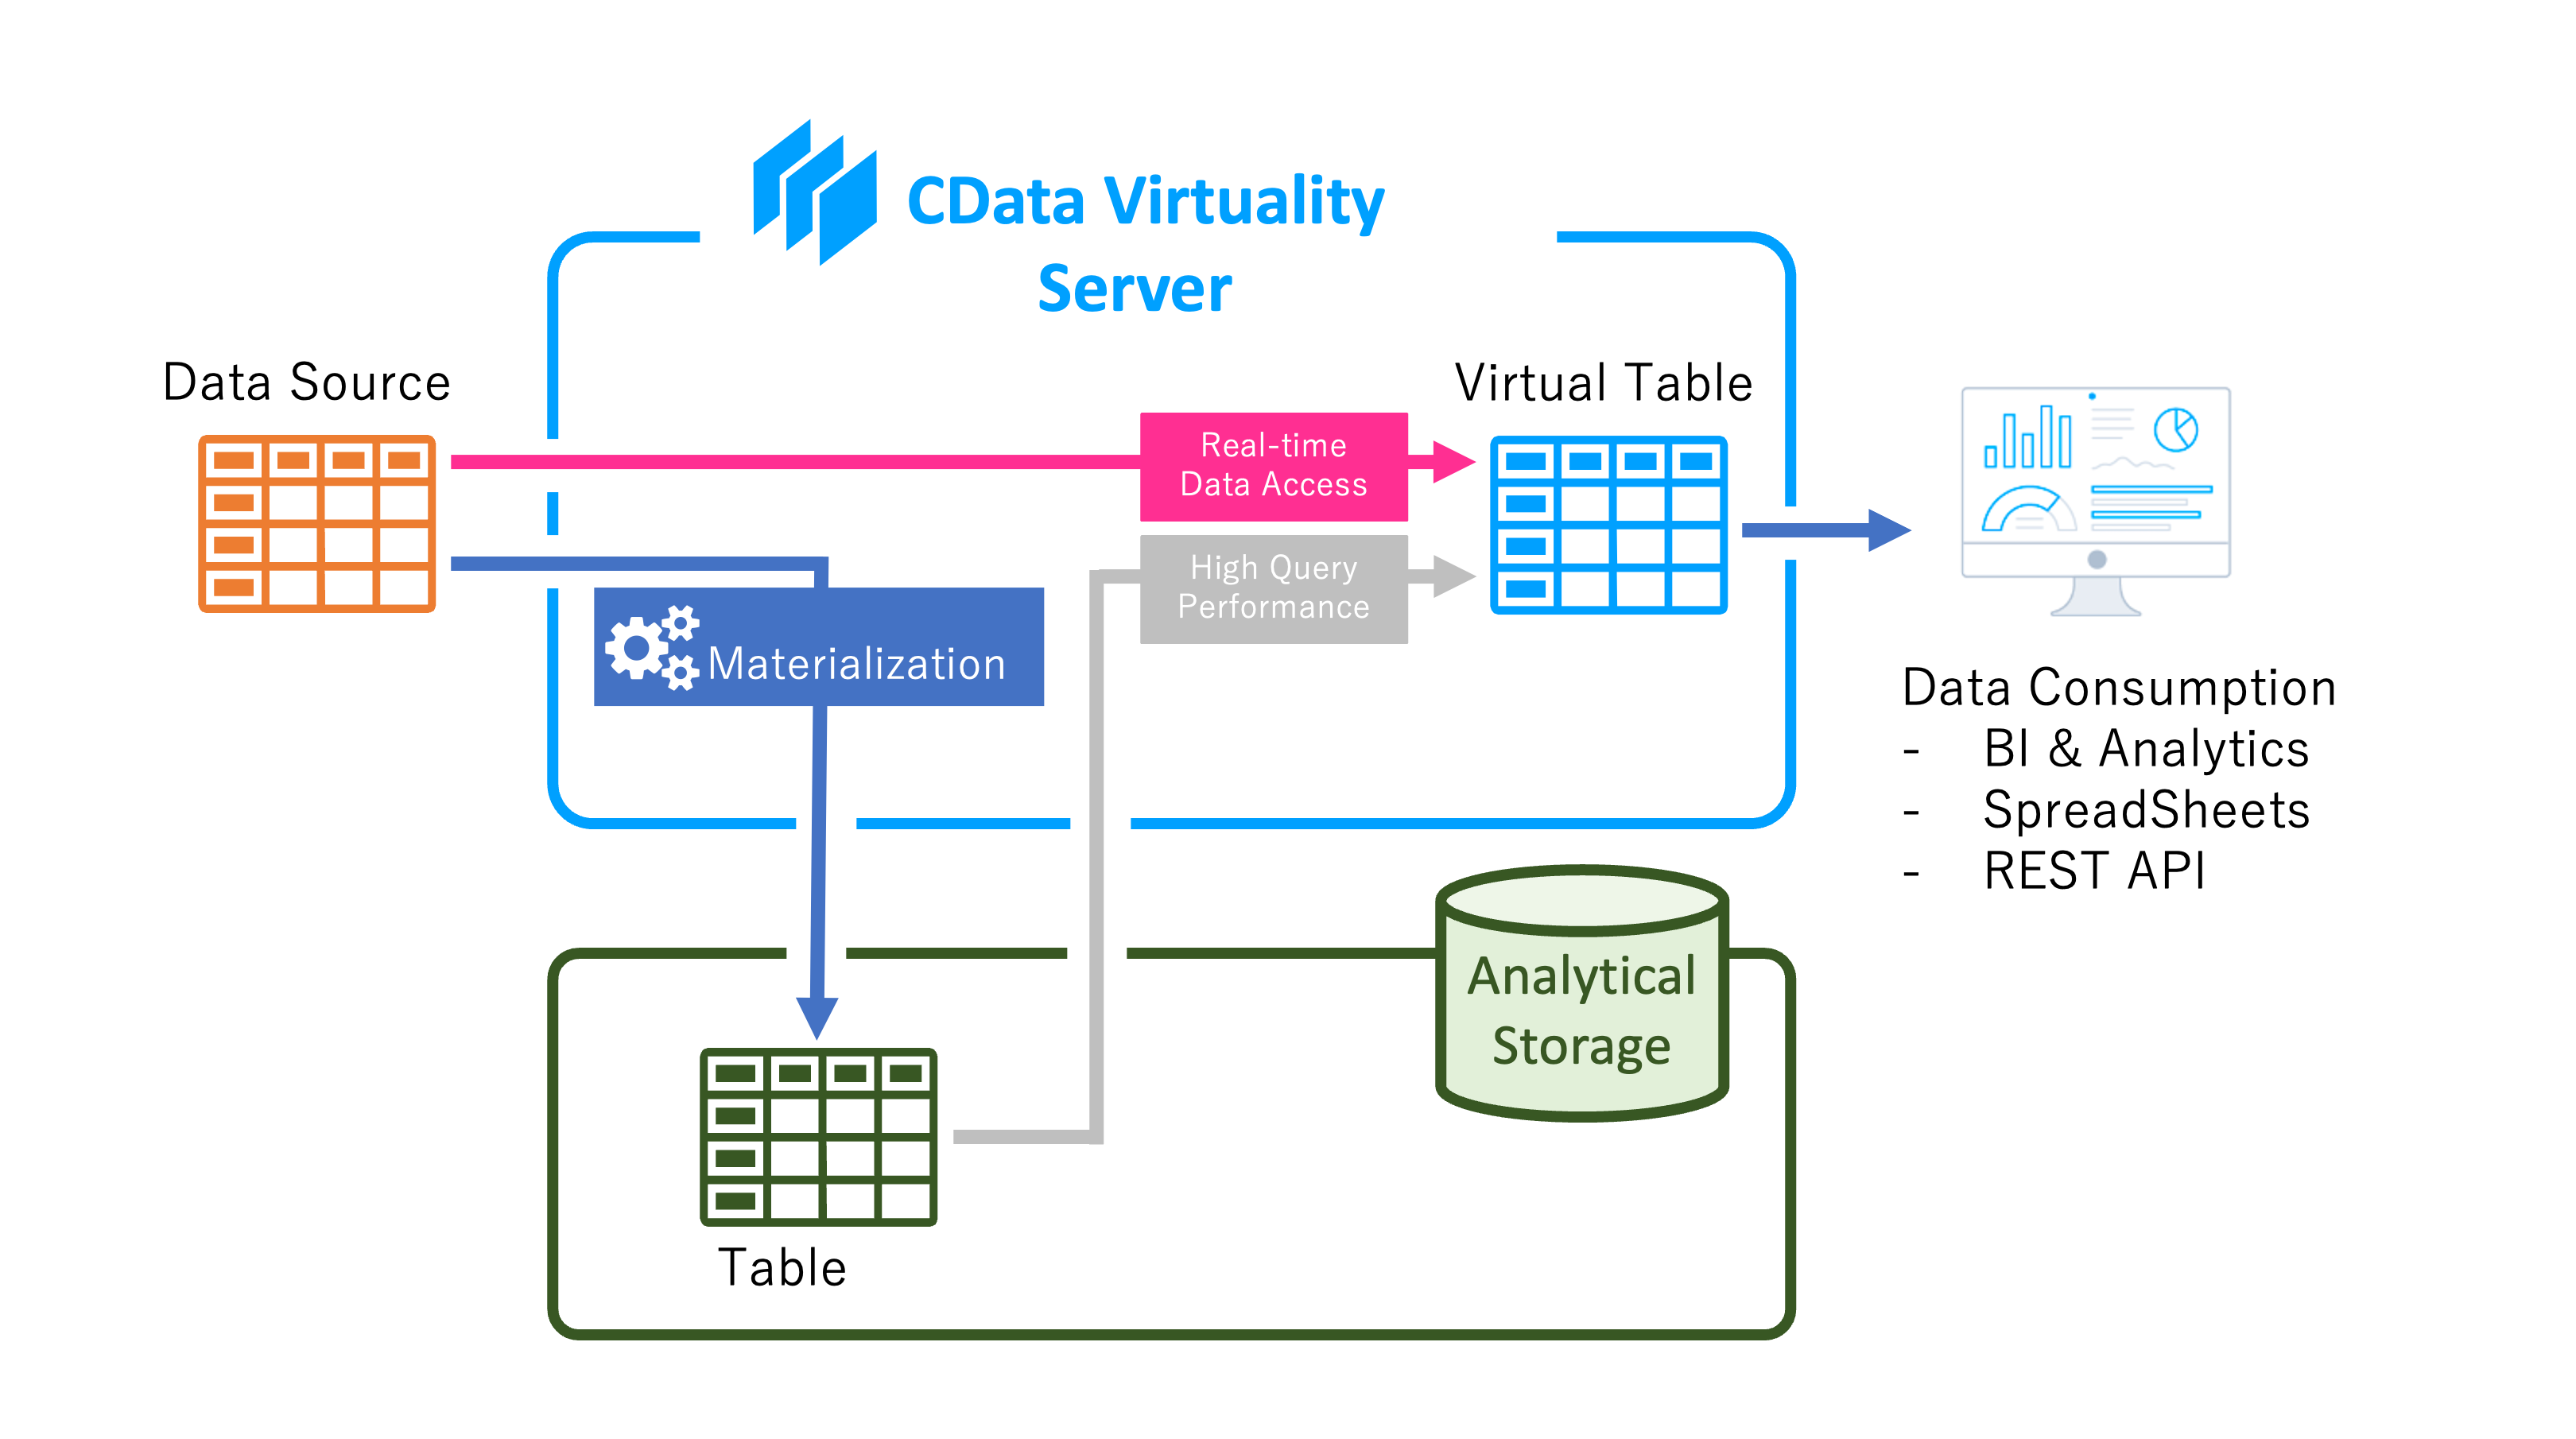
CData Virtuality offers a feature called materialization that caches data to accelerate data retrieval. The goal of materialization is to allow users to access data without being concerned about the performance (response time) or the impact (high load) on the data source. This ensures a seamless experience for users who can retrieve data through the CData Virtuality Server without needing to know where the data originates or modifying their business logic.
To enable materialization, CData Virtuality uses analytical storage, an external database that stores replicated data from virtual views, tables, and data sources. The replicated data is stored as materialized tables - exact 1:1 copies of the queried data - ensuring quick and efficient data access for end-users.
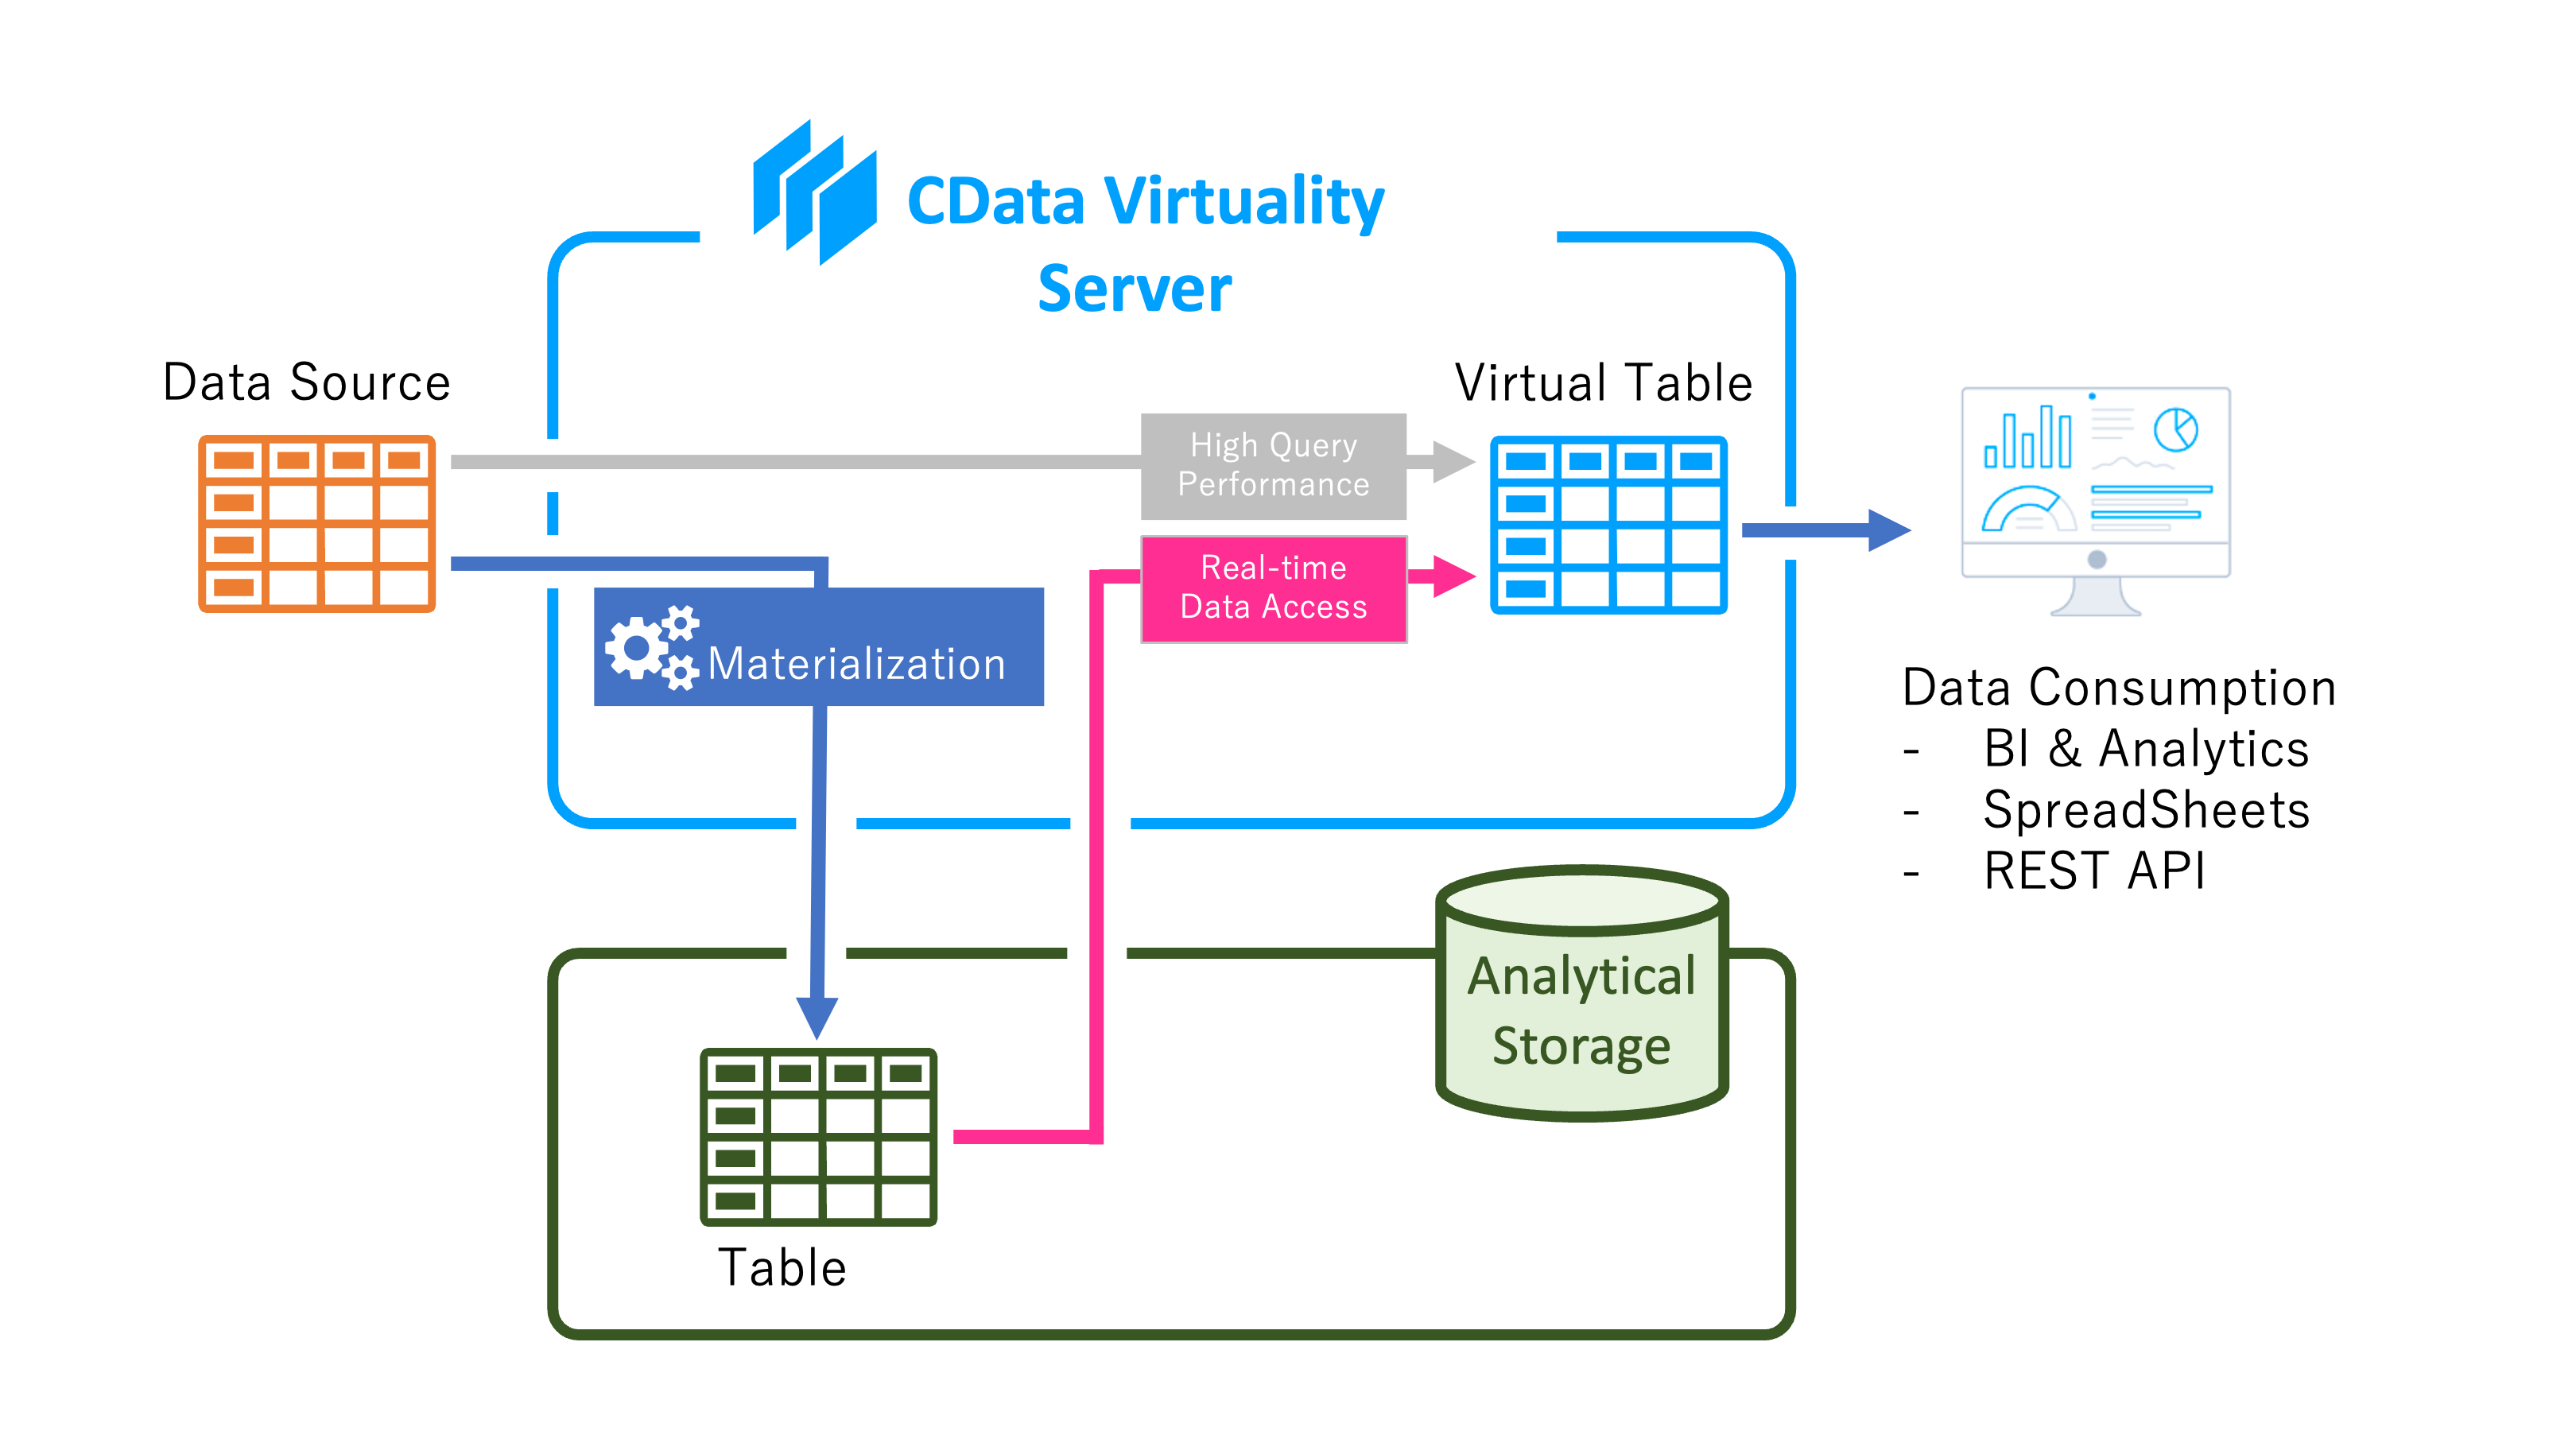
This is how materializiation in CData Virtuality works:
Materialization Types
There are two types of materialization in CData Virtuality:
Complete
All records are copied into the materialized table each time the materialization process is executed;
This method is straightforward but can result in longer job execution times, especially when the source data is very large.
Incremental
Only newly added records are copied into the materialized table;
This approach is more efficient as it reduces execution time and minimizes the number of copies by only transferring newly added records.
Setting Up Materialization
This guide describes setting up materialization from the CData Virtuality Web Interface / SaaS.
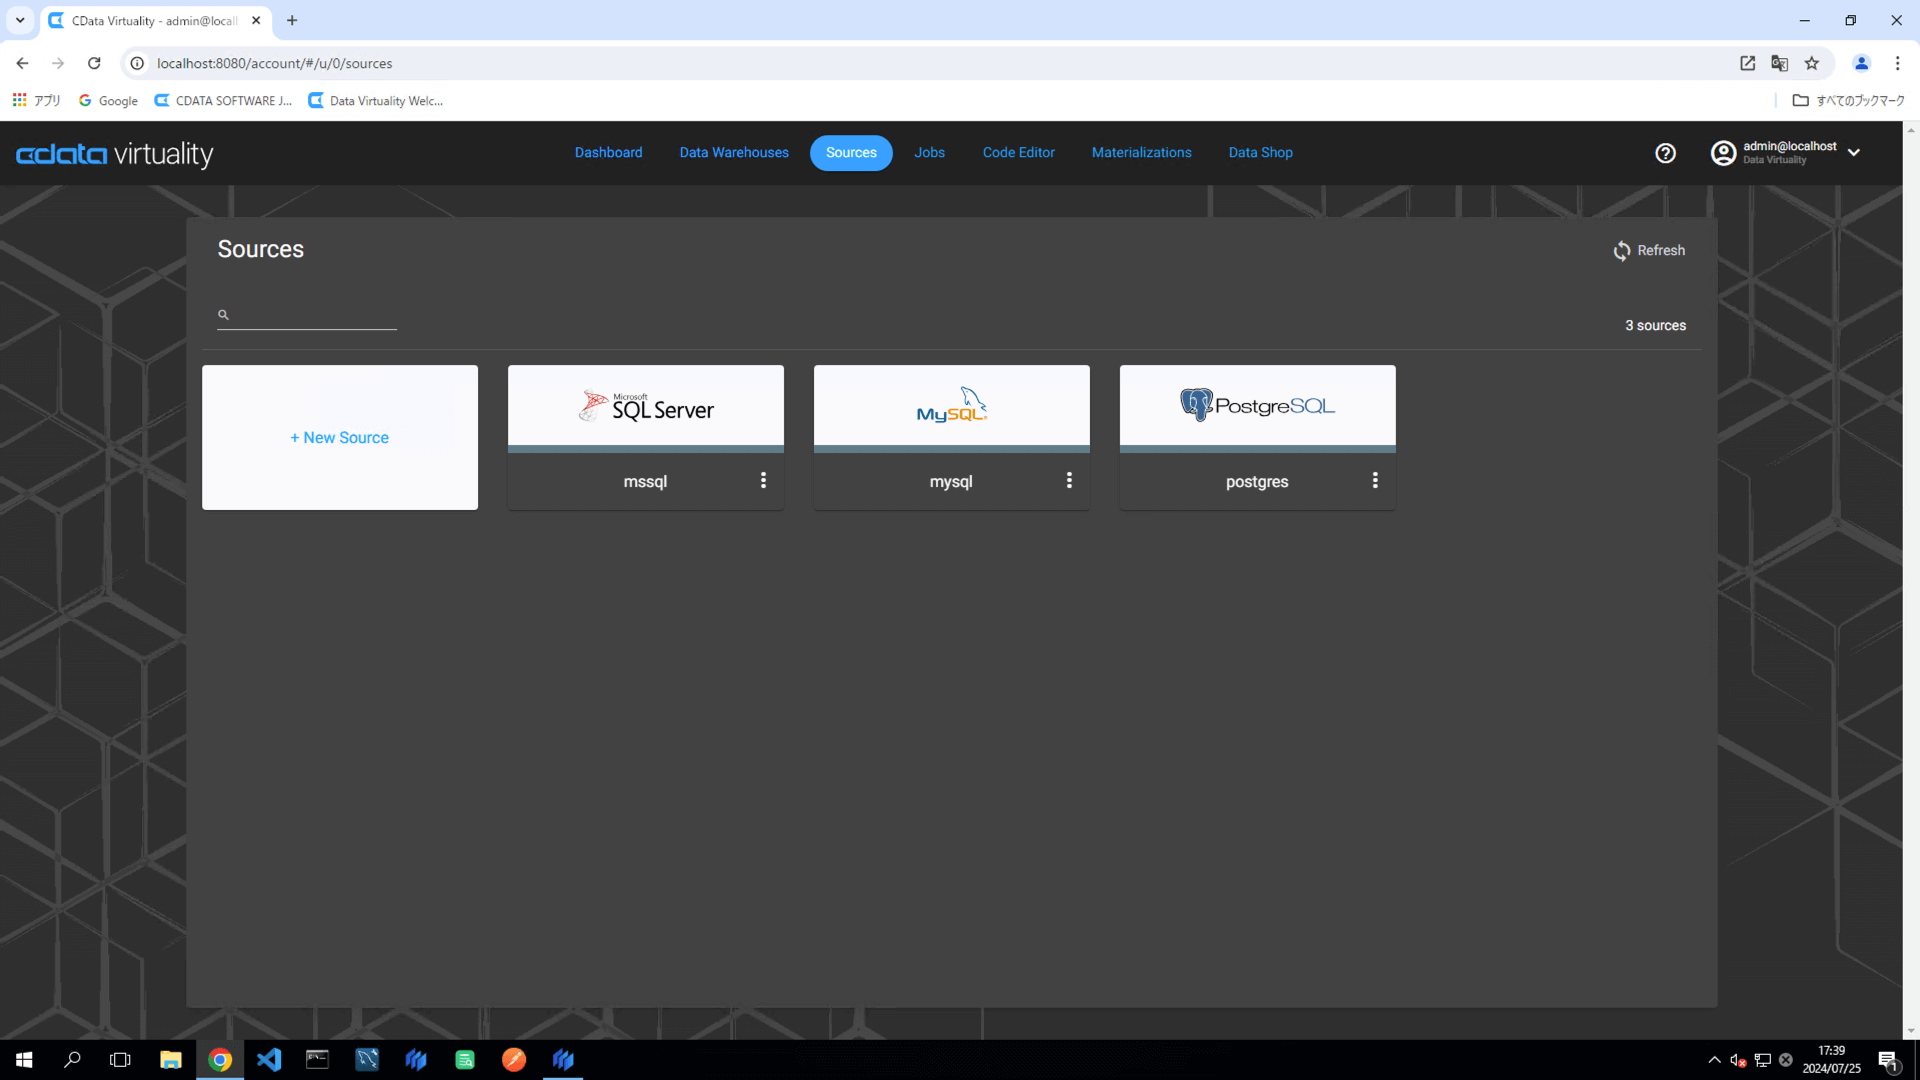
Open the Code Editor, select the desired table or view from the data source, or choose a view from the Virtual Schemas section to materialize, and click the vertical three-point button. For this example, the Customers table in Microsoft SQL Server will be used:
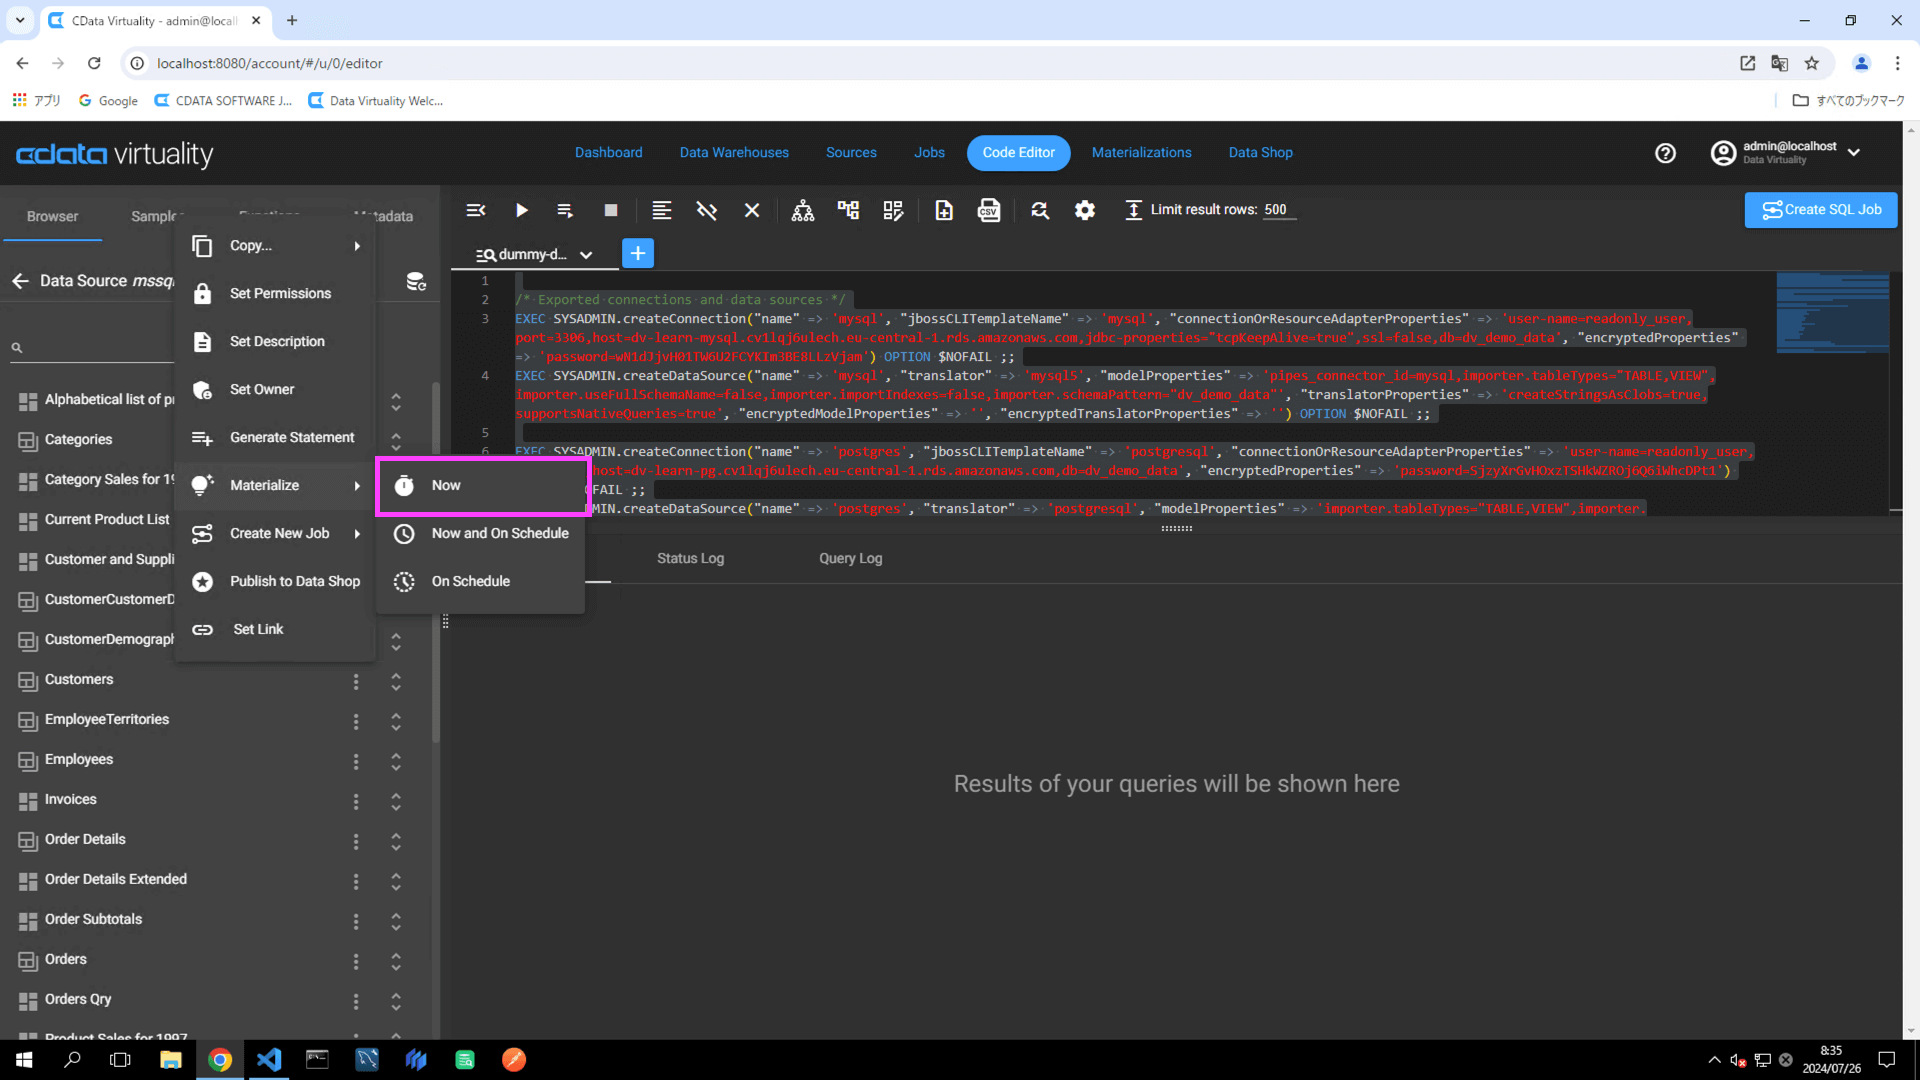
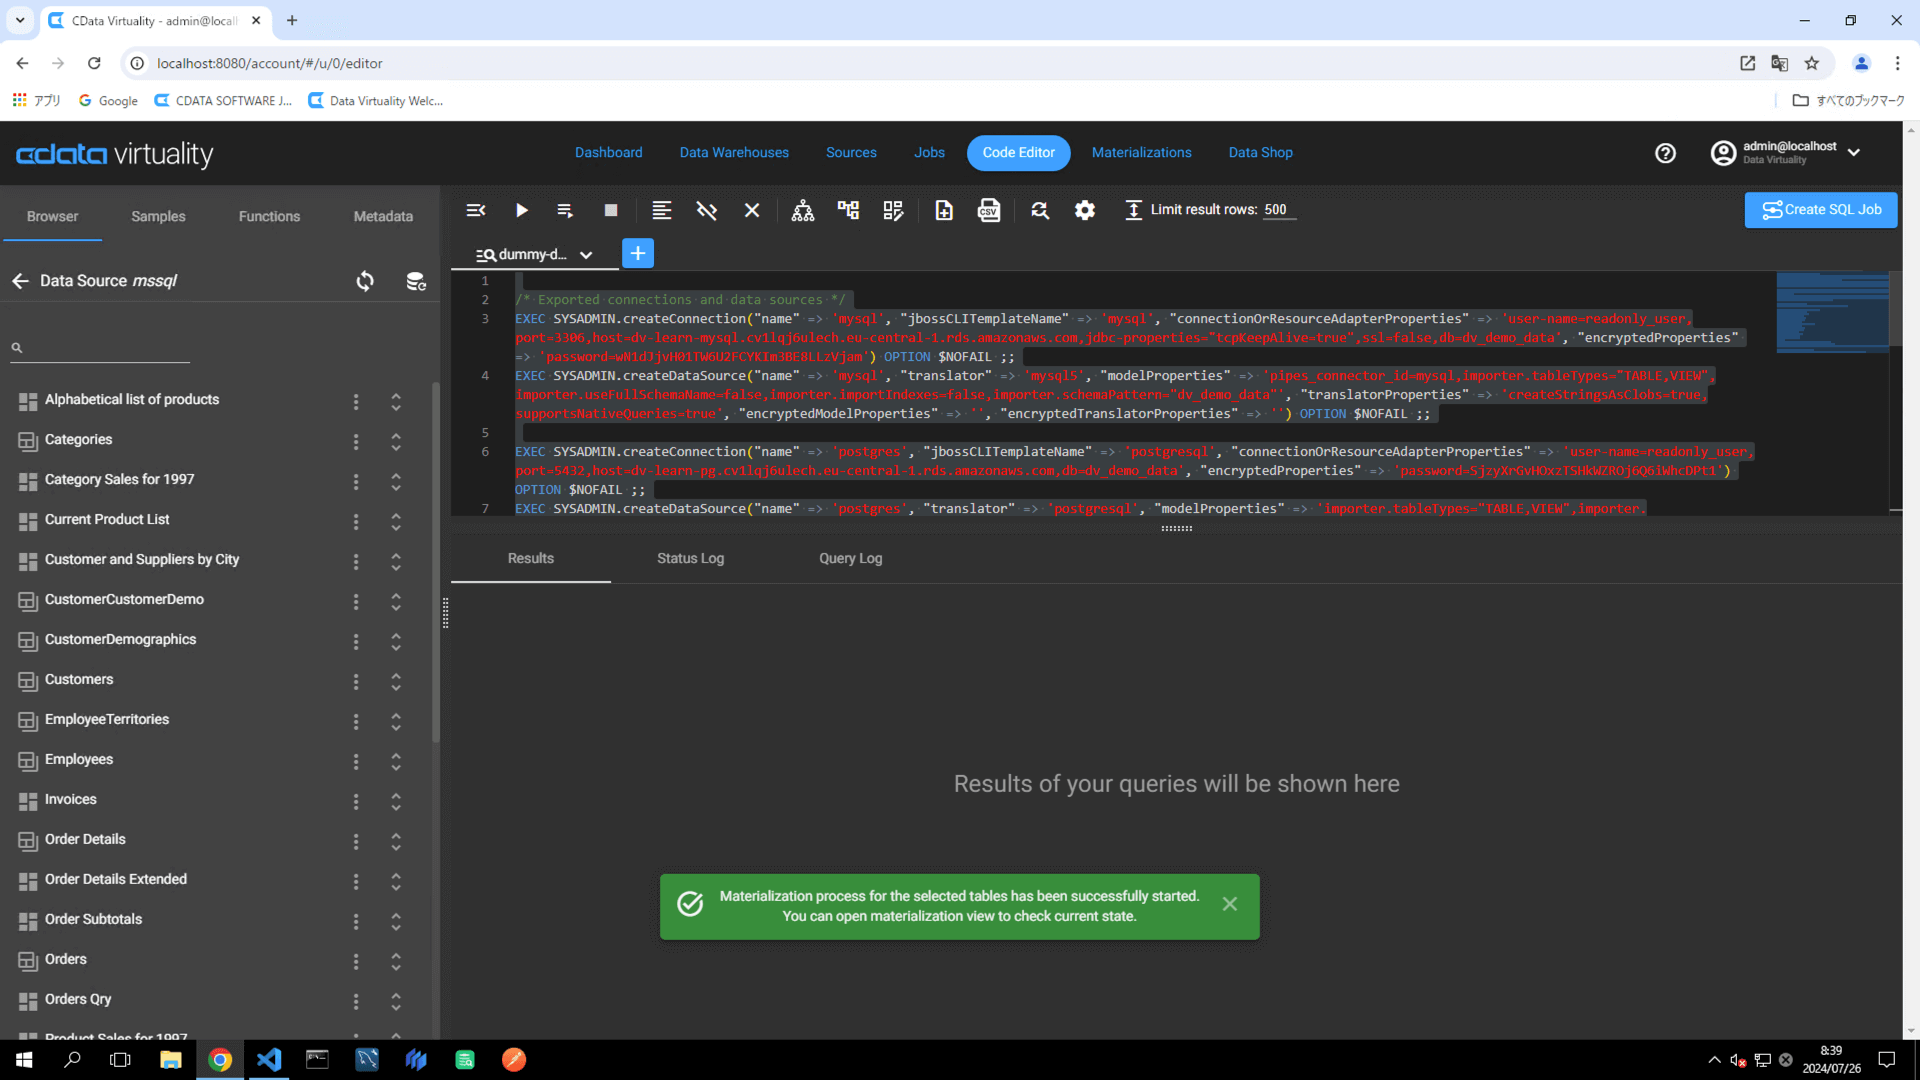
From the context menu, select Materialize -> Now. A green dialog box will appear, confirming that the materialization process has successfully started:
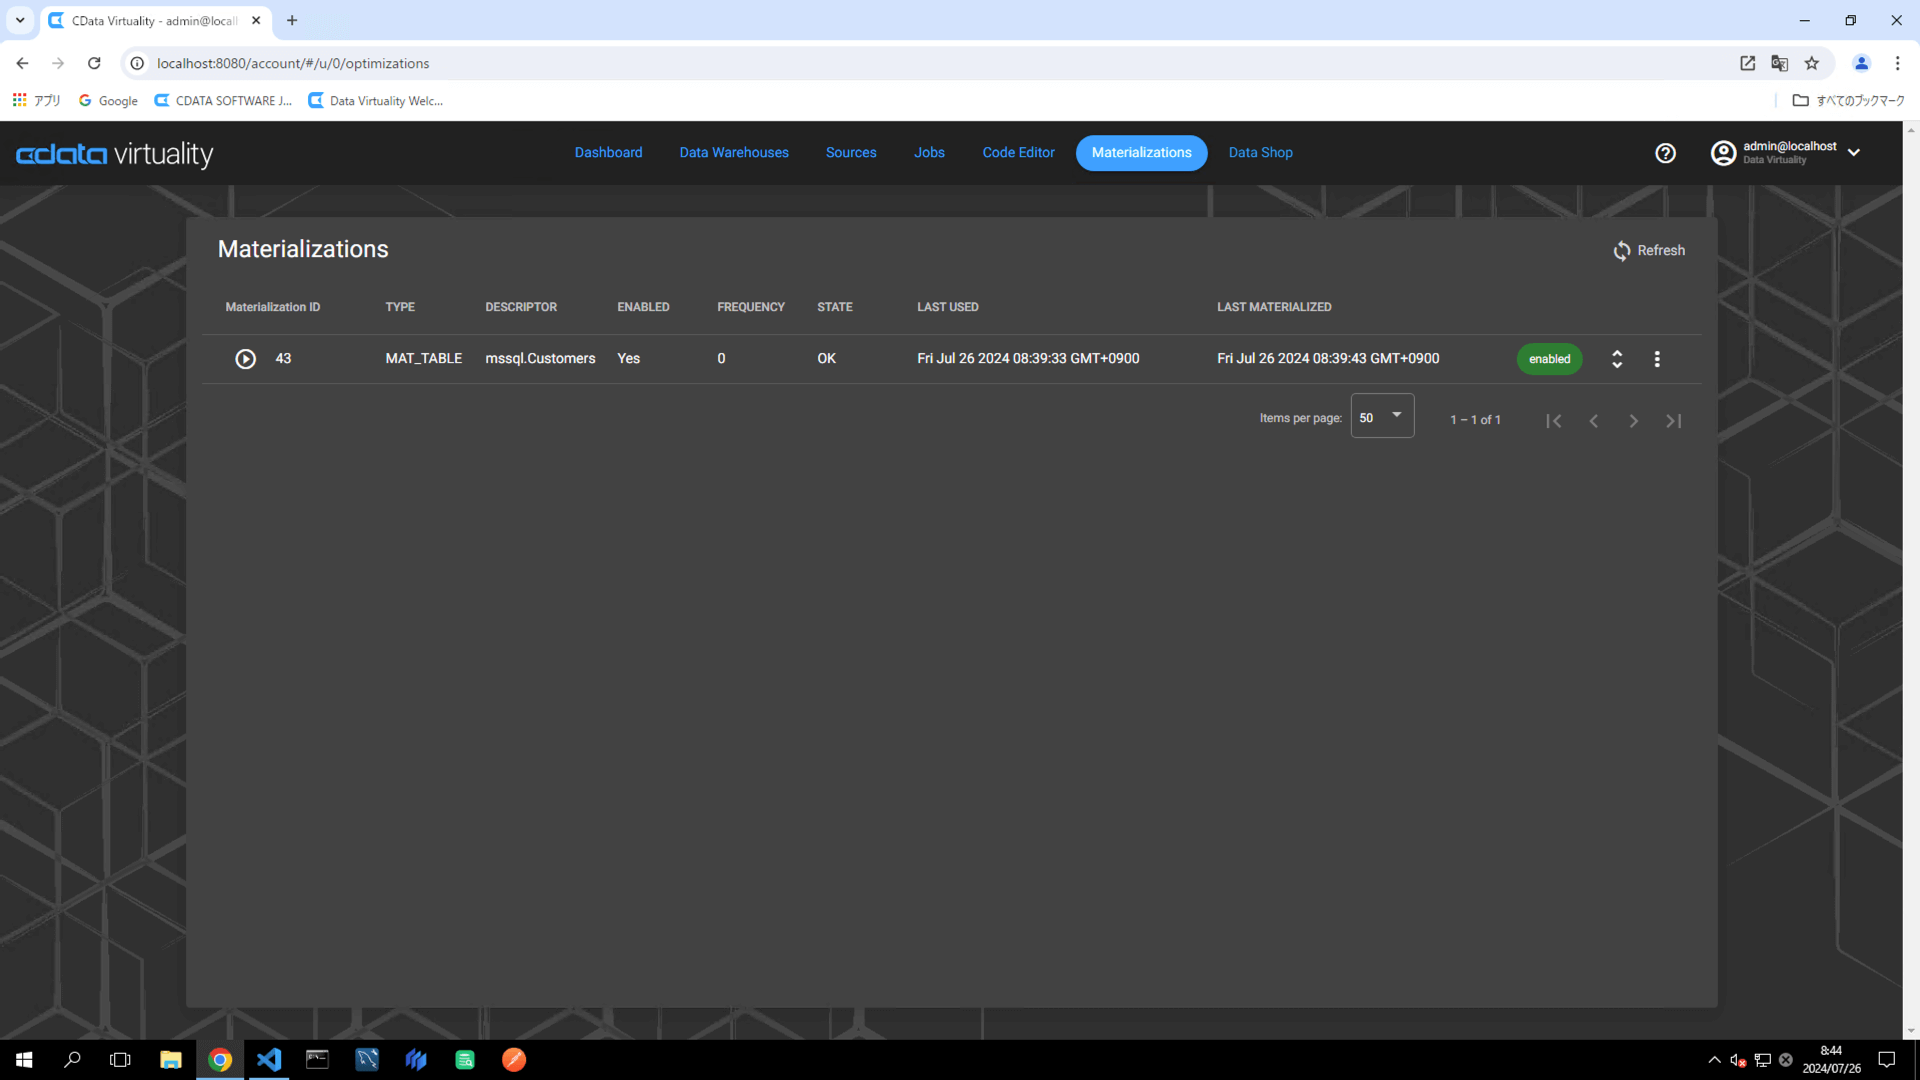
Navigate to the Materialization tab in the menu. Confirm that the newly created materialization appears in the list:
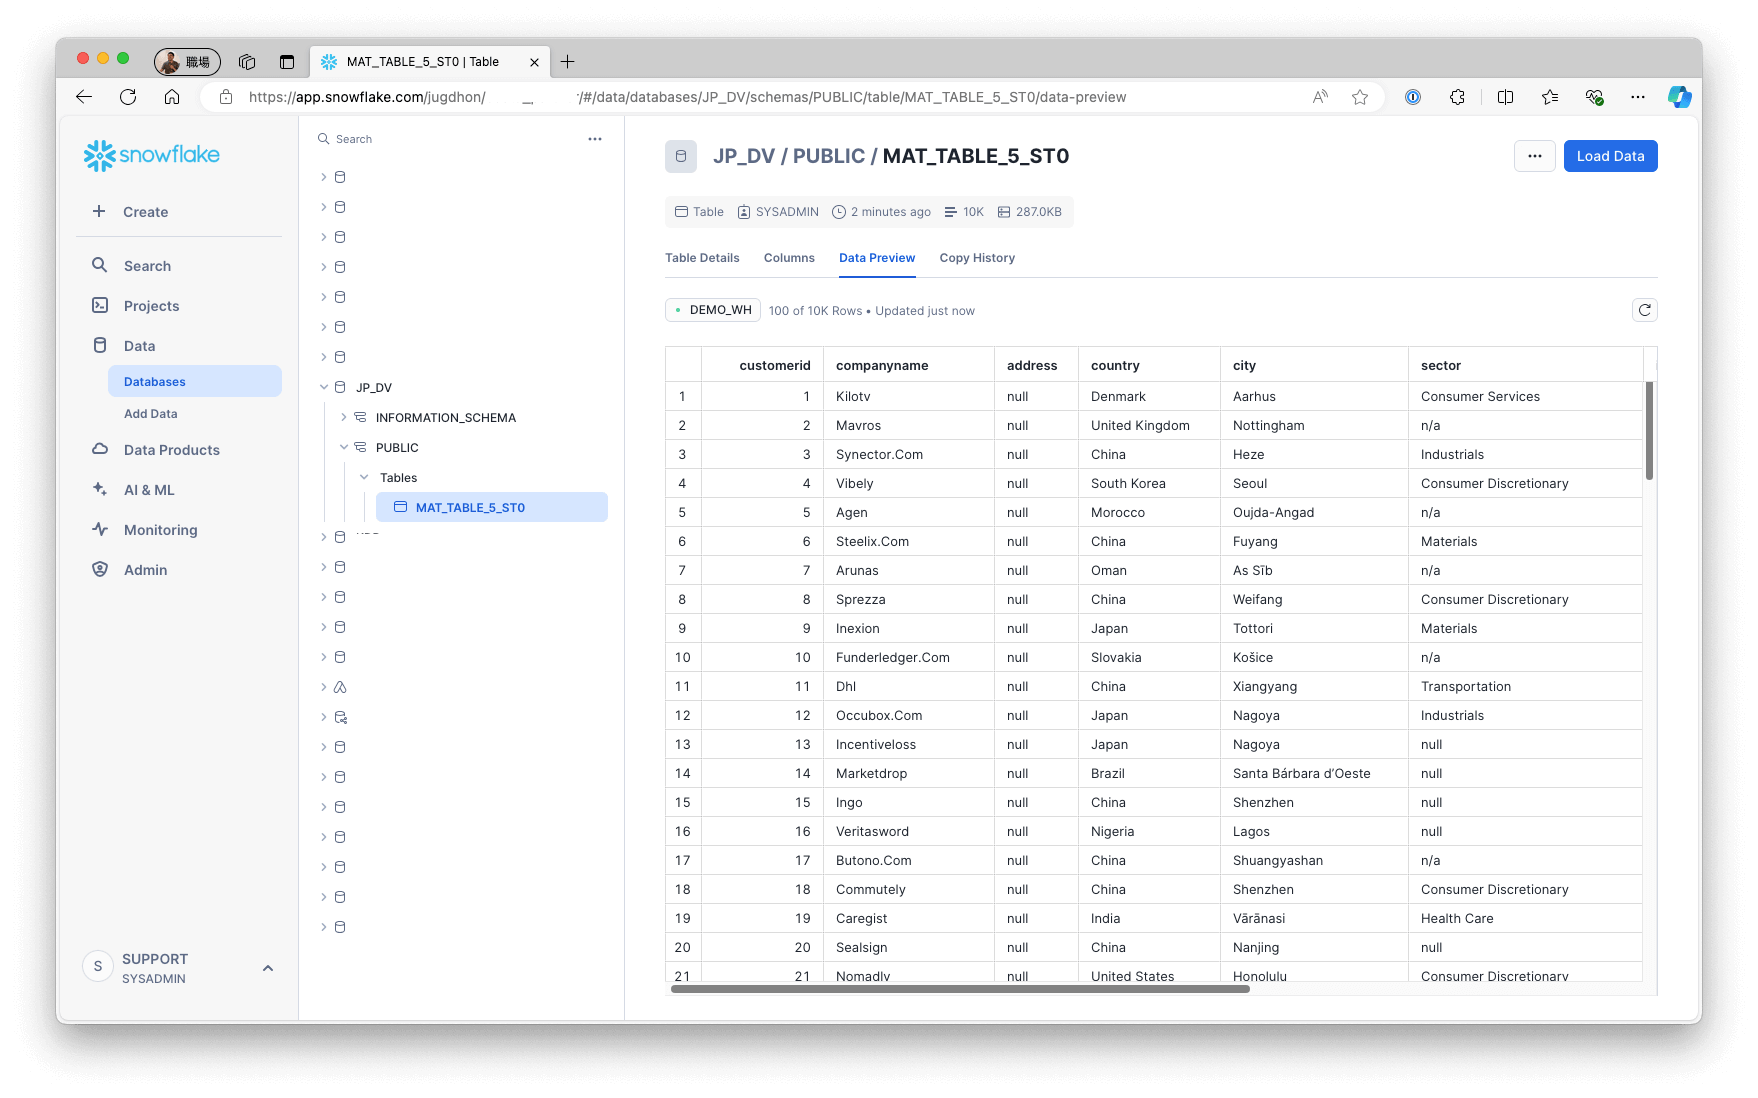
A materialized table is created in the analytical storage with a name like MAT_TABLE_5_ST0. To preview the materialized table and verify that it contains the data, access the analytical storage:
The following steps demonstrate how to access data from the materialized table in analytical storage via the Customer table in SQL Server. The diagram below illustrates the process:
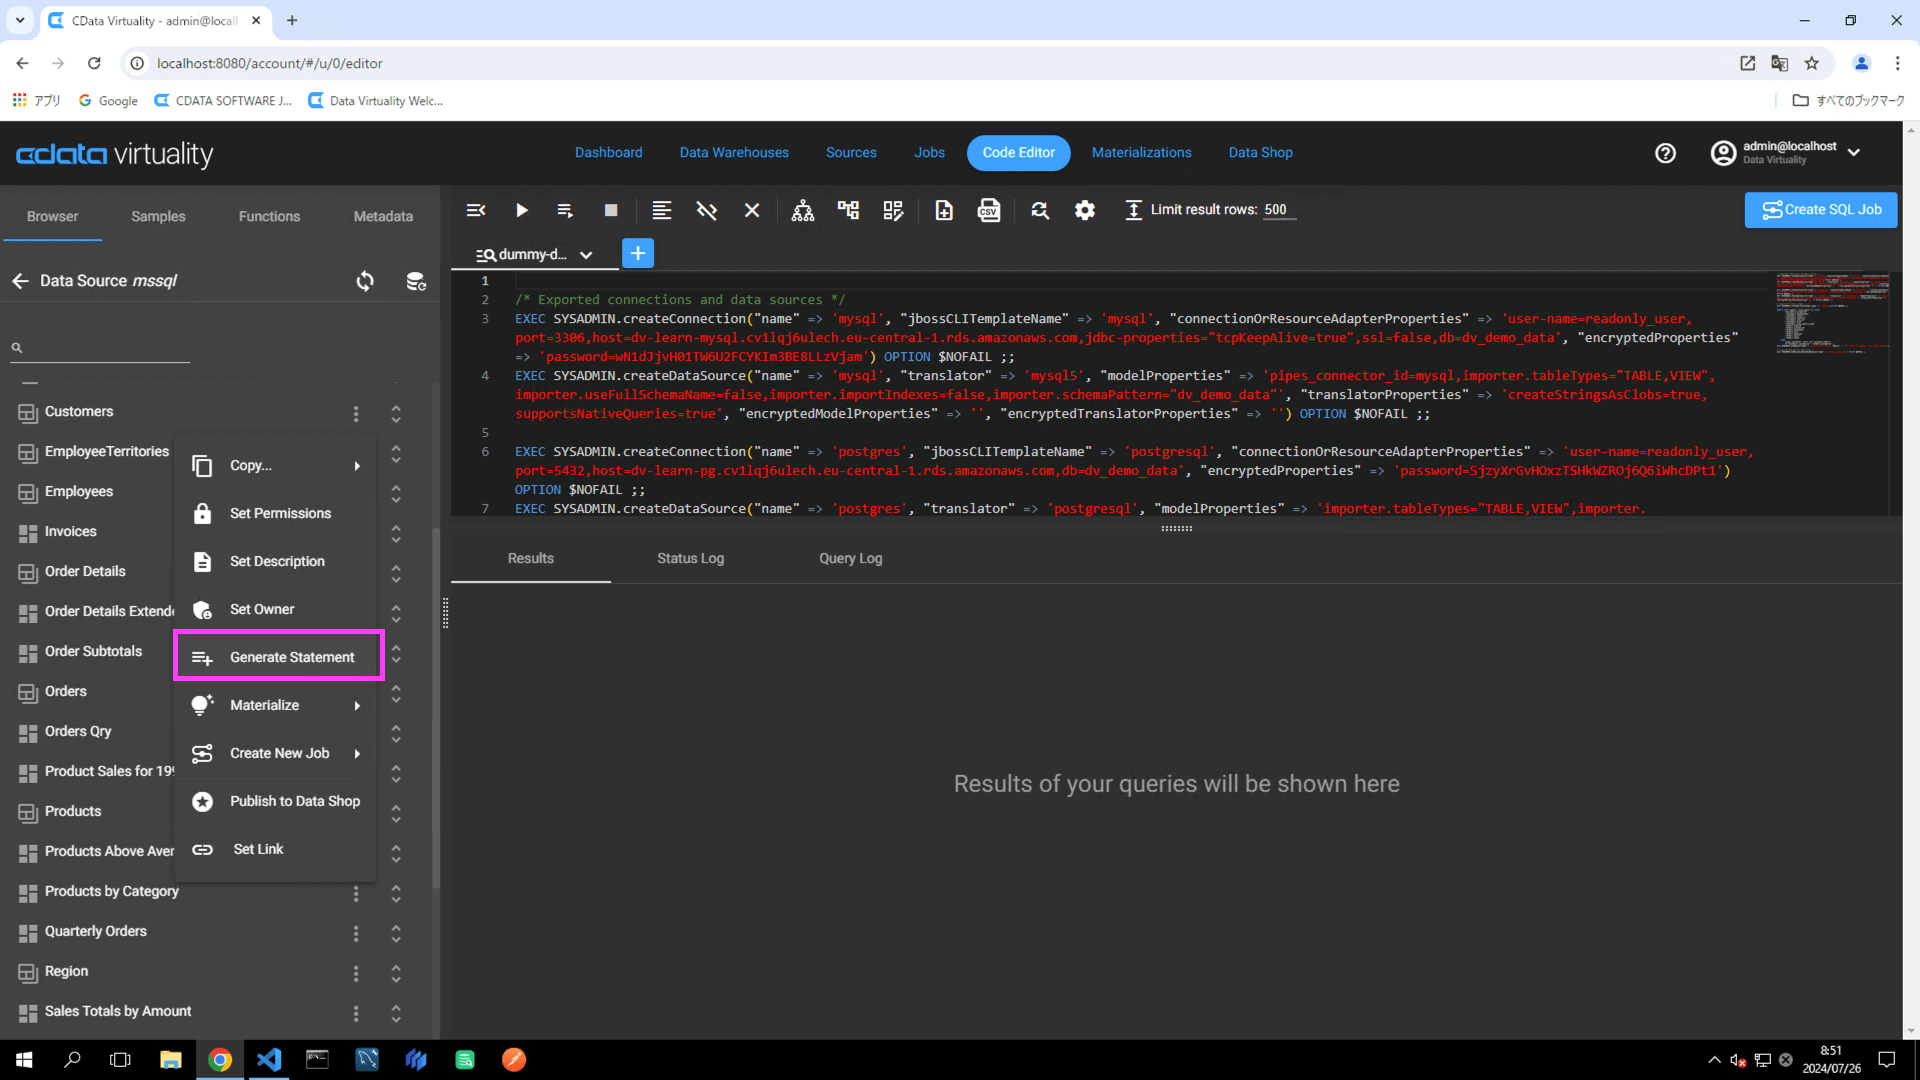
Navigate to the Code Editor tab. Click the Browser tab -> Microsoft SQL Server Data Source (labelled as mssql in this example) -> Materialize, and locate a table (e.g., Customers). Click the three vertical dots and select Generate Statement from the context menu:
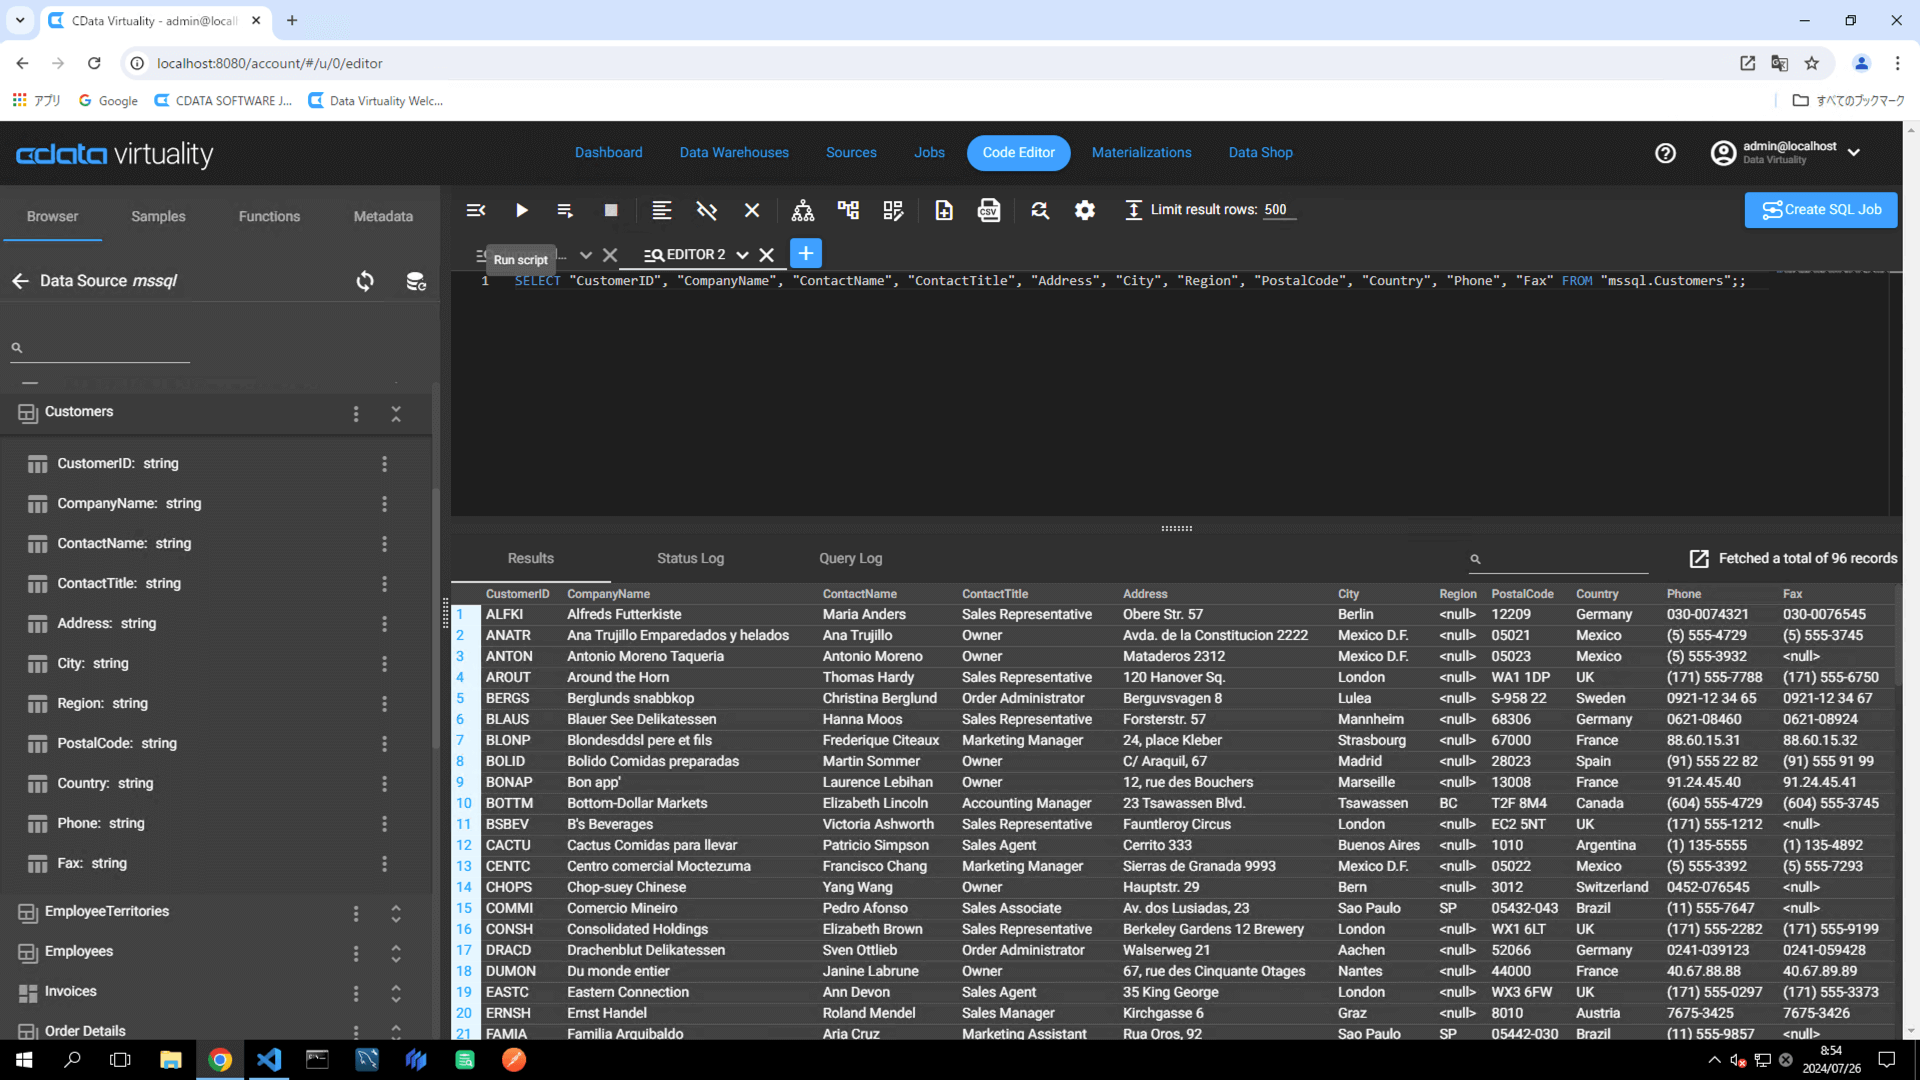
The Code Editor will open and generate a
SELECTstatement from the selected table:
SELECT "CustomerID", "CompanyName", "ContactName", "ContactTitle", "Address", "City", "Region", "PostalCode", "Country", "Phone", "Fax" FROM " mssql.Customers";;Click the Play (right-facing triangle) button in the menu to execute the generated SQL query. Success is indicated when the table data is displayed in the Results area below:
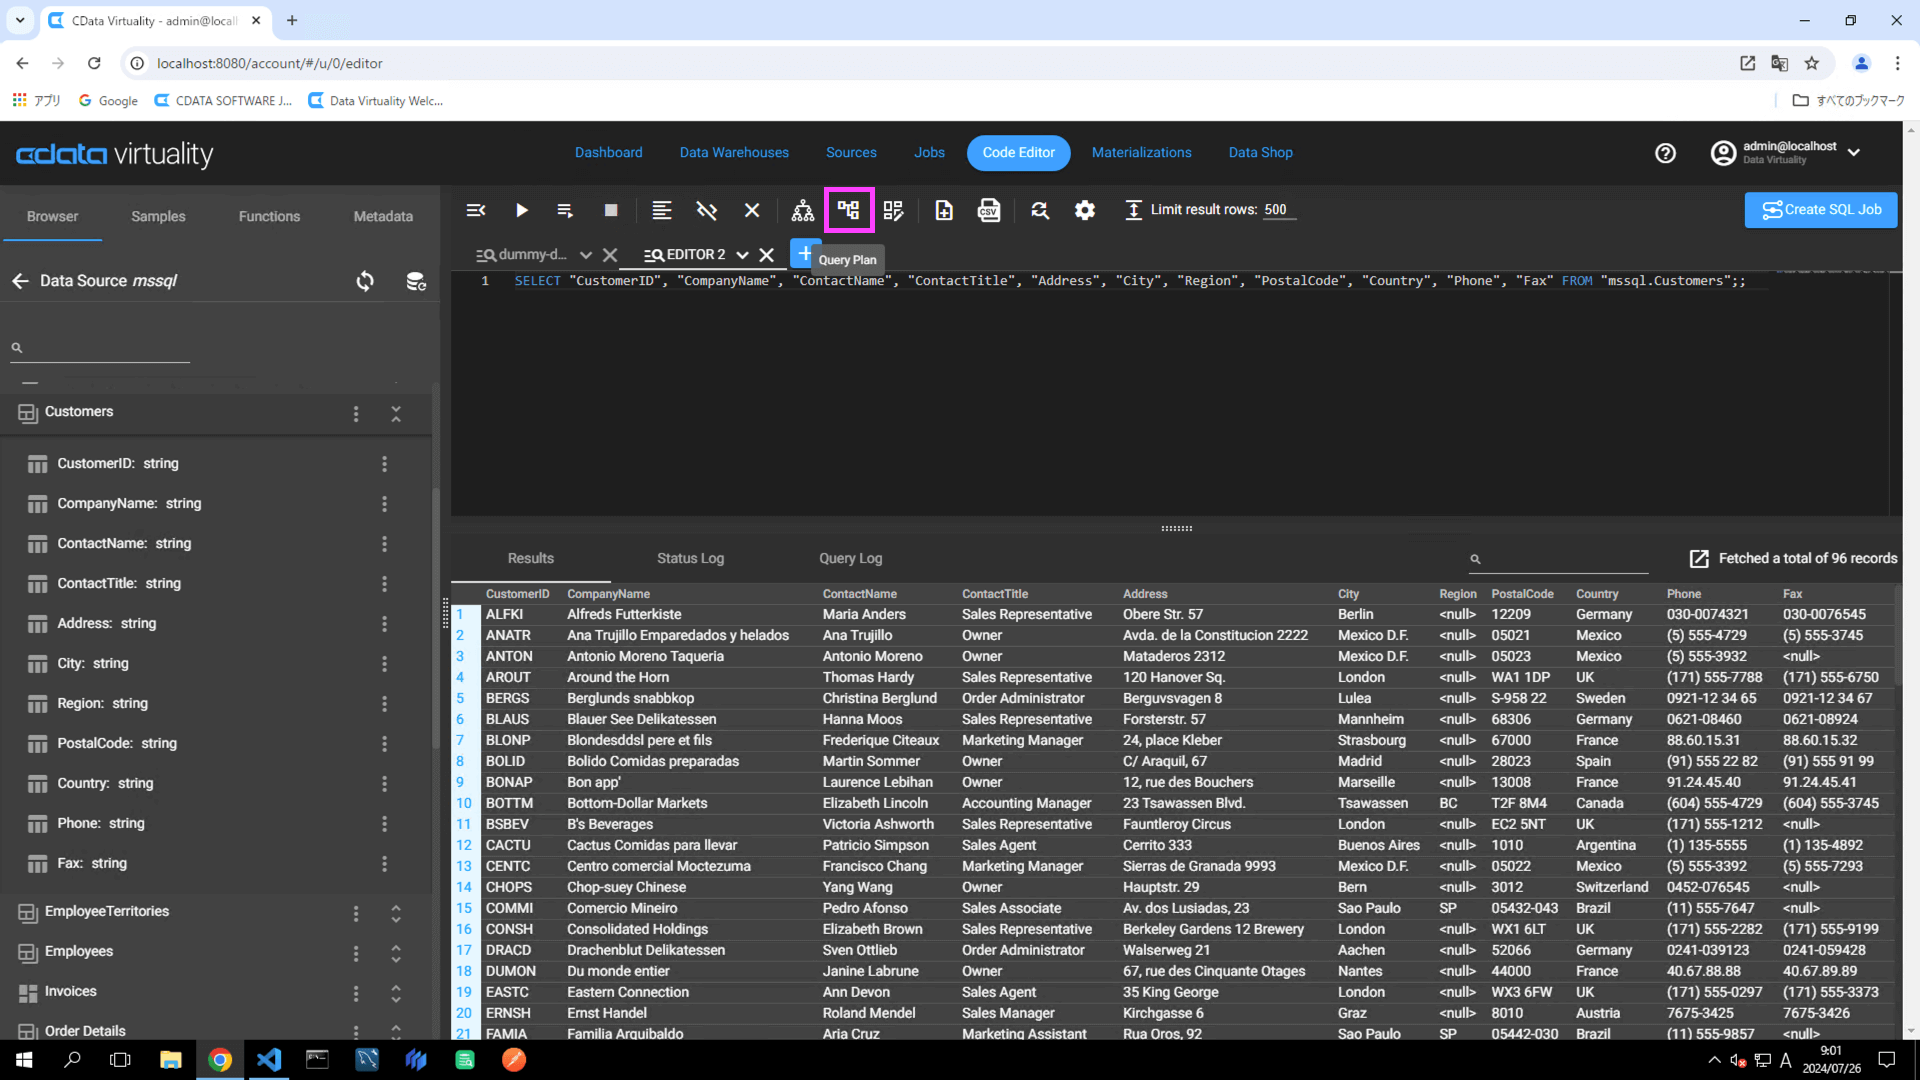
To confirm that the retrieved data is from the materialized table in analytical storage, the Query Plan function can be used. Click the Query Plan button in the menu:
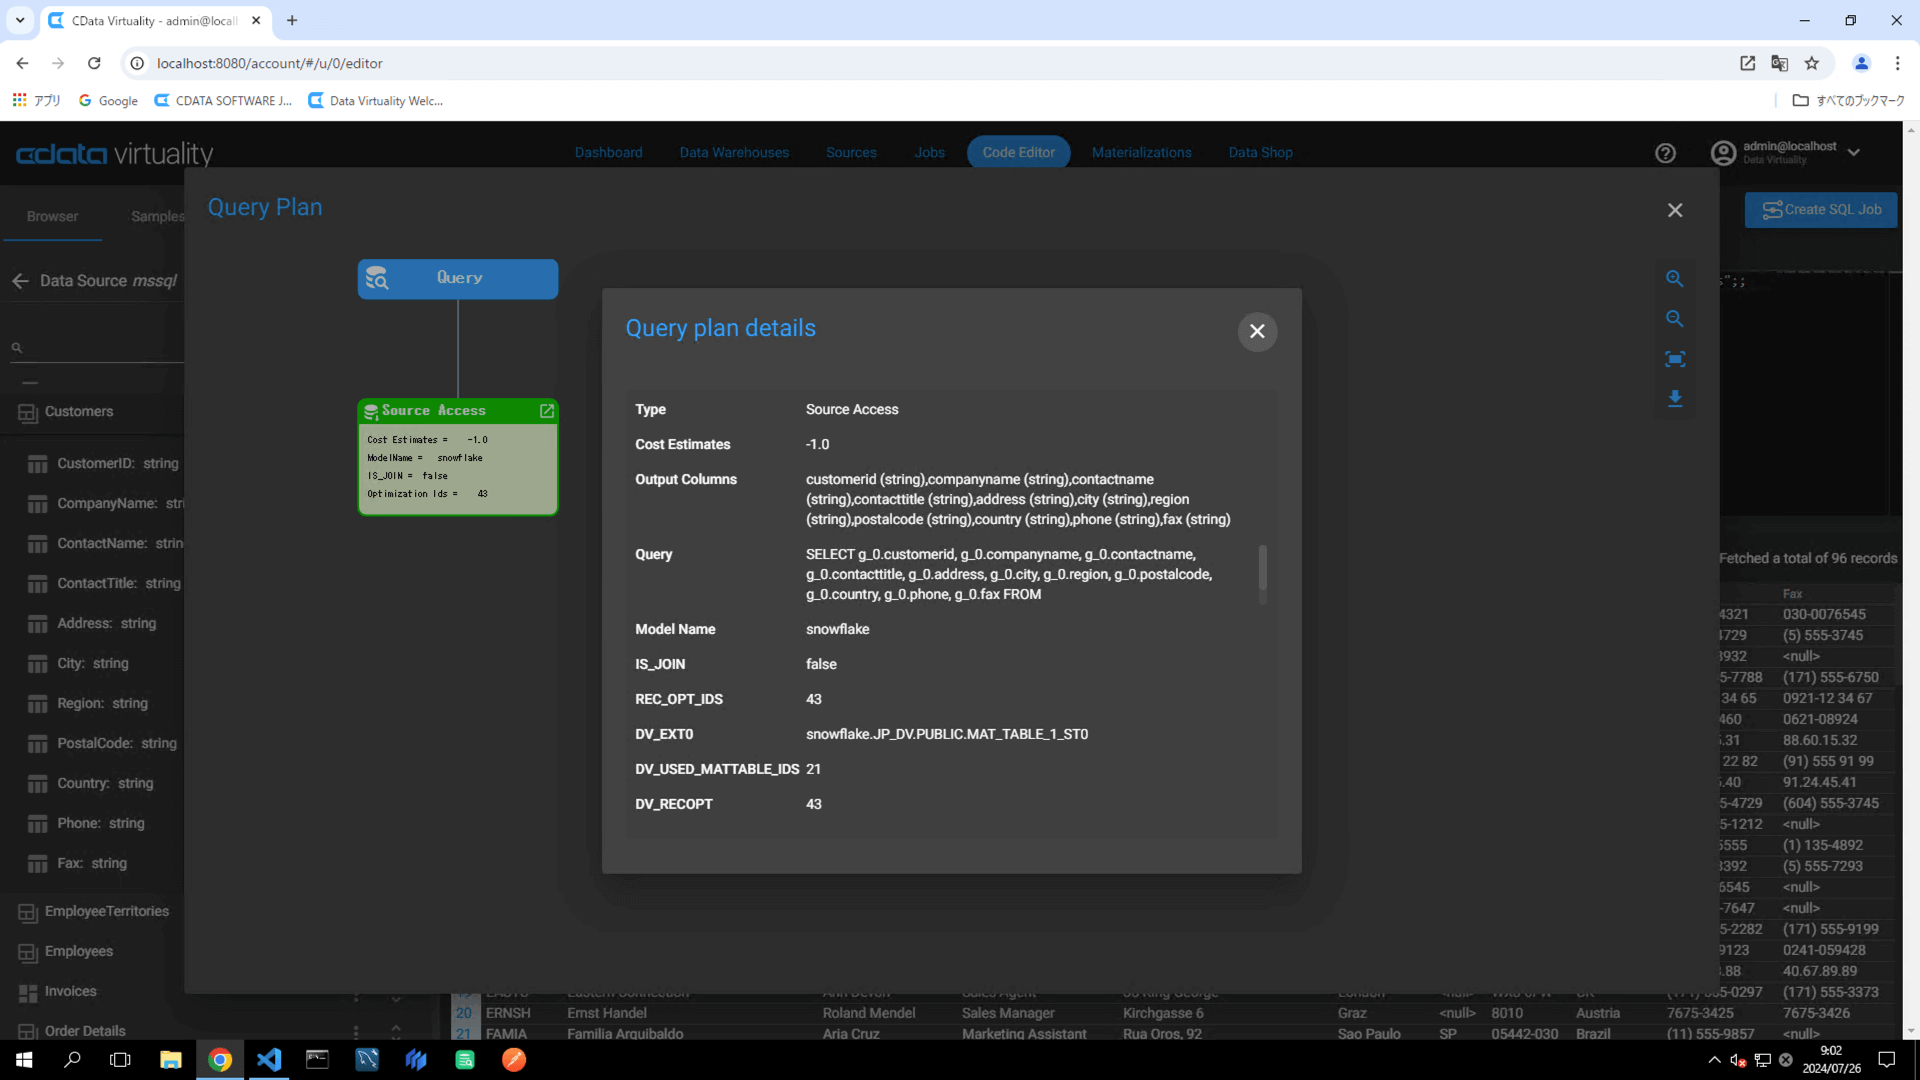
The Query Plan window will open, displaying the execution plan of the query. A green color in the Source Access indicates that the query is retrieving data from a materialized table. The Query plan details specify which materialized table in analytical storage is being used to retrieve the data:
Model Name: snowflake(Analytical Storage)
DV_EXT0: snowflake.JP_DV.PUBLIC.MAT_TABLE_1_ST0
To retrieve data directly from the data source rather than from a materialized table, materialization must be turned off. This setting allows the query to access the original data source (e.g., the Customers table in Microsoft SQL Server) instead of the materialized table in analytical storage. The diagram below illustrates this process:
Close Query Plan window and navigate to the Materialization screen:
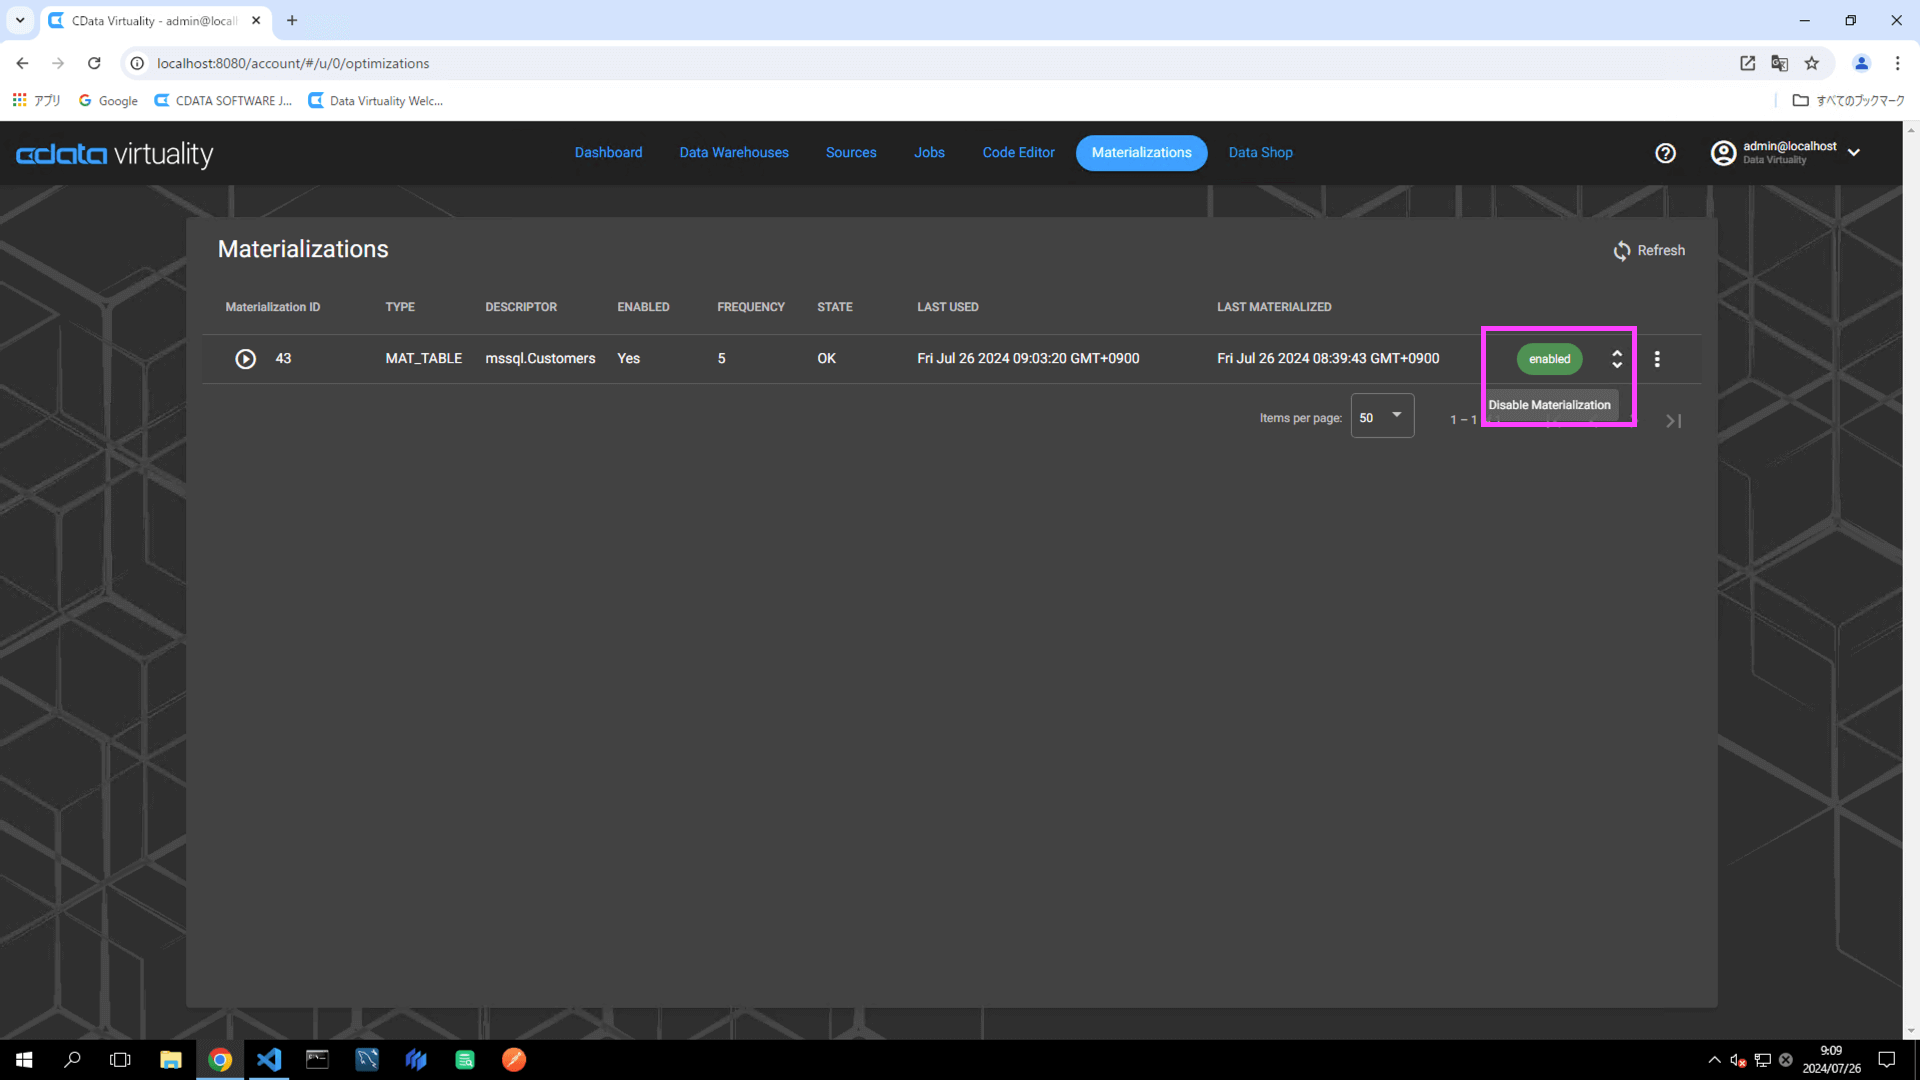
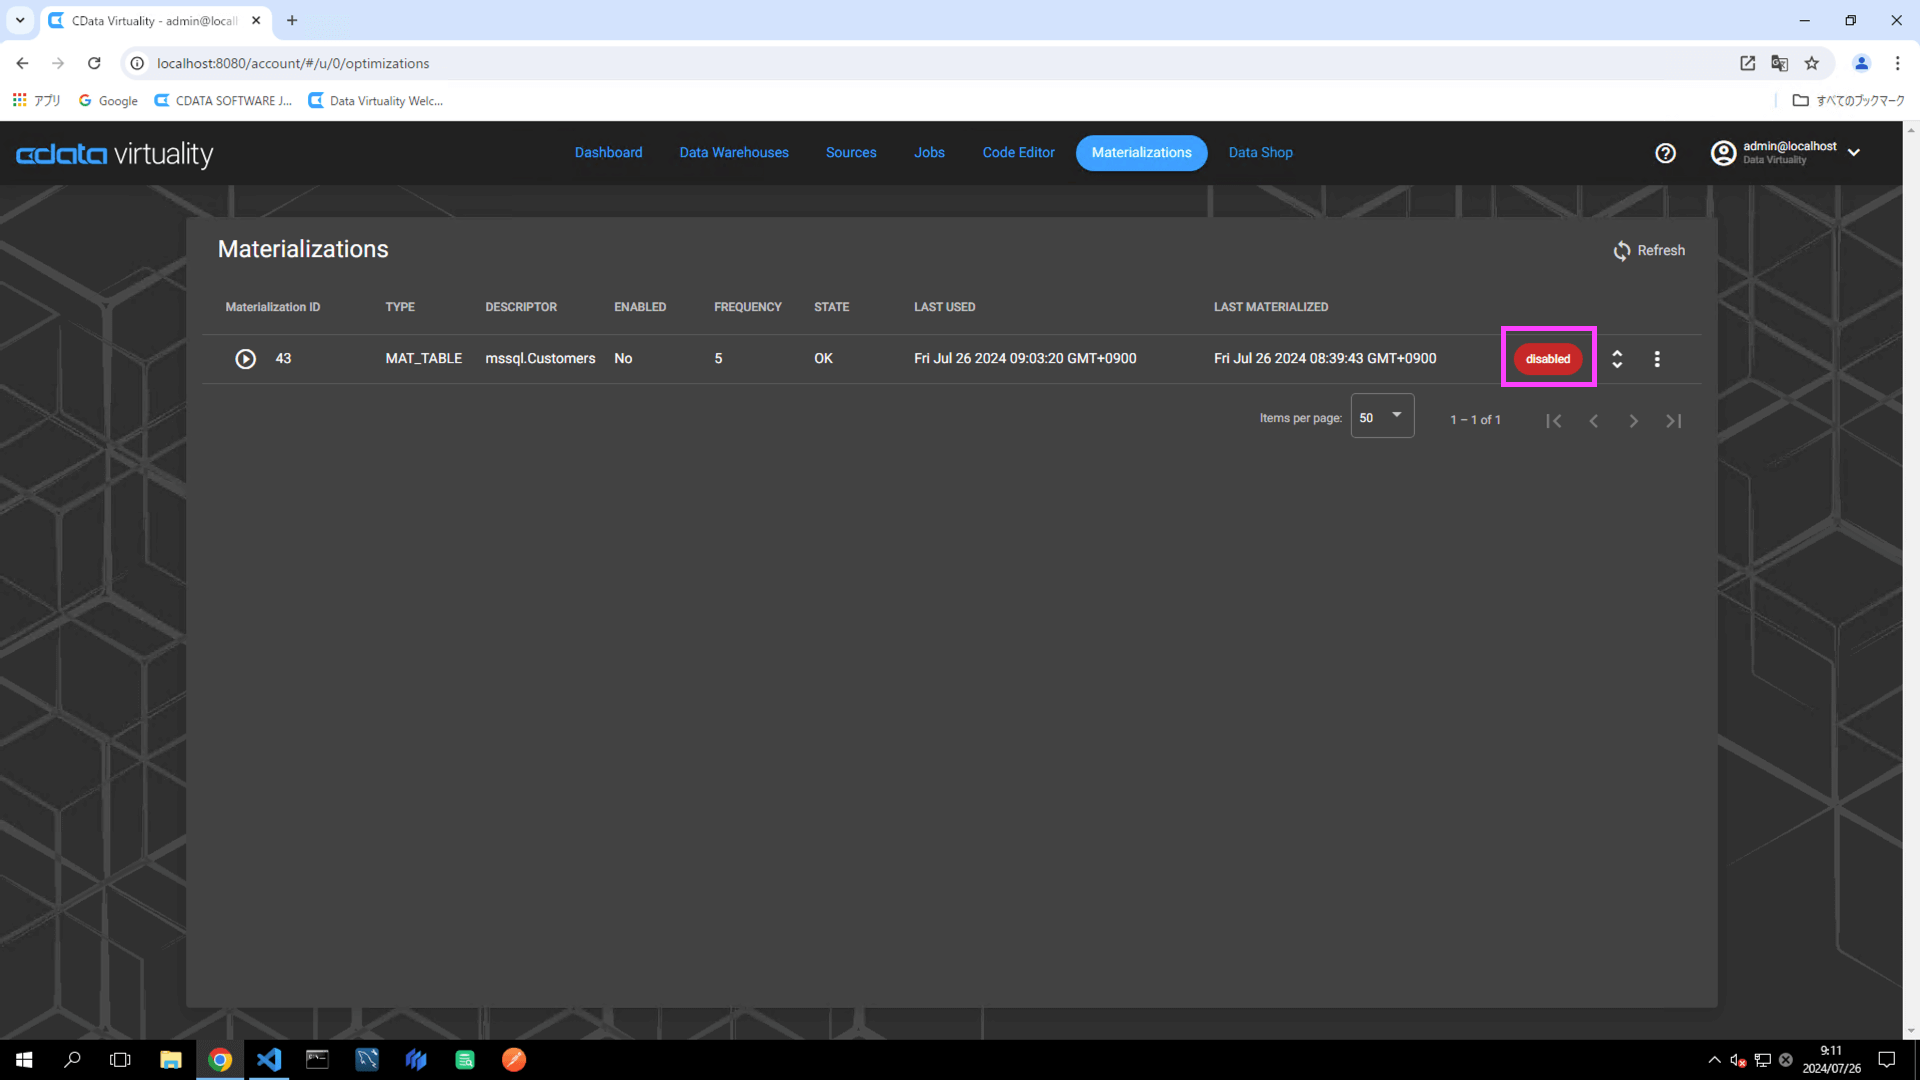
In the Materializations list, locate the target record. Click the Enable button to the right of the record to switch the status to Disable Materialization:
Open the Code Editor again and execute the
SELECTstatement for the target table. Click the Query Plan button. The Query Plan window will open, displaying the execution plan of the query. A blue color in the Source Access indicates that the query is retrieving data directly from the data source, not from a materialized table:
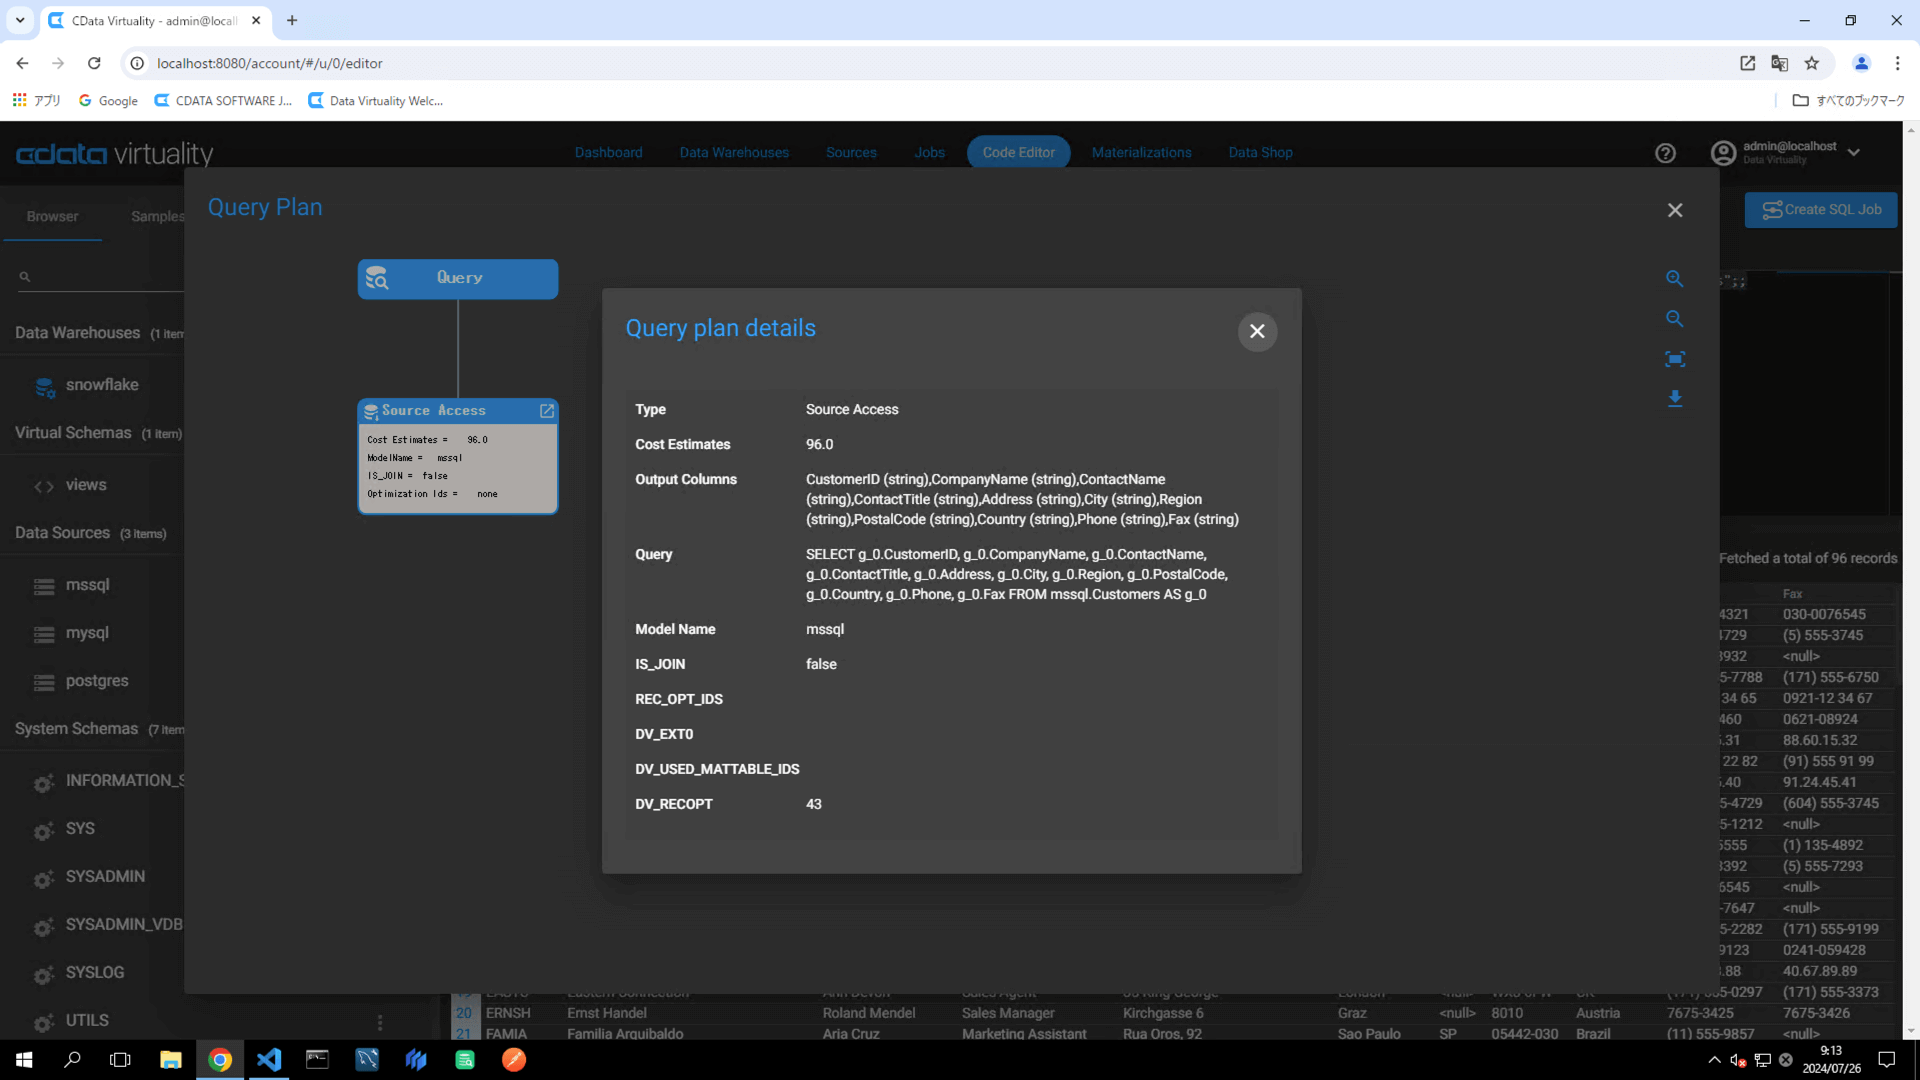
It is possible to verify that the data is being retrieved directly from the data source (mssql) and not from a materialized table in analytical storage: the Model Name in the Query Plan will be displayed as mssql.
Scheduling a Materialization Job
This section explains how to schedule a materialization run by creating a job. Both complete materialization jobs and incremental materialization jobs will be covered, detailing their configurations and execution.
Complete Materialization Job
Open the details of the corresponding record in the Materialization list and click the +Create Materialization Job button:

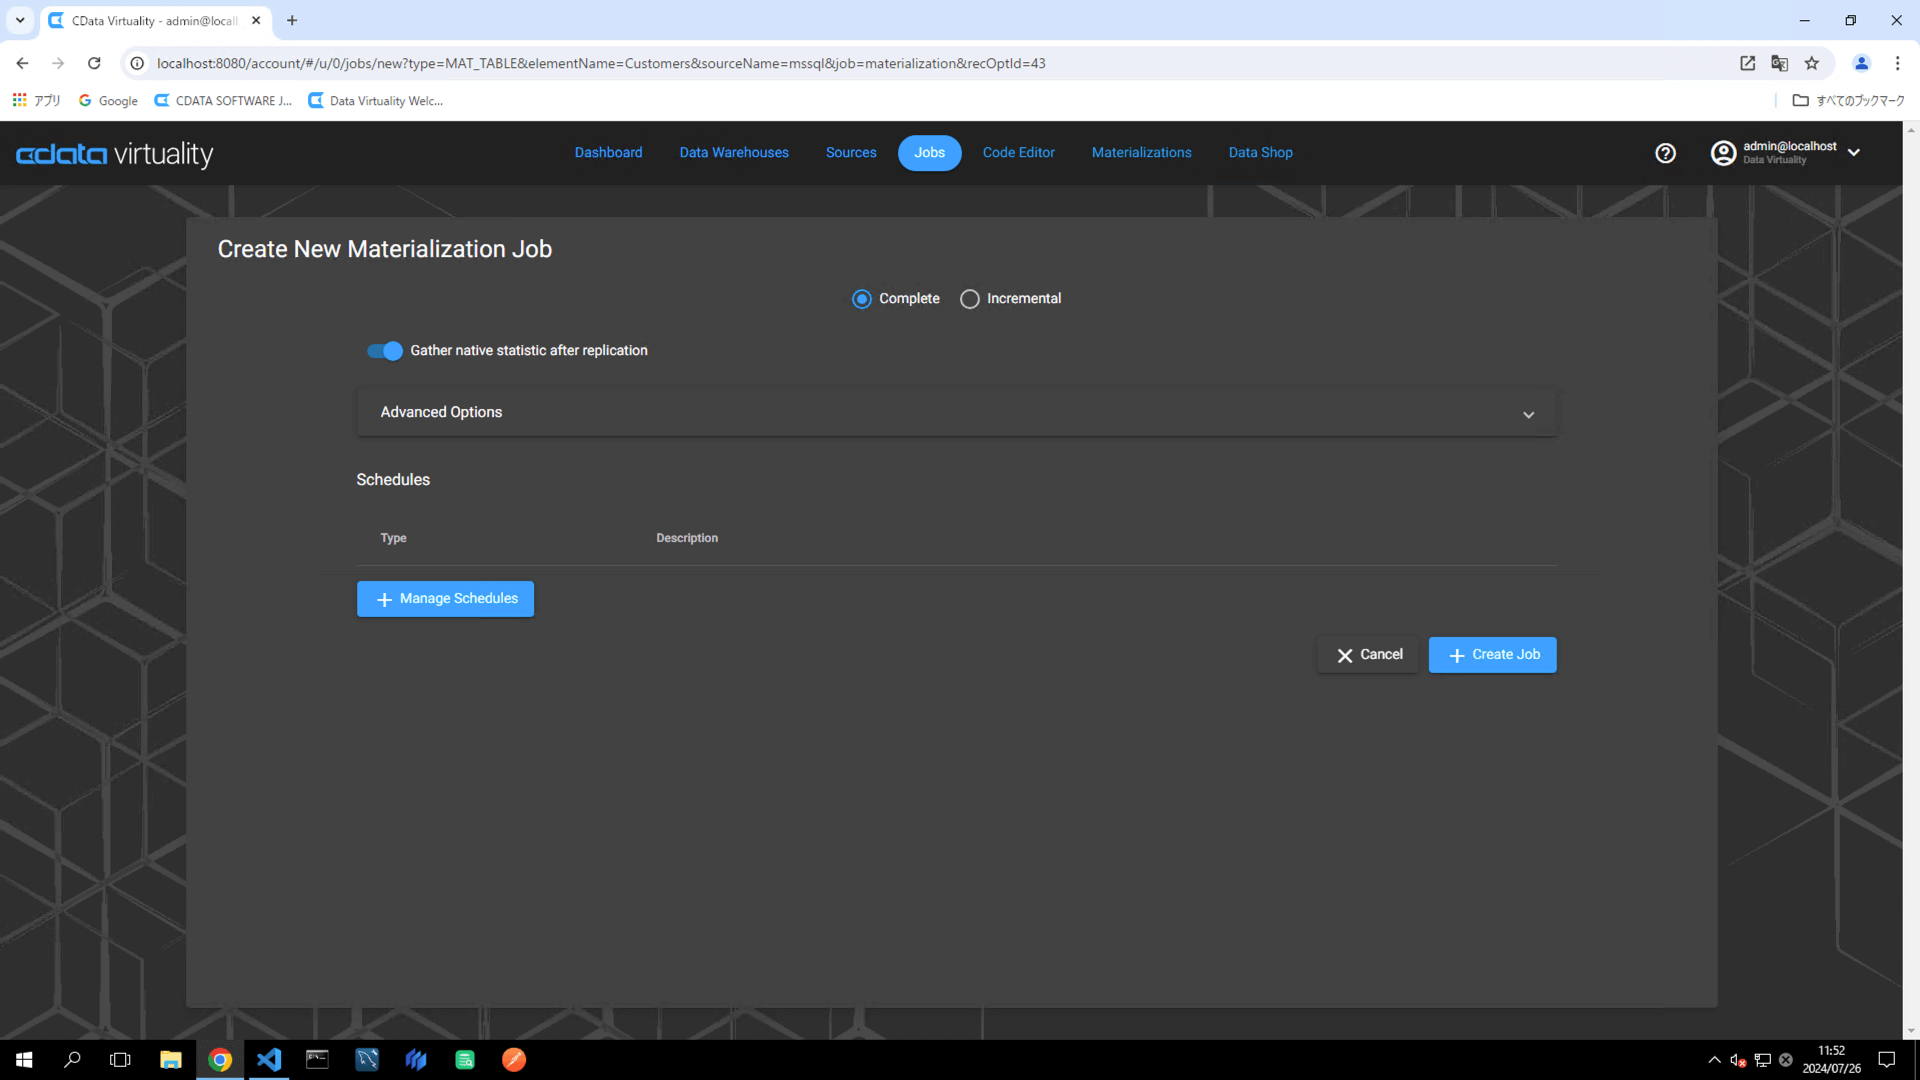
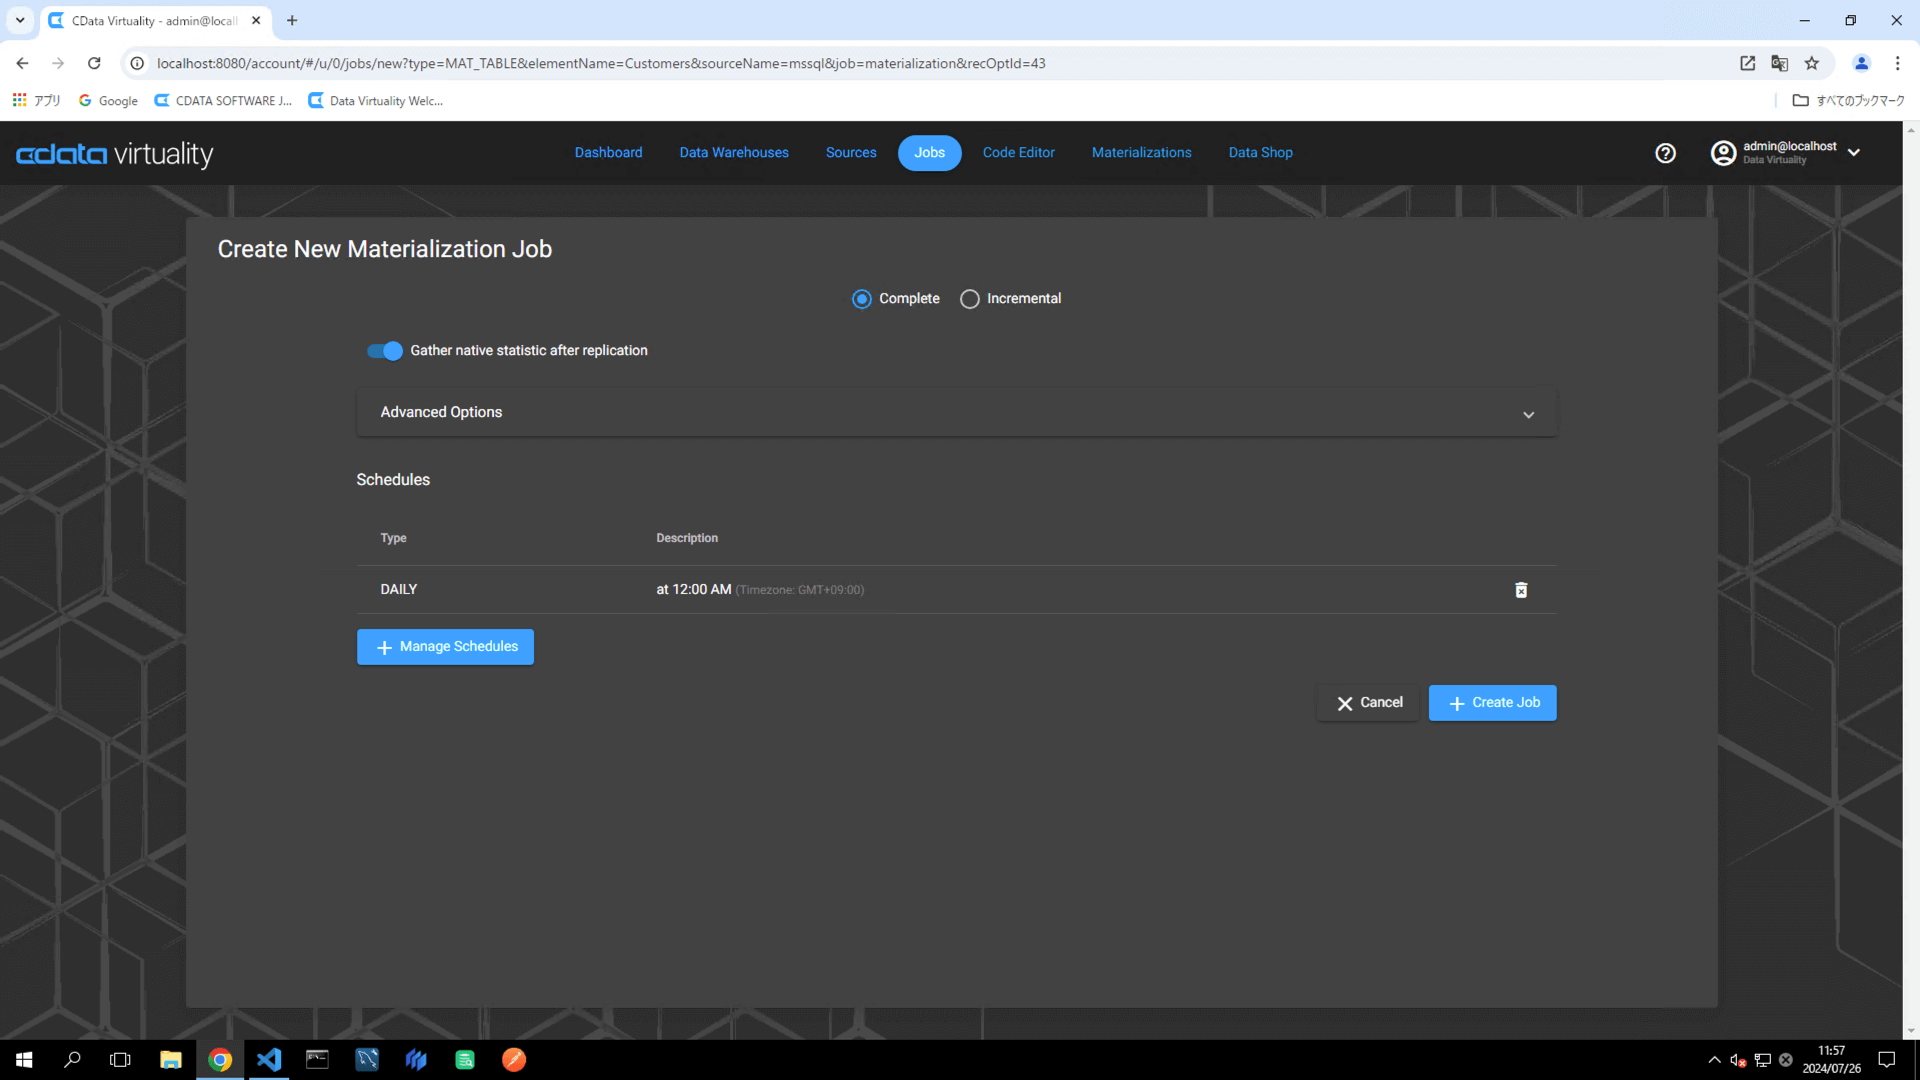
When the Create New Materialization Job screen opens, select Complete from the Type dropdown (options: Complete/Incremental) and click the +Manage Schedules button under the Schedules section to configure the materialization schedule:
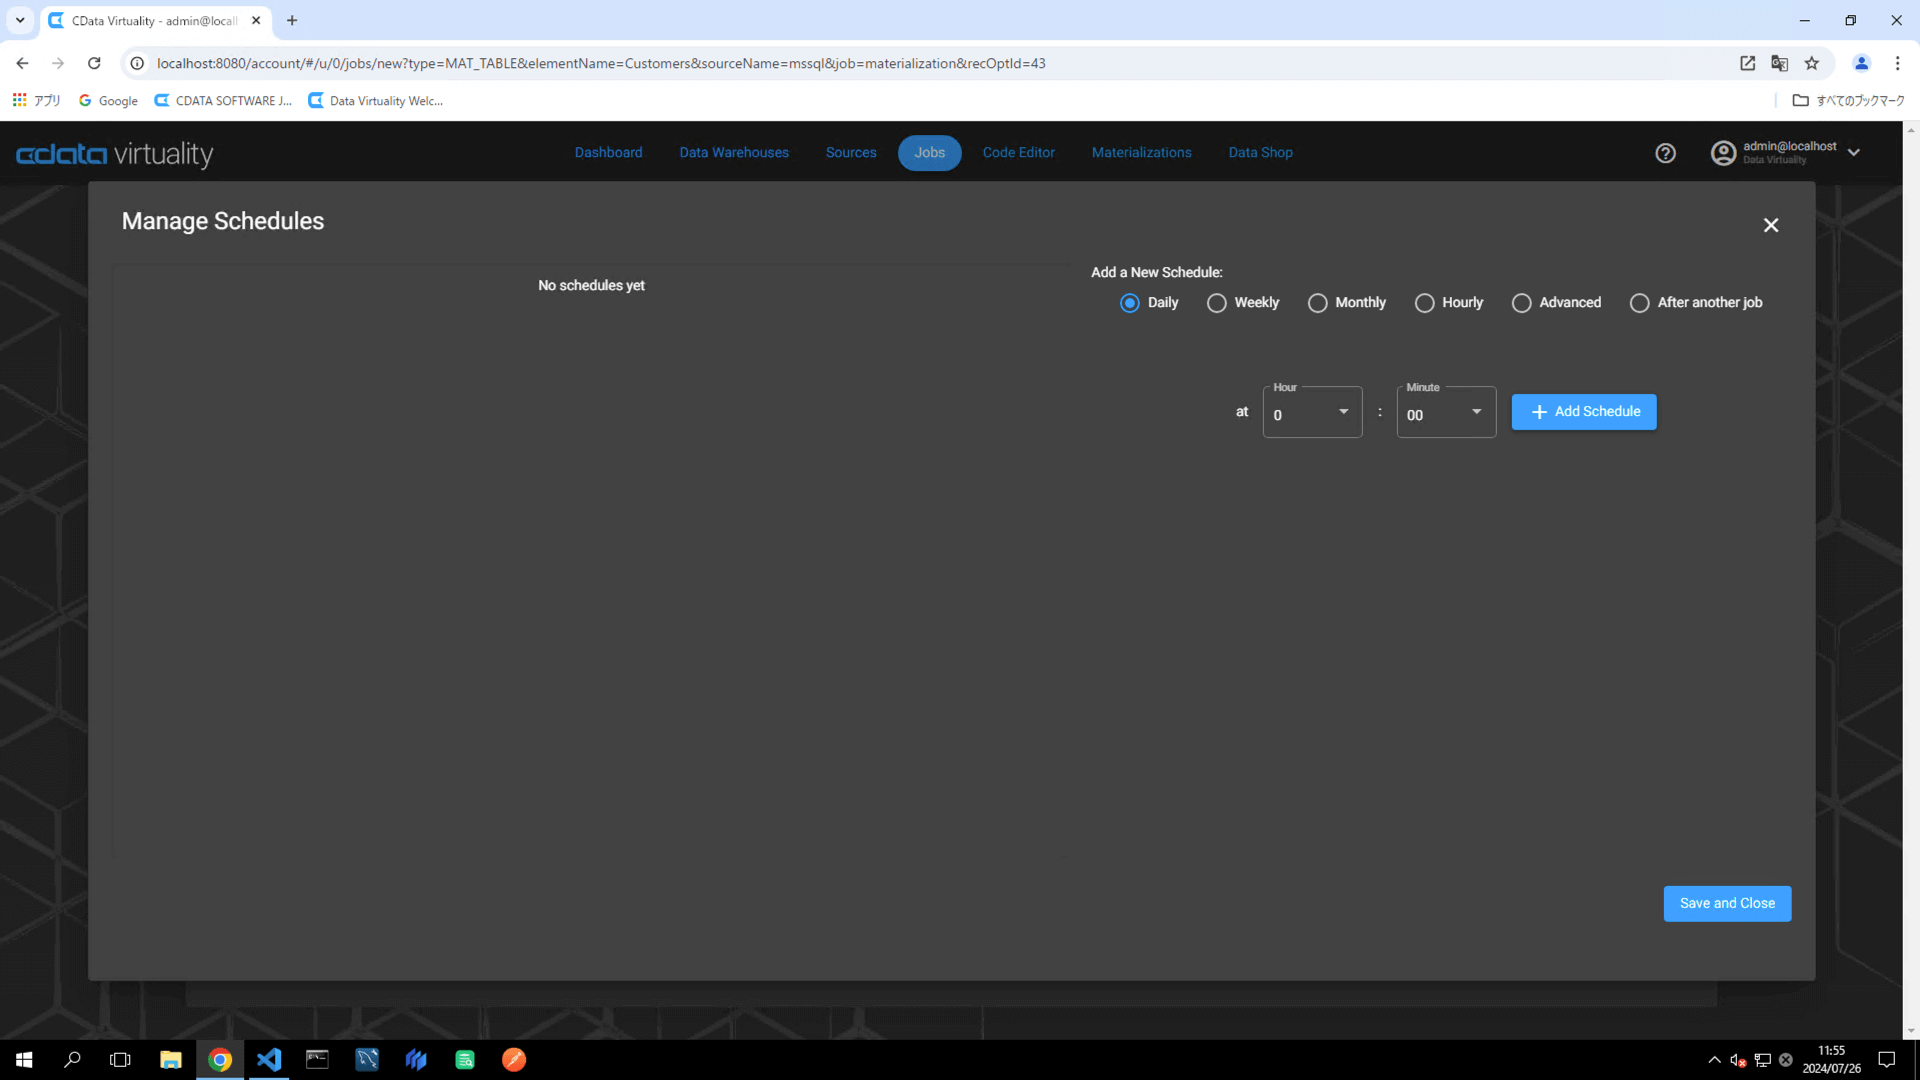
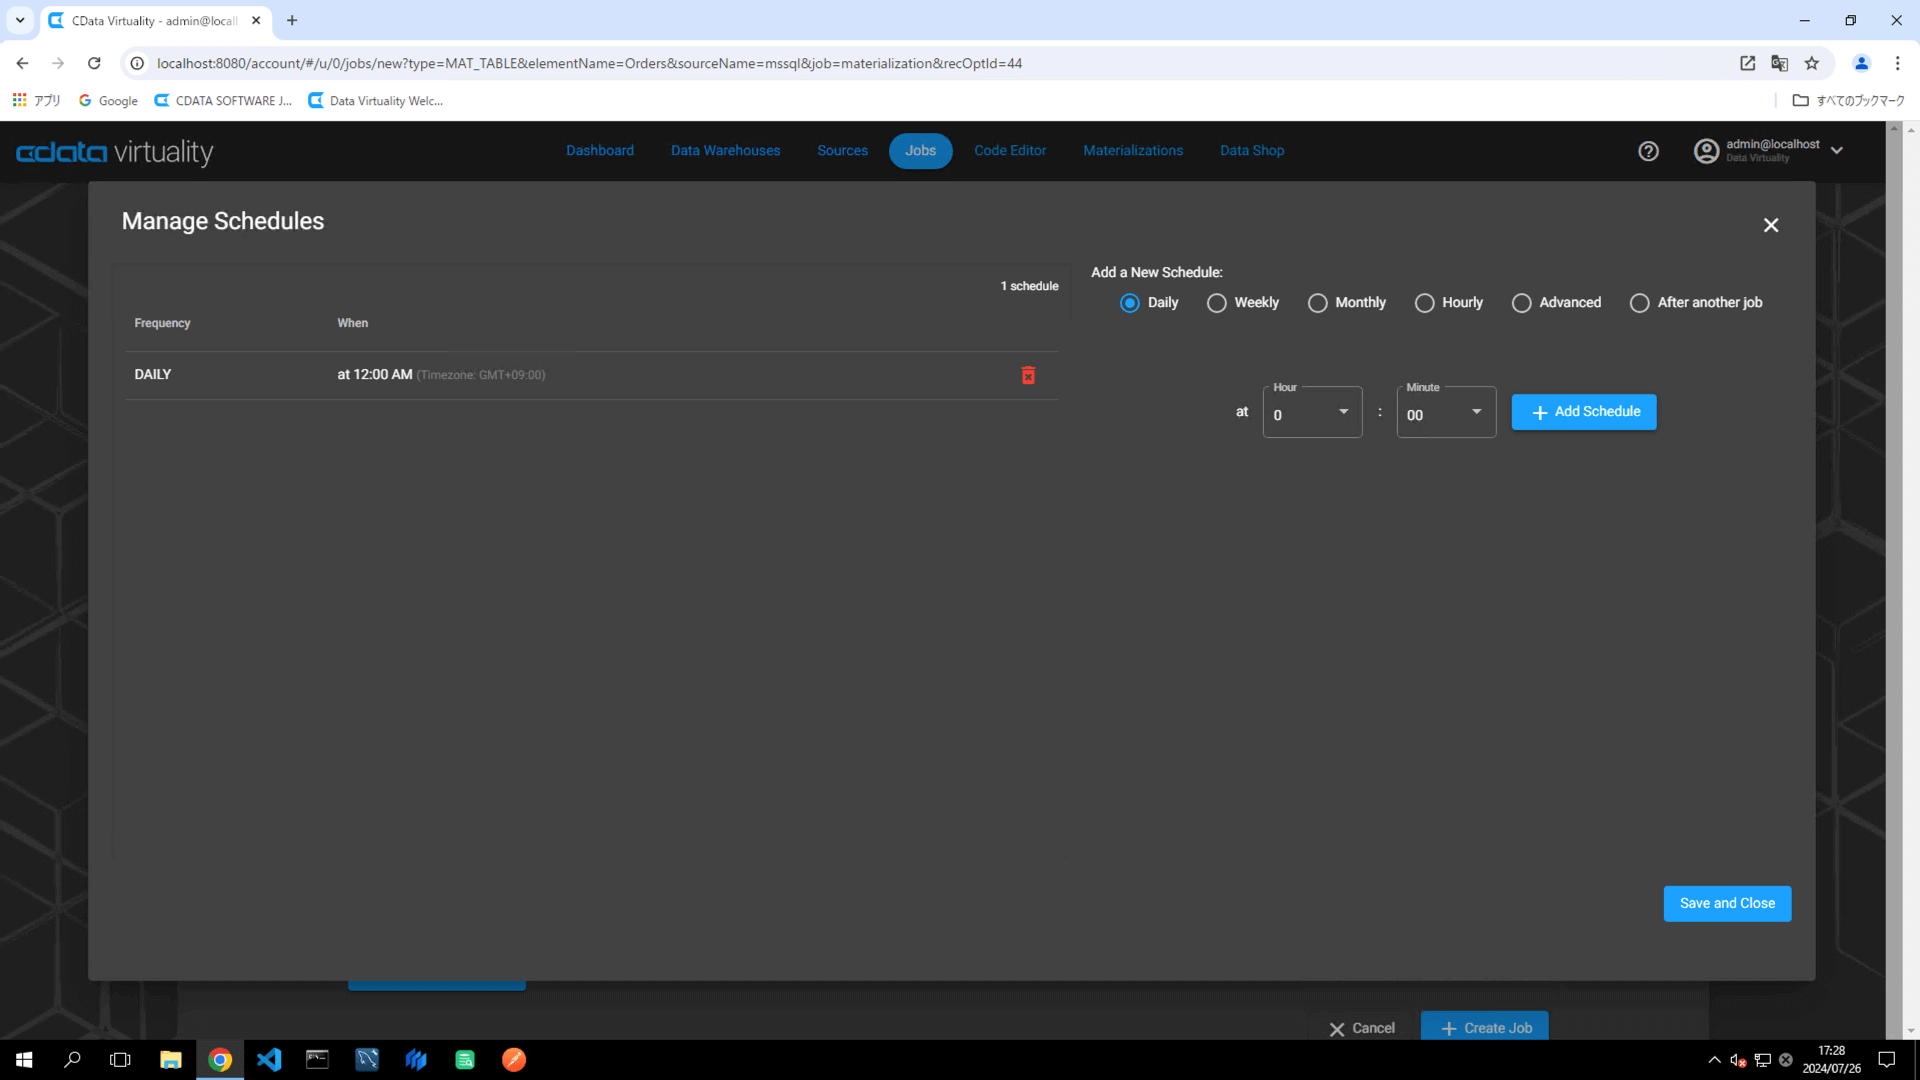
When the Manage Schedules screen opens, click the +Add Schedule button. Configure the job execution schedule by specifying the desired frequency and timing. Click the Save and Close button to save the schedule:
Verify that the newly added schedule appears in the Schedules section. Click the +Create Job button:
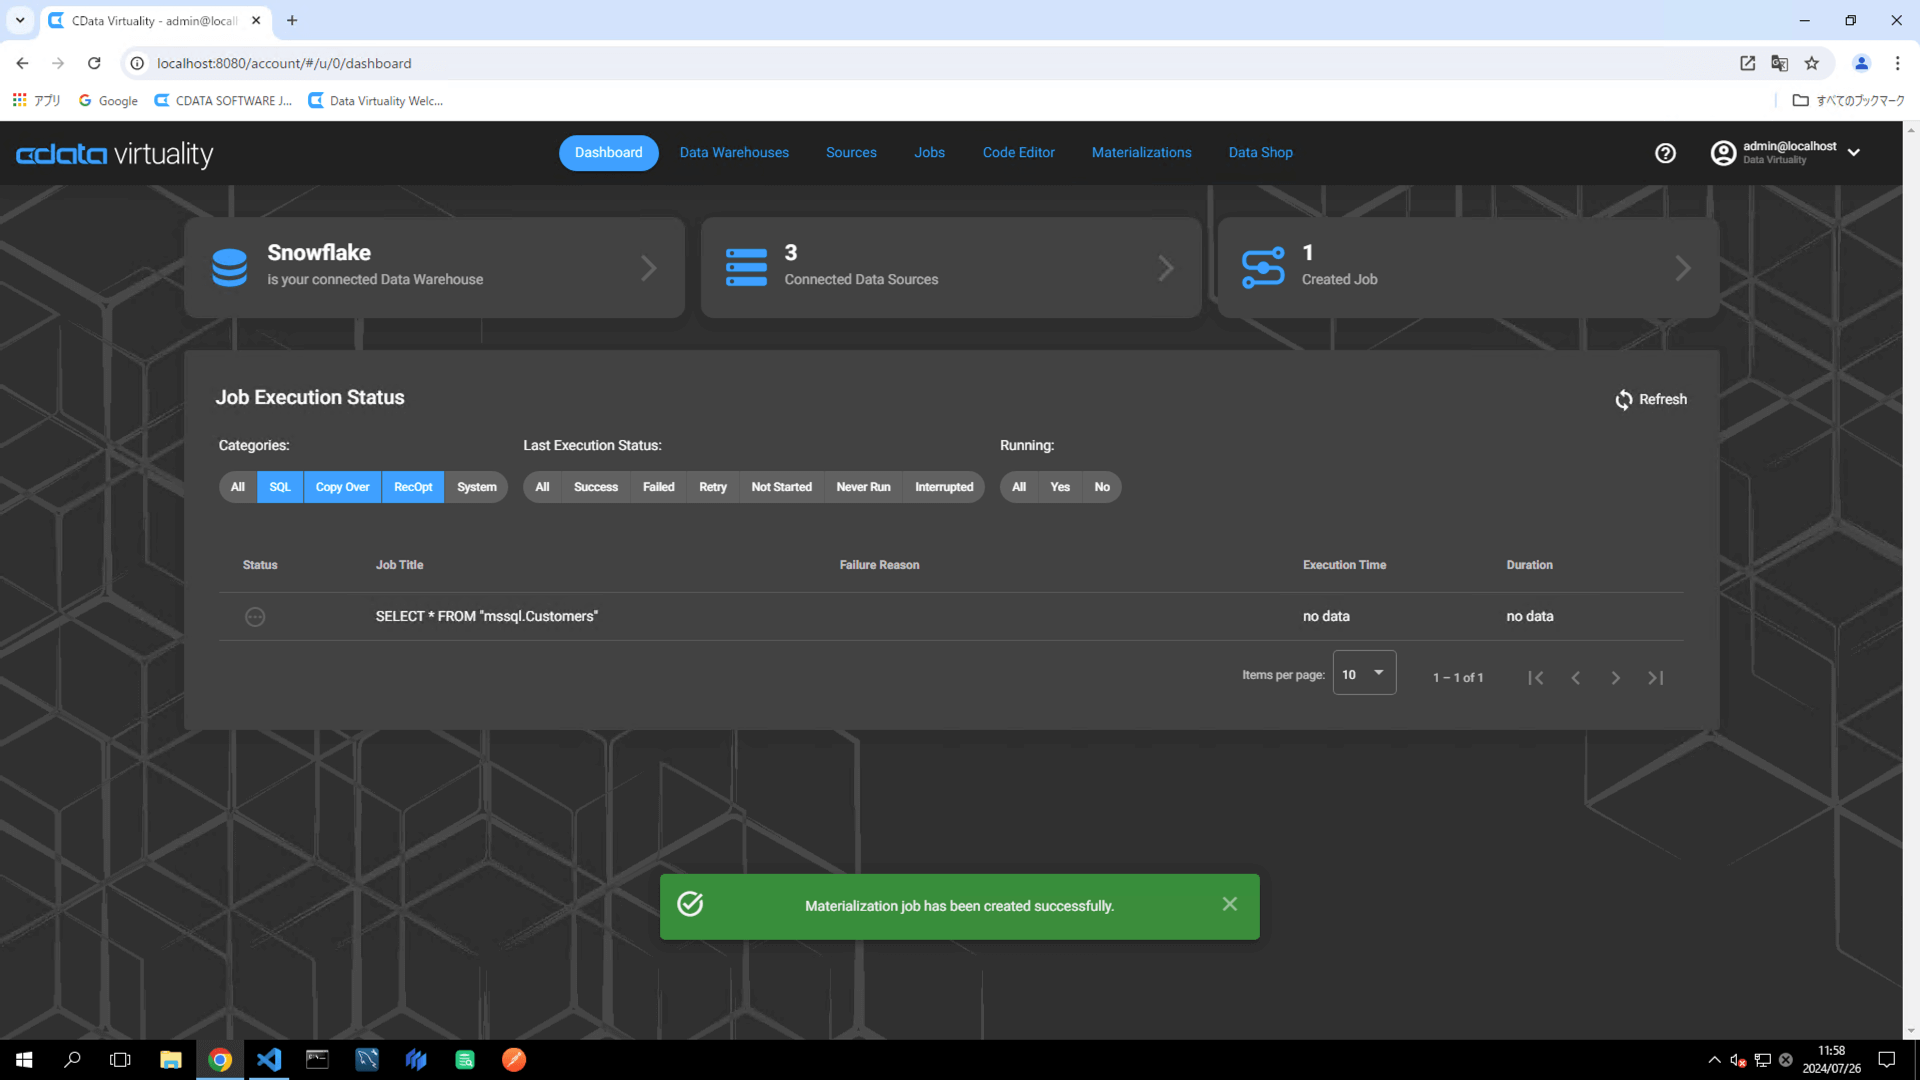
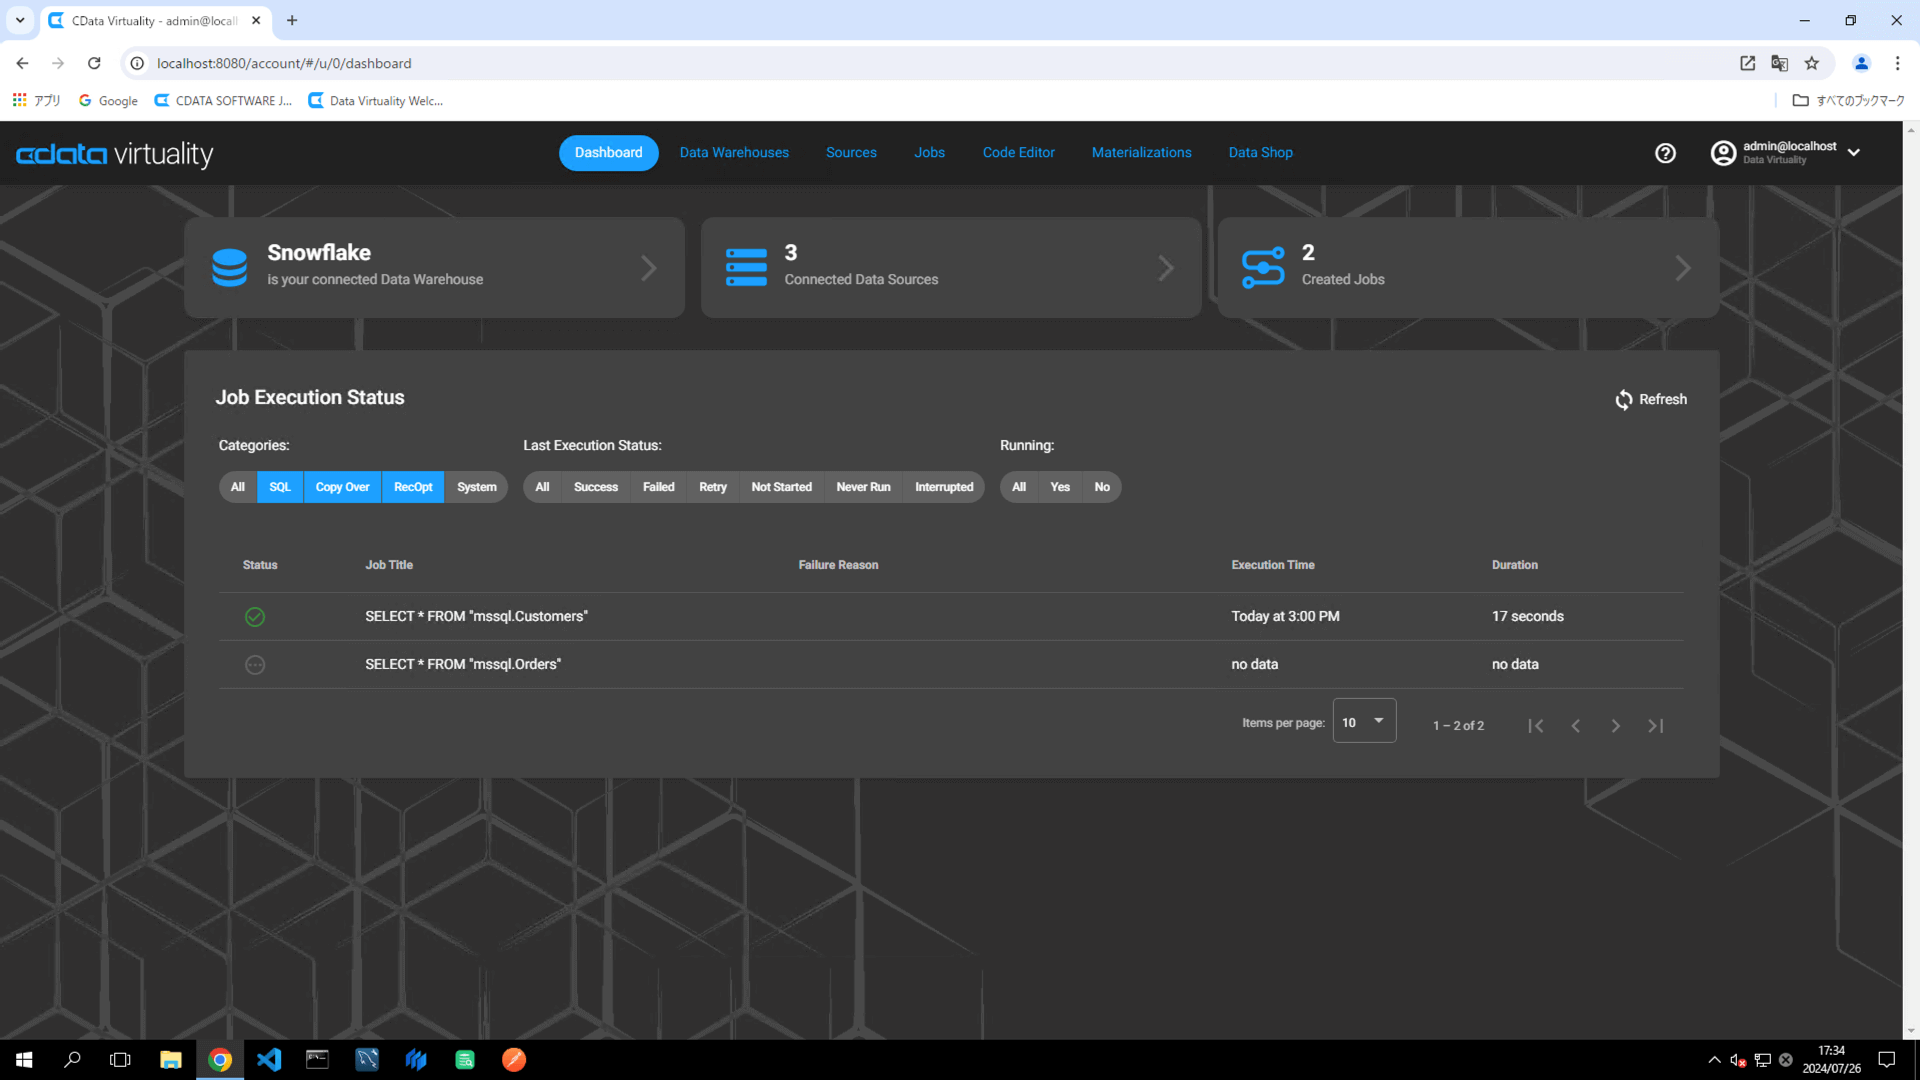
Verify that the Dashboard screen opens and displays the newly added materialization job:
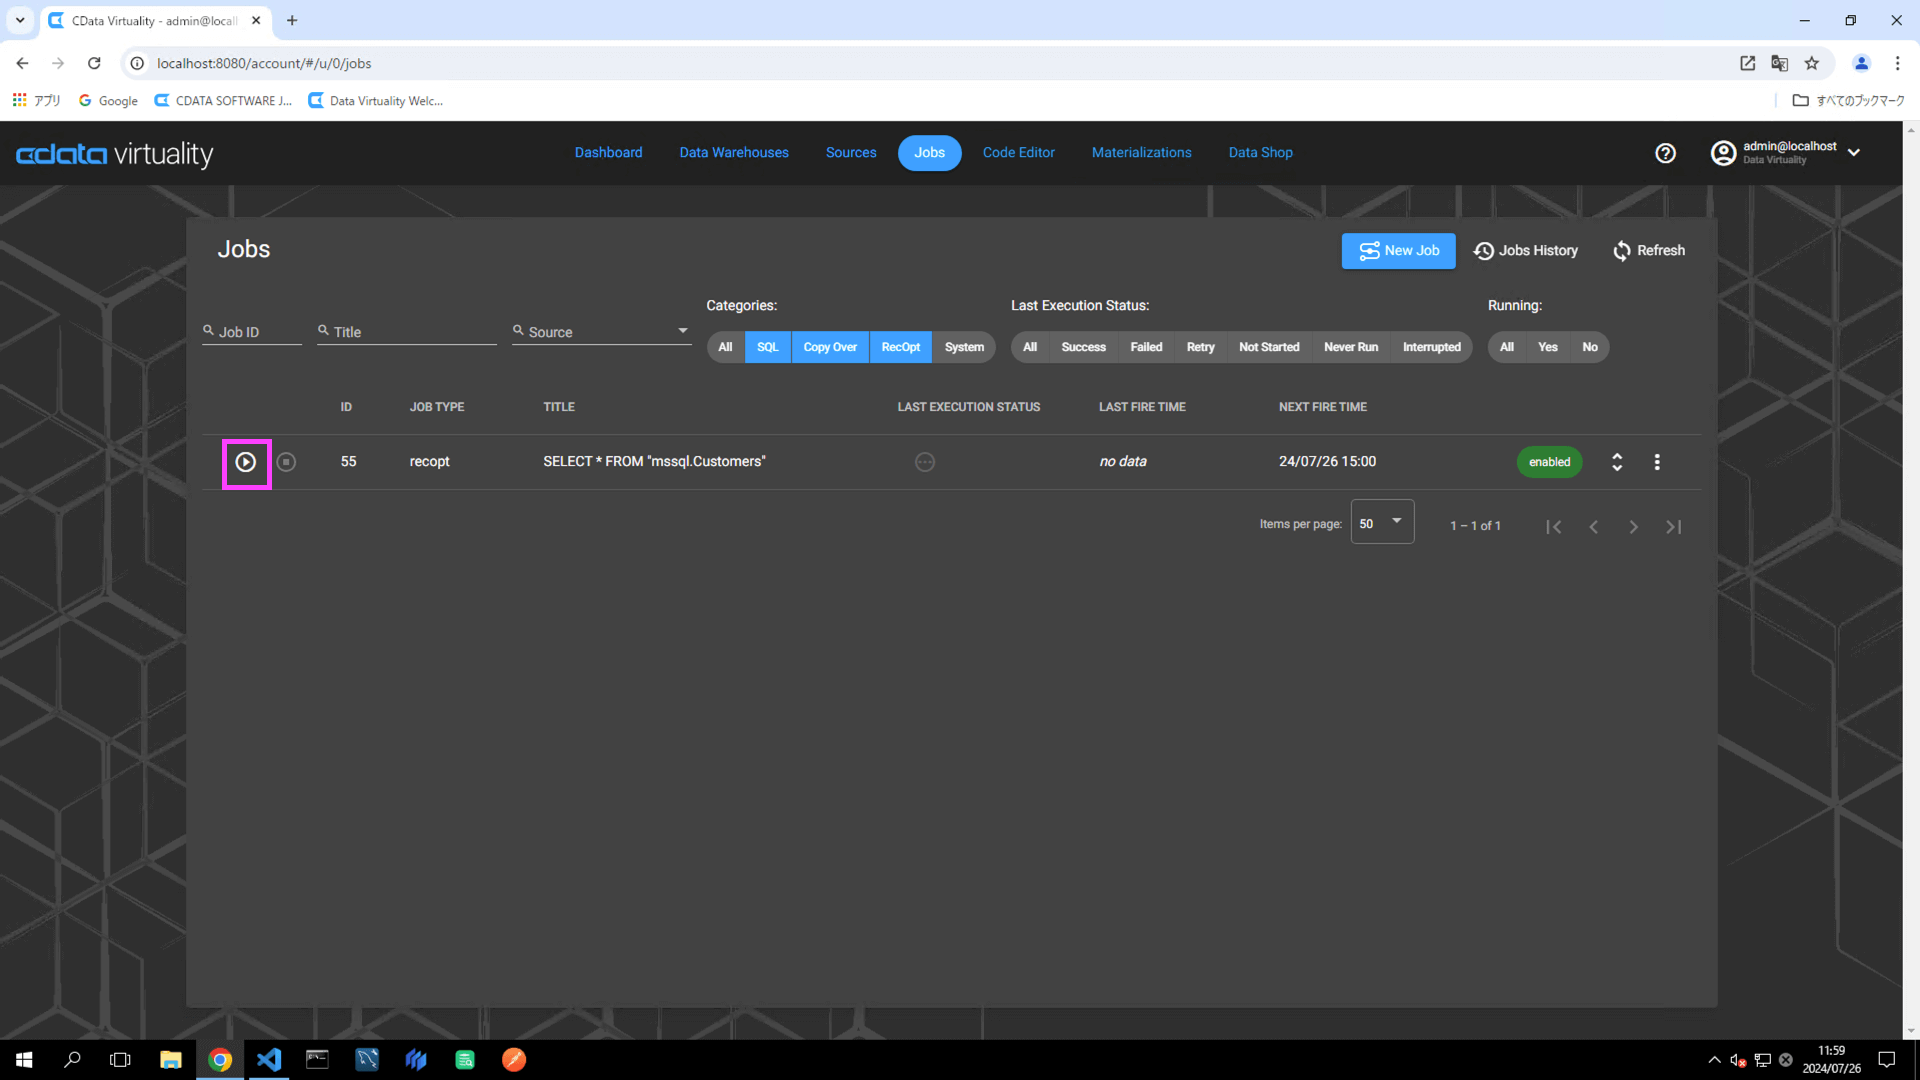
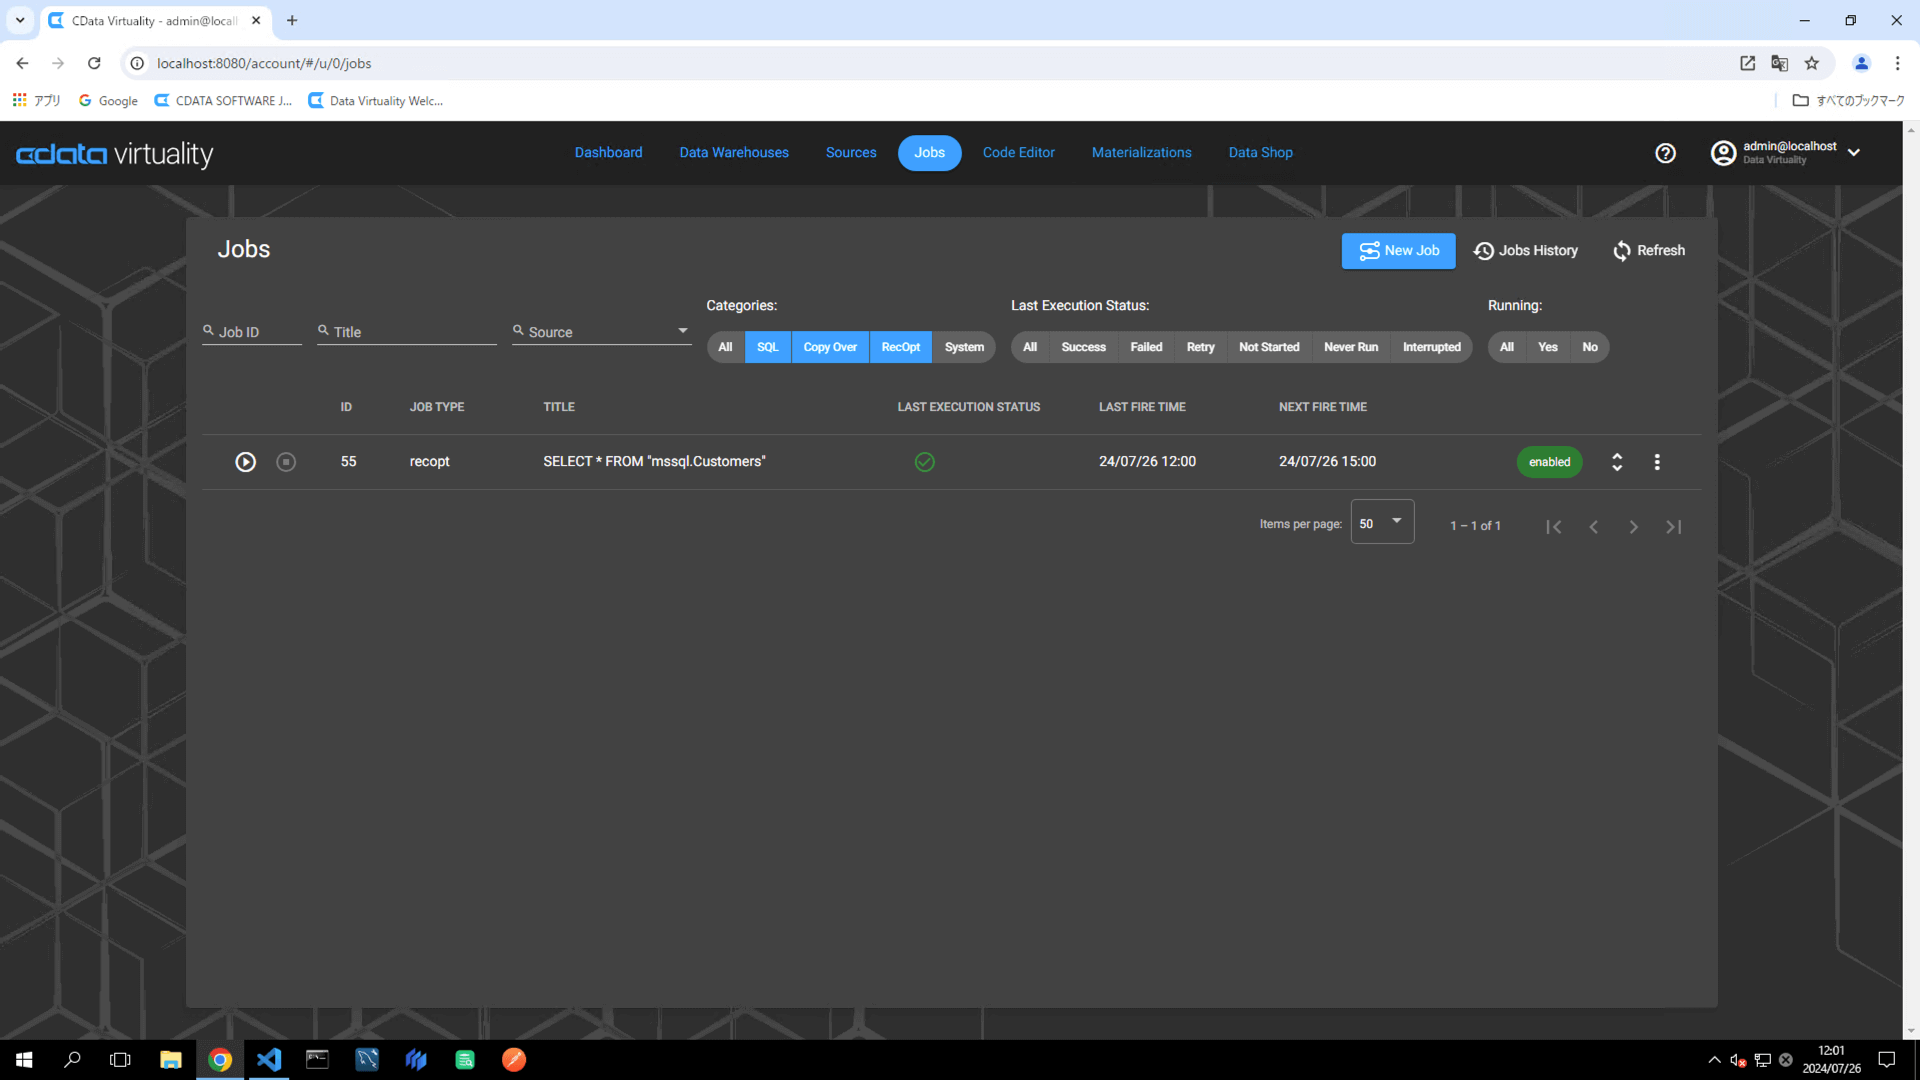
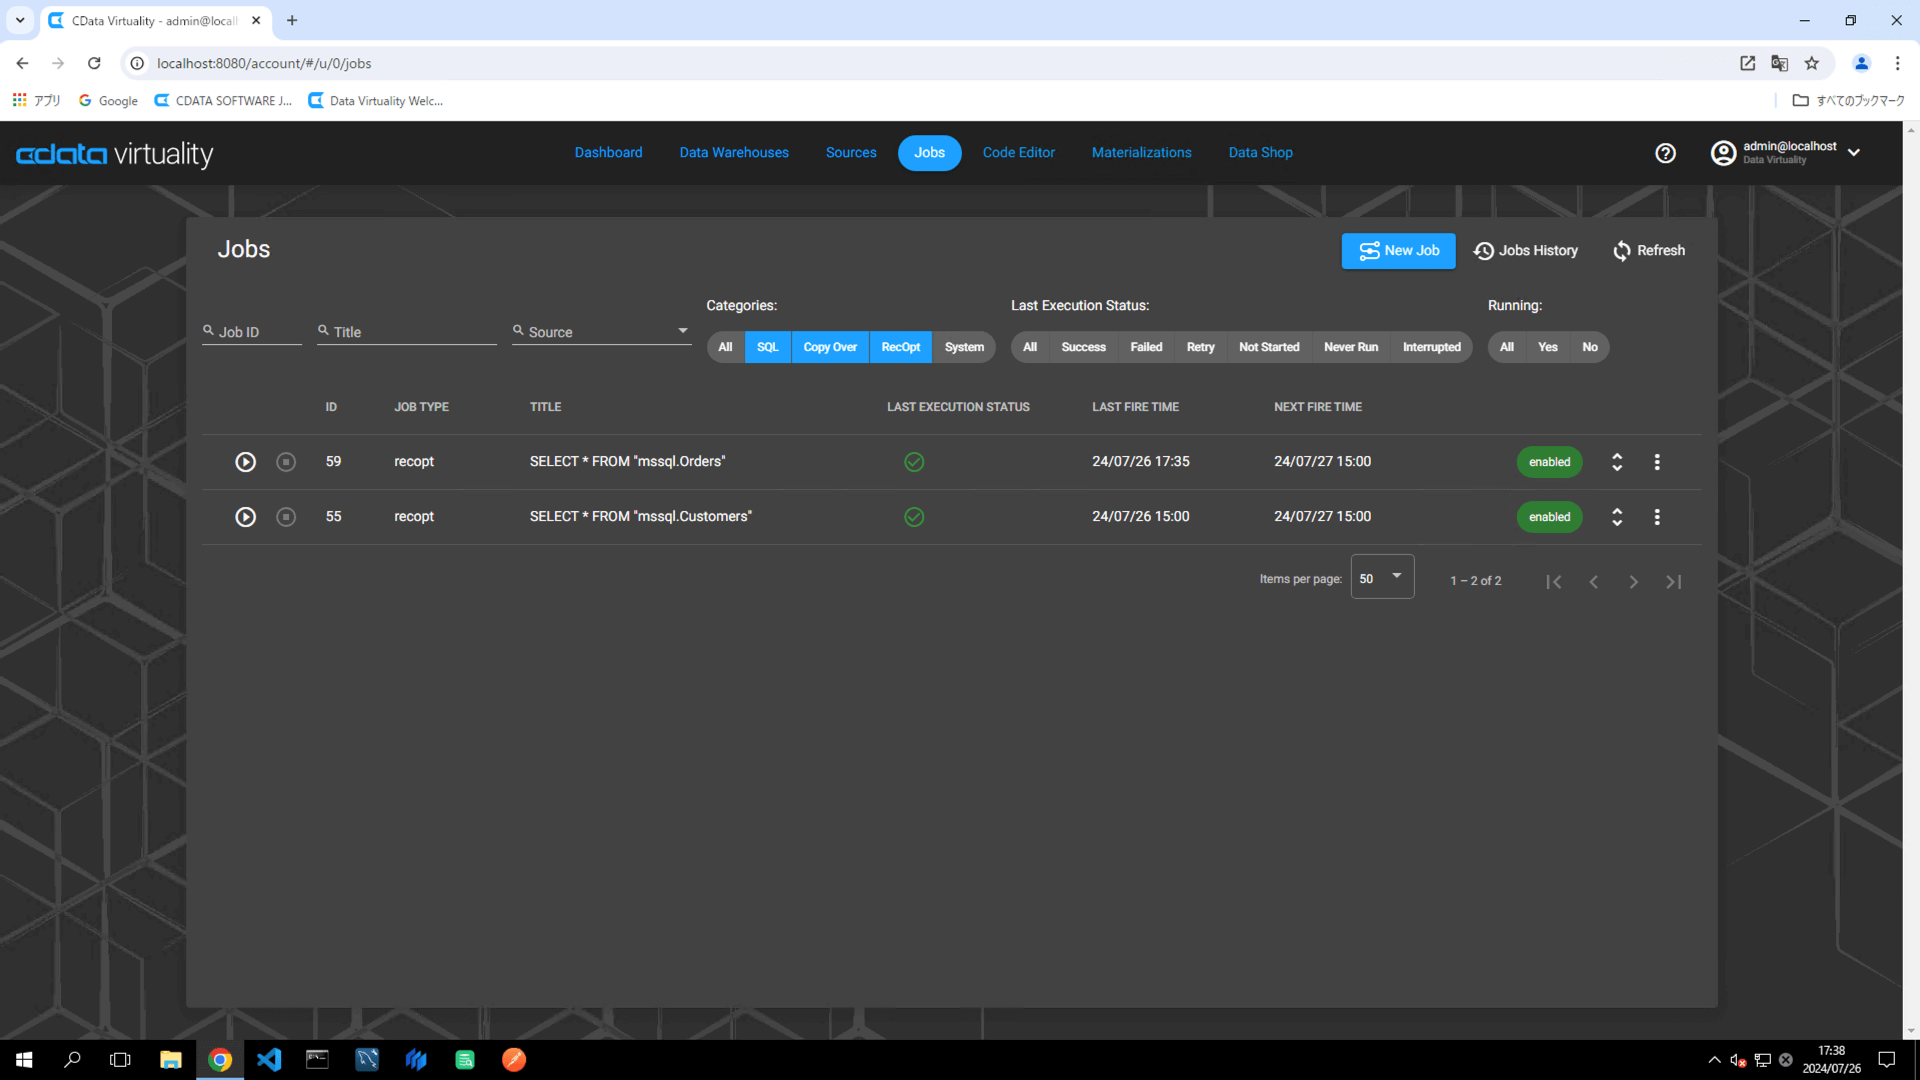
Open the Jobs screen, locate the created job, and click the Run Job Now icon to manually execute the materialization job:
Confirm that the job has been successfully executed. Refresh the screen if necessary:
In the analytical storage, a new table has been added MAT_TABLE_5_ST1, alongside the previously created MAT_TABLE_5_ST0:
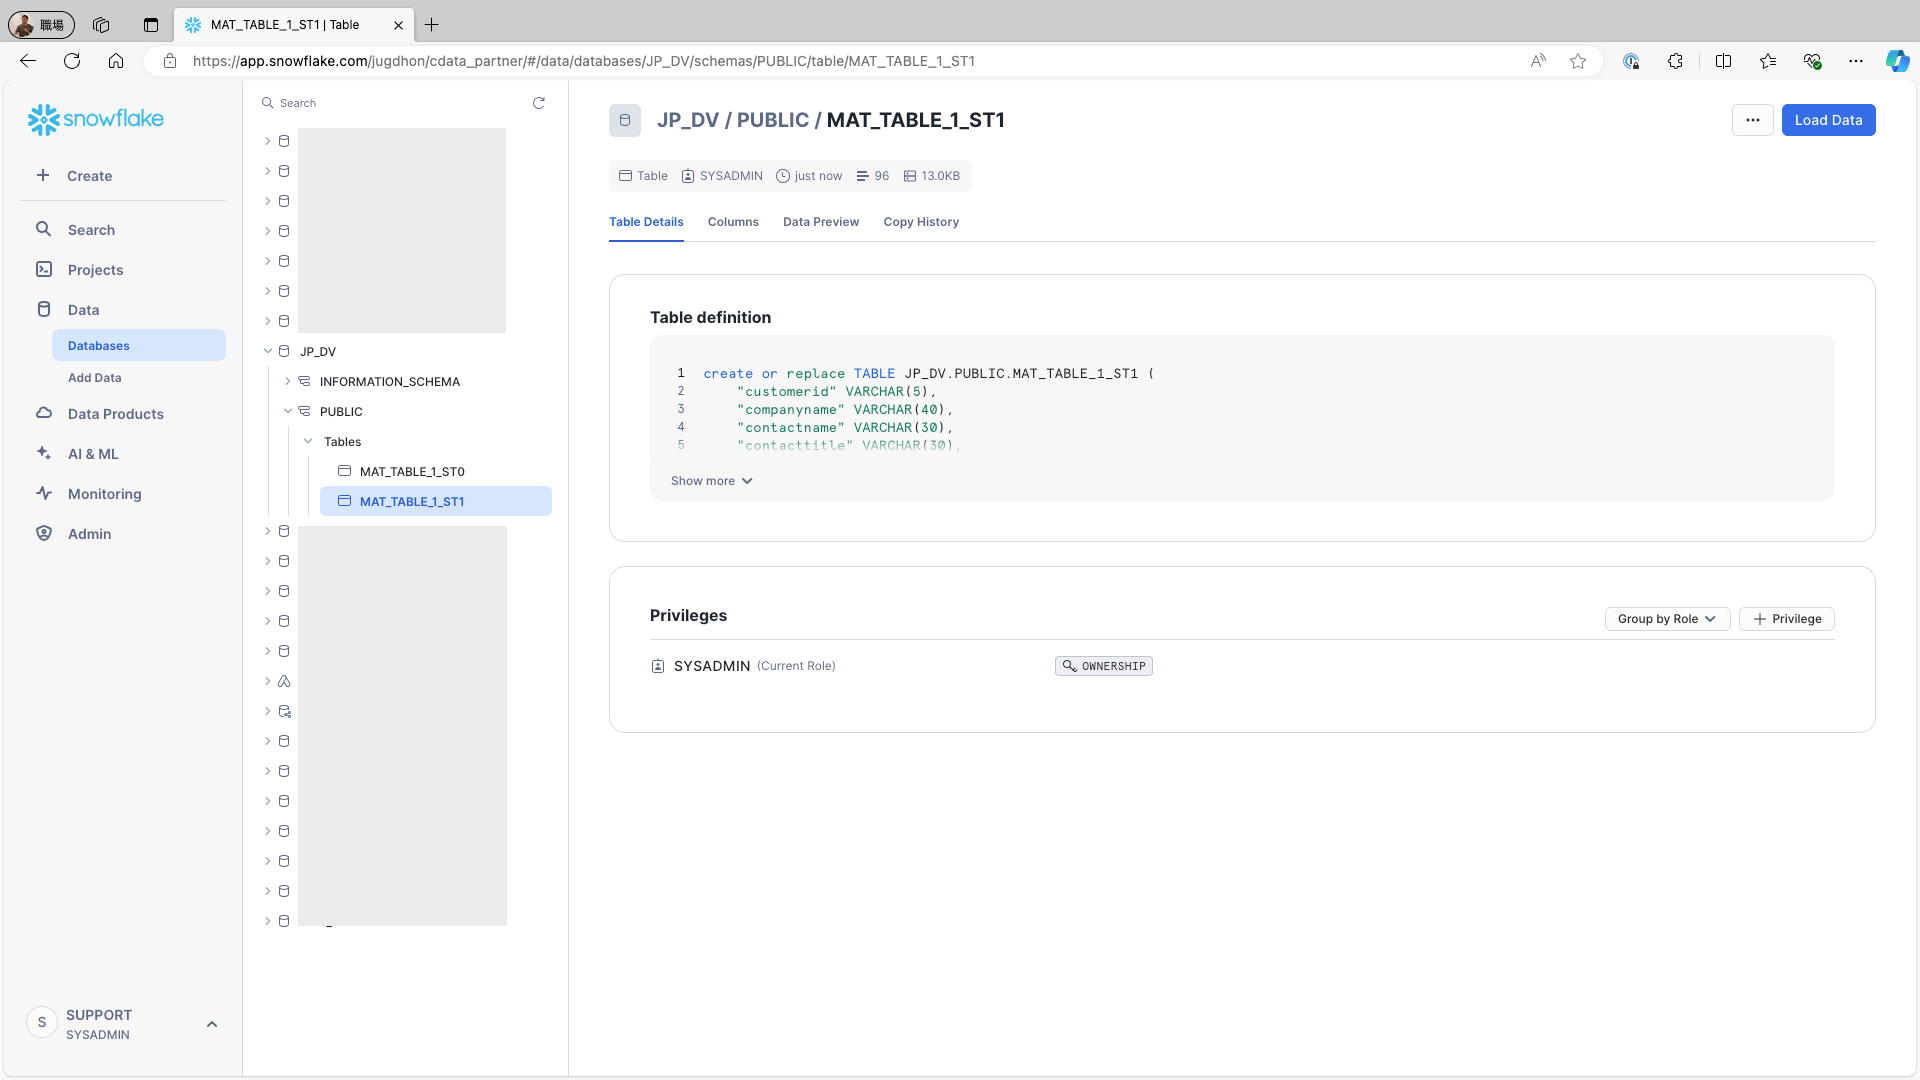
In the Complete mode, a new materialized table is created as a separate table each time materialization is executed. Users can access the latest materialized table without having to be aware of updates or changes.
Incremental Materialization Job
To create an incremental materialization job, first set up materialization for a different table. In this example, the Orders table in the Microsoft SQL Server Northwind database will be used. Follow the same process as outlined in the previous section:

Verify that the materialized tables have been created in the analytical storage:
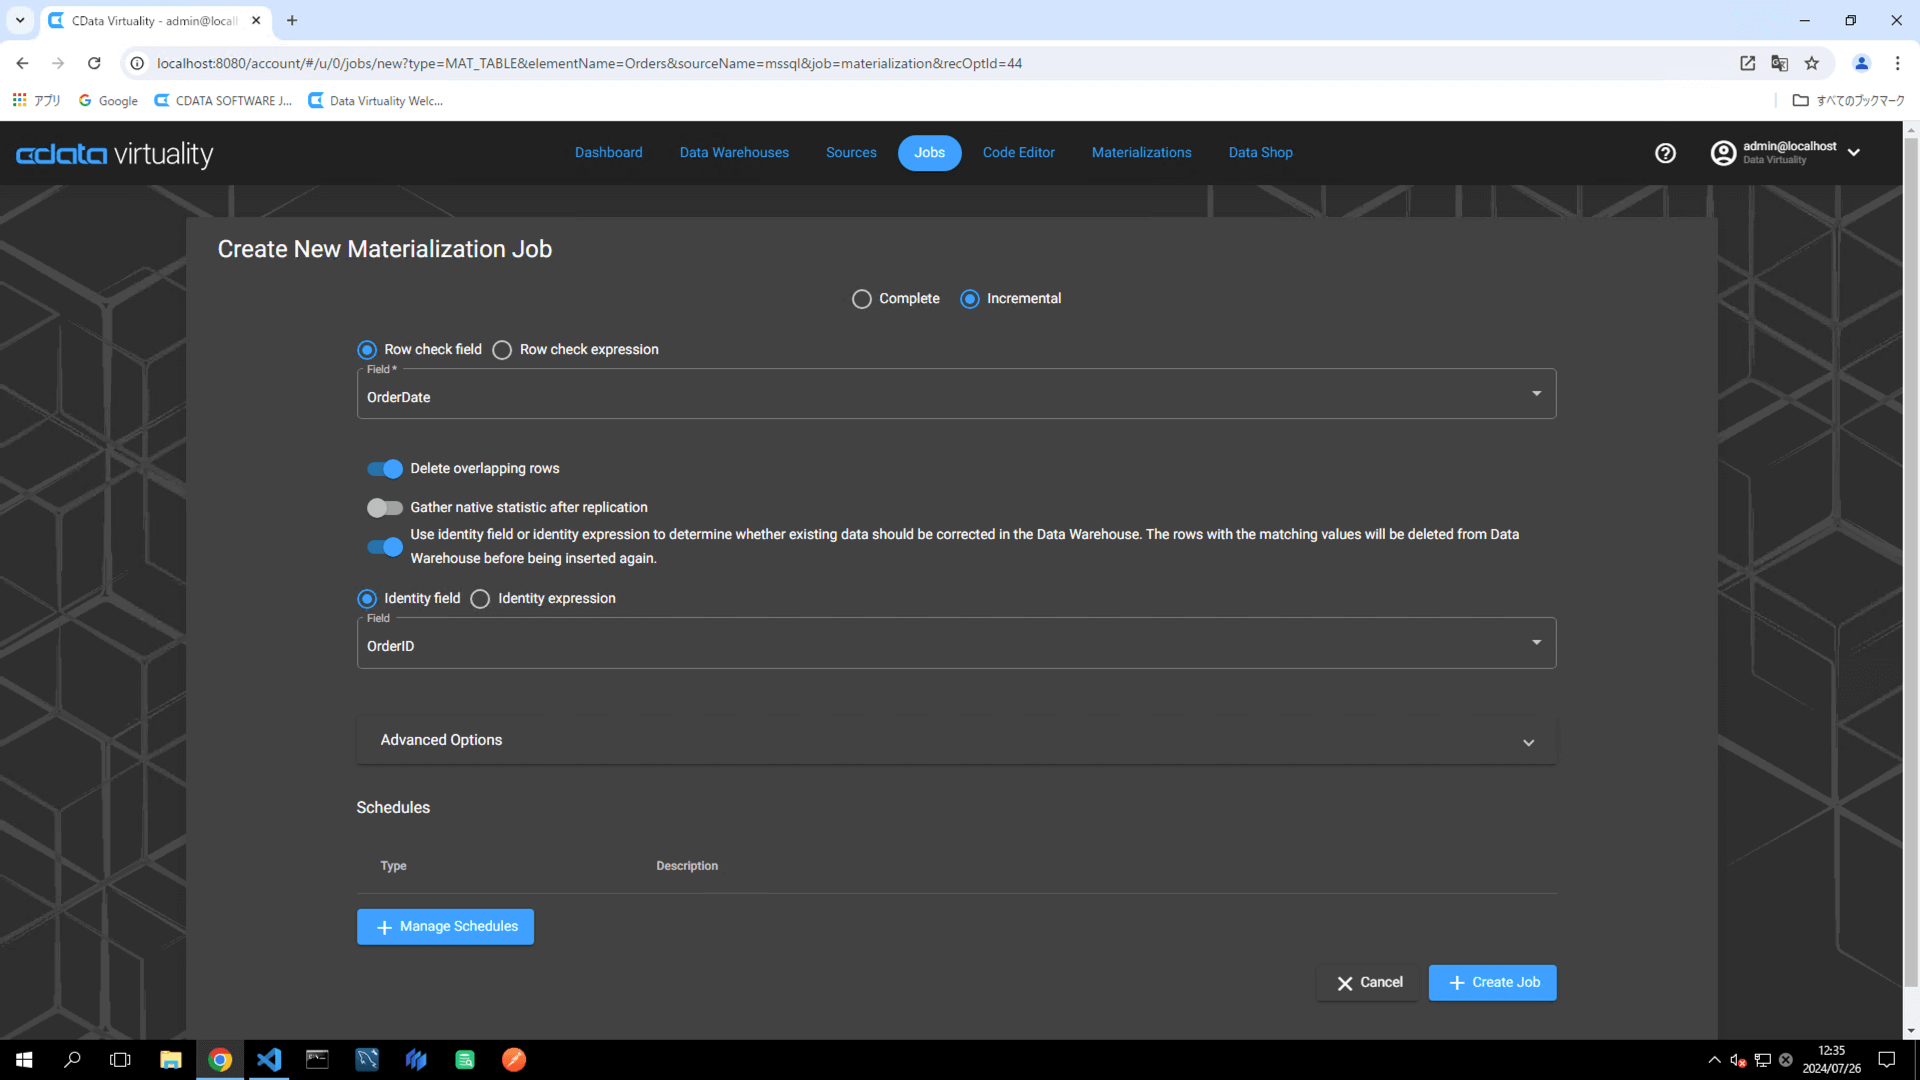
Create a job from the created materialization by configuring the following settings:
Select Incremental from the Type dropdown (options: Complete/Incremental)
Set the Row check field to a field that tracks increments (e.g., OrderDate)
Enable Use Identity field.…
Set the Identity field to a field that uniquely identifies rows (e.g., OrderID)
Click the +Manage Schedules button under Schedules.
Verify that the schedule has been added to the Schedules section and click the +Create Job button:
Verify that the Dashboard screen opens and displays the newly added materialization job:
To test the incremental reflection, add a new record to the data source table (e.g., the Orders table in Microsoft SQL Server):
INSERT INTO Orders (CustomerID, EmployeeID, OrderDate, RequiredDate, ShippedDate, ShipVia, Freight, ShipName, ShipAddress, ShipCity, ShipRegion , ShipPostalCode, ShipCountry) VALUES ('RATTC', 1, '2024/07/26', '', '', 2, 0, '', '', '', '', 'USA');Return to the CData Virtuality Web UI, open the Jobs screen, locate the created job, and click the Run Job Now icon to manually execute the job:

Confirm that the job has been successfully executed. Refresh the screen if necessary:
Navigate to the Materializations screen, and confirm that materialization for the created job is set to enabled:

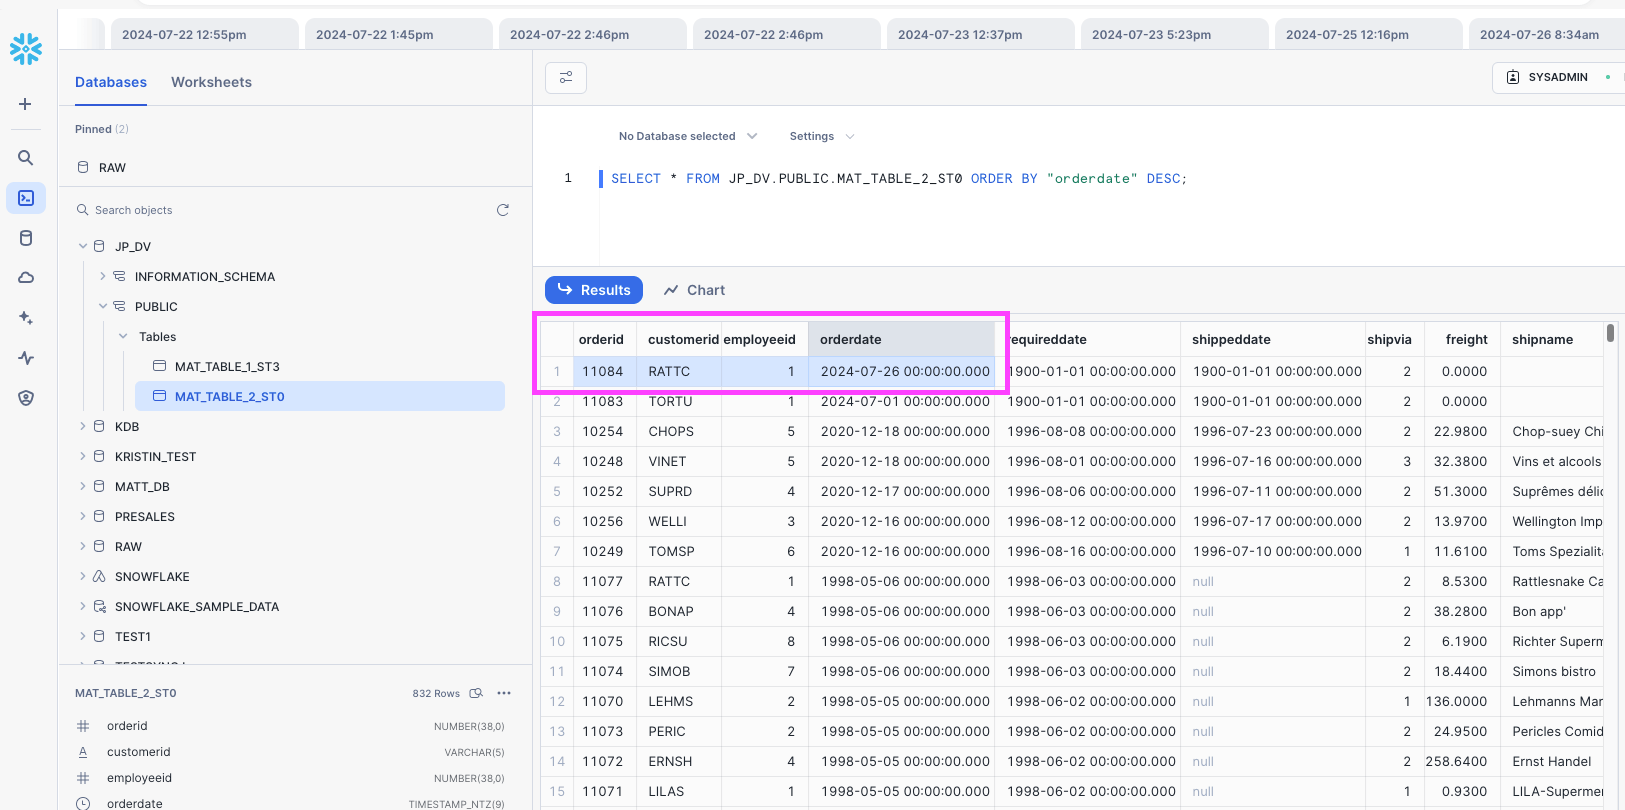
Open the Code Editor and select the materialized data source table (e.g., the Orders table in Microsoft SQL Server). Use the Generate Statement option to create an SQL query. Modify the query to sort the results in descending order by the field used for the increment check (e.g., OrderDate).
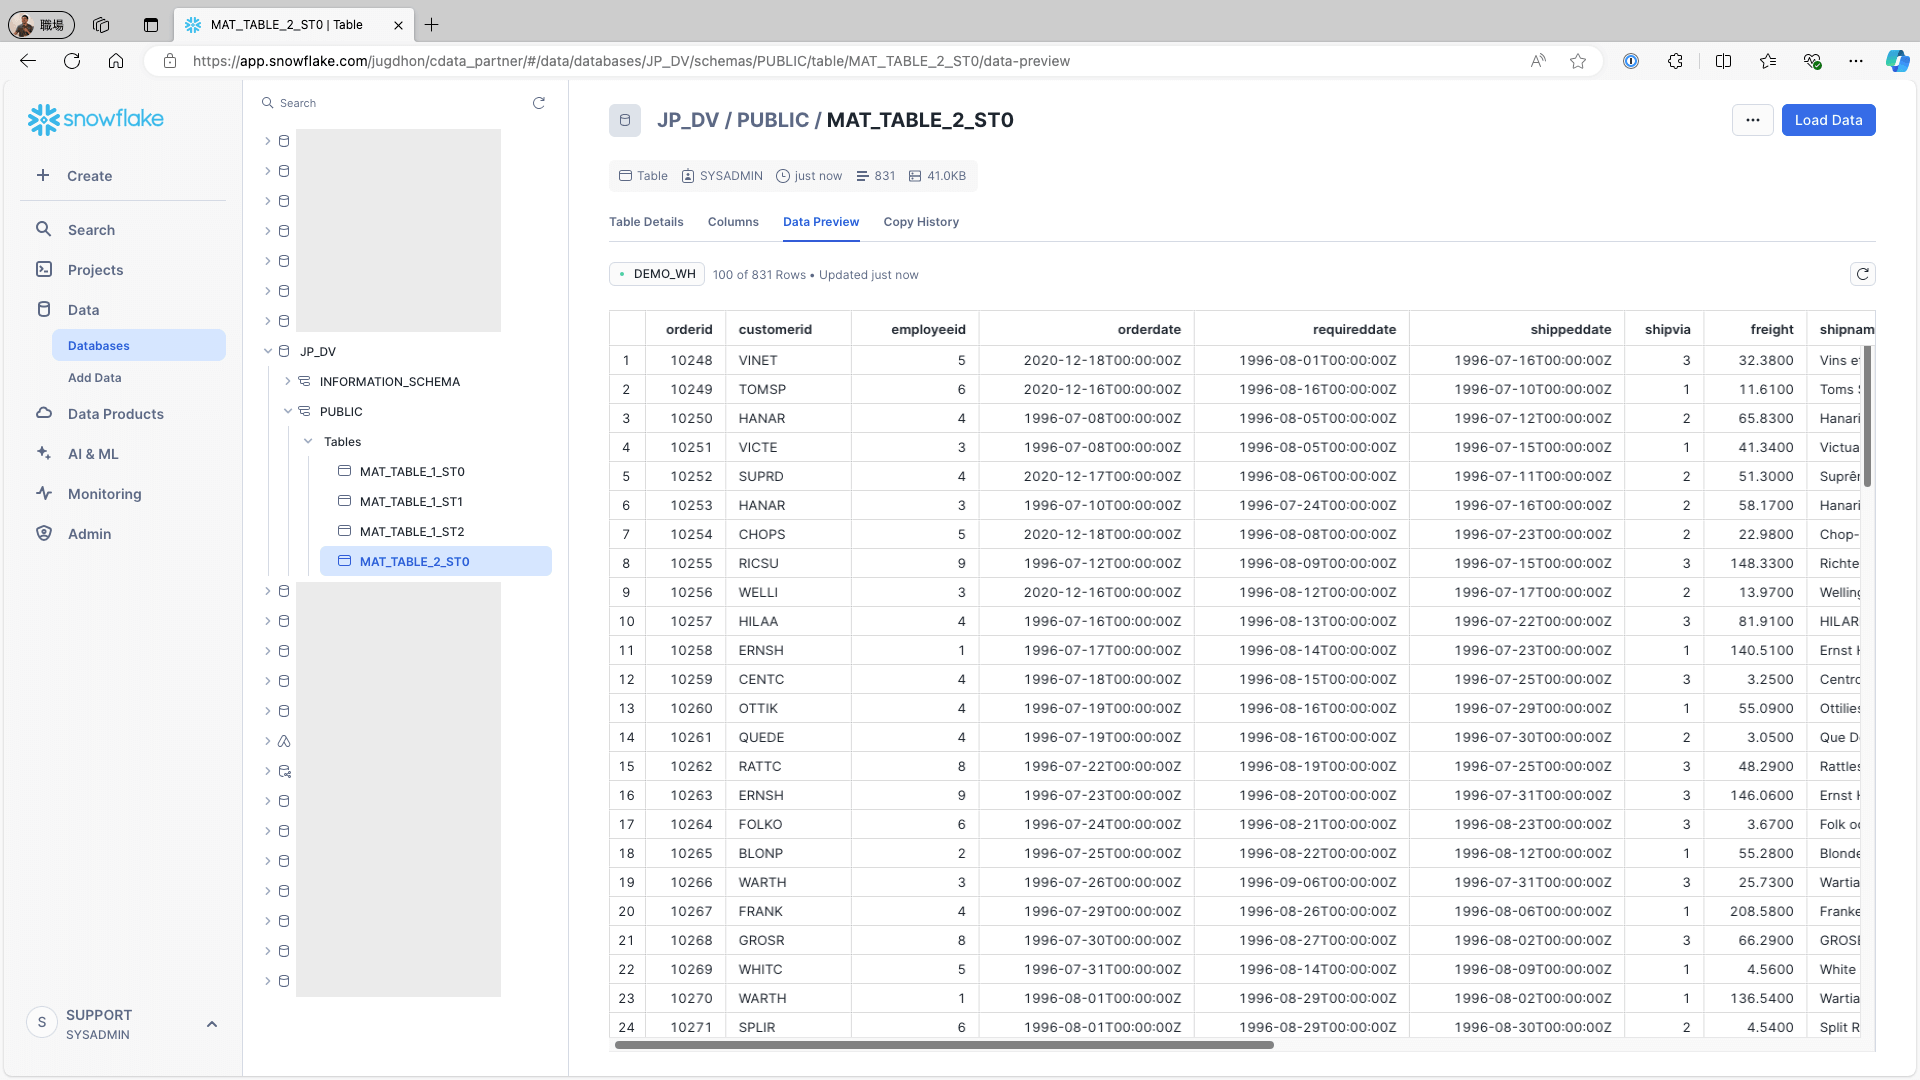
SELECT "OrderID", "CustomerID", "EmployeeID", "OrderDate", "RequiredDate", "ShippedDate", "ShipVia", "Freight", "ShipName", "ShipAddress", " ShipCity", "ShipRegion", "ShipPostalCode", "ShipCountry" FROM "mssql.Orders" ORDER BY "OrderDate" DESC;;Verify that the record has been added, as shown in the results below:
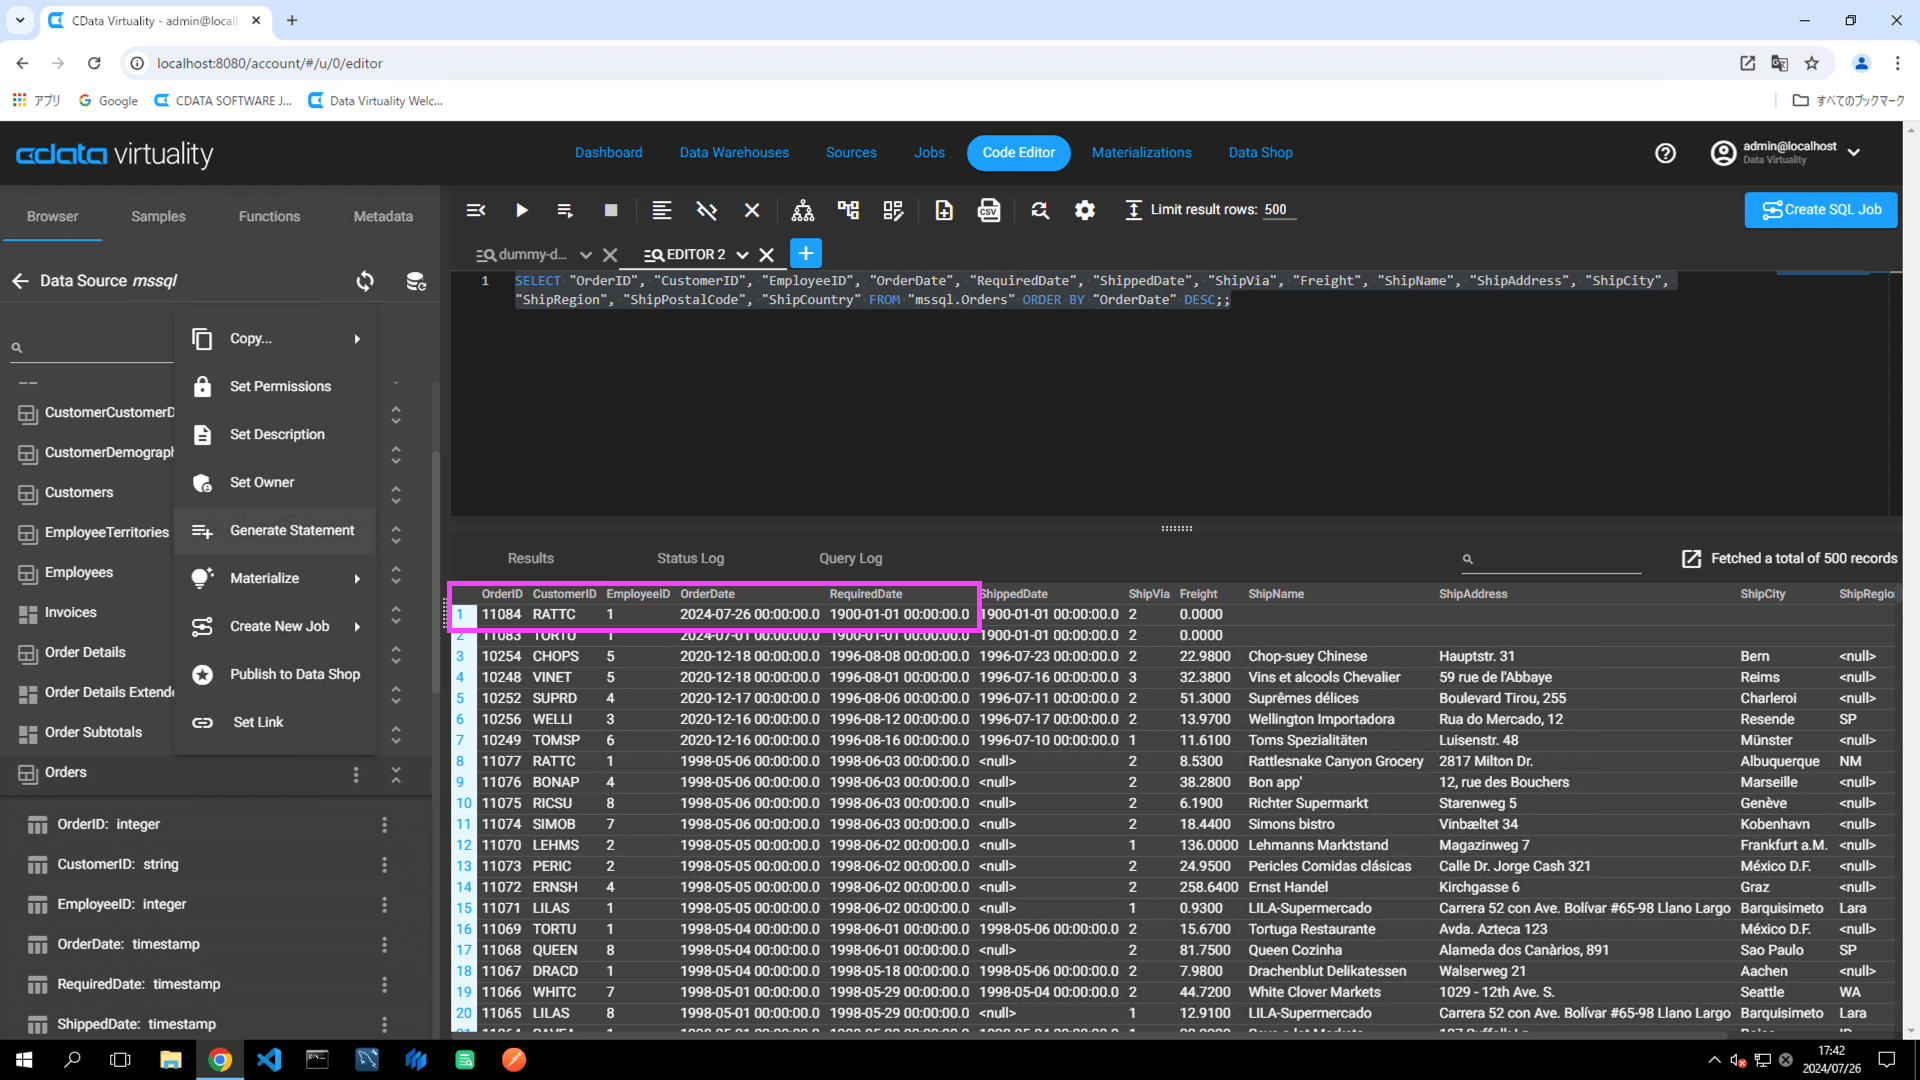
Confirm that the newly added record in the data source (Microsoft SQL Server in this example) is also retrieved.
The newly added record is now reflected in the updated materialized table in analytical storage:
See Also
Materialization for more information on materialization and its types